Table of Contents
Advertisement
Quick Links
Advertisement
Table of Contents
Troubleshooting

Related Manuals for HP OmniBook 800CS/CT


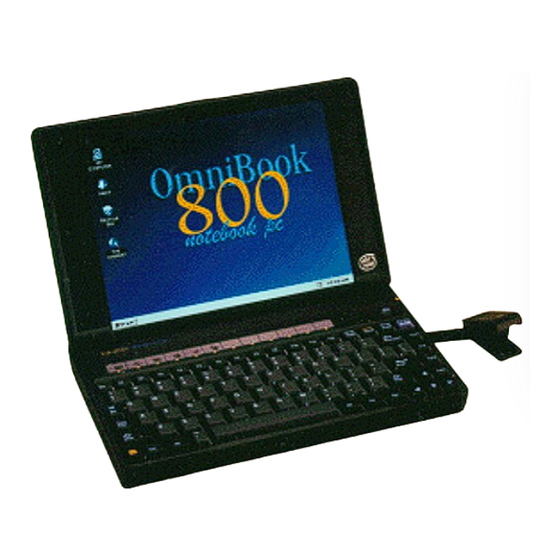
Summary of Contents for HP OmniBook 800CS/CT
-
Page 1: Service Manual
Service Manual HP OmniBook 800CS/CT... - Page 2 Thank you for purchasing this Factory Service Manual CD/DVD from servicemanuals4u.com. Please check out our eBay auctions for more great deals on Factory Service Manuals: servicemanuals4u...
- Page 3 Hewlett-Packard assumes no responsibility for the use or reliability of its software on equipment that is not furnished by Hewlett-Packard. As an ENERGY STAR partner, HP has determined that these products meet the ENERGY STAR guidelines for energy efficiency. All Certifications may not be completed at product introduction.
-
Page 4: Table Of Contents
I/O Door ...59 Memory Cover...59 PCMCIA Card Tray...59 Rubber Feet ...59 Keyboard (HP Authorized Service Providers Only) ...60 Display (HP Authorized Service Providers Only)...62 CPU (HP Authorized Service Providers Only) ...67 Heat Transfer Disk...68 Logic PCA Board (HP Authorized Service Providers Only)...70... - Page 5 Electronic Serial Number...70 Paw Active (HP Authorized Service Providers Only)...73 Other Components and Accessories (HP Authorized Service Providers Only)...74 Appendix A - Technical Specifications...78 Mass Storage Specifications ...78 Hard Disk Drive ...78 Floppy Disk Drive ...78 CD-ROM Drive ...79 System Resources ...80 System Interrupts (IRQs) ...80...
-
Page 6: List Of Figures
List of Figures Figure 1 - OmniBook 800 External Features...3 Figure 2 - OmniBook 800 External Features (continued) ...3 Figure 3 - Exploded Diagram...4 Figure 4 - Main Diagnostic Screen...8 Figure 5 - Serial Loop Back Connector ...10 Figure 6 - Parallel Loop Back Connector ...10 Figure 7 - SCSI Loop Back Connector ...10 Figure 8 - SyCard Solder Bridges ...11 Figure 9 - Sycard Test Results ...19... - Page 7 List of Tables Table 1 - Parts Identification...5 Table 2 - POST Beep Codes ...4 Table 3 - POST Display Codes...5 Table 4 - Diagnotic Command Line Options ...12 Table 5 - Diagnostic Test Selection Commands ...13 Table 6 - Diagnostic Commands for Toggling Settings ...14 Table 7 - Diagnostic Hidden Commands...15 Table 8 - Diagnostic Test Parameters...16 Table 9 - System Menu Settings...32...
-
Page 8: Introduction
Introduction This document provides reference information for the HP OmniBook 800. It is intended to be used by HP-qualified service personnel to help with the installation, servicing, and repair of these HP OmniBook PCs. It is a self-paced guide designed to train you to install, configure, and repair the OmniBook Notebook PC. -
Page 10: Product Overview
Part 1 Product Overview What’s New Product Features Product at a Glance Product Comparisons... - Page 11 What’s New This version of the HP OmniBook 800 Service Manual has been updated to include the HP OmniBook 800 with MMX Technology (F1360A). The following is a list comparing the technologies of the various models of the OmniBook 800.
-
Page 12: Product Features
Product Features The following two illustrations point out the key external features of the OmniBook 800. Figure 1 - OmniBook 800 External Features 1. Latch 2. Kensington security connector 3. Fn-key icon strip 4. Sound jacks 5. Card slots 6. Card-eject lever 15 14 18 17 16 Figure 2 - OmniBook 800 External Features (continued) -
Page 13: Product At A Glance
Product at a Glance The following diagram represents all models of the OmniBook 800. Use Table 1 to identify each part for the F1171 - F1175, and F1360 OmniBooks. Refer to the corresponding repair procedure(s) in Part 3 for the exact placement of each component. Figure 3 - Exploded Diagram... -
Page 14: Table 1 - Parts Identification
Table 1 - Parts Identification DESCRIPTION BATTERY - LI-ION BATTERY LATCH BUSHING CARD TRAY ASSY CPU 100MHZ CPU 133MHZ CPU 166MHZ DISPLAY DISPLAY CSTN DISPLAY TFT DISPLAY TFT DOOR - PIVOT LEFT EJECT ARM LEFT EJECT BUTTON LEFT GROMMET HARD DISK DRIVE 810MB HDD 1.44GB HDD 2.1GB HDD... -
Page 15: Product Comparisons
Product Comparisons HP OmniBook 800 with MMX Technology Size Closed 18.49 × 28.24 × 3.99 cm (7.28 × 11.12 × 1.57 in) Weight 1.77 kg (3.90 lb) Processor 166-MHz Intel Pentium with MMX Technology Bus Architecture 32-bit PCI bus Cache... - Page 16 HP OmniBook 800 with MMX Technology Management computer in ready-to- work state for months on a charge. Turn it on again, and you're instantly back where you were. 2-minute low-battery warning APM 1.2 Removable Hard disk drive Modules Battery Hard Disk Drive 2.1-billion-byte...
- Page 17 Software for Workgroups 3.11 and MS-DOS 6.22 dual-loaded with Windows 95 User upgradable Plug and Play BIOS APM 1.2 Diagnostic Software HP PIM and Financial Calculator DMI 1.1 under Windows 95 with TopTOOLS On-line documentation Security Features 2-level password protection...
- Page 18 HP OmniBook 800 HP OmniBook 800 with MMX Technology battery and accessories) battery and accessories) on battery and HP OmniBook 5700 accessories)
-
Page 22: Troubleshooting
Part 2 Troubleshooting Power-On Self-Test OmniBook Diagnostics Desktop Management Interface System Configuration Utility Troubleshooting Tips... -
Page 23: Power-On Self-Test
Power-On Self-Test The OmniBook 800 BIOS includes a Power-On Self-Test (POST) facility that tests a number of hardware and firmware items in the unit at each cold-start (BOOT or RESET). The OmniBook self-test alone should not be used to diagnose a hardware problem. If the self- test results are absolutely clear and repeatable, confirm the results with at least two other non- self-test failure symptoms. -
Page 24: Display Codes
Display Codes There are a number of Power On Self Test (POST) tests that are performed after the Beep Code tests. Failure of one or more of these tests will result in a displayed failure code (such as 03044). It is extremely important not to interpret a failure code immediately as a hardware failure. - Page 25 Message KEYBOARD FAILURE MACHINE IS LOCKED - TURN KEY NO BOOTABLE FLOPPY DRIVE 0 INSTALLED NO INTERRUPTS FROM TIMER 0 RAM PARITY ERROR AT LOCATION xxxx ROM AT xxxx (LENGTH YYYY) WITH NON-ZERO CHECKSUM (zz) TIME/DATE CORRUPT - RUN SCU UNEXPECTED AMOUNT OF MEMORY - RUN SCU The amount of memory detected by CMOS RAM TEST FAILED DMA CONTROLLER FAULTY...
-
Page 26: Omnibook Diagnostics
OmniBook Diagnostics The OmniBook diagnostics program provides an effective tool for diagnosing and isolating a hardware problem. The diagnostics software is intended for use in concert with additional troubleshooting methods to accurately determine the cause of trouble. The diagnostics program is not designed for unassisted end customer use. -
Page 27: Figure 4 - Main Diagnostic Screen
1 Hard disk 813Mb Ok Floppy disk 2 Battery Bat=LiIo (OK) Chg=FC B%=60 Vb=8.17 Ta=57.2 08/08 14:36:33 SCSI loopback 1 Keyboard 1 HP mouse 2 Audio 1 Display 1 Docked device Ok: NOTHING. SCSI CD ROM SCSI Hard disk Dock slots... -
Page 28: Special Test Hardware Requirements
(Backspace), and left bumper to exit Diag (Esc). Serial – same keys as with a keyboard, but from a remote system (HP 100LX, etc) connected into the RS232 port on the OmniBook. The remote computer’s serial port should be configured for 9600,N,8,1. -
Page 29: Loop Back Connectors
Loop Back Connectors In order to run the RS232 serial port, parallel port, and SCSI port self-test, a loop back connector is needed. The loop back may be placed on either the OmniBook port or at the end of the corresponding cable. -
Page 30: Figure 8 - Sycard Solder Bridges
PCMCIA Type III extender card The PCMCIA test that makes use of SyCard Technology’s SyCard also requires an extender card modified with two jumpers or with solder bridges. In order for the Sycard to be detected, CD1- and GND must be shorted together, and GND with CD2- must also be shorted together. These are both pairs of endmost pins on the extender. -
Page 31: Command Line Options
Command line options When Diag is run, either from the command line, or from a batch file, a number of switches (or options) may be included to “customize” the operation of Diag. Switches must be specified separately, and must begin with either a - or a / character. Upper or lower case may be used as desired. -
Page 32: User Interface Commands
Also some key caps have characters that cannot be displayed with the text characters available. Therefore, when running the keyboard test on a foreign keyboard, the POSITION of the key within the keyboard should match the POSITION of the key shown on the display, not necessarily the character printed on the key (although in nearly all cases, it does match). -
Page 33: Table 6 - Diagnostic Commands For Toggling Settings
Ctrl+T Toggle between the four types of mouse tests. The HP mouse tests are 1) text mode mouse test, 2) graphic mode sine wave mouse test, 3) combined text and sine tests, and 4) graphic draw mode test. -
Page 34: Table 7 - Diagnostic Hidden Commands
Top Bumper Bottom Bumper Left Button Right Button Right Bumper Left Bumper Alt+P Toggle ‘Prompt to retry test after a failure.’ Sometimes it is useful to trap failures and give the operator another opportunity to run a test before logging the test as failed. -
Page 35: Table 8 - Diagnostic Test Parameters
Alt+E + Alt+V Set the Vertical lost calibration speed thresholds used in the graphic draw mouse test. The defaults limits are 200 to 400. Alt+E + Alt+M Set mouse bumper failure threshold. The default number of mickeys for this is 1000. -
Page 36: Details On Using The Diagnostic Tests
Alt+C Set Contrast 0-255. Systems with a DSTN display can specify a display contrast from 0 to 255. This exceeds the normal range permitted with the contrast buttons and can result in a blank display. Repeat the command with a less extreme value to restore the display. - Page 37 operation of all tests depend on the presence or absence of XMS or EMS drivers. In general, if there is no XMS and no EMS driver, then memory will be accessed directly in pseudo-32-bit mode (i.e. with 4 GB selectors but from real code), if there is an XMS/EMS driver, the XMS driver will be used to access memory.
-
Page 38: Figure 9 - Sycard Test Results
Sycard Technology PCCtest 27x/37x software v1.50a Looking for Texas Instruments PCI-1130 PCI Controller… TI PCI-1130 Found at Bus 00, Function 00, Device 04 TI PCI-1130 Successfully Configured for I/O address 3E0/3E1 Testing Slot 0 Socket Controller = Texas Instruments PCI-1130 Checking Socket Controller…...Passed Power on delay (Vcc = 5 volt)…...Complete Basic operational test…...Passed... - Page 39 received is echoed back to the host. The IR port is first tested in slow mode by sending / receiving data packets at 115K baud. If this passes, then data packets are transmitted in high speed at 1 megabit then 4 megabit. These IR transmission tests are repeated 3 times. Serial port Levels: 1,2.
-
Page 40: Figure 10 - Keyboard Test Screen
Text mode mouse test This is the default mouse test. The upper right corner of the screen shows the HP mouse, drawn with line characters. In and around the mouse are names for mouse events. Initially, all events are blinking to indicate that they have not been tested. - Page 41 the mouse position to change. Press both buttons and move the mouse in all directions, then press a key again to exit the test. This will end the text mode mouse test. IMPORTANT NOTE ON THE USE OF BOTH BUTTONS: any time both buttons are pressed down, a release of just one button will NOT be recognized.
-
Page 42: Figure 11 - Mouse Test Screen (Text Mode)
-3 OUT -1034 -95 BOT TOP +1635 -1688 BOT TOP +1640 -658 BOT -235 +195 -688 BOT -177 TOP +1639 +411 -1145 BOT +105 TOP +1667 +227 +169 -639 BOT TOP +1655 +129 OUT -730 -2815 -861 +2802 OUT +145 +132 +166 -89 OUT... -
Page 43: Figure 12 - Mouse Test Screen (Graphics Mode)
FOLLOW THE FROM CORNER TO CORNER. PRESS MOUSE INTO EDGE BUMPERS AS YOU MOVE. Figure 12 - Mouse Test Screen (graphics mode) As the prompt indicates, to run this test, you must move the mouse to the corner where the white box is displayed (initially the top right corner). - Page 44 BotEdgeErr indicates the maximum total sine error along the bottom edge. When the two cycles are complete, the maximum of the top and bottom errors is compared against a test threshold. If above, the test fails, else the test passes. The default threshold is 10 pixels.
- Page 45 Audio Level: 2. This test checks the SoundBlaster compatible audio sound system. The DSP chip, DMA Channel, and Interrupt Lines are checked for proper operation. An audible sound test completes the test; a bong sound alternating between left and right speakers should be heard. Display Levels: 1,2,3.
-
Page 46: Figure 13 - Dock Keyboard Test Screen
Dock keyboard Levels: 1,2. This test operates like the Keyboard test except that it uses a standard 101 key keyboard connected to the dock. The display shown during this test mirrors the layout of a standard 101 key keyboard. Its operation is similar to the internal keyboard test, but for an external keyboard. -
Page 47: Desktop Management Interface (Dmi)
Administrator and user passwords. Tattooing: a string of characters that uniquely identifies the computer. Note: The DMI software package included with the OmniBook can only be used with the HP OmniBook Notebook PC. For full details of the structure of the MIF file, including an explanation of the meaning of the fields of groups and attributes and how to write an application program that accesses this information, you can access the DMTF FTP server ftp.dmtf.org or the DMTF Web Pages at the... -
Page 48: Figure 14 - Dmi Components
The following software is supplied with the DMI package: A Microsoft Windows utility, SETUP.EXE, to install and initialize the DMI software. A Windows utility, HP TopTools. After DMI is installed, this utility can be used to display information about the computer through the DMI. - Page 49 To install the DMI preloaded on the hard disk: Start Windows 95, if it is not already running. Click on “Start”. Go to “Programs - HP DMI”. Select and run “SETUP”. To alternatively install the DMI from floppy disks; Copy the DMI software from the \omnibook\drivers\win95\dmi directory of either the hard disk or Recovery CD to two floppy diskettes (copy contents of the \disk1 subdirectory to diskette #1 and contents of the \disk2 subdirectory to diskette #2).
-
Page 50: Setup And Configuration
Setup and Configuration The System Configuration Utility (SCU) is an operating system independent pop-up program. It can only be accessed at boot-time by pressing F2. SCU Main Screen... -
Page 51: System Menu Screen
System Menu Screen Table 9 - System Menu Settings Setting Parameters Day; Month; Date and Time… Year; Hour; Minute; Second Boot Devices… Boot Device FDD First; HDD First CardBus Mode Legacy; Disable; CardBus Mode Boot Configuration Full; Boot devices only; Auto-detect Fast Boot Selected;... - Page 52 Docking Messages Selected; not selected Passwords… Password options… User Password Turn ON, required to: Always; Turn ON, after FN-OFF; Undock; Save Setup changes Admin Password Selected; not required to save selected changes to PC ID Disable hard disk Selected; not drive lock selected Set Admin password...
-
Page 53: Password Configuration
Password Configuration The Password Options dialog allows the User and an Administrator to control access to certain portions of the OmniBook. If an Administrator Password is set, then modification of the PC Identification Strings or some SCU settings may be restricted by checking the appropriate checkboxes. Note that even if an Administrator Password is required to Save setup changes, the User Password (and its associated options) can still be changed without knowing the Administrator Password. -
Page 54: Input/Output Menu Screen
Input/Output Menu Screen Table 11 - Input/Output Menu Settings Setting Parameters COM Ports… Serial Port: None COM1, Addr 3F8, IRQ 4 COM2, Addr 2F8, IRQ 3 COM3, Addr 3E8, IRQ 4 COM4, Addr 2E8, IRQ 3 LPT Port Printer Port None LPT1, Addr 378, IRQ7 LPT2, Addr 278, IRQ5... - Page 55 Setting Parameters Key Repeat 2 cps; 6 cps; 10 cps; 15 Rate cps; 20 cps; 30 cps Keyboard Selected, Not selected Numlock External Devices… VGA Display External VGA if attached, device LCD off; Both external VGA and Force Selected; Not selected recognition of external VGA Enable External...
-
Page 56: Power Menu Screen
Power Menu Screen Table 12 - Power Menu Settings Setting Parameters Power Controls CPU Power Maximum; Management Moderate; None Auto Turn-off Never; after 1, 2, 3, w/Battery: 4, 5, 10, 15, 20, or 30 minutes HDD power- Never; after 1, 2, 3, down 4, 5, 10, or 15 w/Battery:... -
Page 57: Default Menu Screen
Default Menu Screen Table 13 - Default Menu Settings Setting Parameters Factory Default Settings Restore Settings Default Comment Restore current setup to factory default settings (except password and PC Identification). Restore current setup to settings at SCU startup (except password and PC Identification). -
Page 58: Exit Menu Screen
Exit Menu Screen Table 14 - Exit Menu Settings Setting Parameters Save Quit Version Info… Default Comment Save settings and exit SCU. The OmniBook will automatically reboot. Exit SCU without saving settings. Report current BIOS version info. -
Page 59: Troubleshooting Tips
Troubleshooting Tips This section provides various troubleshooting tips for the OmniBook 800 and its accessories. As with all troubleshooting, these tips should be combined with other techniques and tools to effectively diagnose hardware issues. OmniBook Components The following table lists various symptoms of several OmniBook components. Troubleshooting techniques are then listed for both Call Center and Repair Center Personnel. - Page 60 Check for display cable pinched in case parts. New BIOS v 1.02.00 Run PWR800.exe to measure) battery life (program obtainable from the MCD Internal Web at http//webmcd.cv.hp.com/prods upp/ob800/software/index.htm Isolate to defective component (battery, ac adapter or logic board). Check for display cable pinched in case parts.
- Page 61 Is there a card in dock? Remove card from undocked configuration. Is the user an HP COE user? If so, does the user use COE Connect and COE Disconnect? If not, refer them to their IT dept.
- Page 62 Symptom Some or all keys not working Computer noisy but working HDD “clunking or scratchy” Buzzing or whining Miscellaneous Computer does not resume after: Being suspended A reset An alarm from an application File corruption Computer gets hot Computer won’t time out Call Center comparing it to another OB800? Is customer a heavy user?
- Page 63 Computer pauses and won’t permit kybd or mouse input for a few seconds PCMCIA cards recognized but not available for use. If HP COE customer, modems/PCMCIA cards not recognized consistently Difficult to install RAM expansion door Call Center send in for repair. If not, check...
-
Page 64: Cd Rom Drive Troubleshooting
Symptom Dock latch jammed, won’t permit computer to dock Clock won’t keep time Computer runs slow Hard drive errors RAM module does not fit into OmniBook connector CD ROM Drive Troubleshooting The following table lists several troubleshooting tips specifically for the optional CD-ROM drive. Table 16 - CD-ROM Troubleshooting Tips Trouble Possible Causes... -
Page 65: Resolving Docking Station Operating Problems
Trouble Possible Causes The CD-ROM drive is not For Windows 95, the CD- accessible from the ROM drive was not turned OmniBook. on when you plugged it into the OmniBook. For Windows for Workgroups, the CD-ROM drive was not turned on when you rebooted the OmniBook. -
Page 66: Resolving Omnibook Docking Problems
Make sure the mouse is plugged into the correct port. The mouse and keyboard ports look the same. Turn the system off and on. Reboot the system. Undock the OmniBook, unplug and reconnect the ac adapter, then dock again. If network connections don’t work Make sure that the LAN cable is connected. - Page 67 If the OmniBook isn’t released after pressing the Undock button If you’re using a password, make sure it’s accepted. If you’re prompted about shutting down devices, and if no applications are using those devices, press . Otherwise, close those applications and try undocking again. ENTER To override the undocking software, press a paper clip or other thin object into the security opening in the docking system.
-
Page 68: Hardware Repair
Hardware Repair Battery Memory Hard Disk Drive Mouse Small Parts Keyboard Display Logic PCA Paw Active Other Components and Accessories Always provide proper grounding when performing any of the AUTION following repairs. An electrostatic discharge may cause irreparable damage to the OmniBook and its components Part 3... -
Page 69: Battery (End User Replaceable)
Battery (End User Replaceable) Do not mutilate, puncture, or dispose of batteries in fire. The batteries can ARNING burst or explode, releasing hazardous chemicals. A rechargeable battery pack must be recycled or disposed of properly. Required Equipment none Removal Procedure 1. -
Page 70: Memory (End User Replaceable)
Memory (End User Replaceable) Required Equipment none To avoid damage due to electrostatic discharge, handle the memory module AUTION by the edges only. Removal Procedure 1. Exit all applications, including Windows. 2. Remove the ac adapter and battery from the OmniBook. 3. -
Page 71: Figure 18 - Removing The Memory Module
Figure 18 - Removing the Memory Module Replacement Procedure 1. To replace, position the non-connector end first, then press the front of the module down into the connector. Apply pressure to the memory module only on the connector to avoid AUTION damaging the circuit board. -
Page 72: Hard Disk Drive (End User Replaceable)
Hard Disk Drive (End User Replaceable) Required Equipment Torx #6 screwdriver Removal Procedure 1. Exit all applications, including Windows. 2. Turn the OmniBook off and remove the battery and ac adapter. 3. Use a Torx-T6 screwdriver to remove the two keyboard screws and the three hard drive screws (the exact location of the hard drive screws vary with the manufacturer of hard drive). -
Page 73: Figure 20 - Folding The Keyboard Open
Figure 20 - Folding the Keyboard Open 5. Disengage the hard drive connectors by grasping the left flap of the plastic insulator and gently pulling straight to the right as shown in Figure 21. To avoid damage to the hard drive connector, do not pull the hard drive AUTION insulator up or at an angle –... -
Page 74: Figure 22 - Hard Drive Removal (Continued)
Figure 22 - Hard Drive Removal (continued) Replacement Procedure 1. If the new hard drive is from a different manufacturer than the old one, it may have screws in different positions. Determine which mounting holes in the bottom case are needed; then, if necessary, push out the rubber screw-hole covers from the inside of the bottom case. -
Page 75: Figure 24 - Inserting The Hard Drive
Do not force the drive into the connector or the pins may bend and cause AUTION damage to the hard drive. Figure 24 - Inserting the Hard Drive 4. Holding the Keyboard in place, so as not to damage the flex cables, turn the OmniBook over and re-insert the three hard drive screws removed in step one support the hard drive with one hand in order for the screws to engage. -
Page 76: Hard Disk Drive Breather Holes
6. Replace the two Keyboard Screws and the remainder of the components and reboot. Hard Disk Drive Breather Holes Hard drives used in the OmniBook 800 have a breather hole located on the metal side of the drive (see Figure 26 for location of breather holes for both IBM and Toshiba). The hole is necessary to provide pressure equilibrium. -
Page 77: Mouse (End User Replaceable)
Mouse (End User Replaceable) Required Equipment none Removal Procedure 1. Press the mouse-eject button to eject the mouse. 2. Pull the mouse firmly away from the OmniBook (see Figure 27). The entire mouse assembly will pull free. Figure 27 - Removing the Mouse Replacement Procedure 1. -
Page 78: Small Parts (End User Replaceable)
Small Parts (End User Replaceable) The following small parts are all end user replaceable. Battery Latch Once the battery is removed (refer to the Battery Removal Procedure on page 50), the battery latches will slide out of the bottom case. To replace, align the sides of the latches with the grooves in the slots. -
Page 79: Keyboard (Hp Authorized Service Providers Only)
Keyboard (HP Authorized Service Providers Only) Required Equipment Torx #6 screwdriver Removal Procedure 1. Exit all applications, including Windows. 2. Turn the OmniBook off and remove the battery and ac adapter. 3. Remove the two keyboard screws from the bottom case. See Figure 28. -
Page 80: Figure 30 - Keyboard Flex Cables
5. Lastly, remove the keyboard flex cables from the zero insertion force slots. If available, use the provided Keyboard Flex Cable Removal Tool (part number 5182-7482) to assist in “opening” the zero insertion force slots. Otherwise, a pick may be used to gently lift up the top of the slots. -
Page 81: Display (Hp Authorized Service Providers Only)
Display (HP Authorized Service Providers Only) Required Equipment Torx #6 screwdriver Removal Procedure 1. Exit all applications, including Windows. 2. Turn the OmniBook off and remove the battery and ac adapter. 3. Follow the Hard Disk Drive Removal Procedure on page 53 and the Keyboard Removal Procedure on page 60 to remove these components. -
Page 82: Figure 33 - Keyboard Support Plate Screws
Assembly can then be removed with the CPU still attached to the underside of the Keyboard Support Plate. This avoids causing damage to the CPU or Logic PCA. M2.0x0.4x11.5 qty 2 1.5-3.0 in-lb (p/n 0515-2920) M2.0x0.4x3.5 qty 1 1.5-3.0 in-lb (p/n 0515-2921) Figure 33 - Keyboard Support Plate Screws 6. -
Page 83: Figure 34 - Display Flex Cables
Figure 34 - Display Flex Cables 7. Note -- TFT displays (OmniBook 800CT) have two Display Flex Cables, while DSTN displays (OmniBook 800CS) only have one. Take care to properly remove both cables on TFT units (the smaller cable may be hidden under the larger cable). While still supporting the Top Case and Display Assembly, remove the Display Flex Cable(s) from the connector slot(s). -
Page 84: Figure 35 - Top Case And Display Removal
Figure 35 - Top Case and Display Removal 8. To separate the Display from the Top Case, thread the Display Flex Cable(s) through the opening of the Top Case. Replacement Procedure 1. If the replacement Display arrived without an Intel Inside sticker, one will need to be placed equidistant between the edges of the Display. -
Page 85: Figure 36 - Intel Inside Sticker Placement
Intel Inside Sticker for F1360 only (p/n 7121-7455) Figure 36 - Intel Inside Sticker Placement 2. Thread the Display Flex Cable(s) of the replacement Display through the opening in the Top Case and “close” the assembly comprising of the Top Case and Display Assembly. 3. -
Page 86: Cpu (Hp Authorized Service Providers Only)
(HP Authorized Service Providers Only) Required Equipment Torx #6 screwdriver Removal Procedure 1. Follow the Display Removal Procedure to gain access to the CPU. 2. Remove the two CPU screws (see Figure 37). 3. Gently rock the CPU back and forth from front to back to remove from the connector. -
Page 87: Heat Transfer Disk
Heat Transfer Disk (The following information applies to F1360 units only.) With each replacement of the CPU, a new Heat Transfer Disk must be placed on the underside of the Top Case. See Figure 38. Simply pull back the Keyboard Support Insulator, remove the old Heat Transfer Disk, center the new Heat Transfer Disk in the indentation and reposition the Insulator. - Page 88 Under normal conditions, it is important not to disturb the wax residue on the Top Case and CPU. If the Top Case is replaced, it will have a new Heat Transfer Disk already in place on the Keyboard Support Plate. However, to ensure the integrity of the heat transfer, this Heat Transfer Disk should be replaced with a new disk after installation of the new Top Case Assembly.
-
Page 89: Logic Pca Board (Hp Authorized Service Providers Only)
3. The HP Authorized Service Provider must contact Hewlett-Packard Technical Support at this point. 4. HP Technical Support will ask for a CZ authorization number and the five (5) digit number (from step 2). 5. HP Technical Support will provide a validation key to the HP Authorized Service Provider. -
Page 90: Figure 40 - Logic Pca Removal
Required Equipment Torx #6 screwdriver 5mm hexdriver (F1171 & F1175 only) Removal Procedure 1. Follow the Display Removal Procedure to gain access to the Logic PCA. 2. For convenience, the Microphone Assembly may be removed at this point. See Figure 40. Paw Eject Arm (p/n F1170-40008) Speaker... -
Page 91: Figure 41 - Grommet And Bushing Placement
4. Remove the Paw Eject Arm, Paw Eject Button, two standoffs (F1171 - F1175 only, the CPU must be removed to gain access to the two standoffs), and disconnect the Paw Active Flex Cable and the Speaker Cable. 5. Remove the Logic PCA from the bottom case by first lifting up on the right-hand side . Note –... -
Page 92: Paw Active (Hp Authorized Service Providers Only)
Paw Active (HP Authorized Service Providers Only) Required Equipment Torx #6 screwdriver 5mm hexdriver (F1171 - F1175 only) Removal Procedure 1. Follow the Logic Board PCA Removal Procedure to gain access to the Paw Active. 2. Remove the Paw Shield. Refer to Figure 42 for location of components. -
Page 93: Other Components And Accessories (Hp Authorized Service Providers Only)
Other Components and Accessories (HP Authorized Service Providers Only) The below table list additional replaceable components and the disassembly procedure(s) necessary to gain access to each. Component Disassembly Procedure(s)/Page CD-ROM Drive Docking Station Top Case Display Bottom Case Logic PCA Board... - Page 96 Appendices A - Technical Specifications B - Hewlett-Packard Password Removal Policy C - Hewlett-Packard TFT Display Quality Statement D - OmniBook Diagnostics BIOS Checksums E - OmniBook Diagnostics Error Messages F - Part Numbers...
-
Page 97: Appendix A - Technical Specifications
Appendix A - Technical Specifications Mass Storage Specifications Hard Disk Drive The hard disk drive can be removed by the user for easy upgrades. Hard drive manufacturers are subject to change without notice. Table 17 - Hard Disk Drive Specifications 810-million-byte Hard Drive Manufacturer... -
Page 98: Cd-Rom Drive
1 or less per 10 CD-ROM Drive The CD-ROM Drive is an accessory to the HP OmniBook 800 and can be purchased separately. It is a SCSI device that connects to the OmniBook’s docking port via a proprietary docking- connector-to-SCSI cable. The CD-ROM is can be powered with six AA batteries or by daisy- chaining to the OmniBook’s ac adapter. -
Page 99: System Resources
Modes CD-DA, CD-ROM, CD-ROM XA (except for ADPCM), Photo CD , CD R, Video CD, CD-I Mean Time Between 25,000 hours Failures System Resources The following tables list the various system resources for each OmniBook 800 model. System Interrupts (IRQs) Table 20 - Interrupts for F1171 - F1175 System timer Keyboard... -
Page 100: Dma Channels
DMA Channels Table 22 - DMA Channels for F1171 - F1175, and F1360 Free Sound Floppy drive Free DMA Controller Wave 2 Free Free Memory Map Table 23 - Memory Map for F1171 - F1175 F0000 - FFFFF 64K System BIOS EC000 - EFFFF 16K PCI BIOS E8800 - EBFFF... -
Page 101: I/O Addresses
I/O Addresses Table 25 - I/O Address for F1171 - F1175 1F0 - 1F7 Internal Hard Disk 220 - 22F ESS Sound 2F8 - 2FF COM 2 (if modem installed) 330 - 331 Wave 2 (sound) 378 - 37A LPT1 (external parallel port) 388 - 38B Sound 3B0 - 3BF... -
Page 102: Appendix B - Hewlett-Packard Password Removal Policy
The statement can be a fax copy of the document. The fact that the unit is in the hands of an HP representative on behalf of the customer is not evidence of ownership. In... - Page 103 The log and backup are subject to standard record retention process and review. The final issue relating to descramble of passwords is that HP cannot provide information to users that would assist them in improperly descrambling a...
-
Page 104: Appendix C - Hewlett-Packard Tft Display Quality Statement
HP OmniBook TFT displays meet or exceed all TFT manufacturers’ standards for cosmetic quality of TFT displays. HP does not warrant that the displays will be free of cosmetic imperfections. TFT displays may have a small number of cosmetic imperfections and still conform to the display manufacturers’... -
Page 105: Appendix D - Omnibook Diagnostics Bios Checksums
Appendix D - OmniBook Diagnostics BIOS Checksums When running the OmniBook diagnostics program, these checksums can be specified on the command line with the -c option. Table 27 - OmniBook F1171 - F1175 BIOS Checksums ROMDATE Altera 960808 3E55 DC8C 960910 258F DC8C... -
Page 106: Appendix E - Omnibook Diagnostics Error Messages
Appendix E - OmniBook Diagnostics Error Messages The following are messages that may appear when running the OmniBook diagnostics program. Hewlett-Packard supplied test messages The following test messages were supplied by Hewlett-Packard. XXXMHz CPU, speed=XXX (failed). BIOS flash roms OK C-F=XXXX Altera=XXXX Boot=XXXX FAIL C-F=XXXX#YYYY ... - Page 107 Vpp2 tolerance error (12V) = N.NN) Card Vpp2 12V = N.NN (XX) Vpp2 tolerance error (3.3V) = N.NN) Vpp2 tolerance error (3.3V) = N.NN) Vpp2 tolerance error (5V) = N.NN) Vpp1 tolerance error (12V) = N.NN) -REG bit error - stuck high -REG bit error - stuck low Address miscompare, access = XXXXXXXX, latched = XXXXXXXX Address miscompare, access = XXXXXXXX, latched = XXXXXXXX...
- Page 108 Failure: "X" Interrupt line problem Failure: "X" can't Bus Master Failure: "X" can't issue interrupt HP mouse Unable to prepare internal mouse for i/o. Failed: "X" bumper ON while moving "X". Failed: "X" bumper and movement "X" at the same time.
-
Page 109: Watergate Software Supplied Test Messages
Dock EEPROM FAILED at XXXX: wrote XX read XX. System hardware configuration (invoked with Ctrl+H) Cpu speed (CPU=100 133) Display type (DSP=DSTN or TFT) Hard disk size (HD=814M .. 1.3G) L2 Cache (L2=000 or 256), On or Off Op Sys Version (OS=0.04.09...) Ram memory (RAM=08 .. - Page 110 Comparison "FBLD/FBSTP", "FILD/FIST","FLD/FST","FXCH" -- "FAILED" "FCOM","FICOM","FTST","FXAM" -- "FAILED" "FUCOM" -- "FAILED" Trigonometry "F2XM1","FPATAN","FPTAN","FYL2X","FYL2XP1" -- "FAILED" "FCOS","FSIN","FSINCOS" -- "FAILED" Memory test responses Suspend RAM test "Failed: memory manager loaded" Extended Pattern And "Could not allocate buffer" Address Test "BIOS reports no extended memory available" "Error at address XXXXXXXXH"...
- Page 111 "Mode Register" -- "FAILED" "Color Don't Care Register" -- "FAILED" "Bit Mask Register" Timer chip test responses Timer chip test "Clock 0 Not Counting", "Clock 1 Not Counting" -- "FAILED" "Clock 2 Not Counting" "Could Not Control Clock 2" CMOS RAM test responses CMOS RAM Test "Addr XXH Failed, In YYH, Out ZZH"...
- Page 112 PCDR LOOPBACK PLUGS "AUTOFD-->PE" "INIT-->ACK" "SLCTIN-->BUSY" ACER LOOPBACK PLUGS "DATA1-->SLCT" "DATA2-->PE" "DATA3-->ACK" "DATA4-->BUSY" COM test responses Registers "Baud rate divisor failed" "Divisor latch access bit failed" "Line control register pattern test failed" "Modem control register failed" "Interrupt failed. It was not generated." Loopback Tests "RTS-->CTS", "DTR-->DSR", "Delta-CTS", "Delta-DSR"...
- Page 113 CD ROM test responses CD ROM Test "Invalid Drive"; "Not Ready"; "Error Code XX (II)" "Error reading sector...
-
Page 114: Appendix F - Part Numbers
Appendix F - Part Numbers PART # EXCHANGE DESCRIPTION PART # 0380-4606 STANDOFF - HEX 0515-1634 TOPY SPRING NUT 0515-2396 SCREW 2.0 X.4 6MM 0515-2846 SCREW M2X.4X7PH T6 0515-2847 SCREW M3X.5X5WH T6 0515-2852 SCREW M1.6X.35X4 0515-2853 SCREW M2X.40X4.5WH 0515-2920 SCREW M2X.4X11.5WH 0515-2921 SCREW M2X.4X3.5WH 5182-5110... - Page 115 PART # EXCHANGE DESCRIPTION PART # F1170-60903 SVC KYBRD TOPCASE F1170-60904 SVC KYBRD BTMCASE F1170-60906 F1170-69006 SVC LOGIC PCA 16MB F1170-60909 SVC PAW ACTIVE F1170-60919 F1170-69019 SVC CPU 100MHZ F1170-60920 F1170-69020 SVC CPU 133MHZ F1170-80020 REGULATORY LABEL F1170-80023 OL FN ICON WIN95 F1170-80036 OL FN ICON WFW3.11 F1360-20004...
- Page 116 PART # EXCHANGE DESCRIPTION PART # 8120-6260 PWR CORD US 8120-6261 PWR CORD UK 8120-6262 PWR CORD EUROPE 8120-6346 PWR CORD AUSTRALIA yes MANUALS 5965-0204 SUPP BKLT US 5965-0205 SUPP BKLT GERMAN 5965-0206 SUPP BKLT FRENCH 5965-0207 SUPP BKLT SPANISH 5965-0208 SUPP BKLT ITALIAN 5965-0241...
- Page 117 PART # EXCHANGE DESCRIPTION PART # FRENCH F1170-60913 RECOVERY KIT - ITALIAN F1170-60914 RECOVERY KIT - GERMAN F1170-60915 RECOVERY KIT - SPANISH F1170-60918 RECOVERY KIT - SWEDISH F1360-60912 RECOVERY KIT - ENGLISH F1360-60913 RECOVERY KIT - FRENCH F1360-60914 RECOVERY KIT - ITALIAN F1360-60915 RECOVERY KIT -...
- Page 119 HP Part Number F1360-90049...
Need help?
Do you have a question about the OmniBook 800CS/CT and is the answer not in the manual?
Questions and answers