Table of Contents
Advertisement
Advertisement
Table of Contents

Related Manuals for Axis 200


Summary of Contents for Axis 200
-
Page 2: Safety Notices
Year 2000 Compliance Important - potential hazard that can seriously Axis Communications warrants that the AXIS 200 is year 2000 impair operation. compliant. Do not proceed any of the above notices until you have fully understood the implications. -
Page 3: About This Manual
The manual provides introductory information as well as detailed instructions on how to set up and manage the AXIS 200 in various network environments. It is intended for everyone involved in installing and managing the AXIS 200. To fully benefit from the manual, you should be familiar with basic networking principles. - Page 4 Preface AXIS 200 User’s Manual Network Attached Optical Media Servers provide you with a flexible and cost-efficient solution for sharing CD-ROMs, DVD-ROMs and other optical media across the network. They are available in Ethernet, Fast Ethernet and Token Ring versions.
-
Page 5: Table Of Contents
Stage 4. Assigning an Internet Address and Host Name ..13 Stage 5. Testing the AXIS 200 ....... 14 Stage 6. -
Page 6: Table Of Contents
Physical connector ........77 Setting Up the AXIS 200 Modem Server ..... . . 78 Appendix G Camera Applications . -
Page 7: Section 1 Introduction
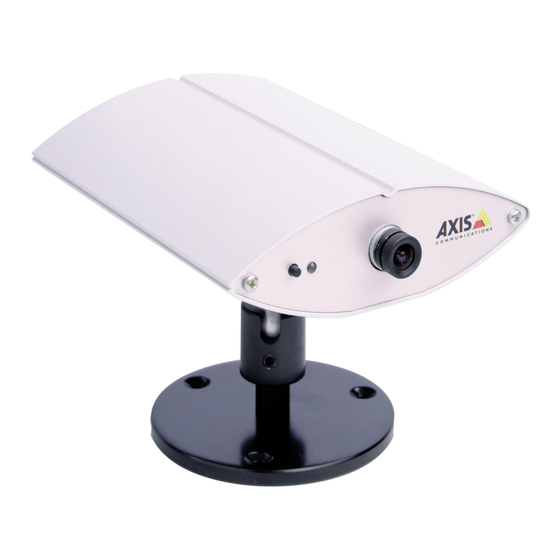
Section 1: Introduction Section 1 Introduction The AXIS 200 Network Camera The AXIS 200 Network Camera is a digital snapshot camera with a built-in Web server. Connecting directly to Ethernet networks, it provides a source for live color pictures over the Internet. -
Page 8: Features And Benefits
Section 1: Introduction AXIS 200 User’s Manual Features and Benefits Connecting the AXIS 200 to the network is easy. It does not require Easy Installation the use of a PC frame grabber card or interaction with any other server. No additional software or hardware is needed. You can actually install it in a single minute - all you need to do is assign a valid Internet address. - Page 9 AXIS 200 User’s Manual Section 1: Introduction The AXIS 200 has hardware support for the JPEG compression as well Fast JPEG Compression as a 32-bit high speed RISC CPU. This results in fast JPEG compression. The AXIS 200 provides JPEG images directly, without the need for manual conversion between image formats.
- Page 10 Section 1: Introduction AXIS 200 User’s Manual...
-
Page 11: Installing The Axis 200
The AXIS 200 is installed in these stages: Stage 1. Unpacking and Checking the Hardware. Stage 2. Identifying the Connectors and Indicators Stage 3. Connecting the AXIS 200 to your Network Stage 4. Assigning an Internet Address and Host Name Stage 5. Testing the AXIS 200... -
Page 12: Stage 1. Unpacking And Checking The Hardware
All packing material is recyclable. The AXIS 200 hardware pack contains: AXIS 200 Network Camera, part no: 0064-1 AXIS 200 Quick Installation Guide, part no: 15107 AXIS 200 Tripod Product Brochure, part no: 14412 Power supply. -
Page 13: Stage 2. Identifying The Connectors And Indicators
Appendix E - The Auxiliary IO Port. RS232 Serial A 9 pin D-sub connector provides the physical RS232 serial interface to a modem server within the AXIS 200. This connector is discussed Connector in detail in Appendix F - The RS232 Serial Port. - Page 14 Wide angle lens with rotational-focus control. Refer to Appendix D - Technical Specifications for complete specification. This is located on the underside label of the AXIS 200. Please note Serial Number that the serial number of your AXIS 200 is identical to the Ethernet address of the unit.
-
Page 15: Stage 3. Connecting The Axis 200 To Your Network
1. Note the serial number of your AXIS 200 for future reference during the installation procedure. This is located on the underside label of the AXIS 200. Please note that the serial number of your AXIS 200 is identical to the Ethernet address of the unit. -
Page 16: Stage 5. Testing The Axis 200
Section 2: Installing the AXIS 200 AXIS 200 User’s Manual Stage 5. Testing the AXIS 200 You are now ready to test the connection between your AXIS 200 and the network. 1. Start your Web browser. 2. Enter the name or Internet address of the AXIS 200 in the... - Page 17 AXIS 200 User’s Manual Section 2: Installing the AXIS 200 3. To further test your AXIS 200, take some more pictures. You can do this by simply reloading your Web browser. Notes: Server push and other automatic updating functions are described in Automatic Picture Updates, on page 37.
-
Page 18: Stage 6. Adjusting The Focus
AXIS 200 User’s Manual Stage 6. Adjusting the Focus The AXIS 200 has a lens with rotational focus control. To obtain a sharp picture, adjust the focus of your AXIS 200 by carefully turning the lens. A white spot on the lens assembly indicates the approximate focus position for the unit, when adjusted to a 12 o’clock position. -
Page 19: Section 3 Assigning An Internet Address
AXIS 200 User’s Manual Section 3: Assigning an Internet Address Section 3 Assigning an Internet Address To enable access to your AXIS 200, you must first assign it an appropriate Internet address. This section describes how to assign and download an Internet address for your AXIS 200. - Page 20 Section 3: Assigning an Internet Address AXIS 200 User’s Manual Make sure the AXIS 200 is powered up and attached to the network. Before you begin Acquire an unused Internet address from your Network Internet Address Administrator. You will require root privileges on your UNIX system and System Privileges administrator privileges on the Windows NT servers.
- Page 21 AXIS 200. Type to display the ARP table. arp -a Note that if your AXIS 200 unit is connected to the Windows 95 client via a hub, without network connection to other devices, you must use the command arp -s <Internet address> <Ethernet...
- Page 22 Section 3: Assigning an Internet Address AXIS 200 User’s Manual Follow these instructions to download the Internet address and verify Using ARP in UNIX and OS/2 the communication. Type the following commands: arp -s <host name> <Ethernet address> temp ping <host name>...
- Page 23 2. If necessary, update your host table and alias name databases as described required by your system. 3. If it is not already running, start the rarp daemon. This is typically performed using the command rarpd -a 4. Restart the AXIS 200 to download the Internet address.
- Page 24 3. If it is not already running, start the bootp daemon. This is typically performed using the command bootpd 4. Restart the AXIS 200 to download the Internet address, default router address, and subnet mask.
-
Page 25: Configuring The Axis 200
Section 4 Configuring the AXIS 200 This section includes an overview of the AXIS 200 configuration parameters. You can configure the AXIS 200 via hyperlinks from within its own web pages from any standard Web browser. Alternatively, you can configure the AXIS 200 using FTP. -
Page 26: Configuring Using A Web Browser
Section 4: Configuring the AXIS 200 AXIS 200 User’s Manual Configuring using a Web browser To configure the AXIS 200, enter the name or Internet address into the location/address field of your Web browser: http://cameraname/ http://172.16.253.80/ The Home Page for your AXIS 200 will be displayed:... - Page 27 AXIS 200 User’s Manual Section 4: Configuring the AXIS 200 On the AXIS 200 Home Page, click on the Settings link to reach the Configuration pages. The configuration parameters are grouped into these pages: • Image • Date & Time •...
- Page 28 AXIS 200 within the defined Image Cache time. This parameter may be varied between 0 - 999 seconds. The default value of zero causes the AXIS 200 to generate a new snapshot for each access. Front panel LED Enables the Snapshot indicator on the front panel of the AXIS 200.
- Page 29 AXIS 200 User’s Manual Section 4: Configuring the AXIS 200 You can set the current date and time via the Configuration - Date & Date & Time Page Time Page. You reach the page by clicking Date & Time on the Configuration pages.
- Page 30 DNS server be unavailable or disconnected. SMTP Mail Server Name of the server that provides your e-mail facilities. SMTP Return Address The reply address for e-mails sent by the AXIS 200. Enable BOOTP Enables the BOOTP protocol for downloading the Internet address.
- Page 31 AXIS 200 User’s Manual Section 4: Configuring the AXIS 200 To enable a serial link to the AXIS 200, click Modem at the top of the Modem Page Configuration page. This is needed if you want to transfer snapshots and configuration data via a connecting modem.
-
Page 32: White Balance
AXIS 200. Freeze The AXIS 200 uses a fix white balance that you establish manually. See “Setting the white balance manually” on page 31.. Note that the setting will be lost when the AXIS 200 is powered off. - Page 33 AXIS 200 User’s Manual Section 4: Configuring the AXIS 200 Follow these steps to set the white balance of the AXIS 200 manually: Setting the white balance manually 1. Hold a white paper in front of the camera lens for at least one minute.
-
Page 34: Configuring Using Ftp
Section 4: Configuring the AXIS 200 AXIS 200 User’s Manual Configuring using FTP The configuration parameters of your AXIS 200 can be modified using the File Transfer Protocol (FTP). FTP is supported in UNIX, Windows 95 and Windows NT environments. -
Page 35: Using The Axis 200
After installing the AXIS 200 and assigning it with an appropriate Internet address, you are ready to begin using it in your own applications. This section describes how to use the AXIS 200 effectively to realize its full potential, including: •... -
Page 36: Snapshots
JPEG image. Example: http://192.36.253.80 This causes the AXIS 200 to generate a fullsize JPEG image. Each time you reload the page, a new snapshot is displayed within the AXIS 200 Home Page. - Page 37 The file size depends on several factors. Low compression and large images result in larger files, but higher quality. Images with a lot of detail will also generate larger files. These snapshot types are available within your AXIS 200: File name Size (pixels)
- Page 38 Microsoft Internet Assistant, Front Page, Adobe PageMill, etc. 2. In your Web browser, enter the name or Internet address of your AXIS 200 together with the preferred snapshot type. Example http://cameraname/fullsize.jpg 3. Add an HTML reference to the snapshot within the target web page.
-
Page 39: Automatic Picture Updates
The Server push function pushes new snapshots into your Web Server Push browser continuously. The frame rate depends on how fast the AXIS 200 can deliver the snapshot data over the available network bandwidth. Therefore, you cannot adjust the frequency of the Server push snapshots within your Web browser. -
Page 40: External Web Sites
AXIS 200 User’s Manual External Web Sites When using the AXIS 200 over the Internet, we recommend that it is accessed over an assisting web server and not directly. This is because the AXIS 200 has limited capacity for handling the extra amount of buffering that might be required. -
Page 41: Cron Script
In practice, the CRON service allows you to program event and/or time triggered functions within the AXIS 200. From the AXIS 200 Home Page, you can access an on-line editor for Script Format generating the CRON script file. Alternatively, you can use a common text editor and download the file via FTP. - Page 42 Section 5: Using the AXIS 200 AXIS 200 User’s Manual A typical CRON script construction is detailed below: # <comment> (first entry) <trigger condition> : <command 1> ; <command 2> ; # <comment> (second entry) <trigger condition> : <command 1> ;...
- Page 43 AXIS 200 User’s Manual Section 5: Using the AXIS 200 Example: # This cron entry will... Trigger Condition The commands contained within each specific entry are triggered by a defined trigger condition. The trigger condition is specified by six separate fields and must be terminated with a colon “:”..
- Page 44 The sixth field is an optional Input and Boot field that defines the Input and Boot Field input and boot trigger functions. You can program the AXIS 200 to trigger at startup or on the logical states present on the Control button and digital input ports, using the trigger variables respectively. The...
- Page 45 AXIS 200 User’s Manual Section 5: Using the AXIS 200 Example 2 Activate on Input port 1 low and Input port 2 transition from low to high. 0I1&/I2 This table summarizes the valid values of the triggering event fields: Triggering Fields...
- Page 46 Section 5: Using the AXIS 200 AXIS 200 User’s Manual [-host HOST] [-user USERNAME] [-pass PASSWORD] [-src SOURCEFILE] [-dest DESTINATIONFILE] [-temp TEMPORARY_DESTINATIONFILE] [-loop LOOPTIME] [-time TOTALTIME]; mail [-s SUBJECT] [-a ATTACHMENTS] [-t RECIPIENTS]; offline online [-dial NUMBER] [-user USERNAME -pass PASSWORD] [-timeout TIME] [-script "word_1 word_2 ...
- Page 47 This example shows how several entries can be programmed into one Sample CRON Script CRON script: # This is an example of an Axis extended CRON script: # Once a day I want my mother to receive an e-mail # containing the lastshot.jpg image.
- Page 48 221 Goodbye. FTP session downloading a CRON script Notes: Only one CRON script can be resident within the AXIS 200 at a time. Active entries contained in any previously downloaded CRON script are stopped and automatically erased from memory once a new script is installed.
-
Page 49: Common Gateway Interface (Cgi)
Section 5: Using the AXIS 200 Common Gateway Interface (CGI) A CGI program within the AXIS 200 allows users to define special snapshot features within an embedded URL request. These requests are generated in the form of a query strings that are appended to the chosen URL of your AXIS 200. - Page 50 (hugesize’ width). Summary of CGI the available CGI parameters Click on the Image types and parameters link within the Home Page of your AXIS 200 for further details and sample images. Note: CGI parameters embedded in URL requests override image parameters previously established within the Configuration - Image page.
-
Page 51: Point To Point Protocol (Ppp)
Section 5: Using the AXIS 200 Point to Point Protocol (PPP) The AXIS 200 supports the Point to Point Protocol (PPP) which is a mechanism for creating and running the Internet Protocol and other network protocols over a serial link. This can be either: •... - Page 52 <name> will confirm a successful connection. You can now access the AXIS 200 by entering the name or Internet address (URL) into the location field of your Web browser. Please ensure that you are not using a proxy server (Netscape: Options...
- Page 53 -detach 4. After approximately 20 seconds, the connection should be ready for service. You should then try pinging the AXIS 200, and make sure that it is online. The ping response times should be similar to those below: 64 bytes from 172.16.3.219: icmp_seq=0 ttl=15...
-
Page 54: Zmodem
Section 5: Using the AXIS 200 AXIS 200 User’s Manual Zmodem By connecting the AXIS 200 to a modem as detailed below, it is Modem Connection possible to download snapshot images to remote computers using standard modem equipment. Configuration of the serial port for modem connection Snapshot data and configuration data may be transferred over the serial link using the zmodem protocol. - Page 55 AXIS 200 User’s Manual Section 5: Using the AXIS 200 Before files can be transferred from your AXIS 200, the host and Notes: remote modems must be configured correctly. Refer to Appendix E - The Auxiliary IO Port for further details.
- Page 56 Section 5: Using the AXIS 200 AXIS 200 User’s Manual...
-
Page 57: Appendix A Troubleshooting
If you cannot resolve your problem after referencing the information contained in this appendix and on the AXIS 200 FAQ, we suggest that you send the following to the AXIS support desk: •... - Page 58 5 15:13:01 Info: Modem ready for incoming calls. Wed Nov 5 15:13:16 Info: SMTPC.exec, trying to connect to (193.13.178.2) Wed Nov 5 15:13:24 Info: SMTPC.exec, mail sent Wed Nov 5 15:13:34 Error: FTPC.exec, failed to "tmp/fullsize151320.jpg", (def) Typical AXIS 200 Log File...
-
Page 59: Symptoms, Possible Causes And Remedial Actions
Check that the first 3 numbers within the Internet address of your AXIS 200 matches the first 3 of your workstation. If not, your AXIS 200 is in a different subnet and the Internet address cannot be set from this workstation. Obtain a new Internet address. - Page 60 The Internet site is too Use a script running on your web server to relay images heavily loaded. from the AXIS 200 to the Internet. This is particularly impor- tant when generating zoom and hugesize images. No image using Refresh Complex images, i.e.
- Page 61 Save the changes in the NVRAM of the modem using the command AT&W. A series broad vertical The CCD sensor Turn the AXIS 200 in a direction to avoid sun light reflexes. white lines appear across becomes overloaded Try adjusting the Brightness parameter. If this does not the image.Gray image in...
- Page 62 This is a optical phenomenon that is common in all cam- for distant objects. close-to-medium proxim- eras. However, further attention to the White Balance set- ity of the AXIS 200 will ting may pay dividends in improving the quality of long appear with a high image range views generally.
-
Page 63: The Parameter List
The Config File This table shows the AXIS 200 parameter list. The left and middle columns show the parameter names and their default values as they appear in the config file. The right column contains brief descriptions of the parameters. - Page 64 String of commands to be sent to the modem for setup. Used for MODEM_INIT. non-US Robotics modems. Specifies how many additional attempts the AXIS 200 will make BUSY_REDIAL. to establish a connection in case the line is busy. The current time.
- Page 65 AXIS 200 User’s Manual Appendix B: The Parameter List Parameter name Value Description TIMEADJ_WEEK. The time adjustment per week. Valid range is 0 to (-)32000 sec- onds. Do not change. Performs a hard reset if the server has reached a WATCHDOGTIME.
-
Page 66: Factory Default Settings
AXIS 200 User’s Manual Factory Default Settings If you should need to reset the AXIS 200 to its factory default settings, you can use the Control button. Follow these steps: 1. Switch off the AXIS 200 by unplugging the power cord. -
Page 67: Appendix C Updating The Software
Obtaining Updated Software The latest version of the AXIS 200 server software is available free of charge from Axis or your local distributor. You may obtain this software over the Internet or via anonymous FTP. -
Page 68: Upgrading The Software
Having obtained the upgrade software, install it into the AXIS 200 by Upgrading using FTP following the instructions below: 1. Reset the AXIS 200 by powering it off and then on again. 2. Start an FTP session and log in to the AXIS 200 as , using root the root password. - Page 69 Flash memory upgrades are performed by persons knowledgeable in this area. You should only need to upgrade the AXIS 200 via the parallel port if Upgrading via the it is impossible to download the software using FTP. Therefore, you...
- Page 70 Appendix C: Updating the Software AXIS 200 User’s Manual Notes: Do not forget to use the switch that indicates that the firmware file has a built-in loader. The network LED will flash during the loading sequence. This normally takes between 30 secs and 4 minutes to complete.
-
Page 71: Appendix D Technical Specifications
Flash memory allows central and remote software updates over the Software Updates network using FTP over TCP/IP. All software upgrades are free of charge and are available from the Axis WWW server. The AXIS 200 supports the following resolutions: Camera Resolution... - Page 72 Appendix D: Technical Specifications AXIS 200 User’s Manual The AXIS 200 uses a RISC CPU and hardware compression chips for Performance the JPEG transformation. A full size, full color JPEG file is created in less than a second. However, inherent delays created by your network and/or the Internet will also need to be added when considering the overall time required to generate a picture.
- Page 73 AXIS 200 User’s Manual Appendix D: Technical Specifications 40-105°F (5-40°C). Operating Temperature 20-80% RHG, non-condensing. Humidity EMC: FCC Class A, CE:EN 55022/1987,EN50082- 1/1992 Approvals Safety: EN 60950, UL, CSA. Height 1.9 in (4.8 cm). Width 4.9 in (12.5 cm). Size Length 6.1 in (15.5 cm).
- Page 74 Appendix D: Technical Specifications AXIS 200 User’s Manual...
-
Page 75: Appendix E The Auxiliary Io Port
Appendix E: The Auxiliary IO Port Appendix E The Auxiliary IO Port A Mini-DIN 8-pole external connector is provided for auxiliary IO connections to the AXIS 200. This appendix discusses the additional functionality that this connector provides. Physical connection The auxiliary IO connector provides the interface to one relay switch output and two digital inputs. -
Page 76: Controlling And Monitoring
The status of the input/output interface can be monitored and IO Files controlled by the IO software within your AXIS 200. From your Web browser, you can access the IO control file in order to either drive the relay output or monitor the status of the digital inputs. - Page 77 Relay - Mains Power 24V DC Schematic diagram of the AXIS 200 Auxiliary Connector - displaying a possible application Status information for each of the two digital inputs is presented within a text string. The status of the inputs can be ‘read’ by clicking on the parameter in the above URL.
- Page 78 The way in which you use the auxiliary connector is of course, for Note: you to decide. Axis does not provide any application software, but instead allows you to determine how this connector is best utilized. Naturally, we would be more than pleased to learn of any...
-
Page 79: Appendix F The Rs232 Serial Port
This appendix discusses the functionality of the RS232 serial interface and how to how to set up a modem connection for the AXIS 200. Physical connector A diagram of the connector and a pin assignment table for the AXIS Pin assignment 200 are detailed below. -
Page 80: Setting Up The Axis 200 Modem Server
RS232 cable is all that is required for connecting the modems to both the computer and the AXIS 200. That is, the transmit and receive signals on pins 2 and 3 of the cable do not need to be reversed. - Page 81 In future releases of the software, the CTS/RTS handshaking will be CTS/RTS supported. However, to enable this mode of transmission in current versions of the AXIS 200, the wiring schedule for the connecting RS232 cables must look like this: AXIS 200...
- Page 82 Appendix F: The RS232 Serial Port AXIS 200 User’s Manual Before files can be transferred from your AXIS 200, the host and Configuring your modems remote modems must be configured correctly. Follow these instructions to configure a US Robotics 28k8+ modem: 1.
- Page 83 Please be aware that the required settings for other types of modems may differ from those defined above. Axis are currently checking the compatibility of the AXIS 200 with other popular modem types and will release configuration details for these shortly.
- Page 84 Appendix F: The RS232 Serial Port AXIS 200 User’s Manual Once you have set up your modems, you need to configure your AXIS Configuring the AXIS 200 200 for modem control. You can use any of these methods: • Web browser •...
- Page 85 4. Log out using any of the commands quit exit depending on your FTP version. 5. Edit the AXIS 200 config file by setting the SERIAL_MODE parameter to FULL_SUPPORT. 6. Start a new FTP session. 7. When you are logged in, issue the command put config download the edited file to the AXIS 200.
- Page 86 Reset SetDate commands. Once connection to the AXIS 200 has been established, you can Zmodem initiate a file transfer. Simply type the ‘ ’ command followed by the filename of file you wish to transfer, as follows:...
- Page 87 Appendix F: The RS232 Serial Port A typical zmodem session is detailed below: atdt555-1212 Welcome! You are connected to the host shell of your AXIS Camera Server. Try 'help' for a list of available commands, or just 'sz fullsize.jpg' to download an image.
- Page 88 Appendix F: The RS232 Serial Port AXIS 200 User’s Manual...
-
Page 89: Appendix G Camera Applications
AXIS 200. The only real limitation for the number of applications to which the Application Ideas AXIS 200 may be suited is your fantasy. Some of the more obvious applications ideas are: • Adding ‘live’ pictures to your Web pages. Snapshot pictures may be triggered and viewed from anywhere in the world. - Page 90 Appendix G: Camera Applications AXIS 200 User’s Manual The list below contains links to a number of Web sites, and illustrates Application Examples the wide range of applications suitable for the AXIS 200: • Surveillance of the company entrance door: http://www.axis.com/neteye/rm_demo/front_doors.html •...
-
Page 91: Appendix H Cron Script Command Reference
For information on how to use the CRON scripts with your AXIS 200, refer to “CRON Script”, on page 39. Script Format A CRON script for the AXIS 200 can include one or several entries. The CRON script entries use this format: # <comments>... -
Page 92: Commands
-host 172.16.253.80 -port 2703 -message "Alarm \"0013\" from AXIS 200"; The ftp command uses the standard File Transfer Protocol (FTP) for transferring an image from your AXIS 200 to a remote host. The ftp command keeps the connection open during each file Note:... - Page 93 AXIS 200 User’s Manual Appendix H: CRON Script Command Reference Syntax [-host HOST] [-user USERNAME] [-pass PASSWORD] [-src SOURCEFILE] [-dest DESTINATIONFILE] [-temp TEMPORARY_DESTINATIONFILE] [-loop LOOPTIME] [-time TOTALTIME]; Specifies the host name or the Internet address of the remote Options -host host.
- Page 94 Appendix H: CRON Script Command Reference AXIS 200 User’s Manual The following table lists the available time stamp variables. Every substitution must be proceeded by a dollar sign ‘ ’. The current second in the range 00-59. The current minute in the range 00-59.
- Page 95 AXIS 200 User’s Manual Appendix H: CRON Script Command Reference In addition to the options described above, the following optional Additional Options settings are also available: -ctrlport Specifies the TCP port number in the range [0..65534] to be used as the control port for the FTP server.
- Page 96 Appendix H: CRON Script Command Reference AXIS 200 User’s Manual Example 1 # This command will log in as “elvis” with the # password “presley” on the host with the Internet # address 123.123.123.123, download a hugesize # image with the name “king.jpg” and put # it in the directory “/home/elvis”...
- Page 97 Appendix H: CRON Script Command Reference This command uses the Simple Mail Transfer Protocol (SMTP) for mail sending images and files from your AXIS 200 to e-mail addresses. To use the mail command, you must specify the Internet address Note: of the mail server and a valid return address on the TCP/IP page.
- Page 98 Example 2 # This command will send an e-mail with the # subject “This “fullsize.jpg” was sent from my # AXIS 200” to two recipients. * * * * * : mail -s "This \"fullsize.jpg\" was sent from my AXIS 200" -a fullsize.jpg -t someone@axis.com anotherone@axis.com;...
- Page 99 If the string does not include an escape code, a carriage return character will be appended automatically at the end of the string. Valid escape codes are: (carriage return), (line feed) and (tab). At the end of the script, the AXIS 200 will enter the negociation phase.
- Page 100 * * * * * /B: online -dial 5551234 -user bob -pass dylan -timeout m5s30 -script “‘’ ‘>’ ‘ppp defaults’ ”; reset This command resets the software or hardware of the AXIS 200. Syntax reset [-soft] [-hard]; Reinitiates the AXIS 200 protocols.
- Page 101 AXIS 200 User’s Manual Appendix H: CRON Script Command Reference Example # This command will reset the AXIS 200 hardware # once a day. 0 0 * * * : reset -hard;...
- Page 102 Appendix H: CRON Script Command Reference AXIS 200 User’s Manual This command adds a pause to the CRON script execution. sleep Syntax sleep <seconds>; Options <seconds> Specifies the number of seconds to wait before proceeding with the next command in the event entry.
- Page 103 AXIS 200 User’s Manual Appendix H: CRON Script Command Reference This command updates the image. The command can snapshot lastshot.jpg also be used for controlling the relay switch. Syntax snapshot [-l LOOPTIME] [-t TOTALTIME] [FILE]; Specifies the time between two consecutive image updates.
- Page 104 Appendix H: CRON Script Command Reference AXIS 200 User’s Manual...
- Page 105 Internet address 17 DNS server 28 automatic picture updates 37 downloading an Internet address 17 auxiliary IO connector 73 AXIS 200 Home Page 24 Ethernet address 18 BOOTP 17 BSD systems 20 factory defaults 64 FAQ’s - Frequently asked questions 7...
- Page 106 Index AXIS 200 User’s Manual Snapshot 12 Power indicator 12 input.txt 75 power supply 10 input/output interface 73 PPP 49 Internet address 17 PPP setup IO connector 73 Linux 50 IO files 74 Windows 95 49 IO Help menu 83...
- Page 107 AXIS 200 User’s Manual Index synchronization 27 TCP/IP 6 technical specifications 69 tone dialing 29 troubleshooting 55 updates 65 US Robotics modem 80 Web browser interface 24 white balance settings 30 Windows 95, PPP 49 XON/XOFF mode 78 Zmodem 52...
Need help?
Do you have a question about the 200 and is the answer not in the manual?
Questions and answers