Ameriphone Photo Phone P-300 User Manual
Hide thumbs
Also See for Photo Phone P-300:
- User manual (80 pages) ,
- Brochure (1 page) ,
- User manual (25 pages)

Related Manuals for Ameriphone Photo Phone P-300


Summary of Contents for Ameriphone Photo Phone P-300
- Page 1 ® P-300 PHOTO PHONE P-300 ™ Users’ Guide ∆ P-300 M10799 5270-31811 6/03...
-
Page 2: Table Of Contents
Contents SAFETY INSTRUCTIONS ................1 INTRODUCTION ..................5 PACKAGE CHECKLIST ................6 FEATURES IDENTIFICATION ..............7 INSTALLATION ..................8 A. Desk mounting............8 B. Wall mounting............8 OPERATING YOUR PHOTO PHONE............10 A. Photo Directory Set Up ..........10 B. Programming Photo Directory........10 C. Memory dialing............11 D. Amplifier..............11 E. Amplify Button ............11 F. -
Page 3: Safety Instructions
Important Safety Instructions When using your telephone 7.Place this telephone on a equipment, basic safety precautions stable surface. Serious damage should always be followed to and/or injury may result if the reduce the risk of fire, electric telephone falls. shock and persons including the 8.Do not cover the slots and following: openings on this telephone. - Page 4 Important Safety Instructions dangerous voltage points or those controls that are short out parts that could covered by the operating result in a risk of fire or instructions. Improper electrical shock. Never spill adjustment may require liquid of any kind on the extensive work by a telephone.
- Page 5 Important Safety Instructions this manual. Do not dispose The equipment must also be of batteries in a fire. They installed using an acceptable may explode. Check with method of connection. In some local codes for possible cases, the company’s inside special disposal instructions.
- Page 6 Important Safety Instructions CAUTION: Users should not attempt to make such connections themselves, but should contact the appropriate electric inspection authority, or electrician, as appropriate. The Ringer Equivalent Number is an indication of the maximum number of terminals allowed to be connected to a telephone interface.
-
Page 7: Introduction
Introducing the P-300 Thank you for selecting the exciting Help from Ameriphone new PHOTO PHONE from For help with using your PHOTO Ameriphone. These Operating PHONE, call our Customer Relations Instructions and the associated department at 800-874-3005. Quick Operating Guide provide... -
Page 8: Package Checklist
Package Checklist Doctor Office Doctor Office Bank Bank Generic P H O T O P H O N E P - 3 0 0 Button Icons Phone Cords HOLD PROG FLASH REDIAL AMPLIFY RINGER HANDSET PITCH Base Unit Handset Photo Template P300 User Guide Telephone Line Cords... -
Page 9: Features Identification
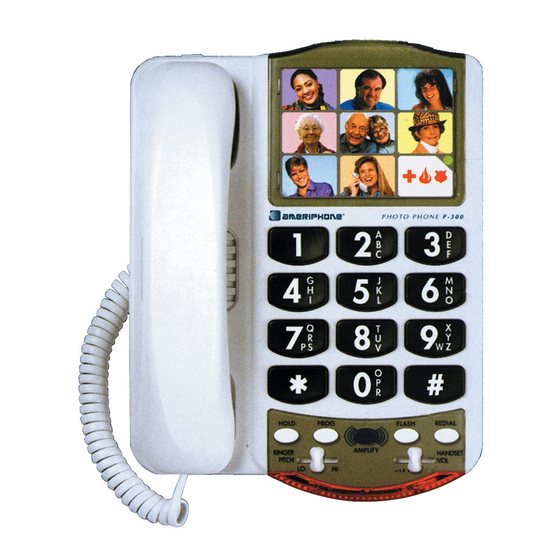
Features on the P-300 Tone/pulse dialing selection Phone line connection DIAL RINGER Ringer volume control switch Off Lo Hi Photo memory buttons Office Doctor Big button keypad Bank P H O T O P H O N E P - 3 0 0 FLASH button REDIAL/PAUSE button AMPLIFY button... -
Page 10: Installation
Installation Follow the steps below to connect B. Wall Mounting and install your PHOTO PHONE. 1. Pull the handset hook out and reverse its position so that the A. Desk Mounting hook points up and will hold the handset when you hang up as shown in figure 4. - Page 11 Installation 4. Set the dial mode switch to T (tone) if you have touch tone service. Set the switch to P (pulse) if you have pulse rotary) dialing. 5. Connect the handset cord to the telephone as shown in figure 3. Figure 5- Phone base installation for wall mounting 6.
-
Page 12: Operating Your Photo Phone
Operating your P-300 The PHOTO PHONE is designed to help you communicate easily. Office Doctor There are many convenient, Bank P H O T O P H O N E P - 3 0 0 easy-to-use features. Figure 7 A. Photo Directory Set Up You can program up to 9 B. -
Page 13: Memory Dialing
Operating your P-300 C. Memory Dialing E. Amplify Button Press the AMPLIFY button to turn the Pick up the handset and simply amplifier on. When AMPLIFY is press the photo directory button to on, it returns to your previous dial the phone number programmed. amplification setting and a red light will illuminate in the ring flasher area. -
Page 14: Ringer Pitch Control
Operating your P-300 G. Ringer Pitch Control I. Last Number Redial Button The ringer can be adjusted to emit The PHOTO PHONE remembers the a high-pitched or a low-pitched last number dialed from the phone ring to suit your needs up to 31digits. -
Page 15: Flash Button
Operating your P-300 J. Flash Button The flash feature is used to access special telephone functions and services available from your local phone company, such as: call waiting, 3-way calling and others. Press this button to activate the flash feature. FLASH Figure 15... -
Page 16: In Case Of Difficulty
In Case Of Difficulty If any problem should arise during use of your PHOTO PHONE, try the suggestions listed below. Should the difficulty persist, contact Ameriphone or your authorized dealer for assistance. SYMPTOM CAUSE AND CORRECTIVE ACTION No dial tone Check all phone cord connections. -
Page 17: Regulatory Compliance
Regulatory Compliance Part 68 of FCC Rules compliant. See installation Information instructions for details. This equipment complies with The REN is used to determine Part 68 of the FCC rules. On the number of devices that may the bottom of this equipment is be connected to a telephone a label that contains, among line. -
Page 18: Warranty Information
Regulatory Compliance If this telephone equipment, the please contact Walker / P-300 telephone causes harm Ameriphone, 1-800-874-3005. to the telephone network, the If the equipment is causing telephone company will notify harm to the telephone network, you in advance that temporary... - Page 19 Regulatory Compliance If your home has specially To comply with state tariffs, the wired alarm equipment telephone company must be connected to the telephone line, given notification prior to ensure the installation of this connection. In some states, the telephone equipment does not state public utility commission, disable your alarm equipment.
- Page 20 Regulatory Compliance FCC rules. These limits are receiving television or designed to provide reasonable radio antenna. protection against harmful interference in residential 2. To the extent possible, installation. relocate the television, radio or other receiver This equipment generates, uses, with respect to the and can radiate radio telephone equipment.
- Page 21 THE PARTY RESPONSIBLE extended by means of a FOR PRODUCT COMPLIANCE certified connector assembly Ameriphone Products by (telephone extension cord). The Walker, A Division of customer should be aware that Plantronics, Inc. compliance with the above...
- Page 22 Regulatory Compliance lines and internal metallic water [The term “IC:” before the pipe system, if present, are certification/registration number connected together. This only signifies that the Industry precaution may be particularly Canada technical specifications important in rural areas. were met.] Caution: Users should not attempt to make such connections themselves, but...
- Page 23 PHOTO PHONE , or property damage caused by your PHOTO If your Ameriphone product is defective and returned within 30 PHONE or its failure to work, or days of the date of purchase, your...
- Page 24 (or the service center) will ship it back to you at no cost within the United States and Canada. CANADIAN RESIDENTS: call Ameriphone at 800-874-3005, 800-772-2889 TTY for instructions. This warranty does not cover defects resulting from accidents,...
-
Page 25: Specifications
Specifications PHYSICAL DIMENSIONS Size: 9 1 /2” x 7” x 3 1 /4” Weight: 2.52 lbs. POWER Telephone line power. Ç... -
Page 26: Index
Index Amplification Volume control....…………11 Base plate ........6 Desk mounting ........8 Dial modes Pulse ..........9 Tone ..........9 Flash Button ........13 Hold ..........12 In case of difficulty ......14 Installation ..........8 Memory Dialing/Programming ..10 Packing checklist ........6 Redial ..........8 Ringer volume ........11 Wall mounting ........8 Regulatory Compliance ......15 Warranty ..........21...
Need help?
Do you have a question about the Photo Phone P-300 and is the answer not in the manual?
Questions and answers