HP Photosmart R707 User Manual
Digital camera with hp instant share
Hide thumbs
Also See for Photosmart R707:
- User manual (191 pages) ,
- User manual (191 pages) ,
- User manual (23 pages)
Table of Contents
Advertisement
Advertisement
Table of Contents

Related Manuals for HP Photosmart R707


Summary of Contents for HP Photosmart R707
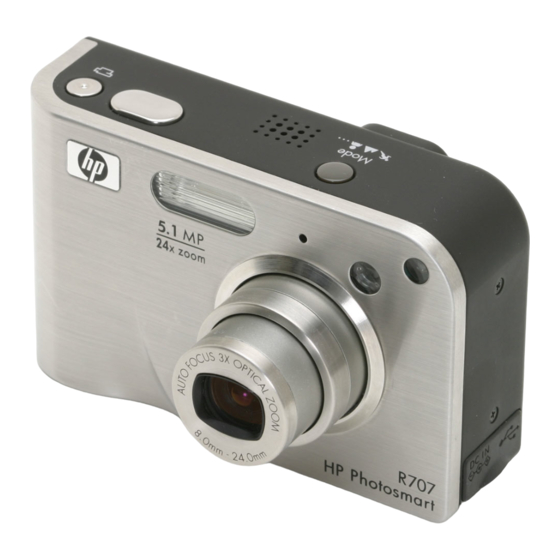
- Page 1 HP Photosmart R707 Digital Camera with HP Instant Share User's Manual...
-
Page 3: Copyright And Trademark Information
Copyright and Trademark Information © 2004 Copyright Hewlett-Packard Development Company, LP Reproduction, adaptation, or translation without prior written permission is prohibited, except as allowed under the copyright laws. The information contained in this document is subject to change without notice. Hewlett-Packard shall not be liable for errors contained herein or for consequential damages in connection with the furnishing, performance, or use of this material. -
Page 5: Table Of Contents
Table of Contents Chapter 1: Getting Started ......11 Setup ........12 Installing the camera dock insert (Optional) . - Page 6 Saturation ......71 Sharpness ......72 HP Photosmart R707 User’s Manual...
- Page 7 Preview Panorama ..... . 95 Chapter 4: Using HP Instant Share ....97 Setting Up the HP Instant Share Menu on the Camera 98 Setting Up Destinations on a Windows Computer .
- Page 8 Resetting the Camera ..... . .124 Using Your Camera without Installing the HP Image Zone Software ....125 Transferring Images to a Computer without HP Image Zone Software .
- Page 9 HP Accessibility Website ....155 HP Photosmart Website ....155 Support Process .
- Page 10 HP Photosmart R707 User’s Manual...
-
Page 11: Chapter 1: Getting Started
HP Photosmart printer or PictBridge-compatible printer without ever connecting to your computer. -
Page 12: Setup
Camera Parts Installing the camera dock insert (Optional) If you buy the HP Photosmart R-series dock, you will notice one or more clear dock inserts included in the box with the dock. When setting up the dock for use... -
Page 13: Installing A Memory Card (Optional)
Installing a Memory Card (Optional) If you do not have a memory card, skip this section and go on to the next section, camera contains internal memory that allows you to store images and video clips. However, you can use a memory card (purchased separately) instead to store images and video clips. -
Page 14: Installing The Battery
Installing the Battery Your camera can use either a rechargeable HP Photosmart R07 lithium ion battery (L1812A) or a disposable Duracell battery. NOTE If a rechargeable battery was shipped with your camera, it will be partially charged, but you should fully charge it before using it the first time. -
Page 15: Attaching The Ferrite To The Ac Adapter Cord
The ferrite will not degrade the performance or safety of the camera. Attach the ferrite to the thin HP AC adapter cord (the cord that attaches to the camera, not the cord that attaches to the wall) in... -
Page 16: Charging The Battery
If the battery you installed is a rechargeable lithium ion battery, do the following. Plug the power cord into the HP AC adapter. If more than one power cord is in the box, use the cord that is appropriate for power outlets in your country. -
Page 17: Turning On Power
NOTE The camera may get warm while it is charging the battery, as well as after prolonged use under battery power. This is normal. NOTE Digital cameras use batteries at a much faster rate than film cameras. Battery life in digital cameras can be measured in hours and minutes of use rather than the years more typical of film cameras. -
Page 18: Setting The Date And Time
See Chapter 6: Using the Setup Menu page 115. on page 76). buttons. button when you have entered the Menu/OK Date & Time HP Photosmart R707 User’s Manual Playback menu Menu/OK button button to button. The setting in the... -
Page 19: Installing The Software
Windows 98, 98 SE, or Me. Close all programs and temporarily disable any virus protection software running on your computer. Insert the HP Image Zone software CD into the CD drive of your computer. Follow the instructions in the installation screen that automatically appears. -
Page 20: Macintosh
Macintosh Close all programs and temporarily disable any virus protection software running on your computer. Insert the HP Image Zone software CD into the CD drive of your computer. Double-click the CD icon on the computer desktop. Double-click the installer icon, and then follow the on-screen instructions to install the software. -
Page 21: Camera Parts
Camera Parts NOTE Refer to the pages in parentheses after the part names for more information about those parts. Back of the Camera # Name Power/Memory light ON/OFF switch (page 17) Chapter 1: Getting Started Description Solid—Camera is on. Blinking rapidly—Camera is writing to either the internal memory or to an optional memory card that is installed. - Page 22 Allows you to attach a wrist strap to the camera. Allows you to scroll through menus and images on the Image Display. Allows you to display the Playback menus and to select menu options and confirm certain actions on the Image Display. HP Photosmart R707 User’s Manual Capture...
- Page 23 Description Allows you to mark the current image for printing later when you connect the camera to your computer or directly to any HP Photosmart printer or PictBridge- compatible printer. Turns the HP Instant Share off on the Image Display.
- Page 24 (see the following NOTE). NOTE If an error prevents a picture from being taken, then an error message will appear on the Image Display. See Error Messages on the Camera on page 142. HP Photosmart R707 User’s Manual blinking—An error...
-
Page 25: Top Of The Camera
Top of the Camera Name Mode button (page 46) Speaker Shutter button (pages 31, 32) Video button (page 34) Chapter 1: Getting Started Description Allows you to select between different shooting modes for taking still pictures. Plays camera sounds and audio clips. Takes a picture and records audio. -
Page 26: Front, Side, And Bottom Of The Camera
Solid red—On for short periods in low light conditions to improve auto focus. Allows you to connect the HP AC power adapter to the camera to either operate the camera without a battery, or recharge the lithium ion rechargeable battery in the camera. -
Page 27: Camera States
Description Allows you to mount the camera on a tripod. Allows you to connect the camera to the optional HP Photosmart R-series dock. Allows access to insert and remove the battery and an optional memory card. on page 28. Chapter 2:... -
Page 28: Camera Menus
Playback Playback on, and then press the Menu/OK button. For information about using this menu, see Playback Menu on page 86. button to turn Menu/ button when Live Using the button to turn Using the HP Photosmart R707 User’s Manual... - Page 29 Menu , press the Share button. For information about using this menu, see HP Instant Share Menu NOTE Before you can use the HP Instant Share Menu For information on how to do this, see Instant Share Menu on the Camera...
-
Page 30: Using The Help Menu
Help topic to button to exit the Help topic and return buttons when settings are shown, with the icon icon), the battery level, the number of and two stars. HP Photosmart R707 User’s Manual displays in the... -
Page 31: Chapter 2: Taking Pictures And Recording Video Clips
Chapter 2: Taking Pictures and Recording Video Clips Taking Still Pictures You can take a picture almost any time the camera is on, regardless of what is being shown on the Image Display. For example, if a menu is currently displayed when you press the Shutter button, the menu will be canceled, and the camera will take a picture. -
Page 32: Recording Audio With Still Pictures
Record Audio Self-Timer button all the way down to take the picture. Shutter button down to record the HP Photosmart R707 User’s Manual Review. You can by pressing the on page 94. Burst settings. -
Page 33: Orientation Sensor
To stop recording audio, release the Audio recording stops when you release the otherwise, the audio will continue recording for up to 60 seconds or until the camera runs out of memory, whichever happens first. After recording has stopped, the image is displayed for several seconds in Display. -
Page 34: Recording Video Clips
Live icon, REC, and a video counter Using Live View Self-Timer Menu/OK on the camera to review the video clips HP Photosmart R707 User’s Manual Video Self-Timer - on page 44), Self-Timer - 2 Shots button. -
Page 35: Using Live View
Battery level when using battery power (actual icon shown depends on the state of your camera battery; Battery Gauge AC power when using the HP AC power adapter or optional HP Photosmart R-series dock Chapter 2: Taking Pictures and Recording Video Clips... -
Page 36: Focusing The Camera
Front, Side, and Bottom of the Focus Assist Light screen turn green when the image is Shutter button, re-frame the subject for viewfinder light continues to HP Photosmart R707 User’s Manual on page 36) on page 117). Live Shutter button... -
Page 37: Using Focus Lock
several tries, there may not be enough contrast or light in the focus region. Try using a technique called focus on an object about the same distance away but in a higher-contrast region, and then, without releasing the Shutter button, point the camera at the object you were originally trying to photograph (see page 37). -
Page 38: Using The Focus Range Settings
Live View Live View screen and by a meter that Hints on Using Manual on page 40. HP Photosmart R707 User’s Manual screen). Auto buttons to adjust the focus. Live View screen. For... -
Page 39: Understanding The Focus Search Priority
Understanding the Focus Search Priority When the camera is set to begins searching for focus from the last focus position. However, you can use the behavior. This feature is useful when there are multiple objects at different distances in the focus region. Holding the down causes the camera to begin searching for focus from the farthest position (infinity in... -
Page 40: Hints On Using Manual Focus
Focus, here are some hints that may help: Live View button until the image begins to button until the image begins to Normal Focus setting, then switch to HP Photosmart R707 User’s Manual Manual Focus screen. From... -
Page 41: Using Zoom
Using Zoom NOTE The more you zoom in on the subject of your picture, the more that even small movements of the camera are magnified (this is called “camera shake”). So, especially at full telephoto zoom (3x), you really need to hold the camera steady in order to take a picture that is not blurry. - Page 42 (such as printing), limit the use of digital zoom. It is also recommended to use a tripod when using digital zoom. again and hold it until digital zooming stops. Release HP Photosmart R707 User’s Manual 4.2MP appears in Zoom...
-
Page 43: Setting The Flash
Setting the Flash NOTE The flash does not work in Burst setting, or while recording video clips. Flash button the camera. To change the flash setting, press the button until the desired setting appears in the Image Display. The following table describes each of the flash settings on the camera. -
Page 44: Using The Self-Timer Settings
The camera will hold these settings until it takes the picture. Remove Red Eyes (see page 91). button until appears in the Image Display. on page 35.) button halfway down to gain HP Photosmart R707 User’s Manual option in Self-Timer Live View. Focus... - Page 45 Press the Shutter Display is on, a 10-second countdown appears on the screen. The Self-Timer light on the front of the camera then blinks for 10 seconds before the camera takes the picture. If you set the camera to Self-Timer light blinks for a few more seconds until the second picture is taken.
-
Page 46: Using The Burst Setting
Record Audio on page 94). Also, the flash Burst Burst Burst setting, and ignores button until Shutter Shutter button is released. HP Photosmart R707 User’s Manual Panorama mode, nor setting. while in Bracketing, Burst appears in button all the way... - Page 47 To change the shooting mode, press the the camera until the desired shooting mode appears in the status screen. Alternatively, you can press the once and then use the shooting mode. The following table describes each of the shooting mode settings on the camera. Setting Description Auto...
- Page 48 Live View using the Aperture Priority in this mode. (See Preview Panorama (see Preview Panorama mode for shooting flat, textual, or HP Photosmart R707 User’s Manual buttons, while the mode when Panorama Using Panorama option in Flash Off. Use Using My...
-
Page 49: Noise Reduction For Long Exposures
This means that at longer shutter speeds, you may not be able to take quite as many shots back-to-back. Using Panorama Mode NOTE If the HP Image Zone software is not installed on your computer, see HP Image Zone Software Panorama mode allows you to take a sequence of 2–5 pictures... -
Page 50: Taking A Panoramic Sequence Of Pictures
The Panorama Maker software was automatically installed on your computer during the HP Image Zone software installation process (see To transfer the panoramic sequence of images from your... - Page 51 Position the camera to take the second picture. Notice the transparent overlay of the image of the first picture in the sequence superimposed on the left third of the screen. Use this overlay to align your second picture horizontally with the first. Press the Shutter second picture.
-
Page 52: Using My Mode
Menu. button.The sub-menu for that menu HP Photosmart R707 User’s Manual Action as the White Balance setting in My Mode... -
Page 53: Using The My Mode Saved Settings Sub-Menu
c. Use the want for that menu option. d. Press the Menu/OK return to the My Mode Capture Menu. Repeat step 3 for each menu option setting you want to change. When you have finished changing settings in the Capture Menu, press the of the camera to exit the return to... - Page 54 Start in My Mode Menu. Menu, press the Live View. HP Photosmart R707 User’s Manual My Mode Capture My Mode Saved Menu/OK button. The sub-menu will Start in My...
-
Page 55: Using The Capture Menu
Using the Capture Menu Capture Menu that affect the qualities of the images and video clips you capture with your camera. To display the Capture button, and then press the Display is already off, you can simply press Menu/OK. Screen 1: Use the options. -
Page 56: Help For The Menu Options
Use the buttons to scroll through the Help screens. To exit the Help and return to the particular press the Menu/OK Menu, highlight the Help... Help screen is displayed, button. HP Photosmart R707 User’s Manual EXIT option and Capture sub-menu,... -
Page 57: Ev Compensation
EV Compensation In difficult lighting conditions, you can use Value) Compensation setting that the camera makes. EV Compensation objects (like a white house in the snow) or many dark objects (like a black cat on a dark background). Scenes containing many light objects or many dark objects could turn out gray without the use of light objects, increase the... -
Page 58: Image Quality
640 by 480, Image Quality (page 55), select sub-menu, buttons to to save a pre- sub-menu (see page 60). HP Photosmart R707 User’s Manual Image Quality settings or 3MP. The higher settings is Image Quality. - Page 59 The following table helps explain the pre-defined Quality settings in more detail: Setting Description Images will be full resolution and have the lowest pre-defined compression. This setting produces very high quality images, with greater color accuracy, but uses the most memory. This is recommended if you plan to enlarge images, or print images to a size larger than 18 by 24 cm (8 by 10 in).
-
Page 60: Custom Image Quality
183 for more information about setting affects the number of images Digital Zoom on page 41. option from the sub-menu displays. This sub- Image Quality sub-menu, the default HP Photosmart R707 User’s Manual settings than Image Quality sub- setting, Resolution Compression... - Page 61 In the Image Quality (page 58), select the option. Use the between the Resolution and Compression options. Use the buttons to change the Resolution Compression explain these settings. Resolution Settings 5MP—Full resolution; therefore, highest quality 3MP—3MP (medium) resolution 1MP—1MP (low) resolution VGA—640 by 480 (lowest) resolution;...
-
Page 62: White Balance
The camera balances color assuming the subject is outdoors under sunny or bright cloudy conditions. Digital Zoom on page 41. (page 55), select sub-menu, buttons to Live View to save the setting and return to the HP Photosmart R707 User’s Manual setting can White Balance. - Page 63 Setting Description Shade The camera balances color assuming the subject is outdoors in shade, in dark cloudy conditions, or at dusk. Tungsten The camera balances color based on incandescent or halogen lighting (typically found in homes). Fluorescent The camera balances color based on fluorescent lighting.
-
Page 64: Manual White Balance
(the camera will not take a picture). is displayed on the screen. When Manual White Balance is displayed. setting. Manual Menu/OK button to exit the Capture HP Photosmart R707 User’s Manual Menu/ screen without setting: White Balance setting Live View setting, setting you have Manual White Menu. -
Page 65: Iso Speed
ISO Speed NOTE This setting does not apply when recording video clips. This setting adjusts the sensitivity of the camera to light. When ISO Speed is set to the default the best ISO speed for the scene. Lower ISO speeds will capture the best quality images with the least amount of grain (or noise), but result in slower shutter speeds. -
Page 66: Ae Metering
The camera uses the entire scene region to measure and calculate exposure. Use this setting when you want everything in the picture to be used equally when calculating exposure. (page 55), screen behind the to save the setting and return to the HP Photosmart R707 User’s Manual... - Page 67 Setting Description Center- The camera uses a large area in the center of the Weighted scene region to measure and calculate exposure. This setting is good to use when the subject of the picture is in the center of the frame. Exposure will be based more on the subject than on its surroundings.
-
Page 68: Adaptive Lighting
When Adaptive Lighting take longer to store an image in memory, since the image is being processed before storing it. Panorama Lighting: With is turned on, the camera will HP Photosmart R707 User’s Manual mode or when Adaptive Adaptive Lighting:... - Page 69 You can use Adaptive Lighting it is not recommended as a replacement for regular flash. Unlike regular flash, exposure settings, so brightened areas may appear “noisy” or grainy, and indoor or night images may be blurry if taken without a regular flash or a tripod. In the Capture Menu select...
-
Page 70: Color
(page 55), select Color. screen behind the to save the setting and return to the (page 52), the new setting remains in HP Photosmart R707 User’s Manual Color Black & Full Color setting when... -
Page 71: Saturation
Saturation This setting allows you to determine how saturated the colors will be in your pictures. In the Capture Menu In the Saturation buttons to highlight a setting. Press Menu/OK setting and return to the Menu. The following table helps explain the settings in more detail: Setting Description Mutes colors to give a softer, more “natural”... -
Page 72: Sharpness
Sharpness setting resets to the default when you turn the camera off. (page 55), select Sharpness. sub-menu, use to save the Capture screen. (page 52), the new setting remains in HP Photosmart R707 User’s Manual Medium Medium setting... -
Page 73: Contrast
Contrast This setting allows you to control how much contrast there will be between the dark and light colors in your captured images, including the amount of detail there will be in the highlights and shadows within the images. In the Capture Menu select Contrast. -
Page 74: Ae Bracketing
AE Bracketing Burst mode, AE Bracketing set, the Self-Timer - 2 Shots (page 55), sub-menu, buttons to to save the Capture HP Photosmart R707 User’s Manual Panorama mode. Bracketing settings, when you AE Bracketing AE Bracketing with Self- setting is... - Page 75 To take the three pictures, each at a different exposure setting, simply press the time. The entire 3–shot sequence is taken with one press of Shutter button, as long as there is enough space in the memory buffer of the camera to store all three images. Be sure to hold the camera still until all three pictures have been taken.
-
Page 76: Date & Time Imprint
(page 86), the date or date and time (page 55), Imprint. sub- buttons to to save the Capture HP Photosmart R707 User’s Manual mode or when Date & Time Imprint Date Rotate option in the... - Page 77 The following table helps explain the settings in more detail: Setting Description The camera will not imprint a date or date and time on the image. Date Only The camera will permanently imprint the date in the lower left-hand corner of the image. Date &...
- Page 78 HP Photosmart R707 User’s Manual...
-
Page 79: Chapter 3: Reviewing Images And Video Clips
Print button to select still images that you want to have printed automatically the next time you connect the camera to your computer or directly to any HP Photosmart or PictBridge-compatible printers. See Selecting Images for Printing on page 83. While in Playback, you can also use the... -
Page 80: Using Playback
During Playback, the Image Display also indicates additional information about each image or video clip. The following table describes this information. button to activate Playback. The most Playback button again. HP Photosmart R707 User’s Manual buttons to... - Page 81 Battery level when using battery (actual icon shown depends on the state of your camera battery; see Battery Gauge AC power when using the HP AC power adapter or optional HP Photosmart R-series dock. Displays for the first few seconds when you enter...
-
Page 82: Total Images Summary Screen
(the icon) and the battery level are shown in the upper right-hand corner of the screen. HP Photosmart R707 User’s Manual... -
Page 83: Selecting Images For Printing
HP Photosmart or PictBridge- compatible printers. NOTE... -
Page 84: Viewing Thumbnails
Zoom lever. buttons to scroll vertically to the thumbnail button to exit Thumbnail Thumbnail view) is displayed in full HP Instant Share HP Photosmart R707 User’s Manual view and icon icon signifies that it is icon indicates the icon icon... -
Page 85: Magnifying Images
Magnifying Images NOTE This feature only works on still images; it does not work with video clips. Also, this feature is for viewing purposes only; it does not permanently alter the image. While in Playback press Magnify ) on the Zoom currently displayed image is automatically magnified 2x. -
Page 86: Using The Playback Menu
Playback button first, then press the buttons to highlight the Menu/OK button. Each of the options are explained later in this section. Playback HP Photosmart R707 User’s Manual (an analysis of an Menu/OK button Playback Menu Playback Menu. If, Menu, you decide... - Page 87 The following table summarizes each of the options and describes the information in the bottom right corner of each image or video clip while the displayed. Still Image Screen 1: Still Image Screen 2: Icon Description Delete delete this image or video clip, delete the entire panoramic sequence of images, delete all images and video clips, format the internal memory or an optional memory card, and undelete the last...
- Page 88 Preview Panorama - Exits the Playback Image Quality on page 58.) Panorama shooting mode. (See on page 49.) HP Photosmart R707 User’s Manual on page 94.) Rotate on page 95.) on page 95.) Menu. setting that was used to Using...
-
Page 89: Delete
However, if you delete an image from the beginning or end of the panorama, and there are at least 2 images remaining, the panoramic sequence is preserved. Chapter 3: Reviewing Images and Video Clips Chapter 4: Using HP Instant Share on page 83.) (page 86), Delete... - Page 90 Also, you cannot Use the buttons to highlight an option, and then press Menu/OK button to select it. Sequence—Deletes all images associated Card)—Deletes all of the images Undelete Delete All Images HP Photosmart R707 User’s Manual operation.
-
Page 91: Remove Red Eyes
Remove Red Eyes NOTE This menu option is only available for still images that were taken with a flash. In the Playback Menu Eyes, the camera immediately begins processing the still image to remove red eyes from the subjects in the image. The red-eye removal process takes a few seconds. -
Page 92: Image Advice
The following table explains the information that is displayed for each image when you select the (page 86), when you select Image Advice screen, press Menu/OK. (page 86), when you select Image Info HP Photosmart R707 User’s Manual Image Image Info, option. - Page 93 NOTE The information in the last three rows in the bottom, right-hand corner of the image is the same information that is provided in the Description Non-default shooting mode (Action, Landscape, Portrait, Beach/Snow, Sunset, Document, Non-default Flash Night) and non-default Focus) All non-default F-number (aperture), shutter speed, and...
-
Page 94: Record Audio
Clip—Begins to record audio, replacing the previous audio clip. Delete Clip—Deletes the current audio clip and returns to Playback Menu. (page 86), select Record icon and an elapsed time Record Audio, the Record Audio Menu. HP Photosmart R707 User’s Manual Audio. Playback Record Audio sub-menu... -
Page 95: Rotate
Rotate NOTE This menu option is not available for video clips or for still images that were captured in In the Playback Menu currently displayed image is automatically rotated 90 degrees clockwise. The image then displays and is saved in its new orientation. - Page 96 HP Photosmart R707 User’s Manual...
-
Page 97: Chapter 4: Using Hp Instant Share
Use the HP Instant Share Menu camera for particular Using the HP Instant Share Menu Selecting All Images for HP Instant Share Destinations on page 104 or Share Destinations Connect the camera to your computer and transfer the images as explained in on page 109. -
Page 98: Setting Up The Hp Instant Share Menu On The Camera
Make sure that the HP Image Zone software is installed on your computer (see page 19). Turn on the camera, and then press the button on the back of the camera. - Page 99 Connect the camera to your computer by using either the special USB cable for connecting the camera to a computer that came with your camera, or the optional HP Photosmart R-series dock: • Connect the camera to the computer with the USB...
-
Page 100: Setting Up Destinations On A Windows Computer
Setting Up Destinations on a Windows Computer At the Welcome Set Up Your HP Instant Share Destinations appears. Any HP Instant Share already set up will be listed here. Click destination to your camera Go Online screen appears, prompting you to connect to your Internet service provider. -
Page 101: Setting Up Destinations On A Macintosh Computer
Use my local e-mail application directly to the e-mail address(s) you specify below in this screen without using • Select Use HP Instant Share e-mail and services HP Instant Share Click to add the new destination to the camera’s Instant Share Menu. - Page 102 Camera. The new destinations are then saved to the camera's HP Instant Share confirms they have been saved to your camera, disconnect the camera from the computer. to delete the destination. Menu. When the computer HP Photosmart R707 User’s Manual HP Instant Share HP Instant Share Update...
-
Page 103: Using The Hp Instant Share Menu
(You can select more than one destination per image.) E-mail destinations that were set up in this example HP Instant Share Menu Chapter 4: Using HP Instant Share HP Instant Share Menu HP Instant Share HP Instant Share Menu options as shown in the following screen. -
Page 104: Selecting All Images For Hp Instant Share Destinations
HP Instant Share destinations to the . (See Setting Up the HP Instant destinations for all still images in button to HP Instant destinations. HP Photosmart R707 User’s Manual on page 98.) HP Instant Share... - Page 105 Share destinations. Macintosh users will need to add addressing information for their destinations before the images and messages can be sent. Chapter 4: Using HP Instant Share buttons to scroll Menu/ Share All Images button again.
-
Page 106: Selecting Individual Images For Hp Instant Share Destinations
HP Instant Share button to select the destination, and a HP Instant Share HP Instant Share HP Photosmart R707 User’s Manual destinations, and HP Instant Share destination. HP Instant Share Menu/OK... -
Page 107: How Hp Instant Share E-Mails Images
Chapter 4: Using HP Instant Share Transferring Images to a Computer destinations. Macintosh users will need to... - Page 108 Macintosh, they will be displayed in the HP Instant Share application. Simply follow the instructions in the HP Instant Share application to send your messages and post your images on the web page. HP Photosmart R707 User’s Manual...
-
Page 109: Chapter 5: Transferring And Printing Images
• The HP Image Zone software is installed on your computer (see transfer images to a computer that does not have the HP Image Zone software installed on it, see Camera without Installing the HP Image Zone Software on page 125. - Page 110 Simply click box. Turn on the camera. The HP Image Transfer software will launch on your computer. If you have set the software to automatically transfer the images in the camera, the images will automatically transfer to the computer. Otherwise, in the...
-
Page 111: Printing Panoramas
When a set of images marked as a panoramic sequence is transferred to your computer with ArcSoft Panorama Maker application that was installed with HP Image Zone stitches the images together to form a single panoramic image. This panoramic image can then be printed from Panorama... -
Page 112: Printing Panoramas From Hp Image Zone
See the dock User’s Manual for instructions. You can connect the camera directly to any HP Photosmart printer or PictBridge-compatible printer to print images. You can then print either all images in the camera, or just those... - Page 113 Connect the larger end of that USB cable to the PictBridge-compatible printer. NOTE HP does not support printers from other manufacturers. If your printer will not print, contact the manufacturer of your printer. Chapter 5: Transferring and Printing Images...
- Page 114 Print button again to return to the Print Setup menu look correct, press Print Setup menu using the arrow keys screen showing the page layout that will Print Size HP Photosmart R707 User’s Manual buttons to adjust the Paper Size.
-
Page 115: Chapter 6: Using The Setup Menu
Chapter 6: Using the Setup Menu Setup Menu allows you to adjust a number of camera settings, such as the camera sounds, date and time, and the configuration of the USB or TV connection. To display the Setup Camera Menus to move to the menu tab for the Screen 1: Use the... -
Page 116: Display Brightness
The default Camera Sounds In the Setup Menu (page 115), select sub- screen behind the to save the setting and return to the setting is High. (page 115), select HP Photosmart R707 User’s Manual Display Brightness. Setup Camera Sounds. -
Page 117: Focus Assist Light
Menu. NOTE HP recommends leaving this setting at Auto, since turning it off hinders the ability of the camera to focus correctly in low light. The new setting remains in effect until it is changed again, even when you turn the camera off. -
Page 118: Live View At Power On
Playback. Also, this format chosen in this setting is what is used in the date & time imprint feature (see Date & Time Imprint (page 115), Live View Off. to save the Setup on page 76). HP Photosmart R707 User’s Manual can save battery... -
Page 119: Usb Configuration
Mass Storage Device Class (MSDC) standard. Use this setting to transfer images to a computer that does not have the HP Image Zone software installed on it (see Transferring Images to a Computer without HP Image Zone... -
Page 120: Tv Configuration
Windows 98 computer that does not have the HP Image Zone software installed on it. Press Menu/OK Menu. The new setting remains in effect until it is changed again, even when you turn the camera off. TV Configuration This setting allows you to set the format of the video signal for... -
Page 121: Language
Language This setting allows you to set the language used in the camera interface, such as the text in menus. In the Setup Menu select In the Language highlight the language you want to use. Press Menu/OK setting and return to the Menu. -
Page 122: Reset Settings
— Resets all camera settings to their default value in Capture Menu Language, Press Menu/OK Menu. (page 115), select sub-menu, highlight one of these Setup Menu Configuration, and to reset settings and return to the HP Photosmart R707 User’s Manual Reset Settings... (except Date & Time, Configuration). Setup... -
Page 123: Chapter 7: Troubleshooting And Support
Support This chapter contains information on the following topics: Resetting the camera (page 124) Using the camera without installing the HP Image Zone software (page 125) Possible problems, causes, and solutions (page 131) Error messages on the camera (page 142) -
Page 124: Resetting The Camera
Remove the battery from the camera, and make sure the HP AC power adapter is not connected to the camera. The Reset switch is the small hole located above the battery slot, as shown. -
Page 125: Using Your Camera Without Installing The Hp Image Zone Software
Installing the HP Image Zone Software If you do not, or cannot, install the HP Image Zone software on your computer for some reason (such as there is not enough RAM in your computer, or your computer is not running a supported operating system), you can still use your camera to take pictures and video clips. -
Page 126: Transferring Images To A Computer Without Hp Image Zone Software
USB cable, and the operating system will launch a program to help you transfer images. If you do not, or cannot, install HP Image Zone on your computer, there are two ways to transfer images from your camera to the computer: using a memory card reader, or configuring the camera as a disk drive. - Page 127 Transferring Images to a Windows Computer Remove the memory card from your camera and insert it into the memory card reader (or the memory card slot in your computer or printer). Right-click on the select Explore from the menu. A screen appears that will show a list of disk drives under Computer.
- Page 128 If no application launches automatically, look on the desktop for a disk drive icon which represents the memory card, then copy the images from there to your Playback menu in the camera). Download All Pictures Movies HP Photosmart R707 User’s Manual button to folder Import...
-
Page 129: Configuring The Camera As A Disk Drive
local hard drive. For more information about how to copy files, visit Mac help, the help system included with your computer. Configuring the Camera as a Disk Drive NOTE This method may not work with Windows 98 computers. This method sets up your camera to function as a disk drive when it is connected to your computer. - Page 130 For more information about how to copy files, visit Mac help, the help system included with your computer. HPxnnn (where HP Photosmart R707 User’s Manual xnnn...
-
Page 131: Problems And Solutions
HP Photosmart R07 lithium ion battery for HP Photosmart R- series cameras (L1812A) or a disposable Duracell CP1 battery. Ensure that the HP AC power adapter is connected to the camera and is plugged into a working electrical outlet. Ensure that the HP AC power... - Page 132 A battery that is new or has not been charged recently must be recharged to reach full capacity (see Appendix A: Managing Batteries HP Photosmart R707 User’s Manual on page 168 on page 163).
- Page 133 The camera will not attempt to charge a battery that may be damaged or over-discharged. Remove the battery from the camera and charge it in the HP Quick Recharger for R-series cameras or the spare battery charging bay of the dock (both purchased separately), then try it in the camera again.
- Page 134 If the AC adapter is connected to the camera, disconnect it. Then reset the camera (see the Camera on page 124). Format the internal memory and/or the optional memory card (see Delete on page 89. HP Photosmart R707 User’s Manual Resetting...
- Page 135 Problem Possible cause A long delay The camera occurs needs time to between lock focus and pressing the exposure. Shutter button The scene is and the dark and the camera camera is taking a taking a long picture. exposure. The camera is using a flash setting with Red-eye...
- Page 136 (close-up) range (see Focus Range Settings page 38). Wait a few seconds for the camera to finish processing the last image before taking another picture. HP Photosmart R707 User’s Manual Shutter button all the Lock; see page 37). Using the...
- Page 137 Problem Possible cause My image is The light is low blurry. and the flash is set to Flash Off The camera was set to the wrong focus setting for the scene. You moved the camera while you took the picture. The camera focused on the wrong thing, or...
- Page 138 Decrease the (see page 57). Change the Setup Menu brightness on the Image Display. (see page 116). EV Compensation page 57). HP Photosmart R707 User’s Manual Setting on page 43). EV Compensation (see EV Compensation Display Brightness for more accurate...
- Page 139 Problem Possible cause My image is There was not too dark. enough light. The flash was on, but the subject was too far away. A light is behind the subject. The scene had many light- colored objects, such as a white dog in snow.
- Page 140 Run the camera self-diagnostic Camera Self- test (see diagnostic Tests on page 154) to test the speed of your memory card. Storage on page 179 and Memory Capacity page 183 for tips about memory cards. HP Photosmart R707 User’s Manual...
- Page 141 This is normal. However, if anything seems out of the ordinary, turn off the camera, unplug the camera from the HP AC power adapter, and allow the camera to cool. Then examine the camera and the battery for signs of possible damage.
-
Page 142: Error Messages On The Camera
Battery too low for Live View Possible cause Solution Battery power is Replace or recharge the too low to battery, or use the HP AC continue power adapter. operation. Battery is shorted Purchase a new battery. or severely (See overdischarged. - Page 143 When trying to Simply remove the card configure your from the camera and HP Instant Share continue the menu, the Share optional memory locking tab on the memory card that is card to the unlocked installed is position before continuing.
- Page 144 The card may be corrupted or an unsupported type. HP Photosmart R707 User’s Manual Delete Try turning the camera off and then back on. Try re-formatting the memory card using the Format (Memory/ Card)
-
Page 145: Macro Mode
Message PROCESSING... CHARGING FLASH... FOCUS TOO FAR and blinking FOCUS TOO CLOSE Blinking Chapter 7: Troubleshooting and Support Possible cause Solution The camera is Wait a few seconds for the processing data, camera to finish such as saving processing before taking the last picture another picture or pressing you took. - Page 146 HP Photosmart R707 User’s Manual Focus Lock (see page 37). Point at a part of the scene that is brighter. Make sure the camera is...
- Page 147 (see Resetting the Camera page 124). If the problem persists, note the error code and then call HP Support (see Assistance The camera is Make sure that the camera connected to a...
- Page 148 HP Photosmart R707 User’s Manual Check that the printer is turned on. Make sure the cable is connected between the printer and the camera...
- Page 149 Message Printer has a paper jam The print carriage has stalled Printer is out of paper Selected print size is larger than selected paper size. Selected paper size is too big for printer. Borderless printing is only supported on photo paper. Chapter 7: Troubleshooting and Support Possible cause Solution...
- Page 150 Print Setup printing. select a smaller print size. The print job has Press the been canceled. on the camera. Complete the print request again. HP Photosmart R707 User’s Manual Menu/OK on the screen and Menu/OK button...
-
Page 151: Error Messages On The Computer
Turn on the camera. turned off. The camera is Try connecting the not working camera directly to an correctly. HP Photosmart or PictBridge-compatible printer, and print an image. This will verify that the image, optional memory card, USB connection, and the USB cable are functioning correctly. - Page 152 USB hub is not compatible with the camera. You are using Press the the HP on the dock. Photosmart R- series dock and forgot to press Save/Print button. HP Photosmart R707 User’s Manual setting to in the Setup Save/Print button...
- Page 153 The USB Reboot the computer. connection failed. The computer is Make sure your computer not connected to is online. the Internet. Other HP Instant Close the other Share software is Share running with exclusive access to your camera. HP Instant program.
-
Page 154: Camera Self-Diagnostic Tests
If any of the tests fail, note which one(s) so that you can provide this information when you contact HP Support. The entire set of tests takes only a few minutes to complete. -
Page 155: Getting Assistance
Register your product Subscribe to newsletters, driver and software updates, and support alerts Support Process The HP support process works most effectively if you perform the following steps in the order specified: Review the troubleshooting section of this User’s Manual (see Problems and Solutions Access the HP Customer Support Center website for support. - Page 156 (US and Canadian customers, skip this step and go on to Step 5.) Contact your local HP dealer. If your digital camera has a hardware failure, take it to your local HP dealer for a solution. Service is free during your digital camera’s limited warranty period.
-
Page 157: Phone Support In The United States
The applicable conditions for HP phone support are subject to change without notice. Telephone support is free from the date of purchase for the period specified unless otherwise noted. Locations Africa Asia Pacific Canada Europe Latin America Middle East United States Phone Support in the United States Support is available both during and after the warranty period. -
Page 158: Phone Support In Europe, The Middle East, And Africa
Phone Support in Europe, the Middle East, and Africa HP Customer Support phone numbers and policies may change. Visit the following website to check the details and conditions of phone support in your country/region: www.hp.com/support. Algeria +213 61 56 45 43... - Page 159 Luxembourg 900 40 006 (French) 900 40 007 (German) Middle East +971 4 366 2020 (international number) Morocco +212 22 404747 Netherlands 0900 2020 165 (Euro 0.10/minute) Nigeria +234 1 3204 999 Norway +47 815 62 070 Poland +48 22 5666 000 Portugal 808 201 492 Romania...
-
Page 160: Other Phone Support Worldwide
West Africa +351 213 17 63 80 (French-speaking countries only) Other Phone Support Worldwide HP Customer Support phone numbers and policies may change. Visit the following website to check the details and conditions of phone support in your country/region: www.hp.com/support. - Page 161 Korea, Republic of Malaysia 1 800 805 405 Mexico 01-800-4726684 or (55)5258-9922 New Zealand +64 (9) 356 6640 Panama 001-800-7112884 Peru 0-800-10111 Philippines +63 (2) 867 3551 Republica Dominicana Singapore +65 6272 5300 Taiwan +886 0 800 010055 Thailand +66 (0)2 353 9000 Trinidad &...
- Page 162 HP Photosmart R707 User’s Manual...
-
Page 163: Appendix A: Managing Batteries
Your camera uses either a rechargeable HP Photosmart R07 lithium ion battery for HP Photosmart R-series cameras (L1812A), or a disposable Duracell CP1 battery. For best results, use only a rechargeable HP branded lithium ion battery or high-quality lithium disposable battery. Top Points About Batteries New rechargeable batteries are shipped partially charged. -
Page 164: Extending Battery Life
This minimizes the number of times the lens must extend and retract. Use the HP AC power adapter or optional HP Photosmart R-series dock when the camera will be on for extended periods of time, such as when you transfer images to your computer or when printing. -
Page 165: Safety Precautions For Using Lithium Ion Batteries
Safety Precautions for Using Lithium Ion Batteries Do not place the battery in fire or heat the battery. Do not connect the positive terminal and the negative terminal of the battery to each other with any metal object (such as wire). Do not carry or store the battery together with coins, necklaces, hairpins, or other metal objects. -
Page 166: Performance Per Battery Type
Performance per Battery Type The following table shows how the rechargeable HP Photosmart R07 lithium ion battery and the disposable Duracell CP1 battery perform in different types of use scenarios.: Type of use Most economical (more than 30 pictures per month) -
Page 167: Number Of Shots Per Battery Type
Number of Shots per Battery Type The following table shows the minimum, maximum, and average number of shots that may be obtained using the rechargeable HP Photosmart R07 lithium ion battery and the disposable Duracell CP1 battery. Battery Minimum type... -
Page 168: Battery Gauge
Description is disabled (see Note below). Live View is disabled than you get with HP Photosmart R707 User’s Manual Live... -
Page 169: Recharging The Lithium Ion Battery
HP Photosmart R-series dock. See B: Purchasing Camera Accessories When the HP AC adapter is used to charge the battery and the camera is off, the Power/Memory light on the back of the camera will blink during charging. When the dock is used, the dock light will blink. - Page 170 If you will not be using your camera immediately after charging the battery, we recommend that you leave the camera in the dock or plugged in to the HP AC adapter. The camera will top off the battery periodically to ensure that the camera is always ready for use.
-
Page 171: Safety Precautions For Recharging Lithium Ion Batteries
If battery life has become unacceptably reduced over time, replace the battery with an HP Photosmart R07 lithium ion battery for HP Photosmart R-series cameras (L1812A). The camera, the dock, or the quick recharger may be warm while operating and charging a lithium ion battery. -
Page 172: Sleep Time-Out For Power Conservation
Unplug the HP AC power adapter or the quick recharger from the electrical outlet before cleaning the power adapter or quick recharger. After extensive use, the lithium ion battery may begin to swell. If it becomes difficult to insert the battery into or... -
Page 173: Appendix B: Purchasing Camera Accessories
Appendix B: Purchasing Camera Accessories You can purchase additional accessories for your camera. For information on your HP R707 and compatible accessories, go to: www.hp.com/go/myhpcamera www.hp.ca/myhpcamera www.hp.com (all other countries) To purchase accessories, visit your local retailer or order online www.hpshopping.com... - Page 174 Includes a dock with extra charging bay for a lithium ion battery, a remote control, a rechargeable HP Photosmart R07 lithium ion battery, an audio/video cable, a USB cable, and an HP AC power adapter (North America only). HP Photosmart Quick Recharge Kit for HP Photosmart R-series cameras—L1810A (Not available in Latin...
- Page 175 HP Photosmart 512 MB SD memory card—L1814A NOTE: HP Memory cards are not available in Asia Pacific and Latin America. NOTE: The 64 MB HP memory card is available in North America only. HP Photosmart premium case for HP Photosmart R-series cameras—...
- Page 176 HP Photosmart R707 User’s Manual...
-
Page 177: Appendix C: Specifications
Appendix C: Specifications Feature Description Resolution Still pictures: Video clips: Sensor Diagonal 9.075 mm (1/1.8-inch, 4:3 format) Color depth 36 bit (12 bits by 3 colors) Lens Focal length: F-Number: Lens threads None Viewfinder Optical real image zoom type viewfinder, 3x magnification, without diopter adjust Zoom 3x optical, 8x digital zoom... - Page 178 ISO 100 ISO 200 2.7 m 8.9 ft 1.5 m 4.9 ft Off, Auto Flash (default), Red-Eye, Night HP Photosmart R707 User’s Manual (default), Macro, ISO 400 4.0 m 13 ft 19.7 ft 2.5 m 3.25 m 8.2 ft 10.7 ft...
- Page 179 MMC cards at reading and writing data. This camera may support memory cards up to 2 GB, though HP has only tested up to 512 MB. Cards larger than 2 GB will not work. A high capacity card itself does not affect camera...
- Page 180 Low, Medium (default), High settings Still pictures—maximum of 60 seconds can be recorded Burst—audio capture not available Video clips—audio is recorded automatically (default), Action, Landscape, Portrait, Aperture (default) Custom Image Quality Compression) settings HP Photosmart R707 User’s Manual Priority, My Mode (Resolution and...
- Page 181 MPEG1 for video clips USB Mini-AB receptacle; allows USB (A to Mini- B) to a computer or USB (Mini-A to B) to certain printers (any HP Photosmart or PictBridge- compatible printers) DC input 3.3 Vdc @ 2500 mA HP Photosmart R-series dock...
- Page 182 HP Photosmart R-series cameras (L1812A), or one disposable Duracell CP1 battery. Rechargeable battery can be recharged in the camera using the HP AC power adapter or optional HP Photosmart R-series dock. HP AC power adapter (3.3 Vdc, 2500 mA, 8.25 W)
-
Page 183: Memory Capacity
Memory Capacity The following table lists the approximate number and average size of still images that can be stored in the internal memory in the camera when the camera is set to different settings available in the NOTE Not all 32 MB of internal memory is available for storing images, because some memory is used for internal camera operations. - Page 184 HP Photosmart R707 User’s Manual...
- Page 185 Index AC power adapter connector on camera 26 purchasing 175 accessories for camera 173 Action mode, setting 47 Adaptive Lighting, setting 68 AE Bracketing 74 AE Metering, setting 66 AF light 24 AF viewfinder light 24 Aperture Priority (Av) mode, setting 48 aperture, setting 48 arrow buttons on Controller 22...
- Page 186 front, side, and bottom of camera 26 top of camera 25 Camera Sounds, setting 116 camera states 27 capacity of internal memory 183 Capture menu Help for menu options 56 using 55 case for camera, purchasing Color of images, setting 70 compression format 181 compression settings, custom 61 computer, connect camera to...
- Page 187 19 not using 125 HP Instant Share customizing the HP Instant Share Menu 98 description 11, 97 HP Instant Share button 23, selecting all images 104 selecting individual images turn on/off 98 using the HP Instant Share Menu 103...
- Page 188 Manual Focus setting 38, 40 Manual White Balance, setting memory card door on camera 27 install 13 pictures remaining 36, 82 supported types and sizes 179 memory light 21 Menu/OK button, description menus Capture 55 Help 30 HP Instant Share 103 Index...
- Page 189 Playback, using 80 Portrait mode, setting 47 power battery level icons 168 light 21 specifications 182 turn on/off 17 power adapter, HP AC 15, 26 connector on camera 26 purchasing 175 Power ON/OFF switch, description 21 Power/Memory light, description 21...
- Page 190 95 safety precautions for lithium ion battery 165 Saturation, setting 71 Saved Settings in My Mode 53 selecting images for direct print 83 for HP Instant Share destinations 106 Self-Timer button 23 light 26 using 44 settings, reset 122...
- Page 191 34 Video viewfinder light 24 viewfinder crosshairs 36 lights 24 using 36 viewfinder, description 24 web sites for HP 155 White Balance, setting 62 Windows computer bonus software 19 connect to 109 install software 19 working distance of flash 178...
Need help?
Do you have a question about the Photosmart R707 and is the answer not in the manual?
Questions and answers