
Related Manuals for HP Photosmart R717


Summary of Contents for HP Photosmart R717
- Page 1 HP Photosmart R717 Digital Camera with HP Instant Share User’s Manual Downloaded from ManualsCamera.com Manuals...
- Page 2 Downloaded from ManualsCamera.com Manuals...
- Page 3 © Copyright 2005 Hewlett-Packard Development Company, L.P. The information contained herein is subject to change without notice. The only warranties for HP products and services are set forth in the express warranty statements accompanying such products and services. Nothing herein should be construed as constituting an additional warranty.
- Page 4 Downloaded from ManualsCamera.com Manuals...
-
Page 5: Table Of Contents
Contents Getting Started ..... . 11 Setup ....... 12 Install the Camera Dock Insert (Optional) . - Page 6 Color ......81 Downloaded from ManualsCamera.com Manuals HP Photosmart R717 User’s Manual...
- Page 7 Record Audio ..... . 103 Using HP Instant Share ....105 Using the HP Instant Share Menu .
- Page 8 Resetting the Camera....136 HP Image Zone Software ....137 Computer System Requirements .
- Page 9 Managing Batteries ....183 Top Points About Batteries ....183 Extending Battery Life .
- Page 10 Downloaded from ManualsCamera.com Manuals HP Photosmart R717 User’s Manual...
-
Page 11: Getting Started
Then merge them into one wide image on the computer. See page 49. • HP Image Advice—Provides tips to help you take better photos. See page 99. • HP Instant Share—Easily select still images in your... -
Page 12: Setup
Camera Parts on page 22. 1. Install the Camera Dock Insert (Optional) If you buy the HP Photosmart R-series dock, you will notice one or more clear dock inserts included in the box with the dock. When setting up the dock for use with this camera, make sure you use the dock insert that has the GREEN sticker on it. -
Page 13: Attach The Wrist Strap
3. Install the Battery Your camera can use either a rechargeable HP Photosmart R07 Lithium Ion battery (L1812A/L1812B) or a disposable Duracell® CP1 battery. 1. Open the Battery/ Memory Card door on... - Page 14 See Charge the Battery on page 15. TIP: You can also use an optional HP AC power adapter to power the camera. If you use a rechargeable Lithium Ion battery, you can recharge the battery in the camera or in...
-
Page 15: Charge The Battery
If the battery is a rechargeable Lithium Ion battery: 1. Plug the power cord into the HP AC power adapter. If more than one power cord is in the box, use the cord that is appropriate for power outlets in your country. Plug the other end of the power cord into an electrical outlet. -
Page 16: Turn On The Camera
The lens extends and the Power/Memory light to the left of switch turns on solid green. The HP logo also displays on the Image Display as the camera powers up. 6. Choose the Language The first time you turn the camera on, you are prompted to choose a language. -
Page 17: Set The Region
This information is recorded in the image properties, which you can see in Playback Mode when the Playback Menu (see page 93) or HP Instant Share Menu (see page 106) is displayed, when viewing Image Info (see page 99) and when viewing the image on your computer. -
Page 18: Install And Format A Memory Card (Optional)
You can also transfer the images from the internal memory to the memory card (see Move Images to Card on page 132). Downloaded from ManualsCamera.com Manuals HP Photosmart R717 User’s Manual... - Page 19 1. Turn off the camera and open the Battery/Memory card door on the bottom of the camera. 2. Insert the memory card in the small slot above the battery, with the notched side of the card going in first, as shown. Make sure the memory card snaps into place.
-
Page 20: 10. Install The Software
The HP Image Zone software allows you to transfer images and configure the HP Instant Share Menu on the camera. NOTE: If you do not install the HP Image Zone software, you can still use the camera, but certain features will be affected. -
Page 21: Macintosh
Macintosh 1. Close all programs and temporarily disable any virus protection software running on your computer. 2. Insert the HP Image Zone software CD into the CD drive of your computer. 3. Double-click the CD icon on the computer desktop. -
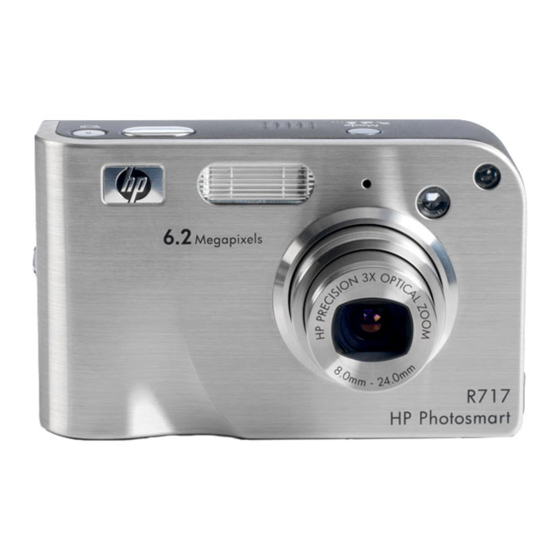
Page 22: Camera Parts
• Solid—Camera is on. light • Blinking rapidly—Camera is writing to memory or memory card. • Blinking slowly—Camera is charging the batteries using the optional HP AC power adapter. • Off—Camera is off. switch Turns the camera power on and off. - Page 23 Name Description Zoom lever • Zoom Out—While taking still (page 44) pictures, zooms out the lens to the wide angle position. • Thumbnails—While in Playback, allows you to view still images and the first frames of video clips arranged in a matrix of nine thumbnail images per screen.
- Page 24 • Both and AF blinking—An error has occurred that prevents the camera from taking the picture (for example, the memory card is full). Downloaded from ManualsCamera.com Manuals HP Photosmart R717 User’s Manual...
-
Page 25: Front, Side, And Bottom Of The Camera
Front, Side, and Bottom of the Camera Name Description Flash Provides additional light to improve (page 47) picture-taking. Microphone Records audio clips that are attached to (page 34) still images and the audio portion of video clips. Viewfinder Allows you to frame the subject of your (pages 33, 36) still images or video clips. - Page 26 Name Description Power Allows you to connect an optional HP AC adapter power adapter to the camera to either connector operate the camera without a battery, or recharge a Lithium Ion rechargeable battery in the camera. Allows you to connect a USB cable from...
-
Page 27: Top Of The Camera
Top of the Camera Name Description Mode button Allows you to select between different (page 49) shooting modes for taking still pictures. Speaker Plays camera sounds and audio clips. Shutter button • Focuses and takes a picture. (page 33) • Records audio clips. Video Starts and stops recording a video clip. -
Page 28: Camera States
TIP: In the Capture and Setup Menus, you can modify settings by highlighting the menu option and using the buttons to change the setting. Downloaded from ManualsCamera.com Manuals HP Photosmart R717 User’s Manual... - Page 29 The HP Instant Share Menu lets you select images to be sent to printers, e-mail addresses, and other online services. For information about using this menu, see Using the HP Instant Share Menu on page 106. Downloaded from ManualsCamera.com Manuals Getting Started...
- Page 30 TIP: To use the HP Instant Share Menu to send images to destinations other than printers (such as to e-mail addresses or online services), you must first set up the menu. See Setting Up Online Destinations in the Camera on page 108.
-
Page 31: Camera Status Screen
Camera Status Screen A status screen appears for a few seconds in the Image Display any time you press the Mode, Flash Focus MF, or Self-Timer/ Burst buttons when Live View is off. The top of the screen shows the name of the current setting selected. - Page 32 Downloaded from ManualsCamera.com Manuals HP Photosmart R717 User’s Manual...
-
Page 33: Taking Pictures And Recording Video Clips
2 Taking Pictures and Recording Video Clips Taking Still Pictures You can take a picture almost any time the camera is on, regardless of what is being shown on the Image Display. To take a still picture: 1. Frame the subject for your picture in the viewfinder. -
Page 34: Recording Audio With Still Pictures
To delete or record a new audio clip, use the Record Audio option in the Playback menu. See Record Audio on page 103. Downloaded from ManualsCamera.com Manuals HP Photosmart R717 User’s Manual... -
Page 35: Orientation Sensor
Orientation Sensor An electro-mechanical device in the camera determines whether the camera is being held horizontally or vertically when a still picture is taken. The camera uses the reading from this sensor to automatically rotate the image to its proper orientation when saving the file. TIP: You can also manually rotate still images using the Rotate option in the Playback Menu. -
Page 36: Recording Video Clips
10 seconds after you press the Video button. With the Self-Timer - 2 Shots setting, the camera only records one video clip. NOTE: Zoom does not apply when recording video clips. Downloaded from ManualsCamera.com Manuals HP Photosmart R717 User’s Manual... -
Page 37: Using Live View
Using Live View The Image Display allows you to frame pictures and video clips using Live View. To activate Live View from the menus or when the Image Display is off, press the Live View button. To turn off Live View, press the Live View button again. - Page 38 • Battery level when using battery power (actual icon shown depends on the state of your camera battery; see Power Indicators on page 188) • AC power when using the HP AC power adapter or optional HP Photosmart R-series dock Remaining pictures count (actual number depends on...
-
Page 39: Focusing The Camera
Focusing the Camera The focus brackets in the Live View screen show the focus region for the still picture you are taking (see Using Live View on page 37). When you press the Shutter button halfway down to take a still picture, the camera automatically measures and locks the focus and exposure in the focus region. - Page 40 F-number and shutter speed it will be using when you press the Shutter button halfway down. The F-number and shutter speed will turn red if they are out of range for the picture being taken. Downloaded from ManualsCamera.com Manuals HP Photosmart R717 User’s Manual...
-
Page 41: Using Focus Lock
Using Focus Lock Focus Lock allows you to focus on a subject that is not in the center of the picture, or to capture action shots more quickly by pre-focusing in the area where the action will occur. You can also use Focus Lock to help achieve focus in low light or low contrast situations. -
Page 42: Using The Focus Range Settings
You can determine the focus by observing the image in the Live View screen and by a meter that appears on the left side of the Live View screen. For more information, see Using Manual Focus on page 43. Downloaded from ManualsCamera.com Manuals HP Photosmart R717 User’s Manual... -
Page 43: Using Manual Focus
Using Manual Focus You may want to use Manual Focus in the following three cases: • In low light conditions when auto focus may have a difficult time gaining the proper focus. • After auto focus, you want to lock the focus for speed and repeatability for the next pictures you take. -
Page 44: Using Zoom
TIP: Increasing ISO Speed can help reduce camera shake, but can result in increased noise in your images (see ISO Speed on page 78). Downloaded from ManualsCamera.com Manuals HP Photosmart R717 User’s Manual... -
Page 45: Optical Zoom
Optical Zoom Optical zoom works like the zoom on a traditional film camera, where physical lens elements move inside the camera to make the subject of your picture appear closer. Press Zoom Out and Zoom In the Zoom lever to move the lens between wide angle (1x) and telephoto (3x) positions. - Page 46 In situations where you need higher quality (such as for printing), limit the use of digital zoom. NOTE: Digital zoom is not available while recording video clips, nor when in Panorama shooting mode. Downloaded from ManualsCamera.com Manuals HP Photosmart R717 User’s Manual...
-
Page 47: Setting The Flash
Setting the Flash The Flash button allows you to cycle through the flash settings on the camera. To change the flash setting, press the Flash button until the desired setting appears on the Image Display. The following table describes each of the flash settings on the camera. - Page 48 Therefore, make sure your subjects wait for the additional flashes. TIP: You can also remove red eyes in pictures you have already taken. See Remove Red Eyes on page 98. Downloaded from ManualsCamera.com Manuals HP Photosmart R717 User’s Manual...
-
Page 49: Using The Shooting Modes
Using the Shooting Modes Shooting modes use a pre-defined set of camera settings that are optimized for taking still pictures of certain scene types to give you better results. In each shooting mode, the camera selects the best settings, such as the ISO speed, F-number (aperture), and shutter speed, optimizing them for the particular scene or situation. - Page 50 This mode allows you to shoot a series of overlapping frames for stitching into one, large panoramic image using the HP Image Zone software. Flash is set to Flash Off in this mode. See Using Panorama Mode on page 52. You can view the entire panoramic shot using the Preview Panorama option in the Playback Menu (see Preview Panorama on page 101).
- Page 51 Setting Description Document Use Document mode for shooting flat, textual, or graphical pieces. This mode uses a high contrast setting and a low saturation setting, with flash set to Flash Off and the orientation sensor turned off. Aperture Use Aperture Priority mode when you want specific Priority control over the aperture (for example, using a lower F-number to blur the background or a higher F-number...
-
Page 52: Noise Reduction For Long Exposures
Playback Menu (see page 101), or you can transfer the images in the panoramic sequence to your computer for automatic stitching together and then viewing or printing. NOTE: Digital zoom is not available in Panorama mode. Downloaded from ManualsCamera.com Manuals HP Photosmart R717 User’s Manual... -
Page 53: Taking A Panoramic Sequence Of Pictures
Taking a Panoramic Sequence of Pictures 1. Press the Mode button on top of the camera until the Panorama icon appears in the Image Display. You are now ready to take the first picture in your panoramic sequence. TIP: Panorama images are stitched together from left to right, so make sure your first image is at the left-most end of the panorama view. - Page 54 NOTE: The Panorama shooting mode requires the full version of the HP Image Zone software to automatically stitch images together on your computer (see Transferring Images to a Computer on page 115 and HP Image Zone Software on page 137). Downloaded from ManualsCamera.com Manuals...
-
Page 55: Using My Mode
Using My Mode My Mode is a customizable shooting mode that allows you to select, save, and then repeatedly use a group of preferred settings on your camera. This shooting mode is especially useful when you frequently take pictures of the same type of subject or scene and want to have the camera set to the same settings each time. -
Page 56: Using The My Mode Saved Settings Sub-Menu
1. Press the Mode button on the top of the camera until you see My Mode and the icon in the Image Display. 2. Press the button to display the My Mode Capture Menu. Downloaded from ManualsCamera.com Manuals HP Photosmart R717 User’s Manual... - Page 57 3. Use the buttons to scroll to the My Mode Saved Settings menu option and press the button. The My Mode Saved Settings sub-menu displays. The options with check marks in the My Mode Saved Settings sub-menu will be saved in My Mode any time you turn the camera off. 4.
-
Page 58: Using The Self-Timer Settings
10-second countdown period. TIP: You cannot record audio with a still picture when using the self-timer settings, but you can add an audio clip later (see Record Audio on page 103). Downloaded from ManualsCamera.com Manuals HP Photosmart R717 User’s Manual... - Page 59 For Video Clips: To start recording video, press the Video button and then release it. A 10-second countdown appears on the Image Display. The Self-Timer/Focus Assist light on the front of the camera then blinks for 10 seconds before the camera starts recording the video.
-
Page 60: Using The Burst Setting
Burst setting, but you can add an audio clip later (see Record Audio on page 103). Also, the flash is not available while using the Burst setting. Downloaded from ManualsCamera.com Manuals HP Photosmart R717 User’s Manual... -
Page 61: Using The Capture Menu
Using the Capture Menu The Capture Menu allows you to adjust various camera settings that affect the characteristics of the images and video clips you capture with your camera. 1. To display the Capture Menu, press the Live View button, and then press the button. -
Page 62: Help For The Menu Options
Balance sub-menu, the White Balance Help screen is displayed, as shown. Use the buttons to scroll through the Help screens. To exit the Help and return to the particular Capture Menu, press the button. Downloaded from ManualsCamera.com Manuals HP Photosmart R717 User’s Manual... -
Page 63: Ev Compensation
EV Compensation In difficult lighting conditions, you can use EV (Exposure Value) Compensation to override the automatic exposure setting that the camera makes. EV Compensation is useful in scenes that contain many light objects (like a white object against a light background) or many dark objects (like a black object against a dark background). -
Page 64: Adaptive Lighting
• Backlit scenes where the subject is too far away for the regular flash to reach, or is severely backlit (for example, in front of a window) Downloaded from ManualsCamera.com Manuals HP Photosmart R717 User’s Manual... - Page 65 You can use Adaptive Lighting with or without flash, but it is not recommended as a replacement for flash. Unlike the flash, Adaptive Lighting does not affect exposure settings, so brightened areas may appear noisy or grainy, and indoor or night images may be blurry if taken without a flash or a tripod.
-
Page 66: Image Quality
Capture Menu. Or, when the Custom... menu option is highlighted, press the button to go to the Custom Image Quality sub-menu (see page 69). Downloaded from ManualsCamera.com Manuals HP Photosmart R717 User’s Manual... - Page 67 The following table explains the Image Quality settings in more detail: Setting Description Images will be full resolution and have the lowest pre- defined compression. This setting produces very high quality images and uses the most memory. This is recommended if you plan to enlarge images, or print images up to 40.6 by 50.8 cm (16 by 20 in).
- Page 68 Except in My Mode (page 55), Image Quality remains in effect until it is changed again, even when you turn the camera off. NOTE: Image Quality settings do not apply when recording video clips. Downloaded from ManualsCamera.com Manuals HP Photosmart R717 User’s Manual...
-
Page 69: Custom Image Quality
Custom Image Quality If you select the Custom... option from the Image Quality sub- menu, the Custom Image Quality sub-menu displays. This sub-menu allows you to select a custom Image Quality setting, including individually setting the resolution and the compression of the images you capture. In the Custom Image Quality sub-menu, the default Resolution setting is 6MP (full resolution), and the default Compression setting is... - Page 70 NOTE: When you use digital zoom, the resolution changes as you zoom in (see Digital Zoom on page 45). Downloaded from ManualsCamera.com Manuals HP Photosmart R717 User’s Manual...
-
Page 71: White Balance
White Balance Different kinds of lighting conditions cast different colors. For example, sunlight is more blue, while indoor tungsten light is more yellow. Scenes dominated by a single color may require an adjustment of the white balance setting to help the camera reproduce colors more accurately and ensure that whites appear white in the final image. - Page 72 The White Balance setting remains in effect until it is changed again, or until it resets to the default Auto setting when you turn the camera off. To save changed settings, use My Mode (see page 55). Downloaded from ManualsCamera.com Manuals HP Photosmart R717 User’s Manual...
-
Page 73: Manual White Balance
Manual White Balance If you select the Manual option, the Manual White Balance screen displays. The Live View portion of the screen shows the color tint from the previous Manual White Balance setting that was made. To change the Manual White Balance setting: 1. -
Page 74: Auto Focus Area
• Selecting Spot causes the camera to search a single zone in the center of the region for focus. Downloaded from ManualsCamera.com Manuals HP Photosmart R717 User’s Manual... - Page 75 The following table explains the settings in more detail: Setting Description Multi When you press the Shutter button halfway down, the camera searches for focus in each of five zones, starting from the closest distance. The camera locks on the first zone(s) that come into focus and surrounds the zone(s) with brackets.
-
Page 76: Ae Metering
This can be useful in backlit scenes or when the subject of the picture is very dark or light compared to the rest of the scene. Downloaded from ManualsCamera.com Manuals HP Photosmart R717 User’s Manual... - Page 77 TIP: When using Spot, frame the subject of the picture in the center of the focus brackets, then press the Shutter button halfway down to lock the exposure and focus. Then recompose the scene as desired and press the Shutter button all the way down.
-
Page 78: Iso Speed
Auto setting when you turn the camera off. To save changed settings, use My Mode (see page 55). NOTE: The ISO Speed setting does not apply when recording video clips. Downloaded from ManualsCamera.com Manuals HP Photosmart R717 User’s Manual... -
Page 79: Ae Bracketing
AE Bracketing This setting allows you to take three pictures with the camera, with each picture set to a different exposure value. When you select one of the AE (automatic exposure) Bracketing settings, the camera will take the first picture at normal exposure (0 exposure value), followed by an underexposed picture at the negative (-) exposure value in the setting, and finally an overexposed picture at the positive (+) exposure... - Page 80 Burst is not available with AE Bracketing. NOTE: The AE Bracketing setting does not apply when recording video clips, nor in Panorama mode. Downloaded from ManualsCamera.com Manuals HP Photosmart R717 User’s Manual...
-
Page 81: Color
Color This setting allows you to control the color in which your images will be captured. For example, when you set Color to Sepia, your images will be captured in brown colors to make them look aged or old-fashioned. 1. In the Capture Menu (page 61), select Color. 2. -
Page 82: Saturation
Live View screen. The Saturation setting remains in effect until it is changed again, even when you turn the camera off. Downloaded from ManualsCamera.com Manuals HP Photosmart R717 User’s Manual... -
Page 83: Sharpness
Sharpness This setting allows you to set how sharp the fine detail will be in your images. 1. In the Capture Menu (page 61), select Sharpness. 2. In the Sharpness sub-menu, use buttons to highlight a setting. 3. Press the button to save the setting and return to the Capture Menu. -
Page 84: Contrast
Live View screen. The Contrast setting remains in effect until it is changed again, even when you turn the camera off. Downloaded from ManualsCamera.com Manuals HP Photosmart R717 User’s Manual... -
Page 85: Date & Time Imprint
Date & Time Imprint This setting imprints either the date or the date and time of when the image was captured in the lower left-hand corner of the image. After you select either of the Date & Time Imprint settings, the date or date and time will be imprinted on all subsequent still images that are captured, not to previously captured images. - Page 86 Live View screen. The Date & Time setting remains in effect until it is changed. NOTE: The Date & Time setting does not apply when recording video clips, nor in Panorama Mode. Downloaded from ManualsCamera.com Manuals HP Photosmart R717 User’s Manual...
-
Page 87: Reviewing Images And Video Clips
HP Image Advice (an analysis of images for any problems with focus, exposure, and so forth, that may have occurred while capturing the images). To do these things and more, see Using the Playback Menu on page 93. - Page 88 • Power indicator, such as this full battery level indicator (see Power Indicators on page 188). • AC power when using the HP AC power adapter or optional HP Photosmart R-series dock. Displays for the first few seconds when you enter...
- Page 89 Icon Description Indicates this image has been selected for printing 2 copies using HP Instant Share (see Using HP Instant Share on page 105). 17 of 43 Shows the number of this image or video clip out of the total number of images and video clips that are stored in memory.
-
Page 90: Total Images Summary Screen
Power Indicators on page 188 NOTE: For information about selecting images for printing or sharing, see Sending Individual Images to Destinations on page 110 and Sending All Images to Destinations on page 112. Downloaded from ManualsCamera.com Manuals HP Photosmart R717 User’s Manual... -
Page 91: Viewing Thumbnails
Viewing Thumbnails NOTE: In Thumbnail view, each image in a panorama displays individually. To preview an entire panoramic sequence of images, see Preview Panorama on page 101. Thumbnail view allows you to view the still images you have taken and the first frames of the video clips you have recorded arranged in a matrix of nine thumbnail images and video clip frames per screen. -
Page 92: Magnifying Images
Zoom Out to increase or decrease the magnification. 4. Press the button to exit Magnify view and return to Playback. NOTE: You can magnify only still images; video clips cannot be magnified. Downloaded from ManualsCamera.com Manuals HP Photosmart R717 User’s Manual... -
Page 93: Using The Playback Menu
Using the Playback Menu The Playback Menu allows you to delete still images or video clips, remove red eyes from still images, undelete images, and format the camera's internal memory or optional memory card. Additionally, you can view advice for improving a selected image, display image capture information, rotate images, record audio and attach it to an image, and preview a panoramic sequence of images. - Page 94 (see Image Advice on page 99). Image Info —Allows you to view all of the settings that were used when capturing this image (see Image Info on page 99). Downloaded from ManualsCamera.com Manuals HP Photosmart R717 User’s Manual...
- Page 95 Icon Description Preview Panorama —Displays a low-resolution, stitched image of the currently selected panorama. (see Preview Panorama on page 101). Rotate —Rotates the currently displayed still image in 90 degree increments (see Rotate on page 102). Record Audio —Records an audio clip to attach to this still image (see Record Audio on page 103).
-
Page 96: Delete
Format Card to format optional memory cards before you use them for the first time, and when you want to delete all of the images and video clips stored on them. Downloaded from ManualsCamera.com Manuals HP Photosmart R717 User’s Manual... - Page 97 • Undelete Last—Recovers the most recently deleted image. (This option is only displayed after a Delete operation has been performed.) You can recover only the most recently deleted image, including entire panoramic sequences. Once you proceed to another operation, for example, powering off the camera or taking another picture, the delete operation you performed is permanent, and the image is no longer recoverable.
-
Page 98: Remove Red Eyes
• Cancel—Returns to the Playback Menu without saving the red eye changes. NOTE: Remove Red Eyes is only available for still images that were taken with a flash. This option is not available for video clips. Downloaded from ManualsCamera.com Manuals HP Photosmart R717 User’s Manual... -
Page 99: Image Advice
Image Advice In the Playback Menu (page 93), when you select Image Advice, the camera analyzes the image for focus, exposure, and so forth. If Image Advice identifies improvements that can be made for similar images taken in the future, an analysis appears on the Image Display listing the issue and recommended solutions, as shown... - Page 100 Displays only when an optional memory card is installed in the camera File name of the image in internal memory or on an optional memory card File size of the image in internal memory or on an optional memory card Downloaded from ManualsCamera.com Manuals HP Photosmart R717 User’s Manual...
-
Page 101: Preview Panorama
This feature is for viewing purposes only; it does not permanently alter the image. NOTE: To create a permanently stitched panoramic sequence, use the full version of the HP Image Zone software that came with your camera (see Printing Panoramas on page 120). -
Page 102: Rotate
3. After you have rotated the image to the desired orientation, press the button to save the new orientation. NOTE: Rotate is not available for video clips nor for still images that are part of a panoramic sequence. Downloaded from ManualsCamera.com Manuals HP Photosmart R717 User’s Manual... -
Page 103: Record Audio
Record Audio You can attach an audio clip to a still picture either while you are taking a picture (see Recording Audio with Still Pictures on page 34) or add an audio clip after a picture is taken as explained in this section. You can also use the method in this section to replace an audio clip already attached to an image. - Page 104 Downloaded from ManualsCamera.com Manuals HP Photosmart R717 User’s Manual...
-
Page 105: Using Hp Instant Share
2. Select images in your camera to send to online destinations (see page 110 and page 112). NOTE: You must have the full version of the HP Image Zone software on your computer to use HP Instant Share features.Computer System Requirements on page 137 If... -
Page 106: Using The Hp Instant Share Menu
The default HP Instant Share Menu lets you select some or all of the images for printing automatically the next time you connect your camera to your computer or printer. You can... - Page 107 Up Online Destinations in the Camera on page 108). EXIT allows you to exit the HP Instant Share Menu. TIP: If you select images to print using HP Instant Share and then take them to a photo printing service for printing, let...
-
Page 108: Setting Up Online Destinations In The Camera
1. Make sure the full version of the HP Image Zone software is installed on your computer (see pages 20 and 137). 2. Turn on the camera, press the... - Page 109 5. The next step is slightly different on a Windows and Macintosh computer: • Windows: Connecting the camera to the computer activates the HP Instant Share Setup program. If some other dialog box appears in addition, close that dialog box by clicking Cancel. In the Instant Share...
-
Page 110: Sending Individual Images To Destinations
(up to 99), then press the button. A appears next to Print in the HP Instant Share Menu. To deselect Print, press the button, set the number of copies to 0 (zero), then press the button. - Page 111 • Images that were selected to be sent to e-mail destinations are not e-mailed as attachments. Rather, the images are uploaded to a secure HP web site, and a message is sent to each e-mail address. The message contains thumbnail images, as well as a link...
-
Page 112: Sending All Images To Destinations
Sending All Images to Destinations 1. Turn on the camera, press the button, and use the buttons to tab to the HP Instant Share Menu 2. Use the button to highlight Share All Images..., and press the button to display the Share All Images sub-menu. - Page 113 Transferring Images to a Computer on page 115. The images will automatically be sent to their respective HP Instant Share destinations (see the last step in Sending Individual Images to Destinations on page 110 for more information about how this works).
- Page 114 Downloaded from ManualsCamera.com Manuals HP Photosmart R717 User’s Manual...
-
Page 115: Transferring And Printing Images
141) or the optional HP Photosmart R-series dock (see the dock User’s Manual). 1. Confirm the following: • Either the HP Image Zone software or the HP Image Zone Express software is installed on your computer (see Install the Software on page 20). To transfer... - Page 116 HP Instant Share destinations (pages 110 and 112), those actions are started. When the Image Action Summary screen appears on the computer, you can disconnect the camera from the computer.
-
Page 117: Printing Images Directly From The Camera
Printing Images Directly from the Camera You can connect the camera directly to any PictBridge-certified printer to print images. To determine if your printer is PictBridge-certified, look for the PictBridge logo 1. Check that the printer is turned on. There should be no blinking lights on the printer or error messages displayed about the printer. - Page 118 (see page 112) or just selected images (see page 110). However, printing directly from the camera has the following limitations (to avoid these limitations, use the HP Image Zone software; see Chapter 4, Using HP Instant Share): Downloaded from ManualsCamera.com Manuals...
- Page 119 See your printer’s manual for more information. NOTE: If you connect the camera to a non-HP printer and encounter problems with printing, contact your printer manufacturer. HP does not provide customer support for non-HP printers.
-
Page 120: Printing Panoramas
See HP Image Zone Software on page 137. To print a panoramic image: 1. Start the HP Image Zone software on your computer. 2. In the My Images tab (Windows) or HP Gallery (Macintosh), select the panoramic image you want to print. -
Page 121: Using The Setup Menu
6 Using the Setup Menu The Setup Menu allows you to adjust a number of camera settings, such as the camera sounds, date and time, and the configuration of the USB or TV connection. 1. To display the Setup Menu, first display any other menu (see Camera Menus on page 28) and then use the buttons to scroll to the menu tab for the Setup Menu 2. -
Page 122: Display Brightness
3. Press the button to save the setting and return to the Setup Menu. The new setting remains in effect until it is changed again, even when you turn the camera off. Downloaded from ManualsCamera.com Manuals HP Photosmart R717 User’s Manual... -
Page 123: Camera Sounds
Camera Sounds Camera sounds are the sounds that the camera makes when you turn it on, press a button, or take a picture. Camera sounds are not the audio sounds recorded with images or video clips. The default Camera Sounds setting is High. 1. -
Page 124: Focus Assist Light
Setup Menu. NOTE: HP recommends leaving this setting at Auto, since turning it off hinders the ability of the camera to focus correctly in low light. The new setting remains in effect until it is changed again, even when you turn the camera off. -
Page 125: Instant Review
Instant Review This setting allows you to specify the length of time a newly- taken image, panoramic sequence, or video clip is displayed in Instant Review. The default Instant Review setting is 2 seconds. 1. In the Setup Menu (page 121), select Instant Review. 2. -
Page 126: Digital Zoom
3. Press the button to save the setting and return to the Setup Menu. The new setting remains in effect until it is changed again, even when you turn the camera off. Downloaded from ManualsCamera.com Manuals HP Photosmart R717 User’s Manual... -
Page 127: Live View At Power On
Live View at Power On This setting allows you to have the camera automatically display Live View every time you turn the camera on, or to have the Image Display turned off every time. The default Live View at Power On setting is Live View On. 1. -
Page 128: Date & Time
The Date & Time settings also remain current as long as the camera battery that is installed has a charge, or the battery is removed for less than 10 minutes, or the camera is connected to an optional HP AC power adapter. Downloaded from ManualsCamera.com Manuals HP Photosmart R717 User’s Manual... -
Page 129: Usb Configuration
Transferring Images to a Computer without HP Image Zone Software on page 140). You may be unable to use this setting with a Windows 98 computer that does not have the HP Image Zone software installed on it. 3. Press the button to save the setting and return to the Setup Menu. -
Page 130: Tv Configuration
This setting allows you to set the format of the video signal for displaying camera images on a television (TV) that is connected to the camera with an optional HP Photosmart R-series camera dock. The default TV Configuration setting depends on the language and region that you selected when you turned on the camera for the first time. -
Page 131: Language
Language This setting allows you to set the language used in the camera interface, such as the text in menus. 1. In the Setup Menu (page 121), select 2. In the Language sub-menu, use buttons to highlight the language you want to use. -
Page 132: Move Images To Card
During the move, a progress bar is shown. All of the images that are successfully moved to the memory card are then deleted from the camera's internal memory. When the move is complete, you return to the Setup Menu. Downloaded from ManualsCamera.com Manuals HP Photosmart R717 User’s Manual... -
Page 133: Reset Settings
Reset Settings This option allows you to reset the camera to the factory default settings. 1. If you have an optional memory card in the camera, remove the memory card (see page 18). 2. In the Setup Menu (page 121), select Reset Settings..3. - Page 134 Downloaded from ManualsCamera.com Manuals HP Photosmart R717 User’s Manual...
-
Page 135: Troubleshooting And Support
• Resetting the camera (page 136) • HP Image Zone software, including system requirements and HP Image Zone Express (page 137) • Using the camera without installing the HP Image Zone software (page 139) • Possible problems, causes, and solutions (page 145) •... -
Page 136: Resetting The Camera
3. Remove the battery from the camera, and make sure the HP AC power adapter is not connected to the camera. 4. The Reset switch is in the small hole located above the battery slot, as shown. -
Page 137: Hp Image Zone Software
HP Image Zone Software The full version of the HP Image Zone software lets you use HP Instant Share to e-mail images to addresses you specify (including distribution lists), create online albums, or print images automatically when you connect your camera to your computer. -
Page 138: Hp Image Zone Express (Windows Only)
However, it lacks several features contained in the full version. • You cannot use the HP Image Zone Express software with any of the HP Instant Share features on the camera. You cannot, for example, select images to print and then use the HP Image Zone software to print those images automatically. -
Page 139: Using Your Camera Without Installing The Hp Image Zone Software
Installing the HP Image Zone Software If you do not, or cannot, install the HP Image Zone software (either the full version or HP Image Zone Express) for some reason, you can still use your camera to take pictures and video clips. -
Page 140: Transferring Images To A Computer Without Hp Image Zone Software
R-series dock). If you do not, or cannot, install HP Image Zone on your computer, there are two ways to transfer images from your camera to the computer: using a memory card reader, or configuring the camera as a disk drive. -
Page 141: Using A Memory Card Reader
(purchased separately). The memory card reader acts just like a floppy disk drive or CD-ROM drive. In addition, some computers and HP Photosmart printers have memory card slots built into them, and you can use these memory card slots as you would use a regular memory card reader to save images to the computer. - Page 142 (under the Delete option in the Playback Menu in the camera). NOTE: It is recommended that you format the card rather than delete the images because it will help prevent corrupted images or cards. Downloaded from ManualsCamera.com Manuals HP Photosmart R717 User’s Manual...
- Page 143 Transferring Images to a Macintosh Computer Using a Memory Card Reader 1. Remove the memory card from your camera and insert it into the memory card reader (or the memory card slot in your computer or printer). 2. Depending on the configuration and/or version of the Mac operating system you are running, either an application called Image Capture or one called iPhoto will launch automatically and guide you through the...
-
Page 144: Configuring The Camera As A Disk Drive
You can set up your camera to function as a disk drive when it is connected to your computer, so you can transfer images without using the HP Image Zone software. NOTE: You may be unable to use this method with Windows 98 computers. -
Page 145: Problems And Solutions
HP Photosmart R-series cameras (L1812A/L1812B) Duracell® or a disposable CP1 battery. If you are using Ensure that the HP AC power an optional adapter is connected to the camera and is plugged into a HP AC power adapter, it is working electrical outlet. - Page 146 So, if you have not used it in two frequently. has not been months or more, it may benefit used lately. from being charged (see page 183). Downloaded from ManualsCamera.com Manuals HP Photosmart R717 User’s Manual...
- Page 147 Try charging it again after it has charge. drained awhile. The wrong AC Use only the HP AC power power adapter adapter approved for use with is being used. this camera (see page 193). The battery is...
- Page 148 The camera is Wait until the Power/Memory processing an light turns solid green, indicating image. the camera has completed processing the previously taken image. The battery is Replace or recharge the battery. drained. Downloaded from ManualsCamera.com Manuals HP Photosmart R717 User’s Manual...
- Page 149 Problem Possible cause Solution The camera • Reset the camera (if the AC The camera does not has stopped adapter is connected to the respond operating. camera, disconnect it first). when I press See page 136. a button • Reset the camera (continued).
- Page 150 (see page 42). finds focus. The camera is Wait a few seconds for the still saving the camera to finish processing the last picture last image before taking another you took. picture. Downloaded from ManualsCamera.com Manuals HP Photosmart R717 User’s Manual...
- Page 151 HP AC power adapter to see drained, or the if the Image Display turns on. camera has • If the Image Display does not...
- Page 152 • Decrease the EV Compensation (see page 63). • Use AE Bracketing (see page 79). Downloaded from ManualsCamera.com Manuals HP Photosmart R717 User’s Manual...
- Page 153 Problem Possible cause Solution My image is The scene had Decrease the EV Compensation too bright many dark (see page 63). (continued). objects, such as a black object on a dark background. The Display Set the Display Brightness to Low Brightness or Medium in the Setup Menu needs to be...
- Page 154 (see page 78). high. There was not • Wait for natural lighting enough light. conditions to improve. • Add indirect lighting. • Use the flash (see page 47). Downloaded from ManualsCamera.com Manuals HP Photosmart R717 User’s Manual...
- Page 155 Problem Possible cause Solution My image is The camera The effect will diminish as the grainy was too warm camera cools. For best image (continued). when the quality, avoid storing the camera picture was in very hot locations. If the taken.
- Page 156 See Storage on page 203 and Memory Capacity responds memory card on page 207 very (like an MMC for tips about memory cards. sluggishly card) can when trying affect to review processing images. times. Downloaded from ManualsCamera.com Manuals HP Photosmart R717 User’s Manual...
- Page 157 HP AC power adapter, and allow charge the the camera to cool. Then examine battery in the the camera and the battery for camera, or you signs of possible damage.
- Page 158 (see page 136). • If the problem persists, contact HP Support (see page 174). I cannot The HP Image Either install the HP Image Zone transfer Zone software software (see page 20), or see images from is not installed...
- Page 159 Problem Possible cause Solution I am having a • Refer to the computer problem requirements (page 137). installing or • Refer to the HP Customer using the Support website: HP Image www.hp.com/support Zone software. I receive an A power surge...
-
Page 160: Error Messages On The Camera
Possible cause Solution BATTERY Battery power is Replace or recharge the DEPLETED. too low to battery, or use the HP AC continue power adapter. operation. Battery is too low Battery power is You can still take pictures for Live View. - Page 161 Message Possible cause Solution Battery is non- There is no Verify that there is a rechargeable battery in the rechargeable battery in camera, or the the camera, then retry battery is not charging the battery a rechargeable. couple of times. If that fails, purchase a new battery and try again (see page 193).
- Page 162 • Make sure the subject is within Macro range (see page 42). Downloaded from ManualsCamera.com Manuals HP Photosmart R717 User’s Manual...
- Page 163 HP Instant locked. Share task. CARD IS The camera is • Try turning the camera UNREADABLE having trouble off and then back on.
- Page 164 96 recording (see Or replace the card with a new one. Downloaded from ManualsCamera.com Manuals HP Photosmart R717 User’s Manual...
- Page 165 Message Possible cause Solution No images on There are no • If you think you are card. images on the missing images, optional memory remove the memory card. card and check internal memory for the images. • Take some images. ERROR SAVING The optional •...
- Page 166 Video clips still images before cannot be printed reconnecting the camera directly from the to the printer. No printable camera. images on card. Downloaded from ManualsCamera.com Manuals HP Photosmart R717 User’s Manual...
- Page 167 (see in memory to card to rotate the page 96). Then rotate the rotate image. image. image using the HP Image Zone software or another image editing package. Insufficient space There is Transfer images from the on card to save...
- Page 168 Camera has camera (see page 136). If experienced an the problem persists, note error and is the error code and then shutting down. call HP Support (see page 174). Downloaded from ManualsCamera.com Manuals HP Photosmart R717 User’s Manual...
- Page 169 Message Possible cause Solution Unsupported USB Your camera Use the USB cable that cable dock is came with this camera. connected to a The larger, flat end printer using the connector on the cable wrong type of (see page 117) should cable, or the connect to the printer, printer is not a...
- Page 170 Replace the ink cartridge. cartridge is You may be able to print running low on some images using the ink. current cartridge, but their color and quality may not be of high quality. Downloaded from ManualsCamera.com Manuals HP Photosmart R717 User’s Manual...
- Page 171 • Make sure the cable is camera and connected between the printer. printer and the camera or the optional HP Photosmart R-series dock. If that does not work, turn off the camera and disconnect it from the USB cable. Turn the printer off and then on again.
-
Page 172: Error Messages On The Computer
USB connection, and the USB cable are functioning correctly. Make sure that the cable is The cable is not connected firmly connected to the correctly. computer and camera. Downloaded from ManualsCamera.com Manuals HP Photosmart R717 User’s Manual... - Page 173 USB hub is not compatible with the camera. You are using Press the Save/Print button on the dock. HP Photosmart R- series dock and forgot to press the Save/Print button. The optional Switch the locking tab on...
-
Page 174: Getting Assistance
This section contains support information for your digital camera, including support website information, an explanation of the support process, and support phone numbers. HP Accessibility Website Customers with disabilities can get help by visiting www.hp.com/hpinfo/community/accessibility/prodserv. Downloaded from ManualsCamera.com Manuals HP Photosmart R717 User’s Manual... -
Page 175: Hp Photosmart Website
1. Review the troubleshooting section of this User’s Manual (see Problems and Solutions on page 145). 2. Access the HP Customer Care website for support. If you have access to the Internet, you can obtain a wide range of information about your digital camera. Visit the HP website for product help, drivers, and software updates at www.hp.com/support. - Page 176 As a part of HP’s continuing efforts to improve phone support information services, we advise you to check the HP website on a regular basis for new information regarding service features and delivery. If you cannot solve the problem using the above options, call HP while you are in front of your computer and digital camera.
-
Page 177: Phone Support In The United States And Canada
(1-800-HP invent). A service charge will be required, which will be charged to your credit card. If you think your HP product needs service, please call HP Total Care and a Total Care Representative will help you determine your service options. - Page 178 +212 22 404747 Netherlands 0900 2020 165 (Euro 0.10/minute) Nigeria +234 1 3204 999 Norway +47 815 62 070 Poland +48 22 5666 000 Portugal 808 201 492 Romania +40 (21) 315 4442 Downloaded from ManualsCamera.com Manuals HP Photosmart R717 User’s Manual...
- Page 179 Russian Federation +7 095 7973520 (Moscow) +7 812 3467997 (St. Petersburg) Saudi Arabia 800 897 1444 (in-country toll-free) Slovakia +421 2 50222444 South Africa 086 0001030 (Republic of South Africa) +27 11 2589301 (international number) Spain 902 010 059 Sweden +46 (0)77 120 4765 Switzerland 0848 672 672 (German, French, Italian—...
-
Page 180: Other Phone Support Worldwide
Other Phone Support Worldwide HP Customer Care phone numbers and policies may change. Visit the following website to check the details and conditions of phone support in your country/region: www.hp.com/support. Argentina (54)11-4778-8380 or 0-810-555-5520 Australia 1300 721 14 (during the warranty... - Page 181 Japan 0570 000 511 (inside Japan) +81 3 3335 9800 (outside Japan) Korea, Republic of +82 1588-3003 Malaysia 1 800 805 405 Mexico 01-800-472-6684 or (55)5258-9922 New Zealand +64 (9) 356 6640 Panama 001-800-711-2884 Peru 0-800-10111 Philippines +63 (2) 867 3551 Republica Dominicana 1-800-711-2884 Singapore +65 6272 5300...
- Page 182 Downloaded from ManualsCamera.com Manuals HP Photosmart R717 User’s Manual...
-
Page 183: A Managing Batteries
A Managing Batteries Your camera uses either a rechargeable HP Photosmart R07 Lithium Ion battery for HP Photosmart R-series cameras (L1812A/L1812B), or a disposable Duracell® CP1 battery. Top Points About Batteries • New rechargeable batteries are shipped partially charged. Lithium Ion rechargeable batteries must be fully charged before first use or if unused for more than 2 months. -
Page 184: Extending Battery Life
This minimizes the number of times the lens must extend and retract. • Use the HP AC power adapter or optional HP Photosmart R-series dock when the camera will be on for extended periods of time, such as when you transfer images to your computer or when printing. -
Page 185: Safety Precautions For Using Batteries
Safety Precautions for Using Batteries • Do not place the battery in fire or heat the battery. • Do not connect the positive terminal and the negative terminal of the battery to each other with any metal object (such as wire). •... -
Page 186: Performance Per Battery Type
Performance per Battery Type The following table shows the approximate number of shots under light, heavy, and average use conditions for the rechargeable HP Photosmart R07 Lithium Ion battery and the disposable Duracell® CP1 battery: Type of use Lithium Most economical if you take more than 30... -
Page 187: Number Of Shots Per Battery Type
Number of Shots per Battery Type The following table shows the minimum, maximum, and average number of shots that may be obtained using the rechargeable HP Photosmart R07 Lithium Ion battery and the disposable Duracell® CP1 battery. Battery type Minimum... -
Page 188: Power Indicators
When the camera is turned off, the battery recovers and the initial gauge reading when the camera is turned on again may not be as accurate as that obtained after a few minutes of use. Downloaded from ManualsCamera.com Manuals HP Photosmart R717 User’s Manual... -
Page 189: Recharging The Lithium Ion Battery
The rechargeable HP Photosmart R07 Lithium Ion battery can be recharged in the camera when the camera is connected to the HP AC power adapter or optional HP Photosmart R- series dock. The Lithium Ion battery can also be recharged with the optional HP Photosmart battery quick recharger or in the spare battery bay of the HP Photosmart R-series dock. - Page 190 If you will not be using your camera immediately after charging the battery, we recommend that you leave the camera in the dock or plugged in to the HP AC adapter. The camera will top off the battery periodically to ensure that the camera is always ready for use.
-
Page 191: Safety Precautions For Recharging Lithium Ion Batteries
Safety Precautions for Recharging Lithium Ion Batteries • Do not charge any other battery than the HP Photosmart R07 Lithium Ion battery in the camera, the dock, or the quick recharger. • Insert the Lithium Ion battery in the correct orientation in the camera, the dock, or the quick recharger. -
Page 192: Sleep Time-Out For Power Conservation
• Do not disassemble the camera, the dock, or the quick recharger. • Unplug the HP AC power adapter or the quick recharger from the electrical outlet before cleaning the power adapter or quick recharger. • After extensive use, the Lithium Ion battery may begin to swell. -
Page 193: B Purchasing Camera Accessories
Transfer photos easily to your computer, send photo e-mails via HP Instant Share, or print photos at the touch of a button. Connect to your TV and view photo slideshows with the remote control. - Page 194 Includes a dock with extra charging bay for a Lithium Ion battery, a remote control, a rechargeable HP Photosmart R07 Lithium Ion battery, an audio/video cable, a USB cable, and an HP AC power adapter (North America only). • HP Photosmart Quick Recharge Kit for HP Photosmart R-series cameras—L1810A/L1810B...
- Page 195 • HP Photosmart black camera case—Q6216A Protect your HP Photosmart R-series camera with this black sport case. Designed to fit HP digital cameras, the case features a neck strap and belt loop, zippered closure, SD card organizer, and two storage pockets.
- Page 196 SD card organizer. • www.casesonline.com—Go to www.casesonline.com to design your own custom case to fit your HP Photosmart R-series camera. Choose the style, material, and color for your camera case.
-
Page 197: C Caring For Your Camera
See Cleaning the Camera on page 198. • Keep your camera and accessories in a padded case with a good strap for easy transport. Most HP digital camera cases have built-in pockets for batteries and memory cards. See Purchasing Camera Accessories on page 193. -
Page 198: Cleaning The Camera
You can also purchase these items in a camera-cleaning kit. NOTE: You should purchase lens-cleaning tissue that has not been chemically treated. Some chemically treated lens tissue can cause scratching of the lens and Image Display. Downloaded from ManualsCamera.com Manuals HP Photosmart R717 User’s Manual... -
Page 199: Cleaning The Camera Lens
Cleaning the Camera Lens Do the following to remove any lubricant that has seeped from the lens wink mechanism onto the camera lens, as well as fingerprints, dust, and so forth that have accumulated on the lens. 1. Turn the camera on to open the lens wink mechanism and to extend the lens. - Page 200 Downloaded from ManualsCamera.com Manuals HP Photosmart R717 User’s Manual...
-
Page 201: D Specifications
D Specifications Feature Description Still pictures: Resolution • 6.4MP (2934 by 2170) total pixel count • 6.2MP (2864 by 2160) effective pixel count Video clips: • 320 by 240 total pixel count, 30 frames/sec Sensor Diagonal 9.075 mm (1/1.8-inch, 4:3 format) Color depth 36 bit (12 bits by 3 colors) 36 bit images are transformed into an optimized... - Page 202 Flash settings Auto Flash (default), Red Eye, Flash On, Flash Off, Night Image Display 4.6 cm (1.8-inch) color active matrix TFT LCD with backlight, 130,572 pixels (558 by 234) total pixel count Downloaded from ManualsCamera.com Manuals HP Photosmart R717 User’s Manual...
- Page 203 Feature Description Image capture • Still (default) options • Self-Timer—still picture or video clip taken after 10-second delay • Self-Timer - 2 shots—still picture taken after 10-second delay, then a second picture taken about 3 seconds later. Single video taken after 10-second delay. •...
- Page 204 • 2MP • VGA • Custom... White Balance Auto (default), Sun, Shade, Tungsten, settings Fluorescent, Manual ISO Speed Auto (default), 50, 100, 200, 400 settings AE Metering Center-Weighted (default), Average, Spot Downloaded from ManualsCamera.com Manuals HP Photosmart R717 User’s Manual...
- Page 205 Interfaces • USB mini A/B connector to a computer or PictBridge-certified printer • DPS (Direct Printing Standard) • USB to HP Photosmart printers • DC input 3.3 Vdc @ 2500 mA • HP Photosmart R-series dock Downloaded from ManualsCamera.com Manuals...
- Page 206 Rechargeable battery can be recharged in the camera using the HP AC power adapter or optional HP Photosmart R-series dock. • HP AC power adapter (3.3 Vdc, 2500 mA, 8.25 W) • Optional HP Photosmart R-series dock Recharging in camera with the HP AC power adapter or optional HP Photosmart R-series dock: average charge time 6 hours.
-
Page 207: Memory Capacity
Feature Description Weight 180 grams (0.3969 pounds) without battery Temperature Operational: range 0 to 50° C (32 to 122° F) at 15 to 85% relative humidity Storage: –30 to 65° C (–22 to 149° F) at 15 to 90% relative humidity Memory Capacity The following table lists the approximate number and average size of still images that can be stored in the internal... - Page 208 Downloaded from ManualsCamera.com Manuals HP Photosmart R717 User’s Manual...
-
Page 209: Index
Index purchasing Lithium Ion AC power adapter quick recharge kit 194 connector on camera 26 recharging Lithium Ion purchasing 194 accessories for camera 193 shots per type 187 Action mode, setting 49 top points about use 183 Adaptive Lighting, setting Beach mode, setting 50 blinking lights on camera AE Bracketing 79... - Page 210 117 front, side, and bottom of connectors camera 25 AC power adapter 26 top of camera 27 camera dock 26 Camera Sounds, setting USB 26 conserving battery life 184 Downloaded from ManualsCamera.com Manuals HP Photosmart R717 User’s Manual...
- Page 211 172 EV Compensation, setting help from customer support extending battery life 184 Help menu, description 30 Help, on-camera 62 flash HP AC power adapter description 25 connector on camera 26 restore setting 62 purchasing 194 Downloaded from ManualsCamera.com Manuals Index...
- Page 212 Image Quality setting 66 ISO Speed setting 78 magnifying 92 Image Advice, using 99 number remaining 31 Image Display description 24 number saved in internal Digital Zoom setting 126 memory 207 Downloaded from ManualsCamera.com Manuals HP Photosmart R717 User’s Manual...
- Page 213 Panorama mode 52 LEDs (lights) on camera record audio clips 34 AF viewfinder light 24 Rotate 102 Focus Assist light 25 Saturation setting 82 Power light 22 Sharpness setting 83 Self-Timer light 25 shooting modes 49 Video viewfinder light 24 thumbnails view 91 lens, cleaning 145 too dark/light 63...
- Page 214 Setup 121 optical zoom 45 messages over-exposing an image 63 on camera 160 override automatic exposure on computer 172 MF Focus button 23 microphone, description 25 Move Images to Card 132 Downloaded from ManualsCamera.com Manuals HP Photosmart R717 User’s Manual...
- Page 215 36 light 22 red-eye reduction specifications 206 description 48 turn on/off 16 Remove Red Eyes 98 power adapter, HP AC 26 Region, choose at first connector on camera 26 startup 17 purchasing 194 remaining pictures count Power light, description 22...
- Page 216 187 Shutter button tripod mount, description description 27 troubleshoot problems 135 lock exposure and focus turn on/off power 16 shutter speed range 202 TV (television) Configuration setting 130 Downloaded from ManualsCamera.com Manuals HP Photosmart R717 User’s Manual...
- Page 217 Video button, description controls 23 video clips, recording 36 Video viewfinder light 24 viewfinder lights 24 using 39 web sites for HP 175 White Balance, setting 71 Windows computer Image Zone Express 138 install software 20 setting online destinations system requirements 137...
Need help?
Do you have a question about the Photosmart R717 and is the answer not in the manual?
Questions and answers