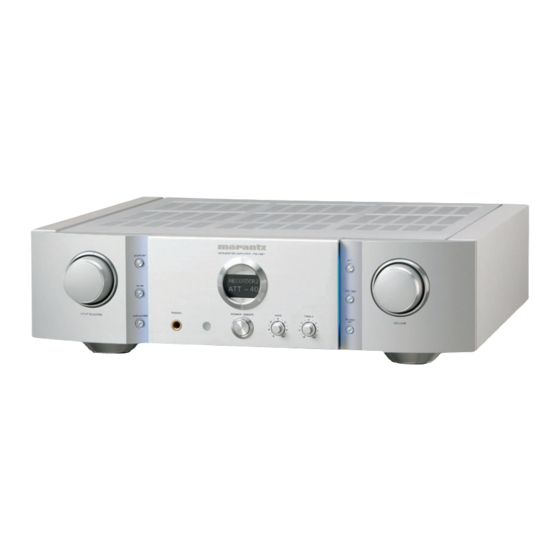
Marantz PM-15S1 User Manual
Hide thumbs
Also See for PM-15S1:
- Service manual (52 pages) ,
- Specifications (1 page) ,
- Full line catalog (39 pages)
Table of Contents
Advertisement
Advertisement
Table of Contents

Related Manuals for Marantz PM-15S1


Summary of Contents for Marantz PM-15S1
- Page 1 Model PM-15S1 User Guide Integrated Amplifier...
- Page 2 Su recibo de compra es su prueba permanente de haber adquirido un aparato de valor, Este recibo deberá guardarlo en un lugar seguro y utilizarlo como referencia cuando tenga que hacer uso del seguro o se ponga en contacto con Marantz. IMPORTANTE Cuando solicite el servicio otorgado por la garantia el usuario tiene la responsabilidad de demonstrar cuándo efectuó...
- Page 3 The PM-15S1 is in conformity with the EMC directive and low-voltage directive. Français Le PM-15S1 est conforme à la directive EMC et à la directive sur les basses tensions. Deutsch Das Modell PM-15S1 entspricht den EMC-Richtlinien und den Richtlinien für Niederspannungsgeräte.
- Page 4 Español Svenska ADVERTENCIAS VARNINGAR - No exponga el equipo a la lluvia ni a la humedad. - Utsätt inte utrustningen för regn eller fukt. - No extraiga la tapa del equipo. - Ta inte bort utrustningens hölje. - No introduzca nada en el interior del equipo a través de los - För inte in föremål i utrustningen genom ventilationshålen.
-
Page 5: Table Of Contents
RECORDING ..............................15 HOW TO USE AND SET FEATURES ....................16 ABOUT FCBS ..............................16 FCBS CONNECTION WITH A PM-15S1 ......................16 ABOUT THE BI-AMP MODE ..........................16 ATTENUATION (ATT) ............................17 HOW TO OPERATE THE SIDE ILLUMINATION ....................17 TRIMMING ................................ -
Page 6: Before Use
Immediately After Use 7 7 7 7 7 EQUIPMENT MAINS WORKING During and immediately after use, the PM-15S1 is hot in ar- eas other than the controls and rear panel connection jacks. SETTING Do not touch hot spots and especially the top panel. Contact Your Marantz product has been prepared to comply with the with hot areas can cause burns. -
Page 7: Features
PM-15S1s, therefore sound qual- ity is not adversely affected. • Display The PM-15S1 adopts an LCD to display input source and vol- ume level. Compared to other types of display panels, an LCD generates less drive noise and radiated noise, hence the ef-... -
Page 8: Before Making Connections
• Wiring with speaker cable. speaker causes little interference with the mid/high speaker. The PM-15S1 and speakers of Connection Example 1 (pg. 5) use a bi-wiring connection, therefore also refer to that page for help. -
Page 9: Speaker Positioning For Super Audio Multi-Channel Sound
BEFORE MAKING CONNECTIONS 7 7 7 7 7 ITU (International Telecommuni- SPEAKER POSITIONING FOR SUPER AUDIO MULTI-CHANNEL SOUND cation Union) The ITU is a special organization of the United Nations. It consists of a number of organs, one of which is the Radio In order to enjoy Super Audio CD multi-channel sound with the best possible acoustics, it is recommended to position Broadcasting Section. -
Page 10: Connections
CONNECTIONS Connection Example 1: Basic Connection for Normal Stereo Playback • Use a bi-wiring connection (pg. 3) for speakers. • Set the SPEAKER button on the front panel in the ON position. Refer also to the instruction manuals of components to connect equipment correctly. •... - Page 11 ⇔ monaural miniplugs or stereo ⇔ stereo miniplugs as described “ABOUT FCBS” on pg. 16. Set the ID numbers for the PM- 15S1 units as explained “HOW TO SET ID” on pg. 19. When the PM-15S1 of ID 1 is operated, those of ID 2 and ID 3 will operate in sync.
- Page 12 FCBS connection, prepare 2 portable audio connection cables with monaural ⇔ monaural miniplugs or stereo ⇔ stereo miniplugs as described “ABOUT FCBS” on pg. 16. Set the ID numbers for the PM-15S1 units as explained “HOW TO SET ID” on pg. 19.
-
Page 13: Names And Functions Of Parts
Attenuation level the OFF position, therefore set the button in the ON posi- is set to –20 dB when the PM-15S1 is shipped from the tion to control bass and treble from these buttons. -
Page 14: Display
PM-15S1 to the left or press the VOLUME 4 button Approximately 3 seconds after power on the remote controller. to the PM-15S1 is activated, the ID set for the PM-15S1 is displayed here. After that, the top line displays the input source, while the bottom line displays the volume level. -
Page 15: Rear Panel
These jacks are for connecting components that are ca- These jacks are for connecting to the output jacks of a pable of remote control (D.BUS jacks) such as a Marantz tuner, DVD player, etc. Super Audio CD Player or DVD Player. This enables these In the bi-amp mode, the R channel jack cannot be used. - Page 16 For instructions on use and con- nections, see “ABOUT FCBS” on pg. 16. L AC IN Socket Connect one end of the included power cable here and the other end to a power outlet. The PM-15S1 can be pow- ered by 230V AC only.
-
Page 17: Rc-11Pms1 Remote Controller
These buttons are for selecting the input source to use in playback. This remote controller can control the PM-15S1 and Marantz The PM-15S1 does not support balanced input, therefore Super Audio CD players and DVD players that have a remote the BALANCED button does not respond even if pressed. -
Page 18: Loading Batteries
When the LINE 2 button is pressed, the buttons in groups , and . function as indicated in the below table. These buttons can be used only when a Marantz DVD player is connected to the LINE 2 input jacks. -
Page 19: Basic Operation
(mute) by turning the VOLUME knob r until muting the volume level. Set the PHONO MC button ! 3 on the PM-15S1 to MC or MM according to the cartridge you are using. To use the speakers connected to the SPEAKER SYSTEMS terminals, press the SPEAKERS button !0 on the PM-15S1. -
Page 20: Recording
CLOSE MODE number, starting from ID 1. Select the input source from the INPUT SELECTOR knob e on the PM-15S1 or the input selector buttons z of the PHONO BALANCED remote controller. And, press the REC OUT button !2 to... -
Page 21: How To Use And Set Features
The below figure is an example of four PM-15S1s connected a 5.1 channel system, but to use the system as a 2-channel by FCBS. The top PM-15S1 is the master unit of ID 1 and stereo, turn OFF power to the PM-15S1s of IDs 2 and 3. As such, the PM-11S1 can be used on its own. -
Page 22: Attenuation (Att)
ATT button on the PM-15S1. Attenuation is a one-touch feature for reducing volume level. When the ATT button on either the PM-15S1 or the remote controller is pressed, the volume level is attenuated. When the PM-15S1 is shipped from the factory, the attenuation level is set to –20 dB, but it can be set to –20 dB, –40 dB or –∞. -
Page 23: Trimming
TRIM EXIT TONE To trim the volume level of the ID 2 (slave) PM-15S1, press the TRIM button again and set volume level as in steps 1 - 3. After that, pressing the TRIM button again allows you to ENTER trim volume level with ID 3 (slave) PM-15S1 and so forth. -
Page 24: How To Set Id
HOW TO SET ID INPUT SELECTOR knob DISPLAY button If using the PM-15S1 by itself as a stereo amplifier, set the ID to “0”. When the PM-15S1 is shipped from the factory, the ID is set to “0”. When the ID is set to a number other than “0”, the PM- 15S1 cannot be used for standalone operation. -
Page 25: Remote Control Jacks
PM-15S1. The PM-15S1 comes with an RC-11PMS1 system remote controller that can operate the basic features of Marantz Super Audio CD Players and DVD Players. Here, a brief explanation of how to control the PM-15S1 and SA-15S1 using this remote controller is provided.. -
Page 26: Troubleshooting
PM-15S1 are covered or if the PM- 15S1 is installed on a cramped audio rack. In these cases, * Record player audio is not heard or contains “PROTECT”... -
Page 27: Others
In the event of difficulty, refer to your dealer or write directly to solution), alcohol, thinner, benzine, insecticide or other volatile the nearest location to you that is listed on the Marantz substances as these wil mar the finish of the equipment. -
Page 28: Specifications & Dimensional Drawings
SPECIFICATIONS & DIMENSIONAL DRAWINGS Power output (20 Hz – 20 kHz simultaneous drive of both channels) Tone control Bass (50Hz) ............±10dB ............90W x 2 (8Ω load) Treble (20kHz) ............±10dB ............ 140W x 2 (4Ω load) Total harmonic distortion (20Hz – 20kHz simultaneous drive Power requirement ......... - Page 29 You can find your nearest authorized distributor or dealer on our website. JAPAN Marantz Japan, Inc. 35-1 Sagami Ohno 7-Chome, Sagamihara-shi, Kanagawa 228-8505, Japan U.S.A. Marantz America, Inc. 1100 Maplewood Drive, Itasca, IL 60143, U.S.A. EUROPE Marantz Europe B.V.
Need help?
Do you have a question about the PM-15S1 and is the answer not in the manual?
Questions and answers