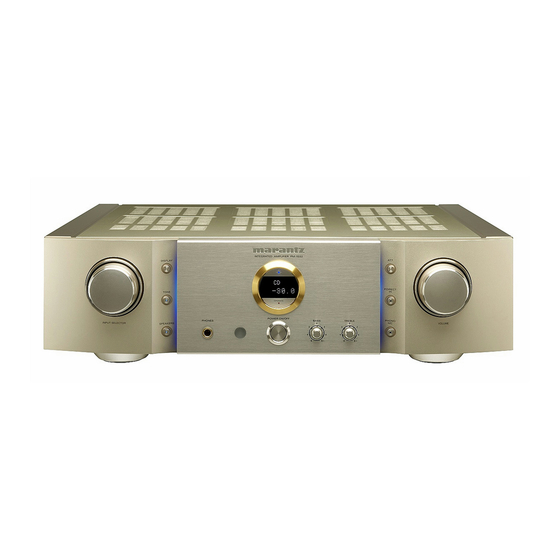
Marantz PM-15S2 User Manual
Integrated amplifier
Hide thumbs
Also See for PM-15S2:
- Service manual (72 pages) ,
- Brochure & specs (28 pages) ,
- User manual (27 pages)
Table of Contents
Advertisement
Advertisement
Table of Contents

Related Manuals for Marantz PM-15S2


Summary of Contents for Marantz PM-15S2
- Page 1 Model PM-15S2 User Guide Integrated Amplifi er...
- Page 2 INSIDE REFER SERVICING TO QUALIFIED SERVICE PERSONNEL The lightning fl ash with arrowhead symbol within an equilateral triangle is intended to alert the user to the presence of uninsulated “dangerous voltage” within the product’s enclosure that may be of suffi cient magnitude to constitute a risk of electric shock to persons.
-
Page 3: Important Safety Instructions
11. Only use attachments/accessories specifi ed by the manufacturer. 12. Use only with the cart, stand, tripod, bracket, or table specifi ed by the manufacturer, or sold with the apparatus. When a cart is used, use caution when moving the cart/apparatus combination to avoid injury from tip-over. - Page 4 Your purchase receipt is your permanent record of a valuable purchase. UW KWITANTIE, KASSABON E.D. BEWAREN It should be kept in a safe place to be referred to as necessary for Uw kwitantie, kassabon e.d. vormen uw bewijs van aankoop van insurance purposes or when corresponding with Marantz.
- Page 5 - Plaats geen voorwerpen met een vloeistof erin, zoals een on the equipment. bloemenvaas, op het apparaat. - No objects fi lled with liquids, such as vases, shall be placed on the - Als de schakelaar op OFF staat, is het apparaat niet volledig equipment.
- Page 6 Lorsque vous mettez cet appareil au rebut, respectez les lois ou réglementations en vigueur. Les piles ne doivent jamais être jetées ou incinérées, mais mises au rebut conformément aux lois en vigueur sur la mise au rebut des piles. VERBRAUCHERINFORMATION ZUR SAMMLUNG UND ENTSORGUNG ALTER ELEKTROGERÄTE UND BENUTZTER BATTERIEN Beachten Sie bei der Entsorgung des Gerätes die örtlichen Vorschriften und Bestimmungen.
-
Page 7: Table Of Contents
ENGLISH Thank you for choosing the Marantz product. Please read this User Guide thoroughly to ensure proper operation and installation before using this product. After reading this User Guide, be sure to keep this for your future reference. Accessories check Before use, check the below accessories were included in the package. -
Page 8: Features
• Wherever it will be subject to vibration The amplifier section adopts a fully discrete design, combining • On top of a rickety stand or in an unstable location which is the HDAM-SA3 and the HDAM-SA2. tilted at an angle ¶... -
Page 9: Usage Of Remote Controller
If you accidentally get fluid on your skin, immediately wash with water and seek medical attention. • Do not heat or take apart batteries or put them in flame or water. • When disposing of used batteries, please comply with governmental regulations or environmental public instruction’s rules that apply in your country or area. -
Page 10: Names And Functions
!2 POWER ON/OFF Switch This button switches the phono equalizer between MC and MM. When MC is set, the center of the button is lit a blue This switch turns power to the unit ON and OFF. When pressed, color. Set the phono equalizer amplifier according to the type power is activated and the blue indicator in the display lights of cartridge you use. -
Page 11: Display
This indicator indicates the operating status of the unit. changed. When the ID is set to “0” for standalone operation, it is lit a red color. When multiple amplifiers are connected by F.C.B.S., only ID number “1” for the master is lit red color. The slave amplifier whose indicator does not light a red color cannot be used to operate other units in sync. -
Page 12: Remote Controller
NAMES AND FUNCTIONS z Input Selector Buttons REMOTE CONTROLLER These buttons are for selecting the input source to use in This remote controller can be used to control the PM-15S2 and playback. Marantz Super Audio CD players or DVD players that have a remote control receptor. -
Page 13: Rear Panel
These jacks are for connecting to the recording input jacks of t P.DIRECT IN Jacks a tape deck etc. These input jacks are used when this unit is used as a power !1 RECORDER 1/2 Input Jacks amplifier in power amplifier direct mode. Connect your preamplifier to these jacks, if you have them. -
Page 14: Basic Connections
• Be sure to connect input and output properly. • Refer to the instructions for each component that is connected to this unit. • Do not tie the connected cable into a bundle with the power supply cord or speaker cables. Doing so may cause noise. CD Player... -
Page 15: Connecting Speaker Systems
• Be sure to use speakers with the specified impedance as shown on the rear panel of this unit. Note: • To prevent damage to circuitry, do not let the bare speaker wires touch each other and do not let them touch any metal part of this unit. -
Page 16: Connecting Of Ac Power Cable
Turn on the connected audio equipment, such as a CD player. Press the POWER ON/OFF button of this unit. Insert the bare part of the wire into the hole in side of each terminal. Input Source Selection Example: CD playback... -
Page 17: Volume Adjustment
Volume Adjustment Attenuating the Volume Level Temporarily Adjust the volume as desired with the VOLUME knob on the front panel or the VOLUME 3 or 4 button on the remote The volume level from the speakers can be temporarily controller. attenuated. -
Page 18: Advanced Connections
If an AV amplifier or preamplifier is available, this unit can be used as a power amplifier, using the connections shown below. For this use, hold the P.DIRECT IN button on the front panel of this unit pressed for at least 3 seconds to set it to ON. “POWER AMP DIRECT”... -
Page 19: Stereo Complete Bi-Amp Connection
⇔ monaural miniplugs or stereo ⇔ stereo miniplugs as described in F.C.B.S. (page. 16). Set the ID numbers as explained in HOW TO SET ID NUMBERS (page. 17). When the ID1 amplifier is operated, the ID 2 amplifier will operate in sync. Set the AMP MODE switch on the rear panel to BI-AMP, referring to BI-AMP MODE (page 17). - Page 20 Each disc indicates how many channels have been recorded on it. • The basic layout is 3 speakers in the front and 2 in the back since multi-channel discs usually have 5 channels. The 2 front, 1 center and 2 surround (rear) speakers should be set in a circle around the listening point as shown below.
-
Page 21: Basic Connection For 5.1 Multi-Channel Playback
ADVANCED CONNECTIONS BASIC CONNECTION FOR 5.1 MULTI-CHANNEL PLAYBACK The three units are connected using F.C.B.S. For the F.C.B.S connection, prepare 3 audio connection cables, and refer to F.C.B.S. on page 16. Set the ID numbers for the three amplifiers as explained in HOW TO SET ID NUMBERS (page. 17). -
Page 22: F.c.b.s
To turn the power of multiple F.C.B.S.-connected units ON/OFF, switch the power ON in order of lowest to highest ID number, and switch the power OFF in order of highest to lowest ID number. -
Page 23: Advanced Operations
ADVANCED OPERATIONS HOW TO SET ID NUMBERS BI-AMP MODE If using this unit by itself as a stereo amplifier, set the ID number This unit is equipped with a bi-amp mode to enable a complete to “0” (Default setting is “0”). -
Page 24: Trimming
3, 4, 2, 1 ENTER button To trim the volume level of the ID 2 (slave) unit, press the DISPLAY TRIM button again and set the volume level as in steps 1~3. After that, pressing the TRIM button again allows you to trim the volume level for the “ID 3”... -
Page 25: Att (Attenuation)
The factory default setting is -20dB. Note: Press and hold the ATT button on the unit for 2 seconds or Setting of the illumination lamp cannot be performed with the longer. The attenuation level will appear on the display. -
Page 26: Controlling Marantz Components
ADVANCED OPERATIONS CONTROLLING MARANTZ COMPONENTS Press the desired SOURCE button. Press the desired operation buttons to play the selected component. • For details, refer to the component’s user guide. • It may not be possible to operate some models. TUNER... -
Page 27: Troubleshooting
If you have any problem using this product, please be sure to check the items in the following table. If you trouble cannot be solved, please unplug the power cable immediately and contact your Marantz authorized dealer or service center. -
Page 28: Phono
Or, no sound is PHONO IN jacks of this unit. heard. A TV set, etc. placed too close to the Place the TV set or record player in – record player may affect the sound. another position. -
Page 29: About The Protection Circuit
Nos. 2-4. properly connected. happen if the vents on top of the amplifier are covered or if the amplifier is installed on a cramped audio rack. In such cases, “PROTECT” flashes on the display, and the volume is automatically decreased. -
Page 30: Others
(4Ω load) ...................................140 W x 2 Headphone rated output (When speaker rated output set to 8 Ω load) ............120mW x 2 (32 Ω load) Total harmonic distortion (20Hz – 20kHz simultaneous drive of both channels, 8 Ω load) .............0.05 % Output band width (8Ω... -
Page 31: Cleaning Of Equipment External Surfaces
• dip a soft, lint free in the solution and wring the it is damp. • wipe the equipment with the damp cloth. • dry the equipment by wiping it with a dry cloth. - Page 32 Memo...
- Page 33 You can find your nearest authorized distributor or dealer on our website. is a registered trademark. Printed in Japan 05/2009 541110275035M mzh-g...
Need help?
Do you have a question about the PM-15S2 and is the answer not in the manual?
Questions and answers