Table of Contents
Advertisement
Quick Links
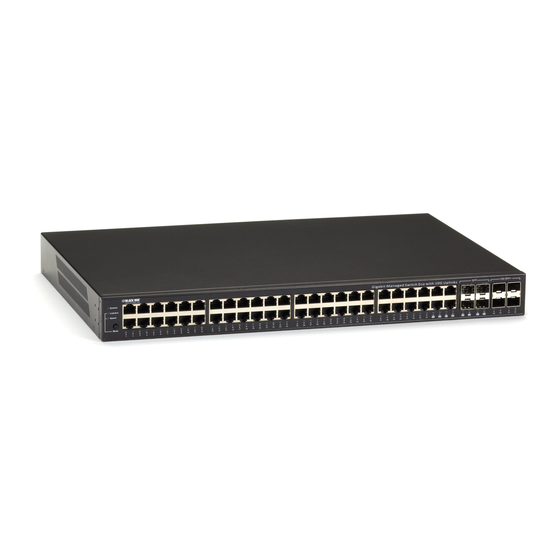
24 + or 48 + 4-Port Gigabit Managed Switch with SFP+ 10G
User's Manual
The switches provide 24 or 48 ports of Gigabit connectivity
plus four 10G ports.
Customer
Support
Information
LGB5028A User's Manual
Order toll-free in the U.S.: Call 877-877-BBOX (outside U.S. call 724-746-5500)
FREE technical support 24 hours a day, 7 days a week: Call 724-746-5500 or fax 724-746-0746
Mailing address: Black Box Corporation, 1000 Park Drive, Lawrence, PA 15055-1018
Web site: www.blackbox.com • E-mail: info@blackbox.com
BLACK BOX
LGB5028A
LGB5052A
®
Advertisement
Table of Contents

Related Manuals for Black Box LGB5028A


Summary of Contents for Black Box LGB5028A
-
Page 1: Black Box
Order toll-free in the U.S.: Call 877-877-BBOX (outside U.S. call 724-746-5500) Customer FREE technical support 24 hours a day, 7 days a week: Call 724-746-5500 or fax 724-746-0746 Support Mailing address: Black Box Corporation, 1000 Park Drive, Lawrence, PA 15055-1018 Information Web site: www.blackbox.com • E-mail: info@blackbox.com LGB5028A User‘s Manual... - Page 2 Trademarks Used in this Manual Trademarks Used in this Manual Black Box and the Double Diamond logo are registered trademarks of BB Technologies, Inc. AppleTalk is a registered trademark of Apple Computer, Inc. Intel and Xerox are registered trademarks of Intel Corporation.
- Page 3 Le présent appareil numérique n’émet pas de bruits radioélectriques dépassant les limites applicables aux appareils numériques de la classe A prescrites dans le Règlement sur le brouillage radioélectrique publié par Industrie Canada. 724-746-5500 | blackbox.com Page 3 LGB5028A User‘s Manual...
-
Page 4: Instrucciones De Seguridad
El aparato ha sido expuesto a la lluvia; o D: El aparato parece no operar normalmente o muestra un cambio en su desempeño; o El aparato ha sido tirado o su cubierta ha sido dañada. 724-746-5500 | blackbox.com Page 4 LGB5028A User‘s Manual... -
Page 5: Safety Instructions
After a firmware upgrade, the switch will reset the configuration automatically to the latest firmware version. This manual provides specific information on how to operate and use the management functions of the switch. 724-746-5500 | blackbox.com Page 5 LGB5028A User‘s Manual... -
Page 6: Table Of Contents
2.1 Introduction ................................. 13 2.2 Features ..................................13 2.3 What‘s Included ................................13 2.4 Hardware Description ..............................14 2.4.1 LGB5028A ................................ 14 2.4.2 LGB5052A ................................ 15 3. Operation of Web-Based Management ..........................16 4. Making Network Connections ............................18 4.1 Connecting Network Devices ............................18 4.2 Cabling Guidelines ............................... - Page 7 Groups Information .............................93 6.7.3 Statistics ...............................93 6.8 LLDP ..................................94 6.8.1 LLDP Configuration ............................94 6.8.2 LLDP Neighbors ............................97 6.8.3 LLDP-MED Configuration ..........................98 6.8.4 LLDP-MED Neighbors ..........................103 6.8.5 EEE ................................106 6.8.6 Port Statistics ............................. 107 724-746-5500 | blackbox.com Page 7 LGB5028A User‘s Manual...
- Page 8 6.19 Trap Event Severity ..............................168 6.20 SMTP Configuration ..............................169 6.21 UPnP .................................. 170 Security .................................. 172 7.1 Source Guard ................................172 7.1.1 Configuration ............................. 172 7.1.2 Static Table ..............................173 7.1.3 Dynamic Table............................174 724-746-5500 | blackbox.com Page 8 LGB5028A User‘s Manual...
- Page 9 Import Config ............................213 8.5 Diagnostics................................214 8.5.1 Ping ................................214 8.5.2 Ping6 ................................. 214 8.5.3 VeriPHY ..............................215 Appendix A. Glossary ................................217 A.1 Web-Based Management ............................217 A.2 Networking Terms ..............................225 724-746-5500 | blackbox.com Page 9 LGB5028A User‘s Manual...
- Page 10 Table of Contents Appendix B. Troubleshooting ..............................227 B.1 Basic Troubleshooting Tips ............................227 B.2 Contacting Black Box ...............................228 B.3 Shipping and Packaging ............................228 Appendix C. Cables .................................229 C.1 Twisted-Pair Cable and Pin Assignments........................229 C.2 10BASE-T/100BASE-TX Pin Assignments........................229 C.3 Straight-Through Wiring ............................229 C.4 Crossover Wiring ..............................230...
-
Page 11: Specifications
Ports 45–48: RJ-45 connector/(100/1000M) SFP, Ports 49–52: 1G/10G SFP ports Ports — LGB5028A: (20) 10/100/1000 Mbps twisted-pair, (4) 100M/1G SFP combo ports, (4) 1G/10Gbps fiber ports; LGB5052A: (44) 10/100/100 Mbps twisted-pair, (4) 100M/1G SFP combo ports, (4) 1G/10Gbps fiber ports Switching Database —... -
Page 12: Standards
IEEE 802.3ad Link Aggregation Control Protocol (LACP) IEEEE 802.1AB Link Layer Discovery Protocol (LLDP) 1.5 Compliances Compliance — EN55022 (CISPR 22) Class A EN 61000-3; FCC Class A Immunity — EN 61000-4-2/3/4/5/6/8/11, EN 55024 724-746-5500 | blackbox.com Page 12 LGB5028A User‘s Manual... -
Page 13: Overview
RMON (Groups 1, 2, 3, 9) protocols. Configure and monitor the switch out-of-band via a null-modem serial cable. (See Appendix C for wiring options.) 2.3 What’s Included Your package should include the following items. If anything is missing or damaged, contact Black Box Technical Support at 724-746-5500 or info@blackbox.com. LGB5028A: •... -
Page 14: Hardware Description
Chapter 2: Overview 2.4 Hardware Description 2.4.1 LGB5028A FIgures 2-1 and 2-2 show the front and back panels of the LGB5028A. Table 2-1 describes its components. Figure 2-1. LGB5028A front panel. Figure 2-2. LGB5028A back panel. Table 2-1. LGB5028A components. -
Page 15: Lgb5052A
(48) 10/100/1000BASE-T RJ-45 ports Copper Ethernet ports. 100/1G SEP combo ports 1G/100 Mbps SFP ports 1G/10G SFP ports 10G/1G SFP ports Console connector DB9 male console port AC power socket IEC 320 power socket 724-746-5500 | blackbox.com Page 15 LGB5028A User‘s Manual... -
Page 16: Operation Of Web-Based Management
NOTE: To configure the switch, you can see the instructions in Chapter 5. Or, access the Switch and click on the “help” button under the Web GUI. The switch’s help screens will pop up. 724-746-5500 | blackbox.com Page 16 LGB5028A User‘s Manual... - Page 17 Chapter 3: Operation of Web-Based Management Figure QS-19. The switch’s Web help screen. Figure 3-2. System Information Help screen. 724-746-5500 | blackbox.com Page 17 LGB5028A User‘s Manual...
-
Page 18: Making Network Connections
STEP 3: As each connection is made, the Link LED (on the switch) corresponding to each port will light green (1000 Mbps) or amber (100 Mbps) to indicate that the connection is valid. 724-746-5500 | blackbox.com Page 18 LGB5028A User‘s Manual... -
Page 19: System Configuration
System Date: Show system time of the switch. Its format: day of week, month, day, hours:minutes:seconds, year. System Uptime: The time accumulated since this switch is powered up. Its format is day, hour, minute, second. 724-746-5500 | blackbox.com Page 19 LGB5028A User‘s Manual... -
Page 20: Configuration
The first character must be an alpha character. And the first or last character must not be a minus sign. The allowed string length is 0 to 255. 724-746-5500 | blackbox.com Page 20 LGB5028A User‘s Manual... -
Page 21: Cpu Load
“Month,” “Day,” “Hour,” “Minute.” and “Second” within the valid value range indicated in each item. Web Interface To configure Time in the Web interface: 1. Click “Time,” “Manual.” 2. Specify the Time parameter in manual parameters. 3. Click “Save.” 724-746-5500 | blackbox.com Page 21 LGB5028A User‘s Manual... -
Page 22: Ntp
Figure 5-4. The Time Configuration screen. Parameter Description Clock Source: Select the clock source for the LGB5028A or LGB5052A. Choose from“Use local Settings” or “Use NTP Server.” Local Time: Show current time of the system. Time Zone Offset: Provide the time zone offset relative to UTC/GMT. The offset is given in minutes east of GMT. The valid range is from -720 to +720 minutes. -
Page 23: Account
Web Interface To configure Account in the Web interface: 1. Click “System,” “Account,” “Users.” 2. Click “Add new user.” 3. Specify the “User Name” parameter. 4. Click “Save.” 724-746-5500 | blackbox.com Page 23 LGB5028A User‘s Manual... -
Page 24: Privilege Level
VLAN, privilege levels from 1 to 15. Web Interface To configure Privilege Level in the Web interface: 1. Click “System,” “Account,” and “Privilege Level.” 2. Specify the Privilege parameter. 3. Click “Save.” 724-746-5500 | blackbox.com Page 24 LGB5028A User‘s Manual... - Page 25 Chapter 5: System Configuration Figure 5-7. The Privilege Level Configuration screen. 724-746-5500 | blackbox.com Page 25 LGB5028A User‘s Manual...
-
Page 26: Ipv4
The “Current” column is used to show the active IP configuration. Web Interface To configure an IP address in the Web interface: 1. Click “System,” “IP Configuration.” 2. Specify the IPv4 settings, and enable DNS proxy service if required. 3. Click “Save.” 724-746-5500 | blackbox.com Page 26 LGB5028A User‘s Manual... -
Page 27: Ipv6
Web Interface To configure Management IPv6 of the switch in the Web interface: 1. Click “System,” “IPv6 Configuration.” 2. Specify the IPv6 settings, and enable Auto Configuration service if required. 3. Click “Save.” 724-746-5500 | blackbox.com Page 27 LGB5028A User‘s Manual... -
Page 28: Syslog
To configure Syslog configuration in the Web interface: 1. Click “System,” “Syslog.” 2. Specify the syslog parameters, including the Syslog server’s IP Address and Port number. 3. Enable Sylog. 4. Click “Save.” 724-746-5500 | blackbox.com Page 28 LGB5028A User‘s Manual... -
Page 29: Log
Error: Send errors. 5.5.2 Log This section describes the switch’s system log information. Web Interface To display the log information in the Web interface: 1. Click “Syslog,” “Log.” 2. Display the log information. 724-746-5500 | blackbox.com Page 29 LGB5028A User‘s Manual... -
Page 30: Detailed Log
5.5.3 Detailed Log This section describes the switch’s detailed log information. Web Interface To display the detailed log information in the Web interface: 1. Click “Syslog,” “Detailed Log.” 2. Display the log information. 724-746-5500 | blackbox.com Page 30 LGB5028A User‘s Manual... -
Page 31: Snmp
Once completing the setting, click on the “Apply” button, and the setting takes effect. Web Interface To display SNMP system in the Web interface: 1. Click “SNMP,” “System.” 2. Enable or disable the SNMP function. 3. Specify the Engine ID. 4. Click “Apply.” 724-746-5500 | blackbox.com Page 31 LGB5028A User‘s Manual... -
Page 32: Communities
To display the configure SNMP Communities in the Web interface: 1. Click “SNMP,” “Communities.” 2. Click “Add new community.” 3. Specify the SNMP communities parameters. 4. Click “Save.” 5. If you want to modify or clear the setting, click “Reset.” 724-746-5500 | blackbox.com Page 32 LGB5028A User‘s Manual... -
Page 33: Users
“Add new user” button, enter the user information, then check “Save.” Max Group Number: 10. Web Interface To configure SNMP Users in the Web interface: 1. Click “SNMP,” “Users.” 2. Specify the Privilege parameter. 3. Click “Save.” 724-746-5500 | blackbox.com Page 33 LGB5028A User‘s Manual... - Page 34 Privacy Protocol: Indicate the privacy protocol that this entry should belong to. Possible privacy protocols are: None: No privacy protocol. DES: An optional flag to indicate that this user uses DES authentication protocol. 724-746-5500 | blackbox.com Page 34 LGB5028A User‘s Manual...
-
Page 35: Groups
Delete: Check to delete the user entry. It will be deleted after saving. Security Model: Indicate the security model that this user entry should belong to. Possible security models are: v1: Reserved for SNMPv1. v2c: Reserved for SNMPv2c. usm: User-based Security Model (USM). 724-746-5500 | blackbox.com Page 35 LGB5028A User‘s Manual... -
Page 36: Views
View Type: Indicate the view type that this entry should belong to. Possible view types are: included: An optional flag to indicate that this view subtree should be included. excluded: An optional flag to indicate that this view subtree should be excluded. 724-746-5500 | blackbox.com Page 36 LGB5028A User‘s Manual... -
Page 37: Access
Group Name: A string identifying the group name that this entry should belong to. The allowed string length is 1 to 32, and the allowed content is ASCII characters from 33 to 126. Security Model: Indicate the security model that this entry should belong to. Possible security models are: any: Any security model accepted(v1|v2c|usm). 724-746-5500 | blackbox.com Page 37 LGB5028A User‘s Manual... -
Page 38: Trap
1. Click “SNMP,” “Trap.” 2. Display the SNMP Trap Hosts information table. 3. Choose a entry to display and modify the detail parameters or click on the “Delete” button to delete the trap hosts entry. 724-746-5500 | blackbox.com Page 38 LGB5028A User‘s Manual... - Page 39 Community/Security Name: The length of “Community/Security Name” string is restricted to 1–32. Severity Level: Indicate what kind of message the switch will send to Security Level. Possible modes are: Info: Send information, warnings, and errors. Warning: Send warnings and errors. Error: Send errors. 724-746-5500 | blackbox.com Page 39 LGB5028A User‘s Manual...
- Page 40 Authentication Password: The length of “MD5 Authentication Password” is restricted to 8–32. The length of “SHA Authentication Password” is restricted to 8–40. Privacy Protocol: You can set DES encryption for UserName. Privacy Password: The length of “Privacy Password ” is restricted to 8–32. 724-746-5500 | blackbox.com Page 40 LGB5028A User‘s Manual...
-
Page 41: Configuration
Parameter Description Port: This is the logical port number for this row. Link: The current link state is displayed graphically. Green indicates the link is up and red that it is down. 724-746-5500 | blackbox.com Page 41 LGB5028A User‘s Manual... -
Page 42: Port Description
1. Click “Configuration,” “Port,” then “Port Description.” 2. Specify the detail Port alias or an alphanumeric string describing the full name and version identification for the system’s hardware type, software version, and networking application. 3. Click “Save.” 724-746-5500 | blackbox.com Page 42 LGB5028A User‘s Manual... -
Page 43: Traffic Overview
1. Click “Configuration,” “Port,” then “Traffic Overview.” 2. If you want to auto-refresh, click on the ”Auto-refresh” button. 3. Click “Refresh” to refresh the port statistics or “Clear” to clear all information. 724-746-5500 | blackbox.com Page 43 LGB5028A User‘s Manual... -
Page 44: Detailed Statistics
2. Scroll through the Port Index to select the port for which you want to show the detailed port statistics overview. 3. If you want to auto-refresh the information then click on the “Auto-refresh” button. 4. Click “Refresh” to refresh the port detailed statistics or click “Clear” to clear al information. 724-746-5500 | blackbox.com Page 44 LGB5028A User‘s Manual... - Page 45 Rx Undersize: The number of short 1 frames received with valid CRC. Rx Oversize: The number of long 2 frames received with valid CRC. Rx Fragments: The number of short 1 frames received with invalid CRC. 724-746-5500 | blackbox.com Page 45 LGB5028A User‘s Manual...
-
Page 46: Qos Statistics
2. If you want to auto-refresh the information, click on the ”Auto-refresh” button. 3. Click “ Refresh“ to refresh the queueing counters or click “Clear” to clear all information. Figure 6-5. The Queuing Counters Overview screen. 724-746-5500 | blackbox.com Page 46 LGB5028A User‘s Manual... -
Page 47: Sfp Information
Vendor OUI: Display the manufacturer's OUI code which is assigned by IEEE. Vendor Name: Display the company name of the module manufacturer. Vendor PN: Display the module manufacturer’s part number. Vendor Rev (Revision): Display the module revision. 724-746-5500 | blackbox.com Page 47 LGB5028A User‘s Manual... -
Page 48: Acl
6.2 ACL The LGB5028A or LGB5052A switch access control list (ACL) is probably the most commonly used object in the IOS. It is used not only for packet filtering, but also for selecting types of traffic to be analyzed, forwarded, or influenced in some way. The ACLs are divided into EtherTypes, IPv4, ARP protocol, MAC, and VLAN parameters, etc. - Page 49 Rate Limiter ID: Select which rate limiter to apply on this port. The allowed values are “Disabled” or the values 1 through 16. The default value is “Disabled.” Port Redirect: Enables you to select which port frames are redirected. The alllowed values are “Disabled” on a specific port number. The default value is “Disabled.” 724-746-5500 | blackbox.com Page 49 LGB5028A User‘s Manual...
-
Page 50: Rate Limiters
3. Scroll through the units in pps or kbps. 4. Click on the “Save” button to save the setting. 5. To cancel the setting, click on the “Reset” button. The settings will revert to previously saved values. 724-746-5500 | blackbox.com Page 50 LGB5028A User‘s Manual... -
Page 51: Access Control List
ACE that is defined. The maximum number of ACEs is 256 on each switch. Click on the lowest plus sign to add a new ACE to the list. The reserved ACEs are used for internal protocol. They cannot be edited or deleted, and the order sequence cannot be changed. The priority is highest. 724-746-5500 | blackbox.com Page 51 LGB5028A User‘s Manual... - Page 52 Ingress Port: Indicate the ingress port of the ACE. Possible values are: Any: The ACE will match any ingress port. Policy: The ACE will match ingress ports with a specific policy. Port: The ACE will match a specific ingress port. 724-746-5500 | blackbox.com Page 52 LGB5028A User‘s Manual...
- Page 53 “up arrow” button: Moves the ACE up the list. “down arrow” button: Moves the ACE down the list. “X” button: Deletes the ACE. “+’ button: The lowest plus sign adds a new entry at the bottom of the ACE listings. 724-746-5500 | blackbox.com Page 53 LGB5028A User‘s Manual...
-
Page 54: Acl Status
To display the ACL status in the Web interface: 1. Click “Configuration,” “ACL,” then “ACL status.” 2. To auto-refresh the information, click on the “Auto-refresh” button. 3. Click ““Refresh” to refresh the ACL Status. 724-746-5500 | blackbox.com Page 54 LGB5028A User‘s Manual... - Page 55 CPU: Forward the packet that matched the specific ACE to CPU. CPU Once: Forward the first packet that matched the specific ACE to CPU. Counter: The counter indicates the number of times the ACE encountered a frame. 724-746-5500 | blackbox.com Page 55 LGB5028A User‘s Manual...
-
Page 56: Aggregation
Enable the Aggregation Group ID and Port members. 3. Click on the “Save” button to save the setting. 4. To cancel the setting, click the “Reset” button. It will revert to previously saved values. 724-746-5500 | blackbox.com Page 56 LGB5028A User‘s Manual... - Page 57 Local: The group members reside on the same unit. Each local aggregation may consist of up to 16 members. Group ID: Indicates the group ID for the settings contained in the same row. Group ID “Normal” indicates there is no aggrega- tion. Only one group ID is valid per port. 724-746-5500 | blackbox.com Page 57 LGB5028A User‘s Manual...
-
Page 58: Lacp
3. Scroll the Role with “Active” or “Passive.” Default is “Active.” 4. Click “Save” to save the setting. 5. To cancel the setting, click the “Reset” button. It will revert to previously saved values. 724-746-5500 | blackbox.com Page 58 LGB5028A User‘s Manual... - Page 59 Role: Role shows the LACP activity status. “Active” will transmit LACP packets each second; “Passive” will wait for a LACP packet from a partner (in other words, it will “speak if spoken to”). Buttons: Save: Click to save changes. 724-746-5500 | blackbox.com Page 59 LGB5028A User‘s Manual...
- Page 60 To display the LACP Port status in the Web interface: 1. Click “Configuration,” “LACP,” “Port Status.” 2. To auto-refresh the information, click on the “Auto-refresh” button. 3. Click “Refresh“ to refresh the LACP Port Status. 724-746-5500 | blackbox.com Page 60 LGB5028A User‘s Manual...
- Page 61 Key: The key assigned to this port. Only ports with the same key can aggregate together. Aggr ID: The Aggregation ID assigned to this aggregation group. IDs 1 and 2 are GLAGs while IDs 3–14 are LLAGs. 724-746-5500 | blackbox.com Page 61 LGB5028A User‘s Manual...
- Page 62 To display the LACP Port statistics in the Web interface: 1. Click “Configuration,” “LACP,” “Port Statistics.” 2. To auto-refresh the information, check the “Auto-refresh” button. 3. Click “Refresh” to refresh the LACP Statistics. Figure 6-15. The LACP Statistics screen. 724-746-5500 | blackbox.com Page 62 LGB5028A User‘s Manual...
-
Page 63: Spanning Tree
2. Scroll to select the parameters and write down available value of parameters in blank field in Basic Settings. 3. Enable or disable the parameters and write down available value of parameters in the blank field in Advanced settings. 724-746-5500 | blackbox.com Page 63 LGB5028A User‘s Manual... - Page 64 Edge Port BPDU Guard: Control whether a port explicitly configured as edge will disable itself when it receives a BPDU. The port will enter the error-disabled state, and will be removed from the active topology. 724-746-5500 | blackbox.com Page 64 LGB5028A User‘s Manual...
-
Page 65: Msti Mapping
2. Specify the configuration identification parameters in the field. Specify the VLANs mapped blank field. 3. Click “Save” to save the setting. 4. To cancel the setting, click the “Reset” button. It will revert to previously saved values. Figure 6-18. The MSTI Configuration screen. 724-746-5500 | blackbox.com Page 65 LGB5028A User‘s Manual... -
Page 66: Msti Priorities
2. Use the drop-down menu to select the priority (maximum is 240). Priority default is 128. 3. Click “Save” to save the setting 4. To cancel the setting, click the “Reset” button. It will revert to previously saved values. 724-746-5500 | blackbox.com Page 66 LGB5028A User‘s Manual... -
Page 67: Cist Ports
3. Enable or disable the STP, then scoll and set all parameters of the CIST normal Port configuration. 4. Click “Save” to save the setting. 5. To cancel the setting, click the “Reset” button. It will revert to previously saved values. 724-746-5500 | blackbox.com Page 67 LGB5028A User‘s Manual... - Page 68 Chapter 6: Configuration Figure 6-20. The STP CIST Port Configuration screen. 724-746-5500 | blackbox.com Page 68 LGB5028A User‘s Manual...
-
Page 69: Msti Ports
An MSTI port is a virtual port that is initialized separately for each active CIST (physical) port for each MSTI instance configured on and applicable to the port. The MSTI instance must be selected before displaying actual MSTI port configuration options. It contains MSTI port settings for physical and aggregated ports. 724-746-5500 | blackbox.com Page 69 LGB5028A User‘s Manual... - Page 70 4. Scroll to set all parameters of the MSTI Port configuration. 5. Click “Save” to save the setting. 6. To cancel the setting, click the “Reset” button. It will revert to previously saved values. Figure 6-21. The MSTI Port Configuration screen. 724-746-5500 | blackbox.com Page 70 LGB5028A User‘s Manual...
-
Page 71: Bridge Status
Root Cost: Root Path Cost. For the root bridge it is zero. For all other bridges, it is the sum of the Port Path Costs on the least cost path to the root bridge. Topology Flag: The current state of the Topology Change Flag of this Bridge instance. Topology Change Last: The time since last Topology Change occurred. 724-746-5500 | blackbox.com Page 71 LGB5028A User‘s Manual... -
Page 72: Port Status
1. Click “Configuration,” “Spanning Tree,” “STP Port Status.” 2. To auto-refresh the information, check the “Auto-refresh” button. 3. Click “Refresh” to refresh the STP Bridges. Figure 6-23. The STP Port Status screen. 724-746-5500 | blackbox.com Page 72 LGB5028A User‘s Manual... -
Page 73: Port Statistics
Discarded Illegal: The number of illegal Spanning Tree BPDUs received (and discarded) on the port. Auto-refresh: Check this box to refresh the information automatically. Upper right icon (Refresh, Clear): You can click one of these buttons to refresh or clear the STP Statistics information manually. 724-746-5500 | blackbox.com Page 73 LGB5028A User‘s Manual... -
Page 74: Igmp Snooping
3. Select which port will become a Router Port or enable/disable the Fast Leave function.. 4. Scroll to set the Throttling parameter. 5. Click “Save” to save the setting. 6. To cancel the setting, click the “Reset” button. It will revert to previously saved values. 724-746-5500 | blackbox.com Page 74 LGB5028A User‘s Manual... - Page 75 Unregistered IPMCv4 Flooding Enabled: Enable unregistered IPMCv4 traffic flooding. IGMP SSM Range: SSM (Source-Specific Multicast) Range allows the SSM-aware hosts and routers to run the SSM service model for the groups in the address range. Format: (IP address/sub mask). 724-746-5500 | blackbox.com Page 75 LGB5028A User‘s Manual...
-
Page 76: Vlan Configuration
Figure 6-27. The IGMP Snooping VLAN Configuration. Parameter Description VLAN ID: Displays the VLAN ID of the entry. Snooping Enabled: Enable the per-VLAN IGMP Snooping. Up to 32 VLANs can be selected. 724-746-5500 | blackbox.com Page 76 LGB5028A User‘s Manual... -
Page 77: Port Group Filtering
1. Click “Configuration,” “IGMP Snooping,” “Port Group Filtering.” 2. Click “Add new Filtering Group.” 3. Scroll the Port to enable the Port Group Filtering. Specify the Filtering Groups in the blank field. 724-746-5500 | blackbox.com Page 77 LGB5028A User‘s Manual... -
Page 78: Status
1. Click “Configuration,” “IGMP Snooping,” “Status.” 2. To auto-refresh the information, check the box next to “Auto-refresh.” 3. Click “Refresh” to refresh the IGMP Snooping Status. 4. Click “Clear” to clear the IGMP Snooping Status. 724-746-5500 | blackbox.com Page 78 LGB5028A User‘s Manual... - Page 79 Chapter 6: Configuration Figure 6-29. The IGMP Snooping Status screen. Parameter Description VLAN ID: The VLAN ID of the entry. Querier Version: Working Querier Version currently. Host Version: Working Host Version currently. 724-746-5500 | blackbox.com Page 79 LGB5028A User‘s Manual...
-
Page 80: Group Information
When the end is reached, the text "No more entries" is shown in the displayed table. IGMP Group Table Columns VLAN ID: VLAN ID of the group. Groups: Group address of the group displayed. 724-746-5500 | blackbox.com Page 80 LGB5028A User‘s Manual... -
Page 81: Ipv4 Ssm Information
Clicking the button will update the displayed table starting from that or the next closest IGMPv3 Information Table match. In addition, the two input fields will—upon a button click—assume the value of the first displayed entry, allowing for continuous refresh with the same start address. 724-746-5500 | blackbox.com Page 81 LGB5028A User‘s Manual... -
Page 82: Mld Snooping
VLAN that have MLD hosts for that address. It drops that traffic for ports on the VLAN that have no MLD hosts. 724-746-5500 | blackbox.com Page 82 LGB5028A User‘s Manual... -
Page 83: Basic Configuration
3. Scroll to select the Throttling mode with unlimited or 1 to 10. 4. Click “Save” to save the setting. 5. To cancel the setting, click the “Reset” button. It will revert to previously saved values. 724-746-5500 | blackbox.com Page 83 LGB5028A User‘s Manual... - Page 84 Chapter 6: Configuration Figure 6-33. The MLD Snooping Basic Configuration screen. 724-746-5500 | blackbox.com Page 84 LGB5028A User‘s Manual...
-
Page 85: Vlan Configuration
3. Click “ Refresh“ to refresh an entry of the MLD Snooping VLAN configuration Information. 4. Click “<< or >>” to move to a previous or next entry. Figure 6-34. The MLD Snooping VLAN Configuration screen. Parameter Description VLAN ID: The VLAN ID of the entry. 724-746-5500 | blackbox.com Page 85 LGB5028A User‘s Manual... -
Page 86: Port Group Filtering
3. Specify the Filtering Groups with entries per page. 4. Click the “Save” button to save the setting. 5. To cancel the setting, click the “Reset” button. It will revert to previously saved values. 724-746-5500 | blackbox.com Page 86 LGB5028A User‘s Manual... -
Page 87: Status
1. Click “Configuration,” “MLD Snooping,” “Status.” 2. Check the box to auto-refresh the information. 3. Click “Refresh” to refresh an entry of the MLD Snooping Status Information. 4. Click “Clear” to clear the MLD Snooping Status. 724-746-5500 | blackbox.com Page 87 LGB5028A User‘s Manual... - Page 88 Querier Version: Currently working querier version. Host Version: Currenlty working host version. Querier Status: Show the querier status as “ACTIVE” or “IDLE.” Queries Transmitted: The number of transmitted queries. Queries Received: The number of received queries. 724-746-5500 | blackbox.com Page 88 LGB5028A User‘s Manual...
-
Page 89: Group Information
VLAN ID: VLAN ID of the group. Groups: Group address of the group displayed. Port Members: Ports under this group. Auto-refresh: Click on the auto-refresh icon and the device will refresh the log automatically. 724-746-5500 | blackbox.com Page 89 LGB5028A User‘s Manual... -
Page 90: Ipv6 Ssm Information
Source Address: Show the IP address of the source. Currently, the system limits the total number of IP source addresses for filtering to 128. Type: Indicate the Type. It can be either “Allow” or “Deny.” 724-746-5500 | blackbox.com Page 90 LGB5028A User‘s Manual... -
Page 91: Mvr
2. Scroll the MVR mode to enable or disable parameters. 3. Click the “Save” button to save the setting. 4. To cancel the setting, click the “Reset” button. It will revert to previously saved values. 724-746-5500 | blackbox.com Page 91 LGB5028A User‘s Manual... - Page 92 VLAN ID: Specify the Multicast VLAN ID. Port: The physical switch port. Mode: Enable MVR on the port. Type: Specify the MVR port type on the port. Immediate Leave: Enable the fast leave on the port. 724-746-5500 | blackbox.com Page 92 LGB5028A User‘s Manual...
-
Page 93: Groups Information
2. To auto-refresh the information, check the box next to “Auto-refresh.” 3. Click the “Refresh” button to refresh an MVR Statistics Information entry. 4. Click “<<” and “ >>” to move to the previous or next entry. 724-746-5500 | blackbox.com Page 93 LGB5028A User‘s Manual... -
Page 94: Lldp
2. Modify LLDP timing parameters. 3. Set the required mode for transmitting or receiving LLDP messages. 4. Specify the information to include in the TLV field of advertised messages. 5. Click “Save.” 724-746-5500 | blackbox.com Page 94 LGB5028A User‘s Manual... - Page 95 Tx Delay: If some configuration is changed (e.g. the IP address) a new LLDP frame is transmitted, but the time between the LLDP frames will always be at least the value of Tx Delay seconds. Tx Delay cannot be larger than ⁄ of the Tx Interval value. Valid values are restricted to 1–8192 seconds. 724-746-5500 | blackbox.com Page 95 LGB5028A User‘s Manual...
- Page 96 Mgmt Addr: Optional TLV: When checked, the “management address” is included in LLDP information transmitted. Buttons: Save: Click to save changes. Reset: Click to undo any changes made locally and revert to previously saved values. 724-746-5500 | blackbox.com Page 96 LGB5028A User‘s Manual...
-
Page 97: Lldp Neighbors
When a capability is enabled, the capability is followed by (+). If the capability is disabled, the capability is followed by (-). System Description: System Description is the port description advertised by the neighbor unit. 724-746-5500 | blackbox.com Page 97 LGB5028A User‘s Manual... -
Page 98: Lldp-Med Configuration
3. Modify “Coordinates Location” parameters. 4. Fill “Civic Address Location” parameters. 5. Add new policy. 6. Click “Save.” This will show Policy Port Configuration. 7. Select “Policy ID” for each port. 8. Click “Save.” 724-746-5500 | blackbox.com Page 98 LGB5028A User‘s Manual... - Page 99 VoIP systems in general. Advertise only the information that is specifically relevant to particular endpoint types (for example, only advertise the voice network policy to permitted voice-capable devices). This will conserve the limited LLDPDU space and reduce security and system integrity issues. 724-746-5500 | blackbox.com Page 99 LGB5028A User‘s Manual...
- Page 100 State: National subdivisions (state, canton, region, province, prefecture). County: County, parish, gun (Japan), and district. City: City, township, shi (Japan)—Example: Copenhagen. City district: City division, borough, city district, ward, chou (Japan). Block (Neighborhood): Neighborhood, block. Street: Street—Example: Poppelvej. 724-746-5500 | blackbox.com Page 100 LGB5028A User‘s Manual...
- Page 101 This network policy is potentially advertised and associated with multiple sets of application types supported on a given port. The application types specifically addressed are: 1. Voice 2. Guest Voice 3. Softphone Voice 4. Videoconferencing 724-746-5500 | blackbox.com Page 101 LGB5028A User‘s Manual...
- Page 102 Untagged indicates that the device is using an untagged frame format, so it does not include a tag header as defined by IEEE 802.1Q-2003. In this case, both the VLAN ID and the Layer 2 priority fields are ignored and only the DSCP value is relevant. 724-746-5500 | blackbox.com Page 102 LGB5028A User‘s Manual...
-
Page 103: Lldp-Med Neighbors
NOTE: If your network has no devices that support LLDP-MED, then the table will show “No LLDP-MED neighbor information found.” Parameter Description Port: The port on which the LLDP frame was received. 724-746-5500 | blackbox.com Page 103 LGB5028A User‘s Manual... - Page 104 Discovery services defined in this class include provision of location identifier (including ECS/E911 information), embedded L2 switch support, and inventory management. LLDP-MED capabilities: LLDP-MED capabilities describe the neighborhood unit’s LLDP-MED capabilities. The possible capabilities are: 724-746-5500 | blackbox.com Page 104 LGB5028A User‘s Manual...
- Page 105 802.1Q-2003, meaning that only the IEEE 802.1D priority level is significant and the default PVID of the ingress port is used instead. Priority: Priority is the Layer 2 priority to be used for the specified application type. Choose from eight priority levels (0 through 724-746-5500 | blackbox.com Page 105 LGB5028A User‘s Manual...
-
Page 106: Eee
Resolved Tx Tw: The resolved Tx Tw for this link. NOTE: This is NOT the link partner. The resolved value that is the actual "tx wakeup time” and used for this link (based on EEE information exchanged via LLDP). 724-746-5500 | blackbox.com Page 106 LGB5028A User‘s Manual... -
Page 107: Port Statistics
1. Click “LLDP,” than click “Port Statistics” to show LLDP counters. 2. Click “Refresh” for manual update Web screen. 3. Click “Auto-refresh” for auto-update Web screen. 4. Click “Clear” to clear all counters. 724-746-5500 | blackbox.com Page 107 LGB5028A User‘s Manual... - Page 108 Total Neighbors Entries Added: Shows the number of new entries added since switch reboot. Total Neighbors Entries Deleted: Shows the number of new entries deleted since switch reboot. Total Neighbors Entries Dropped: Shows the number of LLDP frames dropped because the entry table is full. 724-746-5500 | blackbox.com Page 108 LGB5028A User‘s Manual...
-
Page 109: Filtering Database
MAC table here. Web Interface To configure the MAC address table in the Web interface: Aging Configuration 1. Click “Configuration.” 2. Specify the “Disable Automatic Aging” and “Aging Time.” 3. Click “Save.” 724-746-5500 | blackbox.com Page 109 LGB5028A User‘s Manual... - Page 110 If the learning mode for a given port is grayed out, another module is in control of the mode, so that it cannot be changed by the user. An example of such a module is the MAC-based authentication under 802.1X. Each port can learn based upon the following settings: 724-746-5500 | blackbox.com Page 110 LGB5028A User‘s Manual...
-
Page 111: Dynamic Mac Table
To display the MAC address table in the Web interface: 1. Click “Dynamic MAC Table.” 2. Specify the VLAN and MAC address. 3. Display MAC address table. Figure 6-49. The MAC Address Table Information screen. 724-746-5500 | blackbox.com Page 111 LGB5028A User‘s Manual... -
Page 112: Vlan
This page enables you to add and delete VLANs as well as add and delete port members of each VLAN. Web Interface To configure VLAN membership in the Web interface: 1. Click “VLAN Membership Configuration.” 2. Specify Management VLAN ID. (0–4094) 3. Click “Save.” 724-746-5500 | blackbox.com Page 112 LGB5028A User‘s Manual... - Page 113 Upper right icon (Refresh, <<, >>): Click the “Refresh” button to refresh the VLAN entries manually. Or, press “Clear” to clean up the VLAN table. Press “<<” or “>>” to go to the next/previous page of the table. 724-746-5500 | blackbox.com Page 113 LGB5028A User‘s Manual...
-
Page 114: Ports
“Access,” “Trunk,” or “Hybrid.” Web Interface To configure VLAN Port configuration in the Web interface: 1. Click “VLAN Port Configuration.” 2. Specify the VLAN Port Configuration parameters. 3. Click “Save.” 724-746-5500 | blackbox.com Page 114 LGB5028A User‘s Manual... - Page 115 Custom S-ports. Custom Ethertype enables the user to change the Ethertype value on a port to any value to support network devices that do not use the standard 0x8100 Ethertype field value on 802.1Q-tagged or 802.1p-tagged frames. 724-746-5500 | blackbox.com Page 115 LGB5028A User‘s Manual...
-
Page 116: Switch Status
To Display VLAN membership status in the Web interface: 1. Click “VLAN membership.” 2. Specify Static, NAS, GVRP, MVR, Voice, VLAN, MSTP, VCL, or Combined. 3. Display membership information. Figure 6-52. The VLAN Membership Status screen. 724-746-5500 | blackbox.com Page 116 LGB5028A User‘s Manual... -
Page 117: Port Status
Web Interface To display VLAN port status in the Web interface: 1. Click “VLAN Port Status.” 2. Specify Static, NAS, GVRP, MVP, Voice, VLAN, MSTP, VCL, or Combined. 3. Display port status information. 724-746-5500 | blackbox.com Page 117 LGB5028A User‘s Manual... - Page 118 Ingress Filtering: Show the ingress filtering on a port. This parameter affects VLAN ingress processing. If ingress filtering is enabled and the ingress port is not a member of the classified VLAN, the frame is discarded. 724-746-5500 | blackbox.com Page 118 LGB5028A User‘s Manual...
-
Page 119: Private Vlans
Web Interface To configure port isolation in the Web interface: 1. Click “VLAN,” “Port Isolation.” 2. Select a port to enable port isolation. 3. Click “Save.” Figure 6-54. Port Isolation Configuration screen. 724-746-5500 | blackbox.com Page 119 LGB5028A User‘s Manual... -
Page 120: Mac-Based Vlan
Web Interface To configure MAC address-based VLAN configuration in the Web interface: 1. Click “MAC address-based VLAN configuration” and add new entry. 2. Specify the MAC address and VLAN ID. 3. Click “Save.” 724-746-5500 | blackbox.com Page 120 LGB5028A User‘s Manual... - Page 121 NAS: NAS provides port-based authentication, which involves communications between a supplicant, an authenticator, and an authentication server. Web Interface To display MAC-based VLANs configured in the Web interface: 1. Click “MAC-based VLAN Status.” 2. Specify the Static NAS Combined. 724-746-5500 | blackbox.com Page 121 LGB5028A User‘s Manual...
-
Page 122: Protocol-Based Vlan
Web Interface To configure protocol-based VLAN configuration in the Web interface: 1. Click “Protocol-based VLAN configuration” and add new entry. 2. Specify the “Ethernet LLC SNAP Protocol” and “Group Name.” 3. Click “Save.” 724-746-5500 | blackbox.com Page 122 LGB5028A User‘s Manual... - Page 123 3. For SNAP: Valid values in this case also are made up of two different sub-values: a. OUI: OUI (Organizationally Unique Identifier) is value in format of xx-xx-xx where each pair (xx) in string is a hexadecimal value that ranges from 0x00-0xff. 724-746-5500 | blackbox.com Page 123 LGB5028A User‘s Manual...
- Page 124 To display group name to VLAN mapping table configured in the Web interface: 1. Click “Group Name VLAN configuration” and add new entry. 2. Specify the group name and VLAN ID. 3. Click “Save.” Figure 6-58. The Group Name to VLAN Mapping Table screen. 724-746-5500 | blackbox.com Page 124 LGB5028A User‘s Manual...
-
Page 125: Voice Vlan
1. Select “Enabled” in the voice VLAN configuration. 2. Specify VLAN ID, aging time, and traffic class. 4. Specify port mode, security, and discovery protocol in the Port Configuration. 5. Click “Save.” 724-746-5500 | blackbox.com Page 125 LGB5028A User‘s Manual... - Page 126 Mode: Indicate the Voice VLAN operation mode. You must disable the MSTP feature before you enable Voice VLAN to prevent an ingress filtering conflict. Possible modes are: Enabled: Enable Voice VLAN mode operation. Disabled: Disable Voice VLAN mode operation. 724-746-5500 | blackbox.com Page 126 LGB5028A User‘s Manual...
-
Page 127: Oui
Web Interface To configure Voice VLAN OUI table in the Web interface: 1. Select “Add new entry” or “Delete” in the Voice VLAN OUI table. 2. Specify “Telephony OUI,” “Description.” 3. Click “Save.” 724-746-5500 | blackbox.com Page 127 LGB5028A User‘s Manual... -
Page 128: Garp
GARP Information Propagation (GIP) component. Protocol exchanges take place between GARP participants via LLC Type 1 services, using the group MAC address and PDU format defined for the relevant GARP application. 724-746-5500 | blackbox.com Page 128 LGB5028A User‘s Manual... -
Page 129: Configuration
• Timer Values • Application • Attribute Type • GARP Applicant Timer Values: Set the GARP join timer, leave timer, and leave all timers, in units of microseconds. 724-746-5500 | blackbox.com Page 129 LGB5028A User‘s Manual... -
Page 130: Statistics
To display GARP Port statistics in the Web interface: 1. Click “GARP statistics.” 2. Scroll to the port you want to display the GARP counter information. 3. Click “Refresh” to modify the GARP statistics information. 724-746-5500 | blackbox.com Page 130 LGB5028A User‘s Manual... -
Page 131: Gvrp
6.13.1 Configuration This page allows you to configure the basic GVRP Configuration settings for all switch ports. The settings relate to the currently selected unit, as reflected by the page header. 724-746-5500 | blackbox.com Page 131 LGB5028A User‘s Manual... - Page 132 The Port column shows the list of ports for which you can configure per-port GVRP settings. There are two configuration settings that can be configured on a per-port basis. • GVRP Mode. • GVRP role. 724-746-5500 | blackbox.com Page 132 LGB5028A User‘s Manual...
-
Page 133: Statistics
To display GVRP port statistics in the Web interface: 1. Click “GVRP statistics.” 2. Scroll to the port that you want to display the GVRP counter information.. 3. Click “Refresh” to modify the GVRP statistics information. 724-746-5500 | blackbox.com Page 133 LGB5028A User‘s Manual... -
Page 134: Qos
The section allows you to configure the basic QoS Ingress Classification settings for all switch ports, and the settings relate to the currently selected unit, as reflected by the page header. Web Interface To configure the QoS Port Classification parameters in the Web interface: 1. Click “Configuration,” “QoS,” “Port Classification.” 724-746-5500 | blackbox.com Page 134 LGB5028A User‘s Manual... - Page 135 Disabled: Use default QoS class and DP level for tagged frames. Enabled: Use mapped versions of PCP and DEI for tagged frames. Click on the mode to configure the mode and/or mapping. DSCP Based: Click to enable DSCP-based QoS ingress port classification. 724-746-5500 | blackbox.com Page 135 LGB5028A User‘s Manual...
-
Page 136: Port Policing
2. Select the port that you want to enable the QoS ingress port policers and type the rate limit condition. 3. Scroll to select the Rate limit Unit from kbps, Mbps, fps and kfps. 4. Click “Save” to save the configuration. 724-746-5500 | blackbox.com Page 136 LGB5028A User‘s Manual... - Page 137 Flow Control: Check this box to enable flow control on a port. Leave it unchecked to disable the flow control. Buttons: Save: Click to save changes. Reset: Click to undo any changes made locally and revert to previously saved values. 724-746-5500 | blackbox.com Page 137 LGB5028A User‘s Manual...
-
Page 138: Port Scheduler
Web Interface To display the QoS port schedulers in the Web interface: 1. Click “Configuration,” “QoS,” “Port Schedulers.” 2. Display the QoS egress port schedulers. 724-746-5500 | blackbox.com Page 138 LGB5028A User‘s Manual... - Page 139 Chapter 6: Configuration Click the port index to set the QoS egress port schedulers. Figure 6-67. The QoS Egress Port Scheduler screen. 724-746-5500 | blackbox.com Page 139 LGB5028A User‘s Manual...
- Page 140 Queue Scheduler Weight: Control the weight for this queue. The default value is “17.” This value is restricted to 1–100. This parameter is only shown if “Scheduler Mode” is set to “Weighted.” 724-746-5500 | blackbox.com Page 140 LGB5028A User‘s Manual...
-
Page 141: Port Shaping
Web Interface To display the QoS port shapers in the Web interface: 1. Click “Configuration,” “QoS,” “Port Shapers.” 2. Display the QoS egress port shapers. 724-746-5500 | blackbox.com Page 141 LGB5028A User‘s Manual... - Page 142 Chapter 6: Configuration Click on the port index to select the QoS egress port shapers. Figure 6-69. The QoS Egress Port Shapers screen. 724-746-5500 | blackbox.com Page 142 LGB5028A User‘s Manual...
- Page 143 Queue Scheduler Weight: Control the weight for this queue. The default value is “17.” This value is restricted to 1–100. This parameter is only shown if “Scheduler Mode” is set to “Weighted.” 724-746-5500 | blackbox.com Page 143 LGB5028A User‘s Manual...
-
Page 144: Port Tag Remarking
Click the port index to set the QoS port tag remarking. Figure 6-71. The Port Tag Remarking screen. Parameter Description Port: The logical port for the settings contained in the same row. Click on the port number to configure tag remarking. 724-746-5500 | blackbox.com Page 144 LGB5028A User‘s Manual... -
Page 145: Port Dscp
3. Scroll to select egress rewrite parameters. 4. Click the “Save” button to save the setting. 5. To cancel the setting, click the “Reset” button. It will revert to previously saved values. 724-746-5500 | blackbox.com Page 145 LGB5028A User‘s Manual... - Page 146 • DSCP=0: Classify if incoming (or translated if enabled) DSCP is 0. • Selected: Classify only selected DSCPs for which classification is enabled as specified in DSCP Translation window for the specific DSCP. • All: Classify all DSCP. 724-746-5500 | blackbox.com Page 146 LGB5028A User‘s Manual...
-
Page 147: Dscp-Based Qos
3. Scroll to select QoS Class and DPL parameters. 4. Click on the “Save” button to save the setting. 5. To cancel the setting, click the “Reset” button. It will revert to previously saved values. 724-746-5500 | blackbox.com Page 147 LGB5028A User‘s Manual... - Page 148 DSCP: Maximum number of supported DSCP values is 64. Trust: Click to check if the DSCP value is trusted. QoS Class: QoS class value is a number between 0–7. DPL: Drop precedence level (0–3). 724-746-5500 | blackbox.com Page 148 LGB5028A User‘s Manual...
-
Page 149: Dscp Translation
3. Click on the checkbox to enable Classify; leave unchecked to disable it. 4. Click “Save” to save the setting. 5. To cancel the setting, click the “Reset” button. It will revert to previously saved values. 724-746-5500 | blackbox.com Page 149 LGB5028A User‘s Manual... - Page 150 Ingress: Ingress side DSCP can be first translated to new DSCP before using the DSCP for QoS class and DPL map. There are two configuration parameters for DSCP translation: 1. Translate: DSCP at ingress side can be translated to any of (0–63) DSCP values. 724-746-5500 | blackbox.com Page 150 LGB5028A User‘s Manual...
-
Page 151: Dscp Classification
2. Scroll to set the DSCP parameters. 3. Click the “Save” button to save the setting. 4. To cancel the setting, click the “Reset” button. It will revert to previously saved values. Figure 6-75. The DSCP Classification screen. 724-746-5500 | blackbox.com Page 151 LGB5028A User‘s Manual... -
Page 152: Qos Control List Configuration
4. Click the “Save” button to save the setting. 5. To cancel the setting, click the “Reset” button. It will revert to previously saved values. Figure 6-76. The QoS Control List Configuration screen. 724-746-5500 | blackbox.com Page 152 LGB5028A User‘s Manual... - Page 153 You can modify each QCE (QoS Control Entry) in the table using the following buttons: “+”: Inserts a new QCE before the current row. “e”: Edits the QCE. “arrow up”: Moves the QCE up the list. “arrow down”: Moves the QCE down the list. 724-746-5500 | blackbox.com Page 153 LGB5028A User‘s Manual...
- Page 154 BE, CS1-CS7, EF, or AF11–AF43. Sport Source TCP/UDP port: (0–65535) or “Any,” specific or port range applicable for IP protocol UDP/TCP.Dport Destination TCP/ UDP port:(0-65535) or “Any,” specific, or port range applicable for IP protocol UDP/TCP. 724-746-5500 | blackbox.com Page 154 LGB5028A User‘s Manual...
-
Page 155: Qcl Status
Ethernet: Only Ethernet frames (with Ether Type 0x600–0xFFFF) are allowed. LLC: Only (LLC) frames are allowed LLC: Only (SNAP) frames are allowed. IPv4: The QCE will match only IPV4 frames. IPv6: The QCE will match only IPV6 frames. 724-746-5500 | blackbox.com Page 155 LGB5028A User‘s Manual... -
Page 156: Storm Control
4. Click on the “Save” button to save the setting. 5. To cancel the setting, click the “Reset” button. It will revert to previously saved values. Figure 6-78. The Storm Control Configuration screen. 724-746-5500 | blackbox.com Page 156 LGB5028A User‘s Manual... -
Page 157: Wred
4. Click the “Save” button to save the setting. 5. To cancel the setting, click the “Reset” button. It will revert to previously saved values. Figure 6-79. The Weighted Random Early Detection (WRED) Configuration screen. 724-746-5500 | blackbox.com Page 157 LGB5028A User‘s Manual... -
Page 158: Sflow Agent
IP type, sFlow collector IP address, and port number for each sFlow collector. 6.15.1 Collector The “Current” field displays the currently configured sFlow collector. The “Configured” field displays the new collector configuration. 724-746-5500 | blackbox.com Page 158 LGB5028A User‘s Manual... - Page 159 Datagram Size: It is the maximum UDP datagram size to send out the sFlow samples to the receiver. The value accepted is within the range of 200–1500 bytes. The default is 1400 bytes. 724-746-5500 | blackbox.com Page 159 LGB5028A User‘s Manual...
-
Page 160: Sampler
3. Scroll to sample type and choose from “None,” “Tx,” “Rx,” or “All.” 4. Click the “Save” button to save the setting. 5. To cancel the setting, click the “Reset” button. It will revert to previously saved values. 724-746-5500 | blackbox.com Page 160 LGB5028A User‘s Manual... - Page 161 Sampler Type: Configured sampler type on the port and could be any of the types: none, Rx, Tx, or all. Scroll to choose your sampler type. Default value is “None.” Sampling Rate: Configured sampling rate on the ports. 724-746-5500 | blackbox.com Page 161 LGB5028A User‘s Manual...
-
Page 162: Loop Protection
2. Check or uncheck the box to enable or disable port loop protection. 3. Click “Save” to save the setting. 4. To cancel the setting, click the “Reset” button. It will revert to previously saved values. 724-746-5500 | blackbox.com Page 162 LGB5028A User‘s Manual... - Page 163 Valid values are 0 to 604800 seconds (7 days). A value of zero will keep a port disabled (until next device restart). Port Configuration Port: The switch port number of the port Enable: Control whether loop protection is enabled on this switch port. 724-746-5500 | blackbox.com Page 163 LGB5028A User‘s Manual...
-
Page 164: Status
Status: The current loop protection status of the port. Loop: Show which loop is currently detected on the port. Time of Last Loop: The time since the last loop event was detected. 724-746-5500 | blackbox.com Page 164 LGB5028A User‘s Manual... -
Page 165: Easy Port
VLAN Mode: Scroll to select the VLAN mode. Choose from “Access,” “Trunk,” or “Hybrid.” Voice VLAN: If you connect the IP phone, you need to assign the Voice VLAN ID. Type the value of the port number into the text box. 724-746-5500 | blackbox.com Page 165 LGB5028A User‘s Manual... -
Page 166: Mirroring
3. Scroll to disabled, enable, TX Only and RX Only to set the port mirror mode. 4. Click on the “Save” button to save the setting. 5. To cancel the setting, click the “Reset” button. It will revert to previously saved values. 724-746-5500 | blackbox.com Page 166 LGB5028A User‘s Manual... - Page 167 Tx only frames transmitted on this port are mirrored on the mirror port. Frames received are not mirrored. Disabled: Neither frames transmitted nor frames received are mirrored. Enabled: Frames received and frames transmitted are mirrored on the mirror port. 724-746-5500 | blackbox.com Page 167 LGB5028A User‘s Manual...
-
Page 168: Trap Event Severity
2. Scroll to select the group name and severity Level. 3. Click “Save” to save the setting. 4. To cancel the setting, click the “Reset” button. It will revert to previously saved values. Figure 6-87. The Trap Event Severity Configuration screen. 724-746-5500 | blackbox.com Page 168 LGB5028A User‘s Manual... -
Page 169: Smtp Configuration
Username: Specify the username on the mail server. Password: Specify the password on the mail server. Sender: Set the mail sender name. Return Path: Set the mail return path as the sender mail address. 724-746-5500 | blackbox.com Page 169 LGB5028A User‘s Manual... -
Page 170: Upnp
In the implementation, the switch sends SSDP messages periodically at the interval one-half of the advertising duration minus 30 seconds. Valid values are in the range 100 to 86400. 724-746-5500 | blackbox.com Page 170 LGB5028A User‘s Manual... - Page 171 Chapter 6: Configuration Buttons: Save: Click to save changes. Reset: Click to undo any changes made locally and revert to previously saved values. 724-746-5500 | blackbox.com Page 171 LGB5028A User‘s Manual...
-
Page 172: Security
2. Select “Enabled” for the specific port in port mode configuration. 3. Select maximum dynamic clients (0, 1, 2, unlimited) for the specific port in port mode configuration. 4. Click “Save.” Figure 7-1. The IP Source Guard Configuration screen. 724-746-5500 | blackbox.com Page 172 LGB5028A User‘s Manual... -
Page 173: Static Table
Figure 7-2. The Static IP Source Guard Table screen. Parameter Description Delete: Check to delete the entry. It will be deleted during the next save. Port: The logical port for the settings. VLAN ID: The VLAN ID for the settings. 724-746-5500 | blackbox.com Page 173 LGB5028A User‘s Manual... -
Page 174: Dynamic Table
The section describes how to configure the ARP inspection parameters of the switch. Use ARP inspection configure to manage the ARP table. 7.2.1 Configuration This section describes how to configure ARP inspection setting including: Mode (enabled and disabled) Port (enabled and disabled) 724-746-5500 | blackbox.com Page 174 LGB5028A User‘s Manual... - Page 175 Buttons: Save: Click to save changes. Reset: Click to undo any changes made locally and revert to previously saved values. 724-746-5500 | blackbox.com Page 175 LGB5028A User‘s Manual...
-
Page 176: Static Table
Adding new entry: Click to add a new entry to the Static ARP Inspection table. Specify the Port, VLAN ID, MAC address, and IP address for the new entry. Click “Save.” Buttons: Save: Click to save changes. Reset: Click to undo any changes made locally and revert to previously saved values. 724-746-5500 | blackbox.com Page 176 LGB5028A User‘s Manual... -
Page 177: Dynamic Table
To configure DHCP snooping in the Web interface: 1. Select “Enabled” in the DHCP snooping configuration mode. 2. Select “Trusted” for the specific port in the port configuration mode. 3. Click “Save.” 724-746-5500 | blackbox.com Page 177 LGB5028A User‘s Manual... - Page 178 Port Mode: Indicates the DHCP snooping port mode. Possible port modes are: Trusted: Configures the port as a trusted source of the DHCP messages. Untrusted: Configures the port as an untrusted source of the DHCP messages. 724-746-5500 | blackbox.com Page 178 LGB5028A User‘s Manual...
-
Page 179: Statistics
Rx and Tx Lease Unknown: The number of lease unknown (option 53 with value 12) packets received and transmitted. Rx and Tx Lease Active: The number of lease active (option 53 with value 13) packets received and transmitted. Auto-refresh: Check this box and the device will refresh the information automatically. 724-746-5500 | blackbox.com Page 179 LGB5028A User‘s Manual... -
Page 180: Dhcp Relay
DHCP messages between the clients and the server when they are not in the same subnet domain. And the DHCP broadcast message won't be flooded for security considerations. Disabled: Disable DHCP relay mode operation. 724-746-5500 | blackbox.com Page 180 LGB5028A User‘s Manual... -
Page 181: Statistics
Transmit Error: The number of packets that resulted in errors while being sent to clients. Receive from Server: The number of packets received from a server. Receive Missing Agent Option: The number of packets received without agent information options. 724-746-5500 | blackbox.com Page 181 LGB5028A User‘s Manual... -
Page 182: Nas
9. Check the box next to Guest VLAN Enabled. 10. Specify Guest VLAN ID. 11. Specify Max. Reauth. Count. 12. Check the box next to Allow Guest VLAN if EAPOL Seen. 13. Click ”Save.” 724-746-5500 | blackbox.com Page 182 LGB5028A User‘s Manual... - Page 183 255 seconds. This does not affect MAC-based ports. Aging Period: This setting applies to the following modes, that is, modes using the Port Security functionality to secure MAC addresses: • Single 802.1X 724-746-5500 | blackbox.com Page 183 LGB5028A User‘s Manual...
- Page 184 Guest VLAN ID: This is the value that a port's Port VLAN ID is set to if a port is moved into the Guest VLAN. You can change it only if the Guest VLAN option is globally enabled. Valid values are in the range [1; 4095]. 724-746-5500 | blackbox.com Page 184 LGB5028A User‘s Manual...
- Page 185 And since the server hasn't yet failed (because the X seconds haven't expired), the same server will be contacted upon the next back-end authentication server request from the switch. This scenario will loop forever. Therefore, the server timeout should be smaller than the supplicant's EAPOL Start frame retransmission rate. 724-746-5500 | blackbox.com Page 185 LGB5028A User‘s Manual...
- Page 186 RADIUS user can be used by anyone. Also, only the MD5-Challenge method is supported. The maximum num- ber of clients that can be attached to a port can be limited using Port Security Limit Control. 724-746-5500 | blackbox.com Page 186 LGB5028A User‘s Manual...
- Page 187 Guest VLAN Enabled: When a Guest VLAN is both globally enabled and enabled (checked) for a given port, the switch considers moving the port into the Guest VLAN according to the rules outlined next. 724-746-5500 | blackbox.com Page 187 LGB5028A User‘s Manual...
- Page 188 Save: Click to save changes. Reset: Click to undo any changes made locally and revert to previously saved values. Upper right icon (Refresh): Click on the “Refresh” button to refresh the NAS Configuration manually. 724-746-5500 | blackbox.com Page 188 LGB5028A User‘s Manual...
-
Page 189: Switch Status
Auto-refresh: Click on the box next to auto-refresh and the device will refresh the information automatically. Upper right icon (Refresh): Click on the “Refresh” icon to refresh the NAS Switch Status manually. 724-746-5500 | blackbox.com Page 189 LGB5028A User‘s Manual... -
Page 190: Port Status
If the port is moved to the Guest VLAN, “(Guest)” is appended to the VLAN ID. Port Counters EAPOL Counters: These supplicant frame counters are available for the following administrative states: • Force authorized • Force unauthorized • Port-based 802.1X • Single 802.1X • Multi 802.1X 724-746-5500 | blackbox.com Page 190 LGB5028A User‘s Manual... - Page 191 Auto-refresh: Click the box next to auto-refresh and the device will refresh the information automatically. Upper right icon (Refresh, Clear): Click on the “Refresh” button to refresh the NAS Statistics manually. Click on the “Clear” button to clear all entries. 724-746-5500 | blackbox.com Page 191 LGB5028A User‘s Manual...
-
Page 192: Aaa
2. Specify IP address or hostname for TACACS+ server. 3. Specify authentication port for TACACS+ server (default is 49). 4. Specify the secret with TACACS+ server. Figure 7-14. The Authentication Server Configuration screen. 724-746-5500 | blackbox.com Page 192 LGB5028A User‘s Manual... - Page 193 Figure 7-15. The TACACS+ Authorization and Accounting Configuration screen. Figure 7-16. The RADIUS Authentication Server Configuration screen. Figure 7-17. The RADIUS Accounting Server Configuration screen. Figure 7-18. The TACACS+ Authentication Configuration screen. 724-746-5500 | blackbox.com Page 193 LGB5028A User‘s Manual...
- Page 194 Secret: The secret—up to 29 characters long—shared between the RADIUS accounting server and the switch. TACACS+ Authentication Server Configuration The table has one row for each TACACS+ authentication server and a number of columns: #: The TACACS+ Authentication Server number for which the configuration below applies. 724-746-5500 | blackbox.com Page 194 LGB5028A User‘s Manual...
-
Page 195: Radius Overview
The number of seconds left before this occurs is displayed in parentheses. This state is only reachable when more than one server is enabled. 724-746-5500 | blackbox.com Page 195 LGB5028A User‘s Manual... -
Page 196: Radius Details
2. Check the box next to “Auto-refresh.” Figure 7-20. The RADIUS Authentication Statistics and Accounting Server screen. Parameter Description Auto-refresh: Click on the box next to “Auto-Refresh” and the device will refresh the information automatically. 724-746-5500 | blackbox.com Page 196 LGB5028A User‘s Manual... -
Page 197: Port Security
1. Select “Enabled” in the port configuration mode. 2. Specify the maximum number of MAC addresses in the limit of port configuration. 3. Set action (trap, shutdown, trap and shutdown) 4. Click “Save.” 724-746-5500 | blackbox.com Page 197 LGB5028A User‘s Manual... - Page 198 MAC addresses, they may have other requirements to the aging period. The underlying port security will use the shorter requested aging period of all modules that use the functionality. The aging period can be set to a number between 10 and 10,000,000 seconds. 724-746-5500 | blackbox.com Page 198 LGB5028A User‘s Manual...
- Page 199 If a port is shut down by this module, you may reopen it by clicking this button, which will only be enabled if this is the case. For other methods, refer to “Shutdown” in the Action section. 724-746-5500 | blackbox.com Page 199 LGB5028A User‘s Manual...
-
Page 200: Switch Status
To configure a port security switch status configuration in the Web interface: Check on the box next to “Auto-refresh” to automatically refresh the information. Figure 7-22. The Port Security Switch Status screen. 724-746-5500 | blackbox.com Page 200 LGB5028A User‘s Manual... -
Page 201: Port Status
If only one chooses to block it, it will be blocked until that user module decides otherwise. Web Interface To configure a Port Security Switch Status Configuration in the Web interface: 1. Specify the port that you want to monitor. 2. Check on the box next to “Auto-refresh.” 724-746-5500 | blackbox.com Page 201 LGB5028A User‘s Manual... -
Page 202: Access Management
1. Select “Enabled” in the Mode of Access Management Configuration. 2. Click “Add new entry.” 3. Specify the Start IP Address, End IP Address. 4. Checked Access Managemnet method (HTTP/HTTPS, SNMP, and TELNET/SSH) in the entry. 5. Click “Save.” 724-746-5500 | blackbox.com Page 202 LGB5028A User‘s Manual... - Page 203 Buttons: Add: Click on this button to add an access management configuration. Save: Click to save changes. Reset: Click to undo any changes made locally and revert to previously saved values. 724-746-5500 | blackbox.com Page 203 LGB5028A User‘s Manual...
-
Page 204: Statistics
This section shows you how to use Secure Shell (SSH) to securely access the switch. SSH is a secure communication protocol that combines authentication and data encryption to provide secure encrypted communication. 1. Select “Enabled” in the Mode of SSH Configuration. 2. Click “Save.” Figure 7-26. The SSH Configuration screen. 724-746-5500 | blackbox.com Page 204 LGB5028A User‘s Manual... -
Page 205: Https
Enabled: Enable HTTPS redirect mode operation. Disabled: Disable HTTPS redirect mode operation. Buttons: Save: Click to save changes. Reset: Click to undo any changes made locally and revert to previously saved values. 724-746-5500 | blackbox.com Page 205 LGB5028A User‘s Manual... -
Page 206: Auth Method
If none of the configured authentication servers are alive, the local user database is used for authentication. Buttons: Save: Click to save changes. Reset: Click to undo any changes made locally and revert to previously saved values. 724-746-5500 | blackbox.com Page 206 LGB5028A User‘s Manual... -
Page 207: Maintenance
This page updates the firmware controlling the switch. Web Interface To configure a firmware upgrade configuration in the Web interface: 1. Chick “Browser” to select firmware in your device. 2. Click “Upload.” 724-746-5500 | blackbox.com Page 207 LGB5028A User‘s Manual... -
Page 208: Firmware Selection
This page provides information about the active and alternate (backup) firmware images in the device, and allows you to revert to the alternate image. Web Interface To configure a firmware selection in the Web interface: 1. Click “Activate Alternate Image.” 2. Click “OK” to complete firmware selection.. 724-746-5500 | blackbox.com Page 208 LGB5028A User‘s Manual... -
Page 209: Save/Restore
This section describes how to save and restore the switch configuration including reset to Factory Defaults, Save Start, Save Users, and Restore Users. 8.3.1 Factory Defaults This section describes how to reset the switch configuration to Factory Defaults. Any configuration files or scripts will recover to factory default values. 724-746-5500 | blackbox.com Page 209 LGB5028A User‘s Manual... -
Page 210: Save Start
This section describes how to save users’ information. Any current configuration files will be saved as XML format. Web Interface To configure a save user configuration in the Web interface: 1. Click “Save User.” 724-746-5500 | blackbox.com Page 210 LGB5028A User‘s Manual... -
Page 211: Restore User
This section describes how to export the switch configuration for maintenance. Any current configuration files will be exported as XML format. Web Interface To configure a Export Config Configuration in the Web interface: 1. Click “Save configuration.” 724-746-5500 | blackbox.com Page 211 LGB5028A User‘s Manual... - Page 212 Chapter 8: Maintenance 2. Save the file in your device. Figure 8-8. The Restore the Backup Configuration screen. Parameter Description Save: Click the “Save” button to store the Configuration to the PC or Server. 724-746-5500 | blackbox.com Page 212 LGB5028A User‘s Manual...
-
Page 213: Import Config
Browse: Click the “Browse...” button to search the Configuration URL and filename. Upload: Click the “Upload” button and the switch will start to upload the configuration stored on a PC or server. 724-746-5500 | blackbox.com Page 213 LGB5028A User‘s Manual... -
Page 214: Diagnostics
This section allows you to issue ICMPv6 PING packets to troubleshoot IPv6 connectivity issues. Web Interface To configure an ICMPv6 PING Configuration in the Web interface: 1. Specify ICMPv6 PING IP address. 724-746-5500 | blackbox.com Page 214 LGB5028A User‘s Manual... -
Page 215: Veriphy
VeriPHY. Therefore, running VeriPHY on a 10 or 100 Mbps management port will cause the switch to stop responding until VeriPHY is complete. Web Interface To configure a VeriPHY cable diagnostics configuration in the Web interface: 1. Specify the port that you want to check. 2. Click “Start.” 724-746-5500 | blackbox.com Page 215 LGB5028A User‘s Manual... - Page 216 Parameter Description Port: The port where you are requesting VeriPHY cable diagnostics. Cable Status: Port: Port number. Pair: The status of the cable pair. Length: The length (in meters) of the cable pair. 724-746-5500 | blackbox.com Page 216 LGB5028A User‘s Manual...
-
Page 217: Appendix A. Glossary
ARP Inspection: ARP Inspection is a secure feature. Several types of attacks can be launched against a host or devices connected to Layer 2 networks by “poisoning” the ARP caches. This feature is used to block such attacks. Only valid ARP requests and responses can go through the switch device. 724-746-5500 | blackbox.com Page 217 LGB5028A User‘s Manual... - Page 218 DNS: DNS is an acronym for Domain Name System. It stores and associates many types of information with domain names. Most importantly, DNS translates human-friendly domain names and computer hostnames into computer-friendly IP addresses. For example, the domain name www.example.com might translate to 192.168.0.1. 724-746-5500 | blackbox.com Page 218 LGB5028A User‘s Manual...
- Page 219 LAN port, establishing a point-to-point connection or preventing access from that port if authentication fails. With 802.1x, access to all switch ports can be centrally controlled from a server, which means that authorized users can use the same credentials for authentication from any point within the network. 724-746-5500 | blackbox.com Page 219 LGB5028A User‘s Manual...
- Page 220 LOC: LOC is an acronym for Loss Of Connectivity and is detected by a MEP and is indicating lost connectivity in the network. Can be used as a switch criteria by EPS. 724-746-5500 | blackbox.com Page 220 LGB5028A User‘s Manual...
- Page 221 Optional TLVs: A LLDP frame contains multiple TLVs. For some TLVs it is configurable if the switch shall include the TLV in the LLDP frame. These TLVs are known as optional TLVs. If an optional TLVs is disabled, the corresponding information is not included in the LLDP frame. 724-746-5500 | blackbox.com Page 221 LGB5028A User‘s Manual...
- Page 222 A communications network transports a multitude of applications and data, including high-quality video and delay-sensitive data such as real-time voice. Networks must provide secure, predictable, measurable, and sometimes guaranteed services. 724-746-5500 | blackbox.com Page 222 LGB5028A User‘s Manual...
- Page 223 TACACS+: TACACS+ is an acronym for Terminal Acess Controller Access Control System Plus. It is a networking protocol that provides access control for routers, network access servers, and other networked computing devices via one or more centralized servers. TACACS+ provides separate authentication, authorization, and accounting services. 724-746-5500 | blackbox.com Page 223 LGB5028A User‘s Manual...
- Page 224 Voice VLAN: Voice VLAN is VLAN configured specially for voice traffic. By adding the ports with voice devices attached to voice VLAN, we can perform QoS-related configuration for voice data, ensuring the transmission priority of voice traffic and voice quality. 724-746-5500 | blackbox.com Page 224 LGB5028A User‘s Manual...
-
Page 225: Networking Terms
IEEE 802.3Z — Define CSMA/CD access method and physical layer specifications for 1000BASE Gigabit Ethernet. (Now incorporated in IEEE 802.3-2005.) LAN Segment — Separate LAN or collision domain. LED — Light-emitting diode used for monitoring a device or network condition. 724-746-5500 | blackbox.com Page 225 LGB5028A User‘s Manual... - Page 226 A VLAN serves as a logical workgroup with no physical barriers, allowing users to share information and resources as though located on the same LAN. 724-746-5500 | blackbox.com Page 226 LGB5028A User‘s Manual...
-
Page 227: Appendix B. Troubleshooting
Because the LGB5028A and LGB5052A switches comply with the IEEE 802.3 standard, if a device connected to the switch has a fixed configuration at full-duplex, the device will not connect correctly to the switch. The result will be high error rates and very inefficient communications between the switch and the device. -
Page 228: Contacting Black Box
Check connections between the switch, the power cord, and the wall outlet. System LED is OFF Contact Black Box Technical Support at 724-746-5500 or info@blackbox.com for assistance. Verify that the switch and attached device are powered on. Make sure the cable is plugged into the switch and the corresponding device. -
Page 229: Appendix C. Cables
(When auto-negotiation is enabled for any RJ-45 port on this switch, you can use either straight- through or crossover cable to connect to any device type.) You must connect all four wire pairs as shown in Figure C-2 to support Gigabit Ethernet. 724-746-5500 | blackbox.com Page 229 LGB5028A User‘s Manual... -
Page 230: Crossover Wiring
Use 100-ohm Category 5, 5e, or 6 unshielded twisted-pair (UTP) or shielded twisted-pair (STP) cable for 1000BASE-T connections. Also be sure that the length of any twisted-pair connection does not exceed 328 feet (100 m). 724-746-5500 | blackbox.com Page 230 LGB5028A User‘s Manual... -
Page 231: Cable Testing For Existing Category 5 Cable
1600-nm region, with low loss in the 1550-nm band. Non-zero dispersion-shifted fiber, single-mode, Extended long-haul applications. Optimized for high-power dense-wavelength-divison G.655 9-/125-micron core multiplexing (DWDM) operation in the region from 1500 to 1600 nm. 724-746-5500 | blackbox.com Page 231 LGB5028A User‘s Manual... - Page 232 About Black Box Black Box provides an extensive range of networking and infrastructure products. You’ll find everything from cabinets and racks and power and surge protection products to media converters and Ethernet switches all supported by free, live 24/7 Tech support available in 30 seconds or less.
Need help?
Do you have a question about the LGB5028A and is the answer not in the manual?
Questions and answers