Table of Contents
Advertisement
Available languages
Available languages
Advertisement
Chapters
Table of Contents

Related Manuals for Haier HD70-A82


Summary of Contents for Haier HD70-A82
- Page 1 User Manual HD70-A82 HD80-A82 Heat Pump Dryer...
-
Page 2: Table Of Contents
TABLE OF CONTENTS Dear customer ....................3 Scope of delivery ....................3 Intended use ....................3 Safety instructions ..................4 Unpacking .......................6 Installation ......................6 Using the dryer rack ..................7 Front view .......................8 Rear view ......................9 Control panel ....................10 Program modes ....................12 Preparing the dryer ..................13 Preparing the laundry .................. -
Page 3: Dear Customer
DEAR CUSTOMER Thank you for your purchase of a Haier Instructions showing this icon product. Please read the manual and need special attention for safe safety instructions carefully and keep handling. them for future reference and pass them on to any future owner. -
Page 4: Safety Instructions
The tumble dryer must not be used in a non-stationary location (e.g. a ship). Do not make any alterations to the tumble dryer, unless authorised to do so by Haier. In areas which may be subject to infestation by cockroaches or other vermin, pay particular attention to keeping the tumble dryer and its surroundings in a clean condition at all times. - Page 5 Items which contain a large proportion of rubber, foam rubber (latex foam) or rubber like materials such as shower caps, waterproof textiles, rubberised articles and items of clothing and pillows with foam rubber filling should not be dried in the tumble dryer. Items which have been cleaned using chemicals such as professional drycleaning agents, should not be dried in the tumble dryer.
-
Page 6: Unpacking
• There may be residual water in the dryer. This can leak out if the dryer is at an angle. TECHNICAL DATA Power 220 - 240 V~ / 50 Hz Nominal load (kg) HD70-A82 HD80-A82 Drying programs Max. power (W) Fuse (A) min. 10 Ambient temperature (°C) -
Page 7: Using The Dryer Rack
power consumption in left on mode: 0.05 W power consumption in off mode 0.05 W For further technical information, please check the type plate on the appliance. Do not dispose of electrical appliances as unsorted municipal waste, use separate collection facilities.Contact your local government for information regarding the collection systems available. -
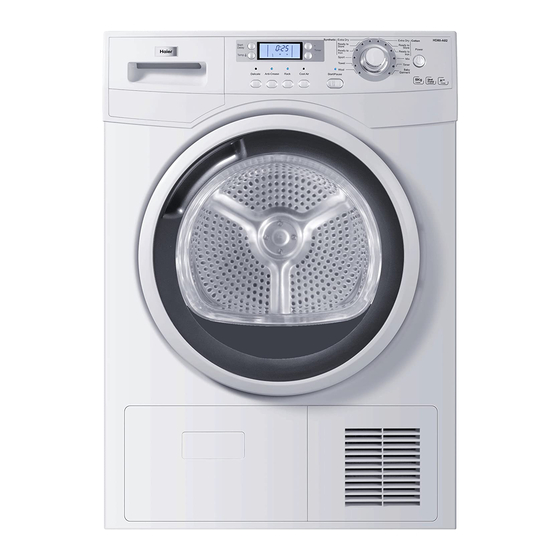
Page 8: Front View
FRONT VIEW The pictures may differ from the appliance you have purchased due to technical improvements. 1 Water tank 3 Service door 2 Tumble dryer door 4 Control panel 8 | English... -
Page 9: Rear View
REAR VIEW 5 Power supply cord 7 Drainage outlet 6 Back plate 8 Adjustable feet English | 9... -
Page 10: Control Panel
CONTROL PANEL Synthetic Extra Dry Extra Dry Cotton Ready to Ready to Start Store Store Delay Power Timer Ready to Ready to Iron Iron Temp. Sport Towel Timer Baby Wool Garment Delicate Anti-Crease Rack Cool Air Start/Pause 1 Temp button Set temperature to the desired level. - Page 11 6 Timer buttons Modify the default time to your needs, using the + and - timer buttons. 7 Empty tank indicator Water tank must be emptied. Important: Empty the water tank after each drying cycle. See Empty the water tank section of the manual.
-
Page 12: Program Modes
PROGRAM MODES DRYING RECOMMENDED MAX. LOAD PROGRAM DEGREE LAUNDRY HD80 HD70 Extra Dry Extra dry Heavy cotton, sheets, 8 kg 7 kg gowns Ready to Store *) Ready to wear Cotton, sheets, coats 8 kg 7 kg Ready to Iron Damp Ordinary cotton 8 kg... -
Page 13: Preparing The Dryer
PREPARING THE DRYER 1 Connect the tumble dryer to a power socket. 2 Make sure the water tank is empty and properly installed. 3 Make sure that the lint filter is clean and properly installed. 4 Make sure that the condenser filter is clean and properly installed. -
Page 14: Loading The Dryer
LOADING THE DRYER 1 Place the laundry evenly in the drum making sure not to overload the dryer. 2 Switch on the tumble dryer by pressing the Power button. Fabric softeners or similar products manufacturer’s instructions. CARE CHART Resistant material Bleachable in cold Do not dry clean water... -
Page 15: Load Reference
LOAD REFERENCE Bed sheet (single) Cotton Approx. 800 g Blended fabric clothes Approx. 800 g Jackets Cotton Approx. 800 g Jeans Approx. 800 g Overalls Cotton Approx. 950 g Pyjamas Approx. 200 g Shirts Approx. 300 g Socks Blended fabrics Approx. -
Page 16: End Of Dry Cycle
END OF DRY CYCLE The tumble dryer stops operation automatically when a dry cycle is complete. The display shows END. Open the tumble dryer door and remove the laundry. If the laundry is not removed the anti-crease program starts automatically. 1 Switch off the tumble dryer by pressing the Power button. - Page 17 LINT FILTER CLEANING &OHDQ WKH OLQW ¿OWHU DIWHU HDFK GU\ cycle. 1 Re move the lint filter from the drum. 2 Open up the lint filter. 3 Clean the lint filter form any lint residuals. 4 Reinstall the cleaned lint filter in the tumble dryer.
-
Page 18: Heat Pump Technology
HEAT PUMP TECHNOLOGY The condensation dryer with heat exchanger is outstanding in terms of These are guide values determined under standard conditions. The values may differ from those given, depending on overvoltage and undervoltage, the type of fabric, composition of the laundry to be dried, the residual moisture in the fabric and the size of the load. -
Page 19: Cleaning & Care
CLEANING & CARE TUMBLE DRYER Wipe the outside of the tumble dryer and the control panel with a damp cloth. Do not use any organic solvent or corrosive agent to avoid damage to the device. DRUM After some operation time, fabric care agents or calcium contained in the water some detergent to remove it. -
Page 20: Troubleshooting
TROUBLESHOOTING Before contacting the customer service, please check the following circumstances: PROBLEM CAUSES SOLUTION Tumble dryer – Poor connection to the Check connection to the power ▪ fails to operate. power supply. supply. – Power failure. Check the power supply. ▪... -
Page 21: Electric Circuit Diagram
ELECTRIC CIRCUIT DIAGRAM NTC1 NTC2 NTC3 Door switch Heat pump Water level switch Drainage pump Humidity sensor Lamp NTC1 Temperature sensor Fan motor NTC2 Temperature sensor Motor NTC3 Temperature sensor English | 21... -
Page 22: Customer Service
Also check the Warranty Card supplied with the product in case of warranty. COUNTRY PHONE NUMBER COSTS Haier Italy (IT) 199-100 912 Haier Spain (ES & PT) 902 509 123 Haier Germany (DE) 0180 5 39 39 99* * 14 Ct/Min Landline / max. 42 Ct/Min Mobile... - Page 23 Mode d'emploi HD70-A82-F HD80-A82-F Sèche-linge avec pompe à chaleur...
- Page 24 Manual del usuario HD70-A82 HD80-A82 Secadora con bomba de calor...
- Page 25 ÍNDICE DE CONTENIDO Estimado cliente .....................3 elementos de suministro ................3 Uso previsto ....................3 Instrucciones de seguridad ................4 Desembalaje ....................6 Instalación .......................6 Utilización del cesto ..................7 Vista frontal .....................8 Vista posterior ....................9 Panel de control ...................10 Programas .....................12 Preparación de la secadora .................
-
Page 26: Estimado Cliente
1 Manual del usuario 2 Cesto USO PREVISTO Esta secadora con bomba de calor Haier no se hará responsable de los está diseñada exclusivamente para daños derivados del uso u operación uso doméstico. Únicamente debe incorrectos o inadecuados. -
Page 27: Instrucciones De Seguridad
No está permitido utilizar la secadora en lugares que puedan moverse (p. ej. en un barco). No realice modificaciones no autorizadas por Haier en la secadora. En los lugares con riesgo de infestación de cucarachas y otros insectos, preste especial atención a que la secadora y sus alrededores estén siempre limpios. - Page 28 No intente secar prendas con grandes cantidades de goma, gomaespuma (látex) o materiales similares, como gorros de ducha, prendas impermeables, artículos recubiertos de caucho o ropa y almohadas con relleno de gomaespuma. No intente secar prendas que se hayan limpiado previamente con productos químicos, como, por ejemplo, productos profesionales de lavado en seco.
-
Page 29: Desembalaje
• Podría haber restos de agua en el interior de la secadora. Si la secadora está inclinada, podría producirse una fuga de agua. DATOS TÉCNICOS Alimentación 220 - 240 V~ / 50 Hz Carga nominal (kg) HD70-A82 HD80-A82 Programas de secado Máx. potencia (W) Fusible (A) Mín. 10 Temperatura ambiente (°C) -
Page 30: Utilización Del Cesto
Consumo de potencia en modo encendido 0.05 W Consumo de potencia en modo apagado: 0.05 W Para conocer el resto de información técnica, consulte la placa de características del aparato. No deseche los aparatos eléctricos como residuos urbanos sin clasificar, utilice las instalaciones de recogida selectiva. -
Page 31: Vista Frontal
VISTA FRONTAL Las ilustraciones podrían diferir del aparato real debido a las mejoras tecnológicas. 1 Depósito de agua 3 Puerta de mantenimiento 2 Puerta de la secadora 4 Panel de control 8 | Español... -
Page 32: Vista Posterior
VISTA POSTERIOR 5 Cable de alimentación 7 Salida de drenaje 6 Placa trasera 8 Patas ajustables Español | 9... -
Page 33: Panel De Control
PANEL DE CONTROL Sintéticos Extra Seco Extra Seco Algodón Para Para Inicio guardar guardar diferido Encendido Para Para Temporizador plancha plancha Temp. Sport Mixtos Temporizador Toallas Ropa Lana de Bebé Inicio/Pausa Delicados Antiarrugas Cesto Aire frío 1 Botón de temp Permite ajustar la temp al nivel deseado. - Page 34 6 Botones del Los botones + y - del temporizador permiten temporizador 7 Indicador de vaciado Es necesario vaciar el depósito de agua. del depósito Importante: vacíe el depósito de agua después de cada ciclo de secado. Consulte el apartado Vaciado del depósito de agua del manual.
-
Page 35: Programas
PROGRAMAS NIVEL DE RECOMENDADO MÁX. CARGA PROGRAMA SECADO PARA HD80 HD70 Extra seco Extraseco Algodón resistente, 8 kg 7 kg sábanas, batas Para Listo para usar Algodón, sábanas, 8 kg 7 kg guardar *) abrigos Listo para Húmedo Algodón normal 8 kg 7 kg planchar... -
Page 36: Preparación De La Secadora
PREPARACIÓN DE LA SECADORA 1 Enchufe la secadora a una toma de corriente. 2 Compruebe que el depósito de agua esté vacío y montado correctamente. 3 Compruebe que el filtro de pelusas esté limpio y montado correctamente. 4 Compruebe que el filtro condensador esté... -
Page 37: Carga De La Secadora
CARGA DE LA SECADORA Encendido 1 Distribuya la ropa uniformemente en el tambor teniendo mucho cuidado de no sobrepasar la capacidad de carga permitida. 2 Encienda la secadora con el botón de Encendido. Los suavizantes y productos similares deben utilizarse tal como se explica en las indicaciones de empleo del fabricante. -
Page 38: Referencias De Carga
REFERENCIAS DE CARGA Sábana (una) Algodón Aprox. 800 g Mezcla de prendas textiles Aprox. 800 g Chaquetas Algodón Aprox. 800 g Vaqueros Aprox. 800 g Monos Algodón Aprox. 950 g Pijamas Aprox. 200 g Camisas Aprox. 300 g Calcetines Tejidos mixtos Aprox. -
Page 39: Finalización Del Ciclo De Secado
FINALIZACIÓN DEL CICLO DE SECADO Encendido La secadora se detiene automáticamente En la pantalla se muestra FIN. Abra la puerta de la secadora y extraiga la ropa. Si no quita la ropa, se activará automáticamente el programa antiarrugas. 1 Apague la secadora con el botón de Encendido. -
Page 40: Lpslh]D Gho ¿Owur Frqghqvdgru
LIMPIEZA DEL FILTRO DE PELUSAS /LPSLH HO ¿OWUR GH SHOXVDV GHVSXpV GH cada ciclo de secado. 1 Extraiga el filtro de pelusas del tambor. 2 Abra el filtro de pelusas hacia arriba. 3 Retire las pelusas del filtro. 4 Una vez limpio, vuelva a montar el filtro de pelusas en la secadora. -
Page 41: Tecnología De Bomba De Calor
TECNOLOGÍA DE BOMBA DE CALOR La secadora con intercambiador de calor tiene un consumo energético excepcional. Los valores indicados son de referencia y bajo condiciones normales. Los sobrevoltajes y subvoltajes, el tipo de tejido, la composición de la ropa que se quiere secar, el nivel de humedad residual en el tejido y el volumen de la TABLA DE CONSUMOS Programa... -
Page 42: Limpieza Y Cuidado
LIMPIEZA Y CUIDADO SECADORA Limpie el exterior de la secadora y el panel de control con un paño húmedo. A corrosivos. TAMBOR Con el tiempo, los productos de cuidado de los tejidos y la cal que contiene el agua pueden formar una película casi invisible en el interior del tambor. Límpiela Español | 19... -
Page 43: Solución De Problemas
SOLUCIÓN DE PROBLEMAS Antes de llamar al servicio de atención al cliente, compruebe lo siguiente: PROBLEMA CAUSAS SOLUCIÓN La secadora no – Está mal conectada a la Revise la conexión a la fuente ▪ funciona. fuente de alimentación. de alimentación. –... -
Page 44: Esquema Eléctrico
ESQUEMA ELÉCTRICO NTC1 NTC2 NTC3 Interruptor de la puerta Bomba de calor Interruptor del nivel de agua Bomba de drenaje Sensor de humedad Indicador NTC1 Sensor de temperatura Motor del ventilador NTC2 Sensor de temperatura Motor NTC3 Sensor de temperatura Español | 21... -
Page 45: Servicio De Atención Al Cliente
NÚMERO DE COSTES TELÉFONO Haier Italia (IT) 199-100 912 Haier España (ES y PT) 902 509 123 Haier Alemania (DE) 0180 5 39 39 99* * 14 cénts./min. (teléfono fijo) / máx. de 42 cénts./min (móvil) Haier Austria (AT) 0820 001 205* * 14,53 cénts./min.
Need help?
Do you have a question about the HD70-A82 and is the answer not in the manual?
Questions and answers