Table of Contents
Advertisement
OWNER'S MANUAL &
INSTALLATION GUIDE
Installer: This booklet must be given to the product owner. Please add important information below.
Model # ___________________________________ Purchase Date ___________________________________
Serial # ___________________________________
Note: Read all instructions before proceeding with installation.
All specifications are ± 3/8'' and are subject to change without notice. Dimensions listed in inches (mm).
Distributor ___________________________________
Advertisement
Table of Contents

Related Manuals for Aquatic Millennium 7


Summary of Contents for Aquatic Millennium 7
- Page 1 OWNER’S MANUAL & INSTALLATION GUIDE Installer: This booklet must be given to the product owner. Please add important information below. Model # ___________________________________ Purchase Date ___________________________________ Serial # ___________________________________ Distributor ___________________________________ Note: Read all instructions before proceeding with installation. All specifications are ± 3/8’’ and are subject to change without notice. Dimensions listed in inches (mm).
-
Page 2: Table Of Contents
TABLE OF CONTENTS PRODUCT WARRANTY REGISTRATION INFORMATION IMPORTANT SAFETY INSTRUCTIONS 4 – 5 USER INFORMATION FCC INFORMATION AQUATIC LIMITED LIFETIME WARRANTY INSTALLATION INSTRUCTIONS Pre-Installation Procedures Structural Preparation Fast-Fill Waterfall Spout Plumbing Electrical Installation 11 – 13 Inline Maintenance Heater Wiring and Operating Instructions Final System Test &... -
Page 3: Product Warranty Registration Information
AQUATIC Product Warranty Registration Information Thank you for choosing an Aquatic bath. You have chosen one of the finest bath products in the industry! Aquatic supports your purchase with strong commitments to quality and customer satisfaction. IMPORTANT! To activate Product Warranty please register with Aquatic. -
Page 4: Important Safety Instructions
WARNING All safety messages will tell you what the potential hazard is, tell you how to reduce the chance of injury, and tell you what can happen if the instructions are not followed. Aquatic... - Page 5 Each bather should start their bath with fresh water. CAUTION: DO NOT USE HARSH ABRASIVES OR SOLVENTS FOR CLEANING THIS UNIT. installer/owner bears all responsibility to comply with all state and local codes when installing this product. SAVE THESE INSTRUCTIONS Aquatic...
-
Page 6: User Information
• If necessary, the user should consult the dealer or an experienced radio/television technician for additional suggestions. • The user may find the following booklet prepared by the FCC helpful: “How To Identify and Resolve Radio-TV Interference Problems.” It is available from the U.S. Government Printing Office, Washington, DC 20402, Stock No., 004-000-00345-4. Aquatic... -
Page 7: Aquatic Limited Lifetime Warranty
EXCLUSIVE REMEDY Aquatic will, at its option, repair or replace (without removal or installation) the affected components of any defective Unit or System; repair or replace (without removal or installation) the entire defective Unit or System; or refund the then-current list price of the Whirlpool, Air Bath, or Tub. In all cases, a reasonable time period must be allowed for warranty repairs to be completed. -
Page 8: Installation Instructions
10 minutes. With the pump running, turn on the blower. Check all functions. Inspect the tub completely. Any defect must be reported to Aquatic prior to installation in order to have it covered by warranty. Should inspection indicate any damage, contact Aquatic immediately. -
Page 9: Structural Preparation
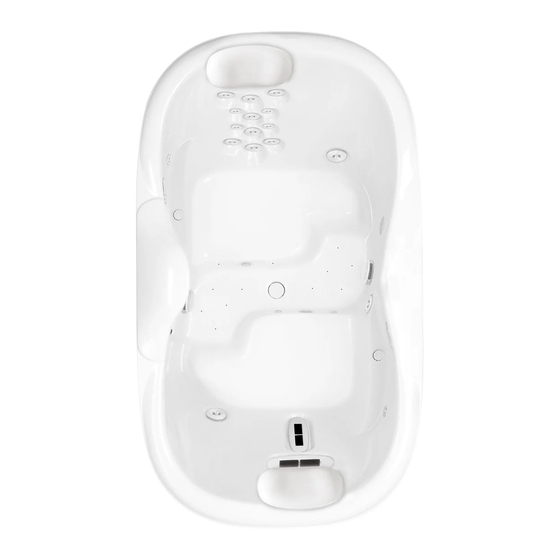
Note: The bath should remain in its shipping carton until time of installation. 1. Literature dimensions are for reference only. INSTALLATION DIMENSIONS SHOULD BE TAKEN DIRECTLY FROM THE TUB. 2X access panels of at least 16" x 16" Millennium 7 (See Figure A) Millennium 8 (See Figure B) -
Page 10: Fast-Fill Waterfall Spout
5 minutes. Check for leaks carefully both while pump is running and has been turned off. Allow water to stand in tub for at least 30 minutes before draining. AQUATIC WILL NOT BE RESPONSIBLE FOR WATER DAMAGE OF ANY KIND IN CONNECTION WITH ONE OF OUR AIR-WHIRLPOOL BATHS. -
Page 11: Electrical Installation
Bonding wire: Connect a #8 bare copper bonding wire from the pump motor or motors and heater to the cold water plumbing or other suitable ground. Grounding is required. The unit should be installed by a qualified electrician and grounded as specified above. For built-in and custom units, install to permit access for servicing. Aquatic... - Page 12 2: NEUTRAL 4: LODE (WHITE) (BLACK) HEATER HEATER TO CIRCUIT BREAKER PANEL BLOWER CONTROL 1 > GROUND 2 > NEUTRAL 1: GROUND 3: LODE (GREEN) (RED) 3 > LODE 4 > LODE *UP TO 25 FEET (REFER TO NEC) Aquatic...
-
Page 13: Electrical Installation
BLOWER 2 PUMP 1 PUMP 2 CONTROL LEDs LIGHTS BLACK BLACK GREEN GREEN HEATER WHITE WHITE NEMA PLUG ELECTRICAL JUNCTION BOX ELECTRICAL JUNCTION BOX MAIN BREAKER PANEL 50A/240VAC 50A/240VAC IMPORTANT: Two 50A/240VAC BREAKER WITH GROUND FAULT CIRCUIT INTERRUPTER CLASS "A". Aquatic... -
Page 14: Inline Maintenance Heater Wiring And Operating Instructions
(3) unawareness of impending hazard, (4) fetal damage in pregnant women, (5) physical inability to exit the whirlpool, (6) unconsciousness resulting in the danger of drowning. WARNING: The use of alcohol, drugs, or medication can greatly increase the risk of fatal hyperthermia. Aquatic... -
Page 15: Final System Test & Clean-Up
5. Dulled areas can be restored to a high gloss with white or cream-colored automotive rubbing compound, followed by application of carnauba wax or white or cream automotive paste wax and buffing. 6. Major gouges require professional repair. Contact Aquatic to arrange factory-authorized repair services. Aquatic... -
Page 16: Operation
Blower LED will blink until the purge occurs except during the first minute. DRYING CYCLE A 1 minute automatic drying cycle will start 20 minutes after the blower is turned off. The blower LED button blinks while waiting for the purge cycle. Aquatic... - Page 17 - LED’s of the selected button will blink 3 times to confirm. All systems will stop. To Select a Preset: - When all accessories are turned off, press the selected button more than 1 second. - The preselected settings will activate. Aquatic...
- Page 18 Advanced Programming DRYING CYCLE WITH WATER DETECTORS The drying cycle will activate 20 minutes after the bathtub is emptied even if the system was not used. The blower touch LED blinks while waiting for the purge cycle. Figure 9 Aquatic...
-
Page 19: Jet Operations
All Millennium Series jets are removable and can simply be put into the dishwasher for cleaning. Note: Use dishwasher top rack and remove before the drying cycle starts. The Millennium Series features Aquatic’s exclusive Shiatsu Back Jetting System, Pressure Plus Jets and Pressure-Flo Hydrotherapy Jets. -
Page 20: Jet Operations
2. Turn the jet clockwise, past point of resistance, until the jet clicks. Fan Jet The Aquatic Fan Jet (see Figure 6) is deeply recessed for greater comfort during bathing. It covers an 8" x 12" area of the body with oscillating streams of air and water, like tiny hands, to massage tired and aching muscles. -
Page 21: Dual Sided Remote Control Installation
6. The remote control is now synchronized on both sides and ready to use. Now you should be able to control the two systems independently. 7. If the synchronization is not successful the first time, you should resynchronize, starting from step 2. Modules and keypads Figure 8 are factory installed Aquatic... - Page 22 Persons with physical conditions that could be affected by magnetic fields should avoid using it and/or consult with their physician. Magnet Installation Figure 10 Figure 11 Aquatic...
-
Page 23: Tub Care
SUPER SYSTEMS CLEAN PLUS (Aquatic part #ST1010) manufactured by Stearns Packaging Corporation to rectify this condition. This may be obtained by calling Aquatic, at (800) 555-5324. It is recommended that you follow the instructions provided by the manufacturer with the product. Repeated use may be necessary. -
Page 24: Repair
The model and serial numbers are located above the pump on the backside of the air-whirlpool. note: all warranty repairs must be authorized by aquatic before work is started. for service, always contact your dealer. CAUTION: Care should be taken to prevent inappropriate chemicals coming in contact with the Lucite® acrylic surface. -
Page 25: Water Quality
If high iron in the water is present, you can also notice rust colored deposits inside your toilet tank or dishwasher. If this Aquatic... - Page 26 CLEAN PLUS (Aquatic part # ST1010) manufactured by Stearns Packaging Corporation to rectify this condition. This may be obtained by contacting Aquatic at (800) 945-2726. It is recommended that you follow the instructions provided by the manufacturer with the product. Repeated use may be necessary. SUPER SYSTEMS CLEAN PLUS does not replace the necessity to purge your air system at least once a month with a low foaming detergent and bleach.
-
Page 27: Troubleshooting Guide
1) GFCI or circuit breaker in OFF position. 1) Reset GFCI. 2) Fuses blown or thermal overload open. 2) Contact your electrician. 3) Locked motor shaft. 3) Contact Aquatic 4) Motor windings burned out. 4) Contact Aquatic 5) Defective starting switch inside single-phase motor. 5) Contact Aquatic 6) Disconnected or defective wiring. -
Page 28: Replacement Parts List
FAN JET ASSY-BRUSHED NICKEL 8102ESCBR FAN JET ASSY-POLISHED BRASS 8102ESCCR FAN JET ASSY-CHROME OSCILLATING FIN FAN JET BODY FAN JET TEE 9250MAGNET MAGNET PILLOW MAGNET;ROUND;3/4”X1/8” 9250PILLWH MAGNETIC PILLOW; WHITE 9250PILLBK MAGNETIC PILLOW;BLACK 8166KEYPAD KEYPAD;BDL;LUXEAIR/LIGHT;RECTANGLE 8168KEYPAD KEYPAD;BDL;LUXEAIR/LIGHT;OVAL 10A. 8169KEYPAD KEYPAD;BDL;INFINITY;RECTANGLE 8170KEYPAD KEYPAD;BDL;INFINITY;OVAL Aquatic... - Page 29 3FT INTAKE HOSE W/ CLAMPS 20B. 8450BLW 450W BLOWER 20C. 8504SEQ 4 PORT AIR SEQUENCER MODULE KIT 21A. 8453 REMOTE REMOTE MILLENNIUM REMOTE CONTROL 21B. REMOTE RECIEVER MODULE CABLE 21C. (PACKAGED WITH 21A) REMOTE RECIEVER MODULE 21D. REMOTE CONTROL MAGNETS Aquatic...
-
Page 30: Replacement Parts Maps
Millennium Owner's Manual & Installation Guide REPLACEMENT PARTS MAP 7a. 7b. Aquatic... -
Page 31: Replacement Parts Map
Millennium Owner's Manual & Installation Guide REPLACEMENT PARTS MAP 11a. 13a. 13b. 11b. Aquatic... - Page 32 Millennium Owner's Manual & Installation Guide REPLACEMENT PARTS MAP 14a. 14b. 14d. 14c. 14e. 14f. Aquatic...
-
Page 33: Replacement Parts Maps
Millennium Owner's Manual & Installation Guide REPLACEMENT PARTS MAP 20a. 20c. 15b. 20b. 15c. 15a. 16e. 16f. 16a. 16b. 16d. 16c. 19a. 19c. 17a. 18a. 19b. 18b. 21a. 21b. 21c. 21d. Aquatic... - Page 36 Revision #007 5/06 AQUATIC Fax-On-Demand System: Toll Free (877) 618-7024 8101 E. Kaiser Blvd., Suite 200 • Anaheim, CA 92808 (800) 945-2726 • Fax (866) 544-5353 • www.aquaticbath.com 8MANMIL | F.O.D. #9000 | Rev. 3/14...
Need help?
Do you have a question about the Millennium 7 and is the answer not in the manual?
Questions and answers