Table of Contents
Advertisement
Quick Links
BACKPACK BLOWERS
GB
TRAGBARER LUFTBESEN
DE
GR
DMUCHAWY PLECAKOWE
PL
HÁTI LOMBFÚVÓ
HU
ZAHRADNÍ VYSAVAČE SE ZÁDOVÝM VAKEM
CZ
SIRT TİPİ BLOVIRLAR (KÖRÜKLER)
TR
SUFLANTĂ PURTATĂ PE SPATE
RO
PUHALNIK LISTJA Z NAHRBNIKOM
SI
RB160EF
GB
OWNER'S MANUAL
DE
BEDIENUNGSANLEITUNG
GR
PL
PODRĘCZNIK UŻYTKOWNIKA
HU
HASZNÁLATI UTASÍTÁS
CZ
NÁVOD K POUŽITÍ
TR
KULLANIM KILAVUZU
RO
INSTRUCŢIUNI DE UTILIZARE
SI
NAVODILA ZA UPORABO
970-16006-200 2008.02
G
B
D
E
G
R
P
L
H
U
C
Z
T
R
R
O
S
I
Advertisement
Chapters
Table of Contents

Related Manuals for Hitachi RB160EF


Summary of Contents for Hitachi RB160EF
- Page 1 HASZNÁLATI UTASÍTÁS NÁVOD K POUŽITÍ KULLANIM KILAVUZU INSTRUCŢIUNI DE UTILIZARE NAVODILA ZA UPORABO BACKPACK BLOWERS TRAGBARER LUFTBESEN DMUCHAWY PLECAKOWE HÁTI LOMBFÚVÓ ZAHRADNÍ VYSAVAČE SE ZÁDOVÝM VAKEM SIRT TİPİ BLOVIRLAR (KÖRÜKLER) SUFLANTĂ PURTATĂ PE SPATE PUHALNIK LISTJA Z NAHRBNIKOM RB160EF 970-16006-200 2008.02...
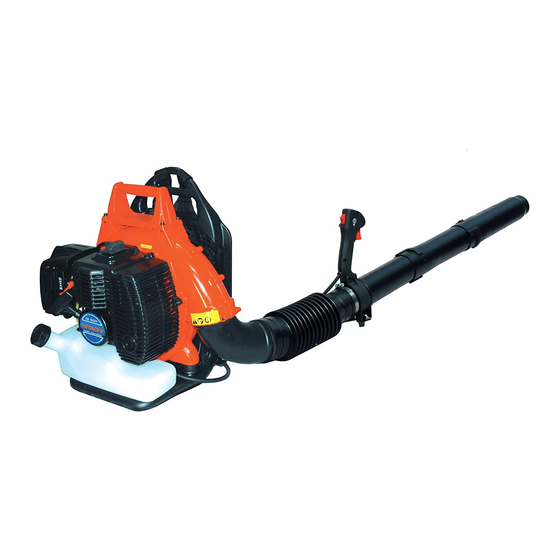
- Page 2 OWNER’S MANUAL Read the manual carefully before operating this machine. BACKPACK BLOWERS RB160EF GB-1...
- Page 3 Nikko Tanaka Engineering Co., LTD 3-4-29 Tsudanuma Narashino Chiba, JAPAN RB160EF E180001 EXPLANATION OF SYMBOLS AND SAFETY WARNINGS WARNING!!! RISK OF DAMAGING HEARING IN NORMAL CONDITIONS OF USE, THIS MACHINE MAY INVOLVE A DAILY LEVEL OF PERSONAL EXPOSURE TO NOISE...
-
Page 4: Table Of Contents
SAFETY FIRST Contents Instructions contained in warnings within this manual marked with a symbol concern critical points which must be taken 1. Parts location ...........3 into consideration to prevent possible serious bodily injury, and for this reason you are requested to read all such instructions 2. -
Page 5: Specifications
2. Specification Model RB160EF Dimensions (LxWxH) 371 x 464 x 495 Dry weight 10.5 Fuel tank capacity liter Engine Type Air cooled 2-cycle gasoline engine Displacement 64.9 Air Filter 2-stage fresh flow filter system Carburetor Rotary Ignition system C.D.I. Spark plug NGK CMR7H (Noise-proof) Muffler... -
Page 6: For Safe Operation
5. For safe operation 1. Read this manual carefully un- sensations followed by loss of til you completely understand color and numbness in the fin- and follow all safety and oper- gers. All factors which contrib- ating instructions. ute to whitefinger disease are 2. - Page 7 5. For safe operation 1. Operate power equipment only in place. If any damage is found at reasonable hours-not early in the fuel line, the exhaust line, in the morning or late at night or the ignition wiring, do not use w h e n p e o p l e m i g h t b e d i s - the blower until it has been re- turbed.
- Page 8 5. When replacing the any other debris before blowing. part, or any lubricant, always be b) In dusty conditions, slightly sure to use only HITACHI prod- dampen surfaces or use mister ucts or products which have attachment when water is avail- been certified by HITACHI for able.
-
Page 9: Set Up
6. Set up BLOWER TUBES WAIST BELT 1. Connect the blower and swivel joint with flexible • The waist belt is attached to the rings on the left and hose. Clamp both ends of the flexible hose securely right sides of the frame. with the hardware supplied with the unit. -
Page 10: Fuel
1. Untwist and remove the fuel cap. Rest the cap on a dustless place. 2. Put fuel into the fuel tank to 80% of the full capac- • The HITACHI engines are lubricated by oil specially ity. formulated for air-cooled 2-cycle gasoline engine 3. -
Page 11: Operation
8. Operation STARTING ENGINE NOTE IMPORTANT When the engine fails to start after several attempts due to overchoking, open the choke and repeat • Avoid operating the blower with the flexible tube pulling the rope. and swivel joint disconnected. That will reduce the cooling air and the engine could be damaged by ADJUSTING IDLE SPEED overheating. -
Page 12: Maintenance
9. Maintenance Maintenance, replacement, or repair of the emission control device and systems may be per- formed by any non-road engine repair establishment or individual. Daily Every Every Every System / Compronent Procedure 25 hours 50 hours 100 hours Before use after after after... - Page 13 9. Maintenance SPARK PLUG PROCEDURES TO BE PERFORMED AFTER • The spark plug may gather carbon deposits on its EVERY 100 HOURS OF USE firing end with reasonable use. Remove and inspect 1. Remove the muffler, insert a screwdriver into the the spark plug every 25 hours and clean the elec- vent, and wipe away any carbon buildup.
-
Page 14: Storage
9. Maintenance 10. Storage BEFORE STORING THE BLOWER: AIR INLET NET 1. Drain a fuel tank and push the primer bulb until it becomes empty of fuel. IMPORTANT 2. Remove the spark plug and drop a spoonful of 2-cycle oil into the cylider. Crank the engine several •... -
Page 15: Troubleshooting Guide
(exhaust port) carbon is built-up wipe away air cleaner clogged with dust wash cylinder fin, fan cover clogged with dust clean When your unit seems to need further service, please consult with our HITACHI service shop in your area. GB-14... - Page 16 BEDIENUNGSANLEITUNG Lesen Sie vor der Verwendung diese Anleitung sorgfältig durch. TRAGBARER LUFTBESEN RB160EF DE-1...
- Page 17 Nikko Tanaka Engineering Co., LTD 3-4-29 Tsudanuma Narashino Chiba, JAPAN RB160EF E180001 1/1/2008 ERLÄUTERUNG DER SYMBOLE UND SICHERHEITSHINWEISE WARNUNG!!! HÖRSCHADEN-RISIKO UNTER NORMALEN ANWENDUNGSBEDINGUNGEN KANN DIESES GERÄT DIE BEDIENUNGSPERSON EINEM TÄGLICHEN GERÄUSCHPEGEL VON 85 dB(A) ODER HÖHER AUSSETZEN. MODELL GERÄUSCHPEGEL VIBRATIONSPEGEL...
- Page 18 SICHERHEIT ZUERST Inhalt Symbol gekennzeichnet sind. Diese beziehen sich auf be- sonders kritische Gefahrenpunkte. Um schwere Verletzungen 1. Anordnung der Teile.........3 weisungen sorgfältig gelesen und befolgt werden. 2. Technische Daten ..........4 3. Warnschilder am Gerät ........4 4. Symbole auf dem Gerät ........4 WARNHINWEISE IN DIESEM HANDBUCH 5.
-
Page 19: Technische Daten
2. Technische Daten Modell RB160EF Abmessungen (LxBxH) 371 x 464 x 495 Nettogewicht 10,5 Kraftstofftank-Volumen Liter Motortyp Luftgekühlter 2-Takt Benzinmotor Hubraum 64,9 Luftfilter Zweistufiges Frischstrom-Filtersystem Vergaserventiltyp (Membran) Drehschieber Zündsystem C.D.I. Zündkerzen NGK CMR7H (mit Rauschunterdrückung) Auspufftopf Ausgerüstet mit Funkenfänger Motor-Betriebsdrehzahl /min. -
Page 20: Sicherheitshinweise
5. Sicherheitshinweise 1. Bitte dieses Handbuch sorgfältig Faktoren sind noch nicht bekannt, durchlesen und alle Sicherheits- w o b e i j e d o c h k a l t e s W e t t e r, hinweise und Bedienungsanwei- Raucherkrankungen, die physischen sungen befolgen. - Page 21 5. Sicherheitshinweise 1. B e t re i b e n S i e m i t M o t o re n b e - um guten Zustand der einzelnen triebene Geräte nur während der Teile und richtiges Festziehen der nor malen Arbeitsstunden, d.h.
- Page 22 U n t e r s t a u b i g e n B e d i n g u n g e n tel ausgetauscht werden müssen, sollten Sie den Boden etwas an- verwenden Sie nur von HITACHI her- feuchten oder die Befeuchtungsvor- gestellte oder von HITACHI für die richtung verwenden, wenn Wasser Verwendung mit HITACHI-Geräten...
-
Page 23: Vorbereitung
HÜFTGURT 6. Vorbereitung • Der Hüftgurt ist an den Ringen an der linken und rechten Seite des Rahmens befestigt. GEBLÄSEROHRE 1. Verbinden Sie das Gebläse und den Angelzapfen mit dem flexiblen Schlauch. Beide Enden des flexi- blen Schlauches fest mit den Geräteteilen verbin- den. -
Page 24: Kraftstoff
Den Verschluss an einem staubfreien Ort ablegen. 2. Den Kraftstofftank bis zu 80 % seines vollen Fassungs- • Die Motoren von HITACHI sind mit Öl geschmiert, das über vermögens mit Kraftstoff befüllen. eine besondere Formel für die Verwendung mit luftgeküh- 3. -
Page 25: Betrieb
8. Betrieb STARTEN DES MOTORS • Achten Sie darauf, dass keine Person in der Nähe des Luftbesens oder des Abgaskanals steht. WICHTIG 6. Sobald der Motor läuft, öffnen Sie langsam den • Benutzen Sie das Gebläse nicht, wenn der flexible Choke, falls dieser geschlossen war und lassen den Schlauch und der Drehzapfen nicht angeschlossen Motor ca. -
Page 26: Wartung
9. Wartung Die Wartung, der Austausch oder die Reparatur der Abgasreinigungsanlage und der Systeme darf von jeder Reparaturwerkstatt oder von jedem Wartungstechniker für allgemeine Motoren (ohne Kraftfahrzeuge) ausgeführt werden. Täglich oder Nach Nach Nach System/Komponente Vorgang vor der jeweils 25 jeweils 50 jeweils 100 Verwendung Betriebsstunden Betriebsstunden Betriebsstunden... - Page 27 9. Wartung ZÜNDKERZE NACH JEWEILS 100 BETRIEBSSTUNDEN • Bei normalem Gebrauch können sich Kohlenstof- AUSZUFÜHRENDE VORGÄNGE fablagerungen auf der Zündkerze ansammeln. 1. Nehmen Sie den Schalldämpfer ab, führen Sie ein- Entfernen und überprüfen Sie die Zündkerze alle 25 en Schraubendreher in den Belüftungskanal ein und Betriebsstunden und reinigen Sie die Elektroden mit entfernen Sie alle Russablagerungen.
-
Page 28: Aufbewahrung
9. Wartung 10. Aufbewahrung LUFTEINLASSNETZ VOR LAGERUNG DES GEBLÄSES: 1. Lassen Sie den Kraftstoff aus dem Tank ab und WICHTIG drücken Sie auf die Zündkappe, bis kein Kraftstoff mehr herauskommt. • Gebläseluft wird vom Lufteinlassnetz eingesaugt. 2. Entfernen Sie die Zündkerze und füllen Sie einen Wenn der Luftfluss während des Betriebes sinkt, Löffel voll mit 2-Takt-Motoröl in den Zylinder. -
Page 29: Störungssuche
Kraftstoff ersetzen Vergasereinstellschraube außerhalb des normalen Bereichs korrekt einstellen Auspufftopf, Zylinder (Auslassöffnung) Kohlenstoffablagerungen entfernen Luftfilter durch Staub verschmutzt reinigen Zylinderrippe, Gebläseabdeckung durch Staub verschmutzt reinigen Sollten weitere Wartungsarbeiten erforderlich sein, ist hierfür der HITACHI-Kundendienst zuständig. DE-14... - Page 30 RB160EF GR-1...
- Page 31 Nikko Tanaka Engineering Co., LTD • • • • 1/1/2008 ISO 11094 ISO 7916 RB160EF 64.9 cm 110 dB(A) 112 dB(A) 1.5 m/s 2.7 m/s GR-2...
- Page 32 GR-3...
- Page 33 RB160EF GR-4...
- Page 34 GR-5...
- Page 35 • • • • • • GR-6...
- Page 36 • • GR-7...
- Page 37 • • • • • • • GR-8...
- Page 38 • • • • • • • • • • • GR-9...
- Page 39 • • • • • GR-10...
- Page 40 • • • • • GR-11...
- Page 41 • • • • • • • • • GR-12...
- Page 42 • • • GR-13...
- Page 43 GR-14...
- Page 47 C.D.I.
- Page 61 C.D.I.
- Page 75 C.D.I.
- Page 89 C.D.I.
- Page 103 C.D.I.
- Page 117 C.D.I.
- Page 128 PRINTED IN JAPAN...
Need help?
Do you have a question about the RB160EF and is the answer not in the manual?
Questions and answers