
Subscribe to Our Youtube Channel
Related Manuals for Seiko 620


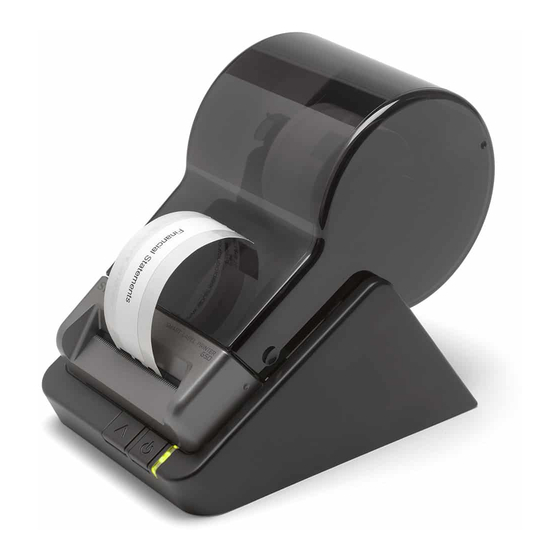
Summary of Contents for Seiko 620
- Page 1 Smart Label Printers User's Guide Models 620, 650, and 650SE U00128837201 For Windows® XP, Server 2003, Vista and Windows 7 or Mac OS® X 10.5 or later. Smart Label Printers® Series...
- Page 2 Smart Label Printers User's Guide Models 620, 650, and 650SE U00128837200 November 2012 U00128837201 February 2013...
- Page 3 EEE Yönetmeliğine Uygundur. Copyright Copyright © 2012-2013 by Seiko Instruments Inc. All rights reserved. No parts of this publication may be reproduced, stored in a retrieval system, or transmitted, in any form, or by any means, electronic, mechanical, photocopying, recording, or otherwise without the prior written permission of Seiko Instruments Inc.
-
Page 4: Important Safety Instructions
Warning 1. Use only the AC adapter provided with this printer, or an AC adapter that has been approved by Seiko Instruments for use with this printer. Use of an incorrect AC adapter may cause risk of overheating or fire. -
Page 5: About This Guide
This guide will help you set up your SLP 620, 650, and 650SE, install the software, and use your SLP. In writing this guide we assume that you are familiar with common operations using Microsoft Windows®... -
Page 6: Table Of Contents
GETTING STARTED ..........................6 What You Need ........................6 A Word about Labels......................7 Caring for Labels........................7 Installing the SLP 620, 650, or 650SE .................8 Installing the Software......................9 Connecting the SLP to a Power Outlet................10 Connecting the SLP to Your Computer ................11 Setting up the Printer ......................12 Loading a Roll of Labels.....................12... -
Page 7: Introduction
INTRODUCTION About Your Smart Label Printer The Smart Label Printer is the best way to instantly print one-at-a-time labels. Direct thermal printing technology does not use ink, toner or ribbon, just labels. The SLP produces fast, laser quality output on a variety of label sizes with the ability to print text, graphics, POSTNET codes and barcodes. -
Page 8: Getting Started
GETTING STARTED What You Need In order to use your SLP and software, you need to have the following: PC Users: Windows XP, Server 2003, Vista or Windows 7 IBM® PC or compatible using 233MHz or higher Pentium-compatible CPU ... -
Page 9: A Word About Labels
SmartLabels are available in a wide variety of sizes and colors to properly label almost anything. The SmartLabels have a mark on the backing of each label that the SLP 620, 650, and 650SE uses for top of label alignment. Check to be sure the labels have this mark before loading them into the SLP. -
Page 10: Installing The Slp 620, 650, Or 650Se
Carefully remove the printer and its components from the box. It's a good idea to save the box and packing materials in case you need to store or ship the printer. Accessories vary depending on the package. A Smart Label Printer (SLP 620, 650, or 650SE) Safety Precautions (Accessories) ... -
Page 11: Installing The Software
Installing the Software Installing the Smart Label Program for MacOS X 1. Insert the Smart Label CD. If the installer does not appear automatically, double-click the CD on your desktop or in the left pane of a new Finder window. 2.... -
Page 12: Connecting The Slp To A Power Outlet
Connecting the SLP to a Power Outlet 1. Connect the supplied AC adapter to the back of the SLP and to a power outlet. DC IN 2. The printer powers on automatically when connected to AC power. The Status Light will flash if no labels are loaded in the printer. -
Page 13: Connecting The Slp To Your Computer
Connecting the SLP to Your Computer Use the USB or serial cable provided with the SLP 620, 650, or 650SE to connect the SLP to your computer. CAUTION: Connecting or disconnecting the interface cable while the printer is turned on may damage the printer. -
Page 14: Setting Up The Printer
Setting up the Printer If the printer is not recognized using the installation wizard, you will need to set up your printer manually. To do so, follow these steps: Prepare the Roll of Labels 1. Open the Smart Label printer software. 2.... - Page 15 Load the Roll of Labels 1. Make sure the power cord is connected and the printer is turned on. The green Status Light should be flashing. 2. Press the left and right side of the Roll Cover, and lift up the edge of the Roll Cover to open. Roll Cover Roll Cover Roll Cover...
- Page 16 3. Remove the Spindle from the SLP and insert the label roll into the Spindle. 4. Insert the labels and Spindle into the SLP. Adjust the guides to fit the labels as shown below. Label Guides Label guides SLP provides three types of labels which have different paper width. Insert each label into positions shown in the figures below.
-
Page 17: Testing The Printer
A quick test lets you know your printer is operating properly and that the labels are loaded correctly. Testing the SLP 620, 650, and 650SE 1. Press and hold the Power Button for 2 seconds to turn the printer standby. -
Page 18: Changing Labels And Printer Care
SLP or they may damage it and void your warranty. Caring for Your Printer Your SLP 620, 650, or 650SE is a high-precision device that's designed for trouble-free operation. Just follow these few precautions: Note: The SLP 620, 650, or 650SE is designed for use only with Seiko Instruments SmartLabels. -
Page 19: Off Line And On Line Mode
Off Line and On Line Mode Pressing and releasing the Power Button toggles the printer between off line and on line mode. An amber Status Light indicates that the printer is off line. There is no communication with the computer when the printer is off line. -
Page 20: Adjusting The Position Of Labels
Adjusting the Position of Labels If you find the labels are advancing at an angle, follow these steps to realign them: 1. Make sure that the SLP is turned off. If the Status Light is on, hold the Power Button until the SLP is turned off. - Page 21 3. Release the pressure on the label stock by moving the Platen Release Lever forward. When you let go of the Platen Release Lever, it goes back to the original position. Hold the Platen Release Lever until the adjustment of the label position completes. Release the platen lever 4....
-
Page 22: Removing Stuck Labels
Removing Stuck Labels If a label becomes stuck in your printer, remove it as follows: 1. Make sure that the SLP is turned off. If the Status Light is on, hold the Power Button until the SLP is turned off. 2.... -
Page 23: Cleaning The Printer
When Using the Cleaning Card 1. Remove label stock from the printer. 2. Insert the Seiko Smart Label Printer Cleaning Card (SLP-CLNCRD). 3. The Cleaning Card should feed automatically or you can press the Form Feed Button to manually feed the card in a couple of times (you may also gently pull the card to guide it through the Platen). -
Page 24: Specifications
SPECIFICATIONS Smart Label Printer 620, 650, and 650SE The Smart Label Printer is a compact printing device ideally suited for label printing applications. There are no built-in fonts and any text must be converted to a bitmap image by a host computer or device for printing. - Page 25 Compliance Table Check the list below to see if the printer and its accessories can be operated in destination countries and comply with the regulations. : Compliant SLP620, PW-B0625-W1-U PW-B0625-W1-E PW-B0625-W1-B PW-B0625-W1-A Countries SLP650, PW-B1230-W1 PW-B1230-W1-E PW-B1230-W1-B PW-B1230-W1-A 650SE ...
-
Page 26: Status Light Indicators
Environment Specifications SLP620 SLP650,650SE Operating Temperature 41°F to 104°F (5°C to 40°C)* Storage Temperature -4°F to 140°F (-20°C to 60°C) Operating Humidity 30%RH to 80%RH (non-condensing) Storage Humidity 30%RH to 90%RH (non-condensing) * Particular papers are excluded. Status Light Indicators LED Indicator State Power off/Stand-by... -
Page 27: Technical Support And Service
ORDERING LABELS AND PARTS Ordering Labels For best results we recommend the use of Seiko Instruments SmartLabels. Other brands may not be engineered to provide optimum, trouble-free results with your SLP; they may not work with your printer or they may damage it and void your warranty.
Need help?
Do you have a question about the 620 and is the answer not in the manual?
Questions and answers
My label won't print - there is no ink on the label. The label feeds but nothing is on the label