Table of Contents
Advertisement
Quick Links
Advertisement
Table of Contents

Related Manuals for Geemarc AMPLIDECT 350


Summary of Contents for Geemarc AMPLIDECT 350
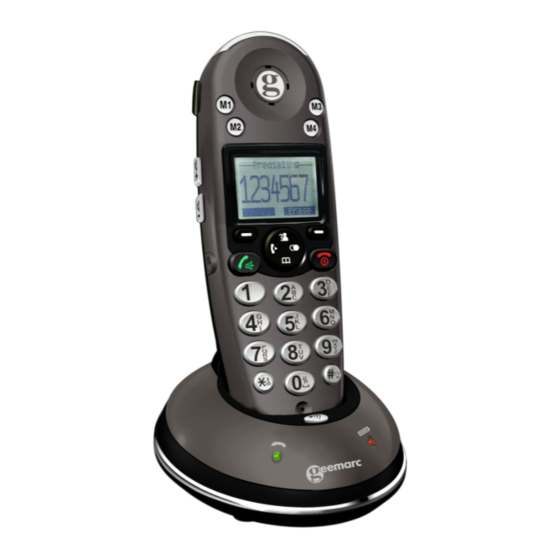
- Page 1 AMPLIDECT 350...
-
Page 2: Table Of Contents
CONTENTS CONTENTS INTRODUCTION Unpacking DESCRIPTION General Description Keys Description LCD Window Icons Description INSTALLATION Connecting Lines Installing Batteries Charging Handset Using Handset Carrying Clip Using Headset (optional) Base Ringer Volume Switch HANDSET SETTINGS Turning Handset On/Off BASIC FUNCTIONS Making a call... - Page 3 CONTENTS Receiving a call Muting the Microphone Amplification Function Menu Navigation Menu Map Handset Ringer Setting Last Number Redial CID Book Torch Key Lock Auto Answer Selecting a Language HS Name Range Alarm Paging Dial Mode Handsfree Flash Signal ADVANCED FUNCTIONS Phone Book One-Touch Memories HS Settings...
- Page 4 CONTENTS BS Settings Registration Calling with more than one Handset Caller ID on call waiting FEATURE LIST TROUBLESHOOTING TECHNICAL SPECIFICATIONS SAFETY INFORMATION GUARANTEE RECYCLING DIRECTIVES...
-
Page 5: Introduction
Its is important that you read the instructions below in order to use your Geemarc telephone to its full potential. Keep this user guide in a safe place for future reference. This guide explains how to use the following telephone:... -
Page 6: Unpacking
1 Telephone line cord 1 Carrying clip 1 User Guide * The shape of the plugs can vary according to each country’s specification. For product support and help visit our website at www.geemarc.com Telephone 01707 384438 Or fax 01707 832529... -
Page 7: Description
DESCRIPTION General Description Handset Description (front) Visual ringer Earpiece One-touch Memories M1 to M4 Up/CID key Display Int key Left soft key Right soft key Dial/ Redial key Speaker key End key Alphanumeric Down keys /Phonebook Keypad # key locked Torch function function Microphone... - Page 8 DESCRIPTION Handset Description (Rear) Carrying clip Speaker Battery compartment cover Charging contacts...
- Page 9 DESCRIPTION PRIOR TO USE Handset Description (Side) Tone Control Volume Control Amplify (AMP) Button Headset Jack...
- Page 10 DESCRIPTION Base Description (Top) : AMPLIDECT350 Charge pins Page botton Charge indicator In use indicator flashes when lights steadily you press the key. while the handset It also flashes when you page is charging. the handset. Base Description (Base) Phone Mains Line power...
- Page 11 DESCRIPTION Base Description (Top) : AMPLIDECT350 HS Charge pins Charge indicator lights steadily while the handset is charging.
-
Page 12: Keys Description
DESCRIPTION Keys Description Dial/Speaker key Make/Answer a call. Activates the speakerphone if pressed during a call, as described in page 41. End key End a call. Long press to activate power on/off, as described in page 20. Navigation key: Up/CID key Scroll up through lists and menu options. - Page 13 DESCRIPTION Int key Set up an internal call to another handset. Transfer an incoming call to another handset. Set up a conference call with an external line and an internal handset. Redial key Enter the redial book, as described in page 29.
- Page 14 DESCRIPTION In standby mode press and hold this key until the icon appears to activate the shaker and visual ringer function. Press and hold this key again until the icon disappears to deactivate...
-
Page 15: Lcd Window Icons Description
DESCRIPTION LCD Window Icons Description New Call Indicates you have missed one or more calls. MSG Waiting Indicates you have one or more voice messages. Off Hook Indicates the line is engaged. Hands-free Indicates the handsfree function is enabled. Battery Icon Indicates battery charge level. -
Page 16: Installation
INSTALLATION Connecting Lines 1. Connect one end of the phone line cord to the phone line jack of the base, and the other end to a standard phone wall outlet. 2. Connect the modular end of the AC power adapter to the power jack of the base, then plug the AC adapter into a standard AC wall outlet. -
Page 17: Installing Batteries
INSTALLATION Installing Batteries The rechargeable Ni-MH batteries (AAA size) come with your phone. Install the battery before using your phone. 1. Slide the battery cover in the direction of the arrow and pull it out. 2. Insert new batteries as indicated, matching correct polarity (+,-). - Page 18 INSTALLATION Notes: The batteries need to be replaced if they do not recover their full storage capacities after recharging. When replacing the batteries, always use good quality Ni-MH re-chargeable batteries. Never use other batteries or conventional alkaline batteries.
-
Page 19: Charging Handset
INSTALLATION Charging Handset ! Important Note: Before initial operation, YOU SHOULD FULLY CHARGE THE HANDSET for about 15 hours. To charge the handset, you should place it on the base. Result: When you place the handset on the base, the handset automatically turns on and the Charge indicator lights during the charge. -
Page 20: Using Handset Carrying Clip
INSTALLATION Using Handset Carrying Clip The supplied handset carrying clip allows you to conveniently carry the handset with you. It clips easily to your belt, waist band, or shirt pocket. If you want to remove the carrying clip: Insert a screw driver along the edge of one of its arms and release the clip. -
Page 21: Using Headset (Optional)
INSTALLATION Using Headset (optional) The headset jack is located in the left side of the handset and is a 2.5mm standard plug. Simply plug the headset into this jack and the headset will be activated. Earphone Microphone Headset Jack Clip Note: When the headset is plugged into the headset jack the microphone on the handset will be deactivated. -
Page 22: Handset Settings
HANDSET SETTINGS Turning Handset On/Off If the handset is in power off mode, when you place the handset on the base, it automatically turns on. To turn the handset on or off in standby mode, follow these steps: 1. To turn on the handset when it's off, press and hold the key until you switch the display on. - Page 23 HANDSET SETTINGS Note: When battery power is very low, if you place the handset on the base, the display will show as below. YOU SHOULD FULLY CHARGE THE HANDSET BEFORE USING. Charging...
-
Page 24: Basic Functions
BASIC FUNCTIONS All descriptions in this manual assume that the handset is in standby mode. Set the telephone to standby mode by pressing the key. Making a Call 1. Pick up the handset and press the key. Result: The In use indicator flashes and the icon appears on the LCD. -
Page 25: Receiving A Call
BASIC FUNCTIONS Receiving a Call When a call is received, the New Call information will appear. If the caller can be identified, the caller's phone number is displayed. If the caller cannot be identified, only the New Call information displays. If you have a voice message, the icon and "MSG WTG ON"... -
Page 26: Muting The Microphone
BASIC FUNCTIONS If the polyphonic ring tone (Melody 8~10) is set, the ring tone may continue for 4 seconds after the caller's hang-up or after the parallel phone had answered the call. Muting the Microphone During a conversation, you can temporarily switch your phone's microphone off, so that the other party cannot hear you. -
Page 27: Amplification Function
BASIC FUNCTIONS Amplification Function Your phone is equipped with a specialized amplification function designed to fit your needs. During a conversation you can adjust the Vol+ or Vol- control on the left side of the handset and use the AMP key on the right side. -
Page 28: Menu Navigation
BASIC FUNCTIONS You can also use the Vol+ or Vol- control in standby mode to adjust the ringer volume. Menu Navigation To access a menu option: 1. To display menu items, press the Menu soft key. 2. To scroll through menu options, press the key repeatedly. -
Page 29: Menu Map
BASIC FUNCTIONS Menu Map 1. CID Book (see page 31) 2. Phonebook New (see page 43) Edit (see page 46) Delete (see page 47) Delete All (see page 47) PB Status (see page 47) 3. BS Settings Terminate HS (see page 59) Dial Mode (see page 40) Flash Time (see page 60) Modify PIN (see page 60) -
Page 30: Handset Ringer Setting
BASIC FUNCTIONS Handset Ringer Setting You can select your own external (from the telephone Network) or internal (from other handsets registered to the same base) ring tone and adjust the volume. 1.Press the Menu soft key. 2.Press key to choose HS Settings menu, then press the Select soft key. -
Page 31: Last Number Redial
BASIC FUNCTIONS Last Number Redial 1. Press the key or the Redial soft key in standby mode. Result: The LCD displays the last number you dialed. 2. Press the key to dial out the number. Your phone allows you to retrieve the last 10 numbers you have dialed and recall them quickly. - Page 32 BASIC FUNCTIONS Use Redial Book options Using the redial book options, you can add a number to phone book or delete a number in the redial book. 1. Press the Redial soft key. 2. Scroll to the desired number by using the key.
-
Page 33: Cid Book
BASIC FUNCTIONS CID Book When you receive a call, if the caller's information is transmitted from the network on which the call was made (and the caller doesn't hide it), the caller's phone number is displayed. Moreover, if you missed one or more calls, icon will appear on the LCD. -
Page 34: Add Cid Number To Phone Book
BASIC FUNCTIONS 3. Use key to view the numbers, you can make a call by pressing the key. You can also add the entry to the phonebook. Note: At step 3, each item of the incoming list is marked with the icon if the call has been reviewed or with the icon if the call hasn't been reviewed yet. - Page 35 BASIC FUNCTIONS Delete a number in the CID Book 1. Press the Menu soft key. 2. Use the Select soft key to choose the CID Book. 3. Scroll to the number you want to delete by using key. 4. When the desired number appears on the display, press the More soft key.
-
Page 36: Torch
BASIC FUNCTIONS Torch If you turn this feature on, the visual ringer will light steadily. You can use the phone as a torch. To turn on this feature, in the Standby mode just keep the key pressed till the visual ringer lights up. To turn off this function, keep the key pressed again till the visual ringer goes out. -
Page 37: Auto Answer
BASIC FUNCTIONS To unlock the keys, keep the key pressed again till the key lock icon disappears from the display. Note: In locked mode, if you press any key, the phone will generate a warning tone, and the "HS Locked" message will be redisplayed. -
Page 38: Selecting A Language
BASIC FUNCTIONS Selecting a Language The handset supports up to 8 predefined languages: English, French, Spanish, German, Italian, Dutch, Russian and Polish. You can change the language used to display the menu messages. 1. Press the Menu soft key. 2. Press key repeatedly to choose HS Settings, press the Select soft key. -
Page 39: Hs Name
BASIC FUNCTIONS HS Name Using this feature, you can define a name to the handset in order to easily recognize your handset if you have more than one registered to the same base, but when you reset the handset, the handset name will be deleted. 1. -
Page 40: Range Alarm
BASIC FUNCTIONS Range Alarm A beep will sound when the handset is out of range of the Base. You are able to select to enable/disable this audible warning. 1. Press the Menu soft key. 2. Press key repeatedly to choose HS Settings, press the Select soft key. -
Page 41: Paging
BASIC FUNCTIONS Paging You can page the handset from the base unit making it ring with a special tone. It's useful to locate a lost handset. Press the key on the base unit (less than 5 seconds), all the handsets registered to the base will ring for about 60 seconds. -
Page 42: Dial Mode
BASIC FUNCTIONS Dial Mode You can select to change the dial mode by the following steps: 1. Press the Menu soft key. 2. Press key repeatedly to choose BS Settings, and press the Select soft key. 3. Press the key to choose Dial Mode, then press the Select soft key. -
Page 43: Handsfree
BASIC FUNCTIONS Handsfree During a call, you may turn on the speakerphone built in the handset. In this mode you can simply put your handset on a surface (e.g. a desk) and enjoy the comfort of the handsfree conversation. To turn the feature on, press the during a call (line engaged). -
Page 44: Flash Signal
BASIC FUNCTIONS Flash Signal When the line is engaged, pressing the Flash soft key sends the Flash signal. This key is used in conjunction with special services (e.g. call waiting) which can be available from your phone network. For further details please contact your network telephone company. -
Page 45: Advanced Functions
ADVANCED FUNCTIONS Phone Book The phonebook built in your cordless phone allows you to store frequently used numbers so that you can easily make a call without having to remember or enter the phone number. Character Map To enter a specific alphanumeric character, press one or more times the relevant key for the required character according to the following table: once for the first character, twice for the second and so on. - Page 46 ADVANCED FUNCTIONS Adding the Phone book Entries 1. Press the Menu soft key. 2. Press the key to choose the Phonebook, press the Select soft key. 3. Press the Select soft key to choose New. 4. The display shows "Name ?". Enter the name you want to use, then press the Next soft key to confirm.
-
Page 47: Using A Pause
ADVANCED FUNCTIONS Using a Pause A pause is useful when you access an interactive voice response system, such as an automated banking system. A pause provides a delay of 3 seconds. If you want to insert a pause when you dial a number in standby mode or store a number in memory, press the key. - Page 48 ADVANCED FUNCTIONS Editing the Phone book Entries 1. Press the Menu soft key. 2. Press the key to choose the Phonebook, press the Select soft key. 3. Press the key to choose Edit menu. Press the Select soft key. 4. Press key repeatedly until the entry you want to edit displays, press the Select soft key to confirm.
- Page 49 ADVANCED FUNCTIONS Deleting the Phone book Entries 1. Press the Menu soft key. 2. Press the key to choose the Phonebook, press the Select soft key. 3. Press key to choose Delete. Press the Select soft key. 4. Press key repeatedly until the name you want to delete displays, then press the Select soft key.
-
Page 50: One-Touch Memories
ADVANCED FUNCTIONS One-Touch Memories You can store up to 4 numbers in direct memories. All the numbers will be stored in the phone book. Storing Memory Numbers 1. Press the memory key (M1 to M4) in standby mode. 2. The display shows "Number ?". Enter the desired number (up to 20 digits), press the Next soft key. -
Page 51: Editing Memory Numbers
ADVANCED FUNCTIONS Editing Memory Numbers Perform the steps of the “Editing the Phone book Entries” paragraph. Please refer to page 46. Note: The memory default names are M1: to M4:, you can add something following them but cannot delete the default name. -
Page 52: Hs Settings
ADVANCED FUNCTIONS HS Settings Setting Alarm You are able to set the alarm on the handset and adjust the alarm settings. 1. Press the Menu soft key. 2. Press key to choose HS Settings, then press the Select soft key. 3. -
Page 53: Audio Setup
ADVANCED FUNCTIONS Notes: At step 5 you need to enter the time in 24-Hour format. If you press any key when the alarm rings, the alarm will be silent. If you choose Snooze On, the alarm will ring at regular intervals of 11 minutes. -
Page 54: Key Tone
ADVANCED FUNCTIONS Key Tone Every time you press a key, your handset acknowledges it with a key tone. You can disable the key tones for a silent use. In certain error conditions, a warning tone will sound when an incorrect key is pressed. 1. - Page 55 ADVANCED FUNCTIONS LCD Contrast Setting The adjustment allows you to optimize the visibility of the display by changing its contrast according to the environment conditions. 1. Press the Menu soft key. 2. Press key to choose HS Settings, then press the Select soft key. 3.
- Page 56 ADVANCED FUNCTIONS 4. Use key to choose Date Format or Time Format, press the Select soft key. 5. You can use key to choose the Date Format (DD-MM/MM-DD) or the Time Format (12-Hour/24-Hour), press the Save soft key to save. Setting date &...
-
Page 57: Selecting A Base
ADVANCED FUNCTIONS Selecting a Base This function allows you to select a base from those already registered to the handset. You can access the options by scrolling the menu. 1. Press the Menu soft key. 2. Press key to choose HS Settings, then press the Select soft key. - Page 58 ADVANCED FUNCTIONS HS Reset If you reset the handset, all the features under HS Settings menu will be restored to the factory initial setting: Alarm, Audio Setup, Ring Setup, Tone Setup, Language, HS Name, Auto Answer and Date & Time. But LCD Contrast can not be restored.
- Page 59 ADVANCED FUNCTIONS Amplified Your phone is equipped with a specialized amplification function designed to fit your needs. If you switch this function on, the handset receiver volume adjustment is 15-30dB. Otherwise the receiver volume adjustment is 0-15dB. 1. Press the Menu soft key. 2.
-
Page 60: Bs Settings
ADVANCED FUNCTIONS BS Settings Terminate HS This function allows you to delete a handset registration from the base. 1. Press the Menu soft key. 2. Press key to choose BS Settings, then press the Select soft key. 3. Press the Select soft key to choose the Terminate HS menu. -
Page 61: Flash Time
ADVANCED FUNCTIONS Flash Time You can select to change the Flash time by the following steps: 1. Press the Menu soft key. 2. Press key to choose BS Settings, then press the Select soft key. 3. Use key to choose Flash Time menu. Press the Select soft key. - Page 62 ADVANCED FUNCTIONS 4. The display shows "PIN?". Enter the current PIN, then press the Next key. If the old PIN code is correct, you will be prompted to enter a new PIN code, otherwise a warning beep will sound and the handset will return to the Modify PIN menu.
-
Page 63: Registration
ADVANCED FUNCTIONS Registration The supplied handset is already registered with the number 1. You can register up to 5 handsets to the same base in order to share the same line with other people. Before registering a handset to the base, you should press and hold the key on the base for about 5 seconds then release it when you have eared an Beep. -
Page 64: Calling With More Than One Handset
ADVANCED FUNCTIONS Calling with more than one Handset If you have more than one handset registered to the same base, you can make internal calls and transfer an external call between the registered handsets. Making an internal call 1. Press the key, the LCD displays as follows, then input the number of the handset you want to call. -
Page 65: Call Transfer Between Handsets
ADVANCED FUNCTIONS Call transfer between handsets You can transfer an external call between the handsets that are registered to the same base. 1. During an external call, press the key then input the number of the handset you want to transfer the call 2. -
Page 66: Caller Id On Call Waiting
ADVANCED FUNCTIONS 4. Either of the two internal handsets can press the key to leave the conference call at any time. Note: If one of the handsets drops the conference call, the remaining handsets will continue the conference. Caller ID on call waiting When you subscribe to Call Waiting service from your local telephone company, the telephone will display the name and number of the second caller while you are... -
Page 67: Feature List
FEATURE LIST 1.8GHz DECT technology with GAP 2.0" large LCD display (128 x 64 dots matrix display) Up to 5 handsets to one base Up to 4 bases to one handset LCD contrast adjustable Phonebook with up to 50 entries 9 VIP ring tones setting for phonebook entries Redial book with up to 10 entries 10 handset ring tones and volume selectable (5... - Page 68 FEATURE LIST Auto answer ON/OFF selectable Alarm clock include snooze option Handset Name setting Backlit LCD screen and keypad Low radiation (optional) Caller ID FSK and DTMF dual system Caller ID Caller ID / Call Waiting Caller ID list with up to 40 entries Incoming calls can be called back/added to phonebook/deleted New call indicator...
-
Page 69: Troubleshooting
TROUBLESHOOTING Symptom Check & Remedy No operation Check that the power adapter is properly connected. Check that the telephone line cord is properly connected. Check that the handset batteries have full power. Check that the handset batteries are installed properly. No dial tone Check that the telephone line cord is properly connected. -
Page 70: Technical Specifications
TECHNICAL SPECIFICATIONS Frequency Range 1.88~1.90GHz Channels 120 Duplex channels Carrier Power <250mW Modulation GFSK Frequency Stability < ± 50 KHz Charging time 15 hours Ambient Normal: 15℃ ~ 35℃, Extreme: 0℃ temperature ~ 40℃ Humidity 0%~90% Dimensions (mm) Base: 136 x 100 x 59; Handset: 160 x 58 x 38 Power Supply Base input: 7.5V, 500mA;... - Page 71 TECHNICAL SPECIFICATIONS If you subscribe to a DSL service Please attach a noise filter (contact your DSL provider) to the telephone line between the base unit and the telephone line jack in the event of the following: - Noise is heard during conversations. - Caller ID features do not function properly.
-
Page 72: Safety Information
SAFETY INFORMATION General Only use the power supply included with the product. Only use the approved rechargeable batteries supplied. Do not open the handset (except to replace the handset batteries) or base. Contact the helpline for all repairs. Never dispose of batteries in a fire. There is a serious risk of explosion and/ or the release of toxic chemicals. - Page 73 SAFETY INFORMATION Environmental Do not expose to direct sunlight. Always ensure there is a free flow of air over the surfaces of the telephone. Do not place any part of your product in water and do not use it in damp or humid conditions e.g. bathrooms. Do not expose your product to fire or other hazardous conditions.
-
Page 74: Guarantee
GUARANTEE From the moment your Geemarc product is purchased, Geemarc guarantee it for the period of one year. During this time, all repairs or replacements (at our discretion) are free of charge. Should you experience a problem then contact our help line or visit our website at www.geemarc.com. - Page 75 GUARANTEE Electrical connection: The apparatus is designed to operate from a 230V 50Hz supply only. (Classified as ‘hazardous voltage’ according to EN60950 standard). The apparatus does not incorporate an integral power on/off switch. To disconnect the power, either switch off supply at the mains power socket or unplug the AC adaptor.
-
Page 76: Recycling Directives
- Or, hand the old product to the retailer. If you purchase a new one, they should accept it. Thus if you respect these instructions you ensure human health and environmental protection. For product support and help visit our website at www.geemarc.com Telephone 01707 384438 Or fax 01707 832529 UGAD350_En_v1.4... - Page 77 UGAD350_En_V.1.4 GERMANY Walter Kolb Str. 9-11 60594 Frankfurt am Main Deutschland Tel: 069 / 96 217 635 Fax: 069 / 96 217 620 www.geemarc.com...
Need help?
Do you have a question about the AMPLIDECT 350 and is the answer not in the manual?
Questions and answers