Table of Contents
Advertisement
Advertisement
Table of Contents

Related Manuals for Intellinet Network Camera & Video Server


Summary of Contents for Intellinet Network Camera & Video Server
-
Page 2: Table Of Contents
Table of Contents SAFETY AND REGULATORY NOTICES ......... 3 1: PRODUCT OVERVIEW ............6 1.1 N ............... 6 ETWORK AMERAS 1.2 M ..............7 ODEL VERVIEW 2: SYSTEM REQUIREMENTS ............8 2.1 H ............8 ARDWARE EQUIREMENTS 2.2 O ......8 PERATING YSTEM AND ROWSER... -
Page 3: Safety And Regulatory Notices
Safety and Regulatory Notices Thank you for purchasing this Intellinet™ Network Camera or Network Video Server. This user manual includes instructions for using and managing the camera on your network. Experience in networking will be helpful when setting up and using this product. - Page 4 Waste Electrical & Electronic Equipment Disposal of Electric and Electronic Equipment (Applicable in the European Union and other European countries with separate collection systems) This symbol on the product or its packaging indicates that this product shall not be treated as household waste. Instead, it should be taken to an applicable collection point for the recycling of electrical and electronic equipment.
-
Page 5: Important Information
Important Information Camera surveillance laws may differ for each country. Contact the local authorities to avoid any surveillance law violations. Note that the image sensor of this network camera can be damaged permanently if exposed to direct sunlight. Defective image sensors that have been damaged by prolonged exposure to direct sunlight are excluded from the product warranty. -
Page 6: 1: Product Overview
1: Product Overview 1.1 Network Cameras Network cameras are closed-circuit television (CCTV) cameras that use the Internet Protocol (TCP/IP) to transmit image data over an Ethernet or Wireless LAN connection. As such, network cameras are also referred to as IP cameras. IP cameras are primarily used for surveillance applications. -
Page 7: Model Overview
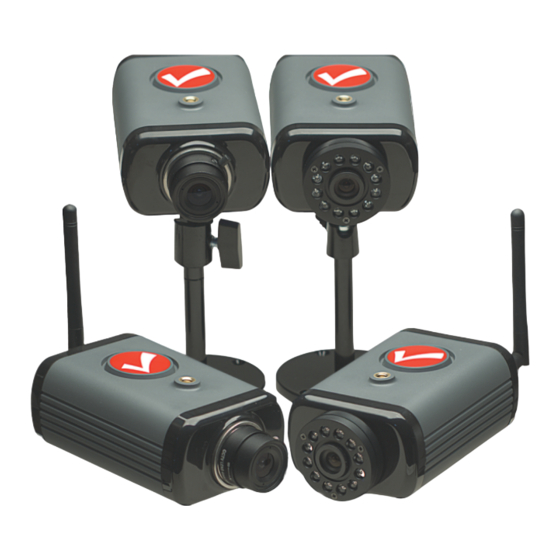
1.2 Model Overview This user manual contains information for the following models: Intellinet Product Model Model Number in Number 16-channel video surveillance software 551380 IDC-752IR Night Vision 720p Network Dome N75113 551397 IDC-757IR Outdoor Night Vision 720p Network Dome N77111 551410 IDC-767IR Outdoor Night Vision 1080p Network Dome N77210... -
Page 8: 2: System Requirements
2: System Requirements 2.1 Hardware Requirements Your computer hardware should meet or exceed the following specifications: Access to a single camera with Web browser: CPU: Pentium 4 1600 MHz (or equivalent AMD) Video Card: 64 MB graphic card RAM: 512 MB Network Adapter: 10/100 Mbps Fast Ethernet Using the 16-Channel viewing / recording utility: CPU: INTEL Dual Core Processor... -
Page 9: Limitations
2.3 Limitations Web Browser Access While it is possible to connect to the network camera with a Web browser other than MS Internet Explorer, some of the features cannot be used. Refer to the overview below: MS Internet Explorer 8.x and 9.x (ActiveX) - view live video in all formats - record live video by right-clicking the live video - listen to audio... -
Page 10: 3: Package Contents
3: Package Contents You should find the following items in the packaging of your Intellinet video surveillance product. 1. Network dome camera 2. Quick installation guide 3. Installation CD -> User manual -> Hardware installation guide -> IP Installer Utility ->... -
Page 11: 4: Installation
4: Installation 4.1 Connecting to the Camera Connect the RJ45 network cable from the camera’s LAN port to your network; e.g., the router or a LAN switch, then power on the camera. The boot sequence will take about one minute. You will need to use the camera’s power adapter, or you can connect the RJ45 cable to a PoE-enabled switch or injector to power the camera. -
Page 12: Windows Xp, Vista And Windows 7
4.1.1 Windows XP, Vista and Windows 7 Insert the Installation CD into the CD or DVD-Drive. After a few moments, the CD will automatically start and display the screen below. If that does not happen, you need to browse the CD with Windows Explorer and double-click the autorun.exe file. - Page 13 IP Installer for Windows Installation Before you start with the installation, make sure that you are connected to your computer with a user account that has administrator rights. The screen shots below are taken from an installation on a Windows XP system. The procedure on Vista and Windows 7/8 systems is similar.
- Page 14 Specify the location where the program should be installed. The default path is OK to be used on most systems. Click on “Browse…” to select a different location and click on “Next” to continue. Select the Windows Start Menu folder. Select or de-select the optional Xvid Codec and MSN Plugin.
- Page 15 Verify the installation summary and click “Install” to begin the installation. Once the installation has completed, click on “Finish”. A new shortcut has been created on your computer desktop; Double-click it to start the application. - 15 -...
- Page 16 IP Installer for Windows When the program starts, you are presented with the screen shown below. Depending on your camera model, the screen may look slightly different, but the functionality is the same. The IP Installer utility lists all cameras that can be found on your network.
- Page 17 Setup: Select a camera from the list and click the Setup button in order to open the camera configuration dialog. Upgrade: Select a camera from the list and click the Upgrade button if you wish to upgrade the firmware of the camera. The firmware upgrade can also be performed with your Web browser.
- Page 18 User Account Settings Page User Name: Enter the user name you wish to use for the new account. Password: Enter the password for the new user account. Confirm: Type the password in again. Mode: There are three possible values to choose from: 1.
- Page 19 Date/Time Settings Page The network camera is equipped with an internal clock. You can display the current date and time information on the video, so that when you look at recorded video material or images you can easily tell when the recording was made.
- Page 20 Network Settings Page The default configuration is shown above, and for most users there should be no need to change these settings. Advanced users can change the following values: HTTP Port: This is the Web server port of the camera. The default value is 80.
- Page 21 PPPoE Settings Page This page allows defining of the PPPoE settings of the camera. This function is not required for the vast majority of users, and if you are not planning on connecting the camera directly to a DSL modem (no network present, just the camera connects directly to the modem) you can safely skip this page.
- Page 22 DDNS Settings Page DDNS stands for “Dynamic DNS.” DDNS is useful for all users who have an Internet service with a dynamic IP address. Most DSL services utilize IP addresses that are highly dynamic and change as often as once every 24 hours. Cable modem services typically keep the IP address assigned to a user for a longer period of time;...
- Page 23 Language Settings Page The Intellinet network camera provides a multi-language user interface for Web-browser access. In order to use this function, you first need to install the additional languages by uploading them to the camera. The default language is English. Additional languages can be found on the Installation CD, or you can download them from the Intellinet Web site at www.networkipcamera.com.
- Page 24 Apply Settings Page This is the last page of the Setup. All configuration changes you have made on the previous screens will be saved when you click the Apply button. If you have selected an additional language to be installed on the previous page, clicking Apply will install that language as well.
- Page 25 5. Will the battery in my notebook last for at least another 10 minutes? 6. Is the camera I want to upgrade located in my local network? 7. Am I sure about what I am doing? If you answer any of these questions with “no,” you should not perform the firmware upgrade and skip this section.
-
Page 26: User Tab
User tab This screen offers two functions: 1. You can change the individual settings of the camera in a similar fashion as with the Setup function on the main screen. However, instead of clicking on Previous and Next to switch between the screens, you can access the individual options more quickly by clicking on any of the tabs (User, Date/Time, TCP/IP, PPPoE and DDNS). -
Page 27: About Tab
About tab This screen displays the version number and date of the IP Installer utility. If you need to contact the Intellinet Technical Support, make sure that you obtain the information from this page and include it in your message to Technical Support. - Page 28 When you connect to the Intellinet network camera for the first time with MS Internet Explorer, you need to install an ActiveX control. The following message appears: Click on Install to being the installation. Depending on your system, additional messages may appear; e.g., the Web browser notification bar. In any event, you need to allow the installation of the ActiveX control.
-
Page 29: Macos
4.1.2 MacOS The installation on Apple systems running MacOS X does not involve the Intellinet installation CD. The Intellinet network camera supports Apple’s Bonjour service. Bonjour, formerly Rendezvous, is Apple Inc.'s trade name for its implementation of Zeroconf, a service discovery protocol. Bonjour locates devices such as printers or network cameras, as well as other computers, and the services that those devices offer on a local network using... - Page 30 2. The Network Camera is shown in the category Webpages. In order to connect to the camera, double-click the circled link. Safari then connects to the camera and the message below appears: 3. Type in “admin” for the user name and the password, then click on Log In. Refer to Chapter 5 for explanations on the Web interface options of your network camera.
- Page 31 4.1.3 Linux The installation on Linux systems does not require any special software. The network camera is compatible to Web browsers such as Firefox and Konqueror. The initial installation requires the setup of the camera’s IP address. As the camera by default obtains an IP address from a DHCP server in the network (e.g., a router), you can access the camera as soon as you have obtained the IP address from the router’s DHCP...
-
Page 32: 5: Web Browser Interface
5: Web Browser Interface 5.1 Live Video Page Use this button to take a snapshot of the video. Clicking the button opens up a window showing the captured frame. Save the image by clicking on the Save Image button. Note: This function is only available in MS Internet Explorer on Windows systems. - Page 33 Click on the Record button, if you wish to record the live video to your computer’s hard drive. When selected, a prompt will request you to specify the folder in which you want to store the video. Click OK to begin the recording. The Record button starts flashing, indicating that the recording is active.
- Page 34 The digital zoom function allows magnification of certain areas of the video. After you click on the magnification icon, a window appears as an overlay on top of the image. See below. You can drag the box over the image, and you can adjust the magnification by moving the slider toward “T”...
- Page 35 This button takes you back to the camera home page where you can view the live video. Click on this button to open the administrator menu page, which allows configuring the camera. This button opens up the integrated online help providing useful tips on the various features.
-
Page 36: Settings Page (Administrator Menu)
5.2 Settings Page (Administrator Menu) The camera’s administrator menu allows you to configure all aspects of your Intellinet network camera. This page provides a complete overview of the status of your network camera. The page may be a little bit intimidating at first glance as a lot of information is displayed, but once you get more familiar with your camera, these values will start to make sense to you. - Page 37 Highlight an account to either edit or remove it. Note that the admin user account cannot be removed. Anonymous Settings Enabling this will allow any user to view the live video from the camera live video page without entering a user name or password. If you do not want to allow this to happen, be sure to set this option to “Disabled.”...
- Page 38 Network - TCP/IP On this page you can define the network settings of the camera. By default the camera is set up to automatically obtain the necessary IP information from the DHCP server (e.g., the router) in your network. You can, however, set up the IP address and related settings manually.
- Page 39 Network - PPPoE You can use this function to connect the camera directly to a DSL modem. A common application for this is where the network camera is installed in a remote location where no network is present. In the location is a DSL Internet connection (DSL modem), but no router or any other network infrastructure.
- Page 40 Date Time On this page you can define the time settings of the camera. Current date/time: Displays the camera’s current time. PC clock: This is the date and time of the computer you are currently using to connect to the camera. Date/Time format: The format determines how the date/time is displayed on the live...
- Page 41 Video – Video Settings The following three menus (Video Settings, Profile and Day/Night) allowing defining all video-related parameters. Note that the Day/Night option as well as other parameters may not be available on all models. Image Rotated: Allows mirroring and rotating the image. Video Clip Format: Select which video profile the camera should be using for video clips it records in a network storage device.
- Page 42 Text Color: Choose between black or white. Background color: Select from either black, white or transparent. Display Position: Define where the overlay should appear on the live image. Privacy masking is the ability of the camera to back out (censor) certain parts of the live video.
- Page 43 As you can create multiple masks, you need to provide a name for the mask, and you can define which color you want to overlay to be. Finally, set the status to “Enabled” and click “Save” to create and activate the privacy mask. ->...
- Page 44 Encoding: Your Intellinet network camera can encode video in three different formats. H.264 is the most advanced and efficient codec delivering excellent image quality and a small video stream size at the same time. Normally, this is your preferred choice. However, you can also select MPEG4 or MJPEG, e.g., for compatibility reasons.
- Page 45 Maximum frame rate: Type in the number of frames the camera should generate per second of video. The higher the value, the smoother the video, but the more bandwidth is going to be required. Valid entries are 1 to 30. Quality: You can control the image quality of the video by selecting “Fixed Quality”...
- Page 46 “Night Mode” – This is the opposite of the day mode. If this mode is enabled, the camera always removes the IR cut filter. As a result, the camera will always be IR sensitive, regardless of the actual light levels. Using night mode in day light conditions is not recommended as it leads to a poor image quality with false and washed out colors.
-
Page 47: Live View
5.2.2 Live View The live view menu provides access to the video settings, which are exactly the same as described in the last section (5.2.1). It also provides access to advanced image settings and allows configuring the view areas that we discussed in the previous section. Note that depending on your camera model, the options on the screen may differ from the screen shots in this user manual. - Page 48 Exposure Frequency: There are four values: “Auto,” “50Hz,” “60Hz” and “Hold Current.” If your camera is installed so that it’s facing outside, you should select “Auto.” If your camera is installed indoors, you must select the appropriate light frequency (either 50 or 60 Hz; e.g., in the US select 60 Hz, in Germany, Poland or Italy select 50 Hz).
- Page 49 Some Intellinet network cameras are equipped with a motorized iris. In optics, an iris is a thin opaque structure with an opening (aperture) at its center. The role of the diaphragm is to stop the passage of light, except for the light passing through the aperture.
- Page 50 Camera Settings – View Settings A view area is a cropped part of the entire image. Each view area is treated as a video source with its own video stream. There are 4 areas that can be set up with different resolutions. When you define a profile (section 5.2.1) you can assign to it a view area, which you define here.
-
Page 51: Playback
5.2.3 Playback The Intellinet network camera offers an integrated playback feature, which allows playing back videos from your local HDD, from a network storage server or the optional SD storage card. Note that video playback is limited to computer systems running Windows and MS Internet Explorer. Client PC You can use the player controls on the bottom left to browse for a video on your HDD, or to pause and stop the video. - Page 52 There are two folders: “Event” which is for event-triggered recordings, e.g., motion detection alerts, and “Schedule” which contains recordings that the camera recorded if scheduled recording is enabled. Refer to the section 5.2.4 Event” for more details on the setup. Above: Each day has its own folder.
-
Page 53: Local Storage
Above: Playback of one event recording in the web browser (MSIE only). Item Description Move one folder up Refresh the view Delete the selected file Select all items in the folder Playback the selected video Download selected item to your computer’s hard drive. Local Storage If your camera is equipped with a local storage option (recording on an SC card) you can access the recordings from here. -
Page 54: Event
5.2.4 Event Your Intellinet network camera supports so-called events. When an event occurs, you can have the camera perform an action, e.g., record a video to a remote location. This section describes how to set up event servers, events, motion detection and the scheduler. Event Server First you need to set up an event server, or multiple event servers. - Page 55 2. How to add a SMTP Server: Server Type: Select “SMTP.” Mail Server: Type in the address of your mail server. Do not type in leading smtp:// or http://. Server Port: Adjust the server port if necessary. Port 25 is standard, but your server may be using different values (not so uncommon these days as an anti-...
- Page 56 4. Adding a Network Storage Server Type: Select “Network Storage.” Type: Select a valid type for your network storage (either Windows SMB or Linux NFS). Network Storage Location: Enter the address of your local storage server as shown on the right.
-
Page 57: Event List
Event List Now that we have created an Event Server, we can proceed with setting up actual events. Click on the “Add” button to begin. You need to specify the trigger type. The drop-down list below shows the available options. Note that depending on your camera model, the options will vary. - Page 58 Onboot This is a one-time event that is triggered after the camera has restarted. IR Cut Filter This trigger event becomes active whenever the camera enters the night mode and has removed the IR cut filter. For example you can have the camera send you an email informing you about this event.
- Page 59 Item Description Send Image Instructs the camera to send out images. When selected, you need to specify whether you want to use FTP, network storage or SD card. You may need to set up these servers first (see previous section) in order to use them here.
-
Page 60: Motion Detection
Motion Detection The Intellinet network camera is able to monitor the video footage for movements and trigger an alert if motion has been detected. This motion detection does not utilize passive infrared, but instead it relies on a frame by frame comparison of the video footage the camera captures. - Page 61 Schedule The Network Camera supports event trigger actions that can be based on a schedule. This can be used, as an example, to only activate motion detection between 9 pm and 6 am during business days and around the clock on the weekends.
-
Page 62: System
5.2.5 System The system menu provides access to a variety of system settings of your Intellinet network camera. Maintenance - Restart You can restart the network camera by hitting the restart button. Set Auto Restart to “On” if you wish to reboot the camera automatically, and then you specify the reboot mode. - Page 63 The following message will appear: Click “OK” to continue. Another message will appear: Click on “Cancel” to abort the operation. Click on “OK” to start the upgrade process. You will see the following messages: Note: You may see additional messages at this stage. When you see this message, the upgrade has been completed.
- Page 64 Date Time - Current Date / Time Refer to section 5.2.1. Security - Account Refer to section 5.2.1. Security - IP Address Filter Once you enabled it, the listed IP address are allowed or denied access to the network camera. Add the IP address that you’d like to allow or deny, select allow or deny from the list and save it.
- Page 65 Network Advanced - RTSP General RTP Port Range: The default value of port range is 5000 ~ 7999 and can be changed from 1124 to 65534. RTSP Port: RTSP stands for Real Time Streaming Protocol. RTSP is supported by most media clients, such as Real Player, VLC and QuickTime.
- Page 66 Multicast: Here the initial stream is sent to the router only, which creates optimal distribution paths for datagrams sent to a multicast destination address. Whether one or 300 PCs are connected to the video stream does not matter. The bandwidth and load of the local camera is unaffected.
- Page 67 Network Advanced - UPNP UPnP stands for Universal Plug and Play. A UPnP-enabled device, such as your network camera, announces its presence in the local network to other computers that support UPnP as well. The operating systems Windows XP, Windows Vista and Windows 7/8 support UPnP. When the network camera is connected to the network, Windows will alert the computer user of the presence of the new device (a new icon will be added to your My Network Places folder) and lets the user connect to the device instantaneously.
- Page 68 Network Advanced - Bonjour UPnP Bonjour is a service that, just like UPnP, helps to find the network camera on the network. Bonjour is available for Windows, but is more commonly used for MacOS. Refer to section “4.1.2 MacOS” for additional information on the usage.
- Page 69 If the router in your home network is equipped with a DDNS client, we recommend using the router instead of the camera. Most SOHO routers are equipped with a DDNS client and since the router is in direct control of handling the Internet connection, it’s the device best suited for the DDNS task.
- Page 70 Digital I/O If your Intellinet network camera is equipped with a digital I/O interface, you can configure the connections on this page. The screen shows the current status of input 1 & 2 and output 1 & 2. The screen also allows you to define the “normal”...
-
Page 71: System Log
System Log The Network Camera features a log function for system messages. These are system messages about the camera start-up procedure, e-mail deliveries, FTP uploads, motion detection and more. The camera stores the messages in its internal memory and displays them on the system log screen. Since memory is limited, the messages will eventually be truncated. - Page 72 The remote log function uses the Syslog Protocol, which is a standard for forwarding log messages in an IP network. Syslog is a client/server protocol. The Syslog sender (the Network Camera) sends a small (less than 1KB) textual message to the Syslog server. This user manual shows one example of a Syslog server, the 3CDaemon utility by 3Com Corporation (Download Location: http://support.3com.com/software/utilities_for_windows_32_bit.htm).
-
Page 73: 6: Video Surveillance Software
6: Video Surveillance Software 6.1 Function Description The Intellinet Network Camera ships with a surveillance application that can monitor and record up to 16 network cameras. You can record video permanently or based on a schedule, or you can use the integrated motion detection function and only record motion events to preserve disk... -
Page 74: 7: Questions And Answers
7: Questions and Answers 9.1 Accessing the Camera What are the camera’s default IP address, administrator user name and password? The camera obtains an IP address from a DHCP server in your network. If no DHCP server is present, the camera reverts back to its default IP address 192.168.1.221. -
Page 75: Web Browser Access
Whenever you change the Web server port from the standard 80 to a different value, you need to append the port to the camera's IP address. The syntax is always http://cameraip:portnumber. Example: When you change the Web server port to 81, the correct address would be: http://192.168.1.221:81. -
Page 76: Camera Related Issues
9.3 Camera Related Issues The camera does not send any e-mails. Why? 1. The problem occurs because the camera cannot contact the e-mail server. Check: Is the e-mail (SMTP) server address correct? Did you specify the correct gateway IP address? Did you specify correct DNS servers? Did you enter the correct e-mail address? Did you specify the e-mail title? - Page 77 Does my camera support PoE (Power over Ethernet)? The following models support PoE: - IBC-607IR Network Bullet Camera - IBC-637IR HD Network Bullet Camera - IBC-667IR HD Network Bullet Camera - IDC-832 HD Mini Network Dome - IDC-862 HD Mini Network Dome - IDC-752IR HD Network Dome - IDC-757IR HD Network Dome - IDC-767IR HD Network Dome...
- Page 78 Intellinet™ offers a complete line of active and passive networking products. Ask your local computer dealer for more information or visit www.intellinet-network.com Copyright © Intellinet All products mentioned are trademarks or registered trademarks of their respective owners. - 78 -...
Need help?
Do you have a question about the Network Camera & Video Server and is the answer not in the manual?
Questions and answers