Table of Contents
Advertisement
Quick Links
Advertisement
Table of Contents

Related Manuals for DREAMVISION Star Light R699780


Summary of Contents for DREAMVISION Star Light R699780
- Page 2 Changes Dreamvision provides this manual ’as is’ without warranty of any kind, either expressed or implied, including but not limited to the implied warranties or merchantability and fitness for a particular purpose. Dreamvision may make improvements and/or changes to the product(s) and/or the program(s) described in this publication at any time without notice.
-
Page 3: Table Of Contents
ABLE OF ONTENTS SAFETY INSTRUCTIONS ..................... 5 Important information........................5 Lead-free regulation ......................5 Information for Users on Disposal of Old Equipment ............5 About the installation place....................5 Important safeguards.......................... 5 REGIONAL SPECIFIC INFORMATION..................7 FCC INFORMATION (USA ONLY) ................. 7 INSTALLATION GUIDELINES .................. - Page 4 Picture Position ......................... 26 Aspect Ratio ........................26 V-Stretch (for Video sources).................... 27 Over Scan (only SD) and Mask (only HD)............... 28 Film Mode (only 480i, 576i, 1080i).................. 28 Installation Menu ..........................28 Lens Control........................28 Pixel Adjust ........................28 Installation Style........................
-
Page 5: Safety Instructions
1.0 SAFETY INSTRUCTIONS 1.0 SAFETY INSTRUCTIONS 1.1 Important information Lead-free regulation This product has a High Intensity Discharge (HID) lamp that contains a small amount of mercury. It also contains lead in some components. Disposal of these materials may be regulated in your community due to environmental considerations. For disposal or recycling information please contact your local authorities, or the Electronics Industries Alliance: http:// www.eiae.org. - Page 6 1.0 SAFETY INSTRUCTIONS temperature, as this causes condensation, which opening or removing covers may expose you to may result in fire, electric shock, or other dangerous voltages and other hazards. Refer all hazards. service to qualified service personnel. • Do not place this product on an unstable cart, •...
-
Page 7: Regional Specific Information
1.0 SAFETY INSTRUCTIONS it. Fragments from a broken light-source lamp may cause injuries. • The light-source lamp used in this projector is a high pressure mercury lamp. Be careful when disposing of the light source lamp. If anything is unclear, please consult your dealer. •... -
Page 8: Installation Guidelines
2.0 INSTALLATION GUIDELINES 2.0 INSTALLATION GUIDELINES 2.1 Environment of Use • Do not use this unit in rooms with cigarette smoke or oily smoke. This may cause the unit to malfunction. Mounting this unit to the ceiling Check temperature around the unit. When a heater is in use, the ceiling may reach a temperature higher than anticipated, hence leading to malfunction of the unit. -
Page 9: Ceiling Mounting The Unit
2.0 INSTALLATION GUIDELINES 200 mm 300 mm 300 mm Space requirements 2.3 Ceiling mounting the unit When mounting of this unit is required, make use of the 4 screw holes (M5x20 screws) at the bottom of this unit indicated by the letter A. Allow sufficient space around the air inlets to avoid blocking them Precautions for Ceiling-mount •... -
Page 10: Projection Distance And Offset Setting
2.0 INSTALLATION GUIDELINES 2.4 Projection Distance and Offset Setting Projection Distance Projection Screen Size Projection Screen Size Projection Screen Starlight Diagonal size Base size Height Projecting Distance (Aspect Ratio 16:9) (Aspect Ratio 16:9) (Aspect Ratio 16:9) minimum - maximum 50" (1270 mm) 43,6"... - Page 11 2.0 INSTALLATION GUIDELINES This unit comes with a optical shift that features vertical and horizontal adjustment of the projection screen position. Adjust the picture to your screen. • The Vertical Shift level is between -80% and 80% of the Screen Height (0.80 x H). •...
-
Page 12: Adjust The Picture Focus
2.0 INSTALLATION GUIDELINES Adjust the picture Focus Into the [Lens Control] menu, press the [Ok] button to access the [Focus] adjustment. Use the up and down buttons to adjust the picture focus. STAND BY INPUT HDMI 1 HDMI 2 COMP. VIDEO S-VIDEO LENS... -
Page 13: Remote Control Unit (Rcu)
3.0 REMOTE CONTROL UNIT (RCU) 3.0 REMOTE CONTROL UNIT (RCU) 3.1 General view STAND BY [Power On] button [Stand By] button INPUT Select Active [Input] HDMI1, HDMI2,Component HDMI 1 HDMI 2 COMP. Video, S-Video Info menu / Input PC VIDEO S-VIDEO (StarLight / Starlight 2) [Hide] Display... -
Page 14: How To Use The Remote Control Unit
3.0 REMOTE CONTROL UNIT (RCU) AUTION WHEN USING BATTERIES Do not mix new and old batteries.Do not mix different type of batteries as they are different in characteristics. Insert batteries according to the + and - marks on the battery case. Do not put batteries into fire or recharge them if they are not design to. -
Page 15: Getting Started
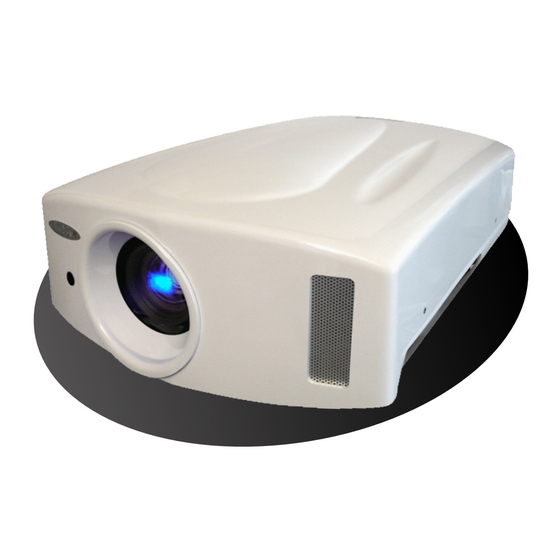
4.0 GETTING STARTED 4.0 GETTING STARTED 4.1 General View Front side Air Inlet Optical Lens Front IR sensor • Air Inlets: see “Air-Flow and Space Requirements”, page 8. Rear side Lamp trap Operating LEDs Operating buttons Back IR sensor • Operating LEDs: see section 4.3, page 17 for more details. -
Page 16: Connecting The Power Cord
4.0 GETTING STARTED 4.2 Connecting the Power Cord •Before plugging in the Power Cord, ensure that all devices have been connected. •Connect the power cord to the power input terminal of the projector. AUTION AGAINST IRE AND LECTRIC HOCK Since the power consumption of this unit is high, insert the power plug directly into a wall outlet. When not using devices, remove the power plug from the wall outlet. -
Page 17: Operating Leds
4.0 GETTING STARTED 4.3 Operating LEDs STANDBY/ON (green / red LED) LAMP (orange LED) WARNING BACK (red LED) INPUT HIDE MENU Operating LED Description STANDBY/ON LAMP WARNING Blinking (green or red) (orange) (red) Unit is in standby mode green Unit is in operate mode (during projection) Unit is in operate mode, but HIDE is ON. -
Page 18: Operating And Navigation Buttons
5.0 CONNECTIONS 4.4 Operating and Navigation Buttons Left - right Hide display Input source Back BACK INPUT HIDE Menu Power button MENU Up - down Button Description Hide display To temporary hide the picture. Input source To switch input source. Power button To turn On or Off the projector. -
Page 19: Connecting A Device To The Projector
5.0 CONNECTIONS 5.1 Connecting a device to the projector HDMI 1 RS-232 S-Video HDMI 2 Video YPbPr VGA (Sub D-15) (SL2 only) SCART Input Device HDMI or DVI-D sources: Blu-Ray Disc player, DVD-player with HDMI, Game HDMI1, HDMI2 Console, Computer with DVI-D output. VGA (StarLight2 only) Computer (VGA output), Multimedia box for StarLight2 only. -
Page 20: Connecting A Scart Device
5.0 CONNECTIONS 5.2 Connecting a SCART device SCART SCART ONNECTING A DEVICE This unit can be connected to a SCART device using a SCART to RGB+Sync cable. Once connected, select the COMP. input as active input. Then browse into the projector menu to Input Signal > COMP. and select SCART option. -
Page 21: Menu And Picture Setting
6.0 MENU AND PICTURE SETTING 6.0 MENU AND PICTURE SETTING 6.1 Menu Structure MAIN MENU SUBMENU AVAILABLE OPTIONS Picture Adjust Picture Mode (Movies) Cinema1 (Vivid HDTV) Cinema2 (SF movies or anims) Cinema3 (Video programs) Natural (Concerts) Stage (bright lightning) Dynamic User1 User2 (StarLight2 only) - Page 22 6.0 MENU AND PICTURE SETTING Input Signal HDMI inputs Input Auto (16 - 235) Standard (0 - 255) Enhanced Color Space Auto YCbCr(4:4:4) YCbCr(4:2:2) Control with HDMI (CEC) On, Off COMP. input Color Space YCbCr SCART Video / S-Video inputs NTSC Setup Level 0 IRE 7.5 IRE...
- Page 23 6.0 MENU AND PICTURE SETTING Display Setup Back Color Blue, Black Menu Position select position Menu Display 15sec, On Line Display (input setting) 5sec, Off Source Display (active input) On, Off Logo On, Off Language Select between 12 languages Function Lamp Power Normal High...
-
Page 24: Picture Adjust Menu
6.0 MENU AND PICTURE SETTING 6.2 Picture Adjust menu Picture Mode Three preset picture modes are available and they can be applied to any input. A picture mode retains the Picture adjustments: • Cinema1 setting is best suited for general movie watching. •... -
Page 25: Advanced
6.0 MENU AND PICTURE SETTING • Normal: Standard tones • Gamma A: rich dark tones. • Gamma B: for film and movie projection. • Gamma C: for film and movie projection with more detailed blacks than setting B. • Gamma D: this setting is recommended for bright midtones and Computer like projection. •... -
Page 26: Input Signal Menu
6.0 MENU AND PICTURE SETTING Reset values to their default settings. 6.3 Input Signal menu HDMI Inputs This menu is available if the selected active input is HDMI1 or HDMI2. 6.3.0.1 Input Auto: The input dynamic range is automatically detected and configured. Standard: Force dynamic range output to 16-235. -
Page 27: V-Stretch (For Video Sources)
6.0 MENU AND PICTURE SETTING • 4:3. The original source is considered as 4:3 format. Generally SDTV broadcasts and entertainments. • 16:9. The picture size is 16:9, generally most recent DVDs, Blu-Ray discs and HDTV broadcasts. • Zoom. The zoom function is useful to zoom in the picture and eliminate black bars SD or HD SOURCE ASPECT RATIO SDTV 4:3... -
Page 28: Over Scan (Only Sd) And Mask (Only Hd)
6.0 MENU AND PICTURE SETTING fit an installation with anamorphic lens. The picture fills completely the projector panels, using the maximum available resolution for 2.35-2.40 aspect ratio movies. SD or HD SOURCE V-STRETCH SDTV (2.35) 16:9, Off HDTV (2.35) 16:9, Off V-Stretch applied to SD and HD sources. -
Page 29: Installation Style
6.0 MENU AND PICTURE SETTING • Vertical Blue (1 to 5) Installation Style Flip the image to the left or right, up or down according to the projection state of the projector: Front, Ceiling Mount (F), Rear or RearCeiling mount (R) Keystone Compensate for trapezoidal distortion caused by installation. -
Page 30: Test Pattern
6.0 MENU AND PICTURE SETTING Test Pattern Display 6 types of test patterns. For checking the color condition and tone, and the pixels size. Use whenever necessary. Off-Timer You can configure this automatic power Off function that will switch off the projector when there is no operation and no signal. -
Page 31: Anamorphic Lens
7.0 ANAMORPHIC LENS 7.0 ANAMORPHIC LENS 7.1 Optional CineWide and 2.35 THEATRE System The Starlight centralizes the controls and automation commands for both the CineWide and the 2.35 THEATRE System for a unique, versatile and unexpectedly simple to operate 2.35:1 theatre experience using an Anamorphic Lens. -
Page 32: Cinewide And Cinewide Pro Options
7.0 ANAMORPHIC LENS 7.3 CineWide and CineWide PRO options Select a 16:9 input: Aspect Ratio to “4:3” When you select a 16:9 input, choose the “4:3” aspect mode to obtain a geometrically correct picture in your screen. Select “4:3” for this input into the menu “Input Signal ⇒ ⇒ ⇒ ⇒ Aspect Ratio ⇒ ⇒ ⇒ ⇒ “4:3””. •... -
Page 33: Quick Aspect Ratio Changes On The Same Input
7.0 ANAMORPHIC LENS ⇒ ⇒ ⇒ ⇒ Configure Function Menu Trigger to “On (V-Stretch)” The “Function ⇒ ⇒ ⇒ ⇒ Trigger” menu determines the 12V Trigger output located in the panel input of the Starlight this is a global parameter (for all inputs): •... -
Page 34: Maintenance
8.0 MAINTENANCE 8.0 MAINTENANCE 8.1 Clean Dirt on the Cabinet Always use a soft cloth. In case of heavy soiling, soak a cloth in neutral detergent diluted with water, wring dry and wipe, followed by wiping again using a dry cloth. Caution Pay attention to the following as the cabinet may deteriorate in condition, get damaged or paint may come off. -
Page 35: Cleaning And Replacing The Dust Filters
8.0 MAINTENANCE • Tighten the screws of the lamp unit. • Attach the lamp cover and fasten the two lamp trap screws. Resetting Lamp Time installing a new lamp, reset the lamp time into the OSD menu. After a) Insert plug into the power outlet b) When the projector is in standby mode (red STANDBY/ON led), use the remote control and press sequentially the [BACK] - [OK] - [HIDE] within 1 second interval then [DOWN] for at least 2 seconds. - Page 36 8.0 MAINTENANCE Warning Led Operating LED Description STANDBY / LAMP WARNING Blinking orange LED red LED Unit is in standby mode green Unit is in operate mode (during projection) Unit is in operate mode, but HIDE is ON. blinking Press again on HIDE button to obtain a green picture.
-
Page 37: Miscellaneous
9.0 MISCELLANEOUS 9.0 MISCELLANEOUS 9.1 RS-232 input and IR Codes Communication Specifications Control of this unit is possible using a computer or automation device connected with a RS-232 cross cable (female - female D-sub 9 pins cable). Communication specifications for this unit are as follows: Baud Rate 19200 bps Data Format... - Page 38 9.0 MISCELLANEOUS Switch Input 49h 50h Switch active input to S-Video Switch active input to Video Switch active input to Component Switch active input to VGA (StarLight2 only) Switch active input to HDMI 1 Switch active input to HDMI 2 Switch to next input Switch to previous input Test Pattern...
- Page 39 9.0 MISCELLANEOUS Picture Mode 52h 43h 37h 33h 36h 34h Day profile (StarLight2 only, require Expert Cal. 37h 33h 36h 35h Night profile (StarLight2 only, require Expert Cal. 37h 33h 36h 36h Cinema 3 37h 33h 36h 37h Stage 37h 33h 36h 38h Cinema 2 37h 33h 36h 39h Cinema 1...
-
Page 40: Available Reference And Response Commands
9.0 MISCELLANEOUS Lens Aperture 52h 43h 37h 33h 32h 30h Toggle the Lens Aperture setting menu. 37h 33h 32h 38h Set Lens Aperture to setting “1” 37h 33h 32h 39h Set Lens Aperture to settign “2” 37h 33h 32h 40h Set Lens Aperture to setting “3”... -
Page 41: Pc Compatible Signals
9.0 MISCELLANEOUS Gamma Table 47h 54h Check the current Gamma table 30h: Normal (header 3Fh) 31h: A 32h: B 33h: C 34h: Custom1 35h: Custom2 36h: Custom3 Gamma Value 47h 50h Check the current Gamma value 30h: 1.8 (header 3Fh) 31h: 1.9 32h: 2.0 33h: 2.1... - Page 42 9.0 MISCELLANEOUS SXGA 60 1280 x 1024 63.981 60.020 108.000 H+ V+ 1688 x 1066 SXGA+ 60 1400 x 1050 64.740 59.950 101.000 H+ V+ 1560 x 1080 WSXGA+ 60 1680 x 1050 65.222 60.002 147.140 H- V- 2256 x 1087 1920 x 1080 60 1920 x 1080 67.500...
-
Page 43: Specifications
9.0 MISCELLANEOUS Specifications Overview The Starlight uses the latest technology developed to provide the ultimate video-projection experience. LCoS (Liquid Crystal on Silicon) technology based on a reflective principle features an extremely high-definition picture and seamless color gradations. Emission Method LCoS (Reflective Active Matrix Principle) Display Panel/Size 0.7"... -
Page 44: Dimensions
9.0 MISCELLANEOUS Dimensions 199 mm 7.8’’ 500 mm 386 mm 19.7’’ 15.2’’ 386 mm 15.2’’ Contact Information: TEC - Dreamvision 7, rue La CAILLE, 75017 Paris - FRANCE Web: www.dreamvision.net R699780 - Starlight User Manual... - Page 45 9.0 MISCELLANEOUS R699780 - Starlight User Manual...
- Page 46 9.0 MISCELLANEOUS R699780 - Starlight User Manual...
- Page 47 9.0 MISCELLANEOUS R699780 - Starlight User Manual...
Need help?
Do you have a question about the Star Light R699780 and is the answer not in the manual?
Questions and answers