
Subscribe to Our Youtube Channel
Related Manuals for HobbyZone Zig Zag Racer ZZ3


Summary of Contents for HobbyZone Zig Zag Racer ZZ3
- Page 1 Инструкция для HobbyZone Zig Zag Racer 3 Перейти в карточку товара 8 800 775 98 98...
- Page 2 In stru cti o n Ma n u a l...
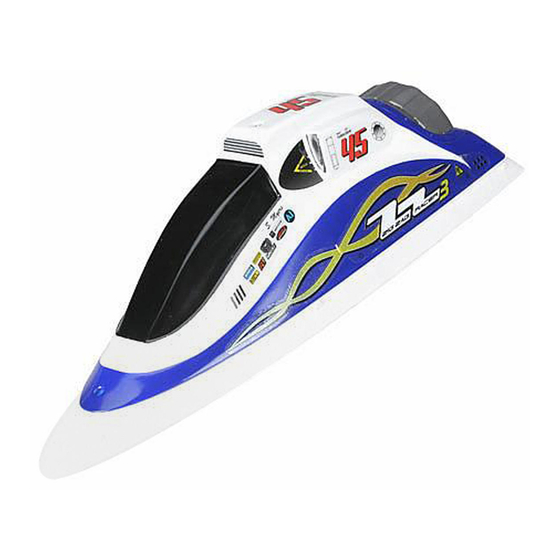
- Page 3 ™ ZIG ZAG RACER 3 —the high-performance, highly maneuverable, self- ® righting speedboat from HobbyZone . You'll have hours of fun zipping across the water, racing with friends and playing Zig Zag Water Soccer. But before the fun begins, it’s very important that you read this manual completely and follow the directions carefully.
- Page 4 Crash damage is not covered under the warranty. Be sure to read the warranty on page 26 and "Warnings and Safety" on page 24 before you proceed to Step 1.
- Page 5 Transmitter Needed for Step 1 "AA" Heavy-Duty Batteries (x8 included) 1. Remove transmitter bottom cover by pushing down with thumbs, as indicated by the arrows. 2. Install batteries. Use fresh 1.5V “AA” batteries only. 3. Watch polarity. Replace cover. 4. To test, switch on transmitter—LED should glow brightly.
-
Page 6: Install Battery
7-Cell Battery Warning: For increased alignment posts. performance, your Zig Zag Racer 3 may be powered by an optional HobbyZone 8.4V Note: Always make sure your transmitter is 1000mAh battery pack (HBZ1013). Please on before you install the battery. After you... - Page 7 Motor Test and Battery Discharging CAUTION: Keep everything clear of the propeller. A moving propeller can cause injury. 1. The buttons below the power switch and labeled as "TH. Trim" are the digital throttle trim buttons. With your boat on the stand, turn on the transmitter and install the battery.
- Page 8 See "Warnings and Safety" on page 24. The charger supplied with the Zig Zag Racer ™ ® , the HobbyZone variable rate DC peak charger, uses unique peak detection circuitry that ensures an accurate charge every time and protects your Ni-Cd and Ni-MH batteries from the dangers of over-charging.
-
Page 9: Rudder Test
Rudder Test Move the steering wheel side to side. Back of Boat Back of Boat The rudder should move as shown in the drawings. NOTE: The small buttons labelled as "ST. Trim" under the power switch are the digital steering buttons and are used to adjust the "neutral"... -
Page 10: Choosing Your Location
Choosing Your Location CAUTION: Parents, do not allow young children to go the lake or pool unsupervised. Do not operate your boat near Be safe and stay away from steep grades near moss, grass, weeds, brush, etc. shorelines where you or those with you could slip and fall into the water. -
Page 11: Choosing A Location
Choosing a Location WATCH OUT! The person holding the boat should hold it so that the propeller does not come in contact with any part of their body. You will need two people to do the range test: one to hold the transmitter and one to ™... - Page 12 Launching and Running Before launching, make sure no one in the area is operating another radio control vehicle on the same frequency. Your frequency is marked on the back of your transmitter and under the boat canopy. ™ 1. To launch your Zig Zag Racer 3 , turn transmitter on, install charged battery and place and release the boat in the water.
- Page 13 Launching and Running (continued) CAUTION ™ • Your Zig Zag Racer 3 has no reverse. Be • Do not run your boat into hard objects or sure to plan ahead while driving so you onto shore or the rudder and propeller don’t get your boat stuck in a dead end.
- Page 14 Trimming the Rudder Control • After launching your boat, check to see that it is running straight. ™ • If your Zig Zag Racer 3 always turns to the right when the steering wheel is at neutral (centered), press the "L" digital trim button until it drives straight.
- Page 15 RACING AND GAMES WITH THE ZIG ZAG ™ The Zig Zag Racer 3 is available on six different frequencies (channels). This means that up to six people can race at the same time. Racecourse Setup 4. To mark the course, use two or three You can use the orange buoys that come with buoys set in a line or in the shape of a your Zig Zag Racer 3 to set up a racecourse.
- Page 16 Racing Options 1. After you've set up your course, drivers 3. Another way to start is for each driver to launch their boats and then stand in a line hold his or her boat at water’s edge. At on the shore a minimum of 6 feet apart. "Go,”...
- Page 17 Zig Zag Water Soccer Setup When you can consistently maneuver your Zig ™ Zag Racer 3 at both low and high speeds, you can add to your racing fun by playing Zig Zag Water Soccer. Here’s how you set up your boat and "playing ield."...
- Page 18 Playing Zig Zag Water Soccer Zig Zag Water Soccer can be played with one, NOTE: For best results, it is easiest to move two, or three players on each team with each the ball when the throttle is in low position. boat on a different frequency.
- Page 19 Retrieving Buoys The bumper provided for Water Soccer can also be used to retrieve the orange buoys. Remember—do not swim to retrieve the buoys. 1. Attach bumper to front of boat using the three screws provided. Secure the screws but do not over-tighten. 2.
- Page 20 Maintaining the Zig Zag Racer 3 • The rudder shaft can be damaged if you ™ • The Zig Zag Racer 3 is designed to be run over an object, another boat or hit the self-righting if it is tipped over during rac- shore.
- Page 21 Propeller/Shaft Replacement Note: The motor is secured to the hull with If you damage the propeller, you may need to aggressive servo tape, so it may take a small purchase a replacement propeller/propeller amount of force, as well as prying with shaft.
- Page 22 Propeller/Shaft Replacement (continued) Follow these steps to replace the prop/prop shaft: 1. Remove prop/prop shaft from cap by unscrewing it. 2. Slide propeller and shaft out of drive tube. 3. Locate the new prop/prop shaft. 4. Slide the new prop/prop shaft into the boat.
-
Page 23: Troubleshooting Guide
Troubleshooting Guide PROBLEM POSSIBLE SOLUTION CAUSE Unit doesn’t operate. 1. Transmitter “AA” batteries are depleted 1. Check that the batteries are installed as per or installed incorrectly. the illustration inside the transmitter bottom 2. The connector inside the boat may not (see page 5). - Page 24 Troubleshooting Guide (continued) PROBLEM POSSIBLE SOLUTION CAUSE The boat goes much 1. The battery isn’t charged. 1. Fully charge the battery per the instructions slower than normal 2. Weeds, moss, or trash may be caught on (see page 4). the prop or rudder. 2.
-
Page 25: Warnings And Safety
Warnings and Safety DO NOT lay it on carpet while charging. 1. Read and follow this manual completely, 6. Never cut into the battery, charger, or observing all instructions, Warnings, boat wires, or serious injury can occur. Notes, Cautions, and safety directions; Causing the battery to “short out”... -
Page 26: Replacement Parts And Optional Parts
Replacement Parts and Optional Parts Item Description Suggested Retail Item Description Suggested Retail HBZ1012 7.2V 900mAh Battery $27.99 HBZ3740 Hull w/PCB,PRP, MTR & RDR: ZZR3 CH 5 $46.99 HBZ1026 DC Peak Charger (1.2 Amp) $19.99 HBZ3741 Hull w/PCB,PRP, MTR & RDR: ZZR3 CH 6 $46.99 HBZ3315 3”... - Page 27 Warranty and Follow-Up Procedures EXPRESS OR IMPLIED, ABOUT NON- Warranty Period: INFRINGEMENT, MERCHANTABILITY OR Exclusive Warranty- Horizon Hobby, Inc., FITNESS FOR A PARTICULAR PURPOSE (Horizon) warranties that the Products OF THE PRODUCT. THE PURCHASER purchased (the "Product") will be free from ACKNOWLEDGES THAT THEY ALONE HAVE defects in materials and workmanship at the DETERMINED THAT THE PRODUCT WILL...
- Page 28 of or to any part of the Product. This warranty If you as the Purchaser or user are not does not cover damage due to improper prepared to accept the liability associated installation, operation, maintenance, or with the use of this Product, you are advised attempted repair by anyone other than to return this Product immediately in new and Horizon.
- Page 29 at our facility. A Service Repair Request is Questions, Assistance, and Repairs: Your local hobby store and/or place of available at www.horizonhobby.com on the purchase cannot provide warranty support "Support" tab. If you do not have internet or repair. Once assembly, setup or use of the access, please include a letter with your Product has been started, you must contact complete name, street address, email...
- Page 30 HobbyZone Zig Zag Racer 3 Описание...
Need help?
Do you have a question about the Zig Zag Racer ZZ3 and is the answer not in the manual?
Questions and answers