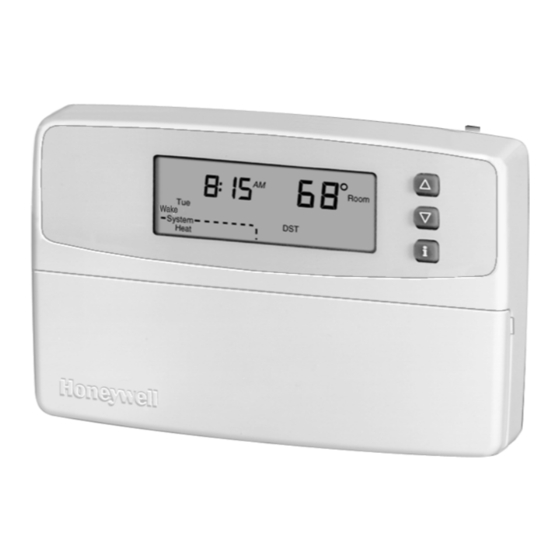
Honeywell CT3611 Owner's Manual
Seven day programmable heat pump low voltage (20 to 30 vac) thermostat and wallplate
Hide thumbs
Also See for CT3611:
- Owner's manual addendum (2 pages) ,
- Installation quick manual (2 pages)
Table of Contents
Advertisement
Seven Day
Programmable Heat Pump
Low Voltage (20 to 30 Vac) Thermostat and Wallplate
Model CT3611
Para pedir estas instrucciones en español, llame al 1-800-468-1502.
Pour obtenir ce ode demploi en français, composer le 1-800-468-1502.
Table of Contents
Step 1. Prepare for Installation ..................................................................................................................................
Step 2. Remove Old Thermostat ...............................................................................................................................
Step 3. Mount thermostat Wallplate ...........................................................................................................................
Step 4. Wire Wallplate Terminals ...............................................................................................................................
Step 5. Mount the Thermostat ...................................................................................................................................
Step 6. Customize Your Thermostat ..........................................................................................................................
Step 7. Set the Clock ................................................................................................................................................. 11
Step 8. Programming ................................................................................................................................................. 12
Step 9. Operating Your Thermostat ........................................................................................................................... 15
Step 10. Set the Fan and System Switches .............................................................................................................. 17
If You Have a Problem ............................................................................................................................................... 18
Smart Response™ Technology ................................................................................................................................. 20
Wiring Diagrams ........................................................................................................................................................ 21
® U.S. Registered Trademark
Copyright © 2001 Honeywell •
Honeywell CT3611
PROGRAMMABLE THERMOSTAT
•All Rights Reserved
OWNER'S GUIDE
5
5
6
7
9
9
69- 1081- 3
Advertisement
Table of Contents

Related Manuals for Honeywell CT3611


Summary of Contents for Honeywell CT3611
-
Page 1: Table Of Contents
Step 10. Set the Fan and System Switches ... 17 If You Have a Problem ... 18 Smart Response™ Technology ... 20 Wiring Diagrams ... 21 ® U.S. Registered Trademark Copyright © 2001 Honeywell • Honeywell CT3611 PROGRAMMABLE THERMOSTAT •All Rights Reserved OWNER’S GUIDE... -
Page 2: Mercury Notice
TOTAL COMFORT TEMPERATURE MANAGEMENT WITH SMART RESPONSE™ TECHNOLOGY. Congratulations! You made a smart choice by purchasing your new Honeywell thermostat; the smart thermostat that; • Keeps you comfortable by automatically calculating exactly when the heat pump should go on to have the house at the desired comfort temperature by the time you wake up or return home. - Page 3 TIME /TIME SETS TIME FORWARD OR BACK SET CURRENT DAY/TIME SETS CURRENT TIME AND DAY RUN PROGRAM RETURNS THERMOSTAT TO NORMAL OPERATING MODE Program HOLD TEMP Hold Temp SETS A HOLD TEMPERATURE SETTING AND ACTIVATES VACATION HOLD FEATURE SETS DAY OF...
- Page 4 DISPLAYS EITHER CURRENT TIME OF DAY OR PROGRAM TIMES SHOWS WHEN THERMOSTAT IS IN THE PROGRAMMING MODE SHOWS VACATION HOLD DURATION SHOWS THERMOSTAT Set Program IS "CALLING" FOR EMERGENCY OR Hold for AUXILIARY HEAT Em Ht Em Ht SHOWS CURRENT...
-
Page 5: Step 1. Prepare For Installation
This thermostat is designed to work with multistage heat pumps (heat pumps with Auxiliary and/or Emergency Heat). Check Table 1 in Step 4 to make sure the CT3611 is compatible with your system. If you have compatibility questions, contact Honeywell at www.honeywell.com/yourhome or call the Customer Relations Center at 1-800-468-1502. -
Page 6: Step 3. Mount Thermostat Wallplate
STEP 3. MOUNT THERMOSTAT WALLPLATE q Separate the wallplate from the thermostat by placing your thumb or fingers between the bottom of the wallplate and the thermostat, and pulling the wallplate up and away from the thermostat. See illustration at right. -
Page 7: Step 4. Wire Wallplate Terminals
Plug the hole in the wall with insulation to help prevent drafts from adversely affecting thermostat operation. q Match the terminals from your old thermostat to the terminals on the CT3611. Find the column from Table 1 that matches your existing thermostat wire terminals to help you match the terminals correctly. - Page 8 — Never attach wires to both the O and B terminals on the CT3611. If the old thermostat had wires on both the O and B terminals, be sure to attach the B wire to the CT3611 C terminal. If another wire is already matched to the C terminal, contact Honeywell.
-
Page 9: Step 5. Mount The Thermostat
STEP 5. MOUNT THE THERMOSTAT STEP 6. CUSTOMIZE YOUR THERMOSTAT Your Honeywell CT3611 thermostat comes preset to the most commonly used settings. The settings are: — Auxiliary and/or Emergency Heat type. — Smart Response™ technology on. — Temperature °F. — 12-hour clock format. - Page 10 q Press and hold down You now can change any of these settings. Auxiliary Heat Type (Feature Number 5) Auxiliary Heat options are: — 3 = Hot water, high efficiency furnace (90% or better). — 6 = Gas or oil forced air furnace (preset). —...
-
Page 11: Step 7. Set The Clock
Temperature Format (Feature Number 14) Temperature format options are: — 0 = °F (preset). — 1 = °C. To change temperature format: q Press once. q Press Time to move to next feature or Time Format (Feature Number 16) Time format options are: —... -
Page 12: Step 8. Programming
Press Program STEP 8. PROGRAMMING The keyboard is located behind the thermostat cover. The three most frequently used keys are near the display. Pressing displays the current temperature settings. Pressing the thermostat displays day, time, program period, temperature and system settings. - Page 13 Table 2 can be helpful when planning your schedule of time and temperature settings. The thermostat default settings are shown in parentheses ( ). Period Default Setting Wake Time (6:00AM) Heat (70°F/21°C) Cool (78°F/25.5°C) Leave Time (8:00AM) Heat (62°F/16.5°C) Cool (85°F/29.5°C)
- Page 14 After the first day is programmed, you can copy that day to any other day using procedure in Copy a Day. q Press when the entire week is programmed. Program Copy a Day Your thermostat can copy program settings from one day to another. q Press Leave Wake Return q Press until the display shows the day you want to copy.
-
Page 15: Step 9. Operating Your Thermostat
Leave q Repeat the above steps for each period to be cleared. q Press Program STEP 9. OPERATING YOUR THERMOSTAT Change Temperature Setting Until the Next Program Period (Temporary Change) q Press until the screen shows the desired temperature setting. - Page 16 Change Temperature Setting Indefinitely (Hold) q Move the System switch to the desired position (Heat or Cool). q Press then Hold Temp temperature to room temperature after approximately three seconds). q To cancel “Hold” press Program Change the Temperature Setting Until a Designated Day and Period (Vacation Hold) q Press twice.
-
Page 17: Step 10. Set The Fan And System Switches
Fan Auto: Normal setting for most homes. The equipment controls the fan operation. Then set the Heat: The thermostat controls your heating system. system switch. Off: Both the heating and cooling systems are off. Cool: The thermostat controls your cooling system. -
Page 18: If You Have A Problem
69-1081—3 Table 3. Solution Guide. • Make sure the thermostat is mounted and latched on the wall plate. Mount and latch the thermostat on the wallplate if it is not. • Make sure terminal C is connected to the system transformer common. - Page 19 Toll-Free Customer Assistance Please read and follow the provided instructions for this thermostat. For additional information, go to www.honeywell.com/yourhome or call the Honeywell Customer Relations Center at 1-800-468-1502. The Center hours are Monday through Friday, 7:00AM to 5:30PM Central Time.
-
Page 20: Smart Response™ Technology
SMART RESPONSE™ TECHNOLOGY Your CT3611 is actually a small computer. The Smart Response™ technology calculates the correct time of day to turn on your heating or cooling system. Smart Response technology considers the following information. • Air temperature. • Wall temperature. -
Page 21: Wiring Diagrams
POWER SUPPLY. PROVIDE DISCONNECT MEANS AND OVERLOAD PROTECTION AS REQUIRED. NEVER ATTACH WIRES TO BOTH THE O AND B TERMINALS. SEE WIRE WALLPLATE TERMINALS SECTION FOR MORE DETAILS. Typical hookup of CT3611 with isolated stage-one heating and cooling connections. EQUIPMENT MONITOR... - Page 22 Golden Valley, MN 55422-3992 This warranty does not cover removal or reinstallation costs. This warranty shall not apply if it is shown by Honeywell that the defect or malfunction was caused by damage which occurred while the product was in the possession of a consumer.
- Page 23 This warranty gives you specific legal rights, and you may have other rights which vary from state to state. If you have any questions concerning this warranty, please write our Customer Relations Center, Honeywell Inc., 1885 Douglas Dr. N., Golden Valley, MN 55422-3992, or call 1-800-468-1502, Monday-Friday, 7:00 a.m. to 5:30 p.m., Central time.
- Page 24 Home and Building Control Home and Building Control Honeywell Honeywell Limited-Honeywell Limitée 1985 Douglas Drive North 35 Dynamic Drive Golden Valley, MN 55422 Scarborough, Ontario M1V 4Z9 69-1081—3 J.H. Rev. 11-01 Printed in U.S.A. on recycled paper containing at least 10% post-consumer paper fibers.
Need help?
Do you have a question about the CT3611 and is the answer not in the manual?
Questions and answers