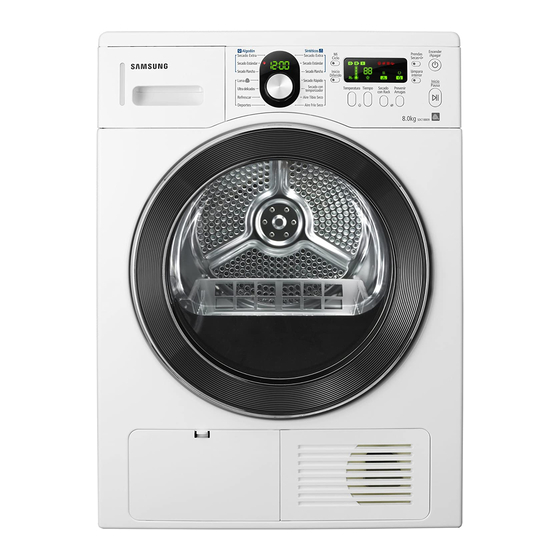
Samsung SDC18809 User Manual
Condensing dryer
Hide thumbs
Also See for SDC18809:
- User manual (36 pages) ,
- User manual (36 pages) ,
- User manual (180 pages)
Table of Contents
Advertisement
Advertisement
Table of Contents

Subscribe to Our Youtube Channel
Related Manuals for Samsung SDC18809


Summary of Contents for Samsung SDC18809
-
Page 1: User Manual
SDC18809 SDC1A809 SDC3C801 SDC3K801 Condensing Dryer user manual This manual is made with 100% recycled paper. imagine the possibilities Thank you for purchasing this Samsung product. To receive more complete service, please register your product at www.samsung.com/register... - Page 2 Our dryers will fi t just about anywhere and without a door confl ict. The direction of our easy reversible door can be changed with simple handy work. 8. Diamond drum for fabric care Samsung electronics’ proprietary diamond-shaped drum offers excellent protection to your laundry. 9. High energy effi ciency Energy effi...
-
Page 3: Safety Information
Congratulations on your new Samsung Dryer. This manual contains important information on the installation, use, and care of your appliance. Please take the time to read this manual to take full advantage of your dryer’s many benefi ts and features. - Page 4 safety information This appliance is not intended for use by persons (including children) with reduced physical, sensory or mental capabilities, or lack of experience and knowledge, unless they have been given supervision or WARNING instruction concerning use of the appliance by a person responsible for their safety. Children should be supervised to ensure that they do not play with the appliance.
- Page 5 SEVERE WARNING SIGNS FOR INSTALLATION WARNING The installation of this appliance must be performed by a qualifi ed technician or service company. - Failure to do so may result in electric shock, fi re, an explosion, problems with the product, or injury. Plug the power cord into an AC 220~240V/50Hz wall socket or higher and use the socket for this appliance only.
- Page 6 safety information SEVERE WARNING SIGNS FOR USING WARNING Do not let children or pets on or into the product. In addition, when disposing of this product, disassemble the door lock (lever). - This may result in children falling and injuring themselves. - If children become locked in the product, there is a danger of suffocation.
- Page 7 CAUTION SIGNS FOR USING CAUTION Do not stand on top of the appliance or place objects (such as laundry, lighted candles, lighted cigarettes, dishes, chemicals, metal objects, etc.) on the appliance. - This may result in electric shock, fi re, problems with the product, or injury. Do not touch the glass door and inside of the drum during or just after drying as it is hot.
-
Page 8: Table Of Contents
contents Tools needed for installation INSTALLING YOUR DRYER See Dryer Exterior Check before installing Before using the product Important to installer Location considerations Alcove or closet installation Electrical requirements Grounding Installation side by side Final installation checklist Draining water without using the water tank Connecting the drain hose Installation stacking Door Reversal... -
Page 9: Installing Your Dryer
installing your dryer TOOLS NEEDED FOR INSTALLATION Hire a professional to install this dryer properly. If there is a service call performed as a result of poor setup, adjustment, and connection, it is considered the responsibility of the installer. If you install the dryer you are responsible. -
Page 10: Check Before Installing
• Check the appearance of the product for any damaged parts before starting the product installation. • If there are any parts that appear to be damaged, please contact your nearest Samsung Customer Service Center. • When moving the product, do not move the product by yourself. -
Page 11: Electrical Requirements
ELECTRICAL REQUIREMENTS Electrical Requirements is AC 220~240V/50Hz. • Improper connection of the equipment grounding conductor can result in a risk of electric shock. Check with a qualifi ed electrician or serviceman if you are in doubt as to whether your dryer is WARNING properly grounded. -
Page 12: Installation Side By Side
installing your dryer INSTALLATION SIDE BY SIDE For proper installation, we recommend that you hire a professional. To install: 1. Move your dryer to an appropriate location for installation. Consider installing the dryer and washer side-by-side. Lay two of the carton Level cushion-tops on the fl... -
Page 13: Draining Water Without Using The Water Tank
DRAINING WATER WITHOUT USING THE WATER TANK You can use the dryer without using the water tank by following the procedures below. CONNECTING THE DRAIN HOSE The Dryer can pump the condensed water outside of the DRYER directly with dain hose provide. The procedures to connect the drain hose are as follows. - Page 14 installing your dryer Connecting the drain hose The end of the drain hose can be positioned in three ways: 1. Over the edge of a wash basin: The drain hose must be placed lower than 90cm. If the end of the drain hose needs to be placed above the ground, we recommend a height of 60cm ~ 90cm.
-
Page 15: Installation Stacking
INSTALLATION STACKING In case of purchasing the additional stacking kit, contact our Samsung service center or local distributers. [Part no. SK-DH(DC98-01330A) / SK-DA(DC98-01330B)] 1. Carefully lay the dryer on its side. Use the packing material so you don’t scratch the fi nish on the dryer. -
Page 16: Door Reversal
installing your dryer DOOR REVERSAL Depending on your requirements (installation location, space constraints), you can change the direction the door opens. This is done according to the customer’s needs. The qualifi ed technician or customer can do this themselves directly. WARNING Frame-Front 1. - Page 17 8. Fasten the 16 screws in the correct positions. 9. Note that two of the screws have a different length from the others. (Use the longer screws for the door-lever.) 10. Move the position of the screw at the back of the door-hinge. 11.
-
Page 18: Operating Instructions, Tips
operating Instructions, tips OVERVIEW OF THE CONTROL PANEL Digital Graphic Displays the remaining drying cycle time, all cycle information, and error Display messages. To select a cycle, rotate the Cycle Selector dial to the desired cycle. [Cottons] Cupboard Dry Extra Dry [Synthetics] Extra Dry Cupboard Dry Iron Dry... -
Page 19: Ultra Delicate
Wool - For machine washable and tumble dryable wool only. Load should be under 1.0 kg. The Wool cycle of this machine has been approved by Woolmark company for Total-Easy-Care Wool products, M1006(Woolmark approval number). Ultra Delicate - The Delicates cycle is designed For lingeries at a low drying temperature. -
Page 20: Child Lock
operating Instructions, tips CHILD LOCK A function to prevent children from playing with your dryer. Activating/Deactivatin If you want to activating/deactivatin the Child Lock, press both the Temp. and Time buttons simultaneously for 3 seconds. The “Child Lock ” will be lit when this feature is activated. •... -
Page 21: My Cycle
MY CYCLE Lets you activate your customised cycle that includes Dryness, drying temperature and time option. By pushing the My Cycle button, you activate the settings used during the previous My Cycle mode. (Default : Normal Cycle) If My Cycle mode is activated, the My Cycle indicator will be lit. You can select all options in My Cycle mode as follows. -
Page 22: Rack Dry
operating Instructions, tips RACK DRY Installing the drying rack 1. Open the dryer door. 2. Position the drying rack in the tumbler, placing the front lip of the drying rack on the top of the lint fi lter case. 3. Place the rear legs in the two recessed areas of the dryer’s back wall then push down the middle of the drying rack to fi... -
Page 23: Load The Dryer Properly
LOAD THE DRYER PROPERLY • Place only one washload in your dryer at a time. • Mixed loads of heavy and lightweight fabrics will dry differently, which may result in lightweight fabrics being dry while heavy fabrics remain damp at the end of a drying cycle. •... -
Page 24: Care And Cleaning
care and cleaning CLEAN THE FILTER CASE • After each load. • To shorten drying time. • To operate more energy effi ciently. Do not operate your dryer without the fi lter case in place. There is a danger of damaging the laundry when drying laundry without the fi lter case. CAUTION CLEAN THE CONDENSER •... -
Page 25: Dumping Condensed Water( )
DUMPING CONDENSED WATER( 1. Pull the water-tank forwards to separate it. Water-Tank When removing the Water tank from the product, hold it using both hands as it is heavy and take care not to spill CAUTION any water inside the tank. 2. -
Page 26: Cleaning The Condenser Assembly
care and cleaning CLEANING THE CONDENSER ASSEMBLY 1. Open the condenser compartment cover. 2. Unlock the fi xer condenser. Fixer Condenser 3. Remove the condenser. 4. Clean the condenser completely under the tap letting water to fl ow through. • Since the drying performance may be degraded if you do not clean the condenser after a specifi... -
Page 27: Special Laundry Tips
special laundry tips SPECIAL LAUNDRY TIPS Please follow the care label or manufacturer’s instructions for drying special items. If care label instructions are not available, use the following information as a guide. Bedspreads & Comforters • Follow the care label instructions or dry on the Cotton cupboard and High temperature. -
Page 28: Troubleshooting
troubleshooting CHECK THESE POINTS IF YOUR DRYER… PROBLEM SOLUTION Doesn’t run. • Make sure the door is latched shut. • Be sure the power cord is plugged into a live electrical outlet. • Check the home’s circuit breaker and fuses. •... - Page 29 PROBLEM SOLUTION Lint on clothes • Make sure the lint fi lter is cleaned before every load. With some loads that produce high amounts of lint, it may be necessary to clean the fi lter case during the cycle. • Some fabrics are lint producers (for example, a fuzzy white cotton towel) and they should be dried separately from clothes that are lint trappers (for example, a pair of black linen pants)
-
Page 30: Information Codes
The drain pump is out of order. If the problem continues call for service. For any codes not listed above, or if the suggested solution doesn’t fi x the problem, call your Samsung Service Centre or local Samsung dealer. 30_ troubleshooting... -
Page 31: Appendix 31 Fabric Care Chart
appendix FABRIC CARE CHART The following symbols provide garment care direction. The Clothing care labels include symbols for drying, bleaching, drying and ironing, or dry cleaning when necessary. The use of symbols ensures consistency among garment manufacturers of domestic and imported items. Follow care label directions to maximize garment life and reduce laundering problems. -
Page 32: Protecting The Environment
appendix PROTECTING THE ENVIRONMENT This appliance is manufactured from recyclable materials. If you decide to dispose of this appliance, please observe local waste disposal regulations. Cut off the power cord so that the appliance cannot be connected to a power source. Remove the door so that animals and small children cannot get trapped inside the appliance. -
Page 33: Cycle Chart
CYCLE CHART ( user option) Cooling load(kg) Delay Mixed Interior Wrinkle Sound Cycle Temp. Time Time (Dry Cycle Load Bell Lamp Prevent (min) Laundry) Extra Dry High Cotton Cupboard Dry High Iron Dry High Extra Dry Medium Synthetics Cupboard Dry Medium Iron Dry Medium... -
Page 34: Consumption Data
appendix CONSUMPTION DATA Final spin speed In a Program Load(kg)* domestic washing machine Ener(kWh) Duration (Minutes) (Rpm) 1000 (60% residual moisture)** 4.49 Cotton Cupborad 1400 (50% residual moisture) 4.18 1000 (60% residual moisture)** 3.96 Cotton Iron 1400 (50% residual moisture) 3.44 1. - Page 35 memo...
- Page 36 QUESTIONS OR COMMENTS? Country CALL OR VISIT US ONLINE AT SOUTH AFRICA 0860-SAMSUNG(726-7864 ) www.samsung.com Code No. DC68-02805K-02_EN...
Need help?
Do you have a question about the SDC18809 and is the answer not in the manual?
Questions and answers