Table of Contents
Advertisement
Quick Links
USB 802.11n Dual Band WiFi Adapter
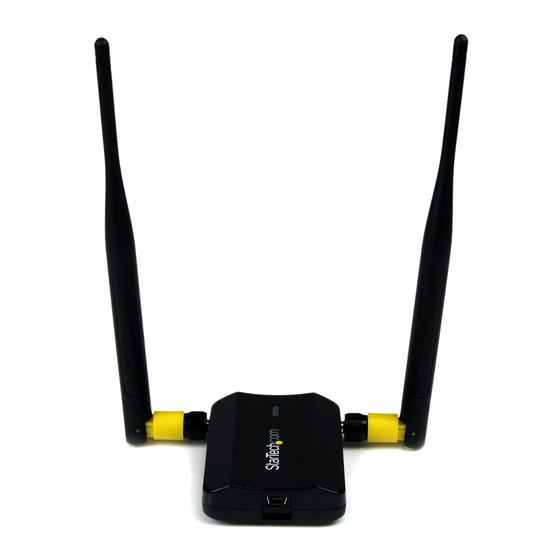
USB300WN2X2D
*actual product may vary from photos
DE: Bedienungsanleitung - de.startech.com
FR: Guide de l'utilisateur - fr.startech.com
ES: Guía del usuario - es.startech.com
IT: Guida per l'uso - it.startech.com
NL: Gebruiksaanwijzing - nl.startech.com
PT: Guia do usuário - pt.startech.com
For the most up-to-date information, please visit: www.startech.com
Manual Revision: 07/03/2012
Advertisement
Table of Contents

Related Manuals for StarTech.com USB300WN2X2D


Summary of Contents for StarTech.com USB300WN2X2D
- Page 1 DE: Bedienungsanleitung - de.startech.com FR: Guide de l'utilisateur - fr.startech.com ES: Guía del usuario - es.startech.com IT: Guida per l'uso - it.startech.com NL: Gebruiksaanwijzing - nl.startech.com PT: Guia do usuário - pt.startech.com For the most up-to-date information, please visit: www.startech.com Manual Revision: 07/03/2012...
-
Page 2: Fcc Compliance Statement
StarTech.com. Where they occur these references are for illustrative purposes only and do not represent an endorsement of a product or service by StarTech.com, or an endorsement of the product(s) to which this manual applies by the third-party company in question. Regardless of any direct acknowledgement elsewhere in the body of this document, StarTech.com hereby... -
Page 3: Table Of Contents
Table of Contents Introduction ....................1 Packaging Contents ..........................1 System Requirements ..........................1 USB300WN2X2D..................2 Installation ....................3 Windows XP/Server 2003 ........................3 Windows Vista/7/8 ............................ 4 Windows Server 2008 R2 Note: ......................5 How to Use ....................6 Windows XP ..............................6 Windows Vista/7/8 ............................ -
Page 4: Introduction
(that may only operate on a 2.4GHz frequeny), as well as newer WAPs that support the less congested 5 GHz range. Backed by a StarTech.com 2-year warranty, with free lifetime technical support, the USB300WN2X2D is designed to provide a dependable, long-lasting wireless access solution Packaging Contents • 1x USB WiFi Adapter... -
Page 5: Usb300Wn2X2D
USB300WN2X2D 5dBi Dual Band antennas Link/Activity USB Mini-B Port (Host) Instruction Manual... -
Page 6: Installation
Installation Windows XP/Server 2003 1. Upon starting Windows, before connecting the USB adapter, insert the included Driver CD into the computer’s CD/DVD drive. 2. AutoPlay should automatically launch the Driver/Software installation splash screen. If not, open “My Computer” then open the CD/DVD drive the Driver CD is inserted into and double-click the file Setup.exe. -
Page 7: Windows Vista/7/8
Windows Vista/7/8 1. Upon starting Windows, before connecting the USB adapter, insert the included Driver CD into the computer’s CD/DVD drive. 2. AutoPlay should automatically launch the Driver/ Software installation splash screen or prompt you to run Setup.exe. If not, open “Computer” then open the CD/ DVD drive the Driver CD is inserted into and double-click the file Setup.exe. -
Page 8: Windows Server 2008 R2 Note
Windows Server 2008 R2 Note: By default, the Microsoft “Wireless LAN Service” Feature is not installed. Before any wireless networking can be enabled, this feature must be installed through the Windows Server Manager window. Refer to Windows’ documentation for details. Instruction Manual... -
Page 9: How To Use
How to Use Connecting to a wireless network can be done through the Windows wireless configuration utilities or the Ralink WLAN Utility (if installed). You must know the name of the wireless network (SSID), the type of security it is using (if any) and its associated password to connect to a wireless network. -
Page 10: Windows Vista/7/8
Windows Vista/7/8 The wireless network adapter will appear as a small icon in the System Tray (next to the clock). Left-clicking on this icon will bring up a list of detected wireless networks. Select the wireless network you wish to connect to and click the “Connect” button. If the network has security enabled, you will be prompted for a password. -
Page 11: Ralink Wlan Utility
Ralink WLAN Utility Instead of using the built-in Windows wireless utility, a 3rd party utility, Ralink WLAN Utility, can be used. This utility provides access to additional features of the wireless card, such as Wi-Fi Protected Setup (WPS). If the Ralink WLAN utility is installed, then a small icon will appear in the system tray area near the clock. -
Page 12: Connecting To An Available Network
Connecting to an available network: 1. To connect to a wireless network, bring up “Available Networks” from the main window. This will list all of the detected wireless networks in the area. 2. Once you locate the network you wish to connect to, select it from the list by click on the entry, then click the ‘Connect’... -
Page 13: Manually Creating A Profile
3. If the network uses encryption, a window will popup where you will need to enter the proper authentication information (i.e. password/passphrase). 4. Once successfully connected to the network, information about the wireless router/ access point will be listed in the main window and the “AP Information” section of the Available Networks window. -
Page 14: Wi-Fi Protected Setup (Wps)
4. Select the type of Authentication/Encryption used by the network (if any). Click the ‘Next’ arrow button when ready. 5. If an Authentication type was specified, enter in the password/passphrase used to access the network. Click the ‘Next’ arrow button when ready. 6. -
Page 15: Wireless Mode
Wireless Mode In the Advanced Settings window, accessible from the main interface window, you can select which wireless frequency range the dual band wireless adapter should use. You can select between 2.4GHz only, 5GHz only or 2.4 + 5 GHz. Instruction Manual... -
Page 16: Specifications
Specifications Host Interface USB 2.0 Chipset ID Ralink RT3572L 1 x USB mini-B female Connectors 2 x RP-SMA female LEDs 1 x Link/Activity Antenna Configuration 2x2:2 (TxR:S) Wireless Frequency 2.4/5 GHz Supported Standards IEEE 802.11b, IEEE 802.11g, IEEE 802.11n Supported Security Schemes WEP, WPA, WPA2, TKIP/AES Operating Temperature 0°C ~ 60°C (32°F ~ 140°F) -
Page 17: Technical Support
Limitation of Liability In no event shall the liability of StarTech.com Ltd. and StarTech.com USA LLP (or their officers, directors, employees or agents) for any damages (whether direct or indirect, special, punitive, incidental, consequential, or otherwise), loss of profits, loss of business, or any pecuniary loss, arising out of or related to the use of the product exceed the actual price paid for the product. - Page 18 StarTech.com is an ISO 9001 Registered manufacturer of connectivity and technology parts. StarTech.com was founded in 1985 and has operations in the United States, Canada, the United Kingdom and Taiwan servicing a worldwide market.
Need help?
Do you have a question about the USB300WN2X2D and is the answer not in the manual?
Questions and answers