Advertisement
Table of Contents
- 1 Product Features
- 2 Table of Contents
- 3 Water Filtration Safeguards
- 4 Parts Description
- 5 Installation Instructions for the Puretouch Aquasuite
- 6 Filter Installation/Replacement
- 7 Filter Replacement Guidelines
- 8 Operating Instructions
- 9 Battery Replacement
- 10 Faucet Disassembly
- 11 Troubleshooting
- 12 Care and Maintenance
- 13 Puretouch Aquasuite Filtering System Warranty
- Download this manual
Advertisement
Table of Contents

Subscribe to Our Youtube Channel
Summary of Contents for Moen PureTouch AquaSuite 77100
- Page 1 INS412A OWNER’S MANUAL With Under Sink Water Filtration System Model Numbers 77100, 77100W, 77100S, 77100V, 77100P, 77100CPR, 77100SL, 77100PM, 77100ST, 77100CG, 77100BP, 77100NL U.S. Patent Pending Other Foreign and Domestic Patents Pending...
-
Page 2: Product Features
PRODUCT FEATURES Optional left hand / right hand setup Includes 2 interchangeable spouts Filter life indicator light Rapid flow rate Easy to install under sink Easy to replace water filter HELPLINE: 1-877-DRINK-H2O INS412A (1-877-374-6542) -
Page 3: Table Of Contents
WELCOME TO MOEN Congratulations on your purchase of the PureTouch ® AquaSuite ™ Under Sink Water Filtration System! This water filtration system is designed to provide great tasting, cleaner water where and when you want it. To get the most enjoyment from your PureTouch AquaSuite, please read all installation and operating instructions carefully. -
Page 4: Water Filtration Safeguards
WATER FILTRATION SAFEGUARDS Your Moen PureTouch ® AquaSuite System utilizes carbon block filtration made by Culligan ® . This technology is fast and effective at reducing contaminants commonly found in water and is certified by NSF ® International. To ensure optimal operation of your new PureTouch filtration system, please read the following safeguards carefully. -
Page 5: Parts Description
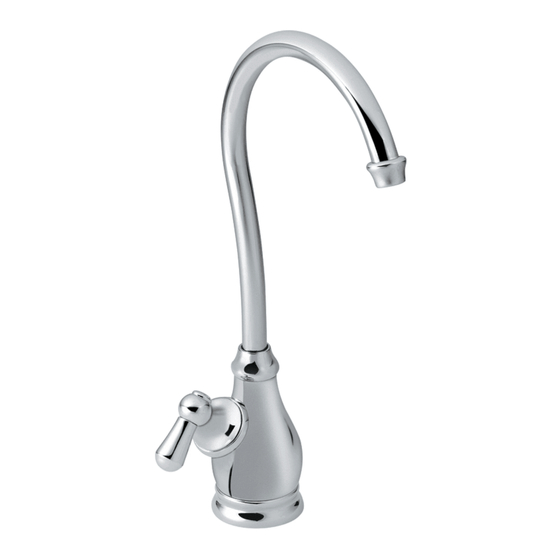
PARTS DESCRIPTION Mounting Tool Spout Nut T Fitting + Stop Valve Mounting Hardware Pack High Profile Spout Low Profile Spout Spout Tip Hose Assemblies (2) Escutcheon w/Filter Life Indicator and LED Wire Handle Insert w/ O-Ring Valve Body w/ Mounting Shank Filter Life Indicator Module w/ Mounting Bracket Filter Assembly... -
Page 6: Installation Instructions For The Puretouch Aquasuite
PRE-INSTALLATION TIPS Recommended tools: Safety glasses, flash light, drill w/ 1" circular hole saw, punch (optional), phillips screw driver, thread seal tape, 8” Kitchen adjustable wrenches (2), pliers, tape measure. Determining the location for install The PureTouch ® AquaSuite can be installed near a kitchen or hole cutout options bathroom sink. - Page 7 INSTALLATION INSTRUCTIONS AquaSuite ™ Faucet Installation After determining in which location you will install your PureTouch AquaSuite (may involve drilling mounting hole – see page 5), install gasket onto escutcheon and drop LED wire through mounting hole. Orient filter life indicator to the front so it will be visible during faucet use.
-
Page 8: Filter Installation/Replacement
INSTALLATION INSTRUCTIONS Installation of Filtration Unit Determine the best location for the installation of the undersink filtration unit. Ensure that the hose connections will reach from the water supply to the water inlet on the filter unit, and the hose connection from the water outlet of the filter unit up to the connection under the faucet. - Page 9 INSTALLATION INSTRUCTIONS 2. Screw one end of the Hose Assembly (8) onto the T-Fitting. Hold the T-Fitting while tightening the Hose Assembly Nut. 3. Finally, connect the sink’s cold water supply line to the remaining open end of the T-Fitting. Attach Filter Mounting Bracket to Cabinet Wall Stop valve Begin by screwing the Stop Valve (packaged in the T-fitting &...
- Page 10 INSTALLATION INSTRUCTIONS Stop valve LED Wire connection When determining the location of the bracket make sure you leave at least 1–1/2" of free space from the floor surface to the bottom of the filter (13) (or 15" from floor to the underside filter connection of the Filter Life Indicator Module (12)), and at least 4"...
- Page 11 FILTER INSTALLATION / REPLACEMENT 1. The filter needs to be replaced when the Filter Life Indicator Light begins to flash red. A flashing amber light indicates less than 8% filter life remaining. 2. Turn off water pressure by closing the Stop Valve located next to the Filter Life Indicator Module (12).
-
Page 12: Filter Replacement Guidelines
Indicator Lights will alternate green and amber until flushing is complete. Once completed, the light will change to flashing green. 11.Filter replacement complete. MICROTECH REPLACEMENT FILTERS Replacement filters can be purchased at retail home centers, plumbing supply warehouses, internet retailers and directly from Moen at www.pure-touch.com. HELPLINE: 1-877-DRINK-H2O INS412A (1-877-374-6542) -
Page 13: Operating Instructions
OPERATING INSTRUCTIONS Controlling the Water Turn the handle on the valve body 1/4 turn clockwise to activate water flow. Return valve to original position to shut off water flow. CAUTION: Only filter cold water. Do not filter water above 100° F. Electronic Indicator The flashing light on the Filter Life Indicator Module provides information regarding the performance of the filter. -
Page 14: Battery Replacement
A new battery should last up to 2 years under normal operating conditions. FAUCET DISASSEMBLY This faucet uses a standard Moen cartridge that will provide years Valve body of trouble free usage. If necessary, the following... - Page 15 FAUCET DISASSEMBLY Cartridge 3. Grasp the stem of the cartridge with pliers and pull straight out. This will remove the cartridge as one unit. For reassembly reverse the steps above. CAUTION: Be careful not to damage the rubber seals when reinstalling cartridge.
-
Page 16: Troubleshooting
Tighten the Handle Retainer Ring by turning it clockwise. Care and Maintenance All that is needed to clean your faucet is a soft damp cloth. Moen does not recommend the use of scour pads, cleansers or chemicals. The abrasive nature of these substances could damage the faucet’s finish. -
Page 17: Puretouch Aquasuite Filtering System Warranty
This warranty gives you specific legal rights and you may also have other rights which vary by state, province or nation. Moen will advise you of the procedure to follow in making warranty claims. Simply write to, or call Moen. Explain the defect and include proof of purchase and your name, address, area code and telephone number. - Page 18 NOTES HELPLINE: 1-877-DRINK-H2O INS412A (1-877-374-6542)
Need help?
Do you have a question about the PureTouch AquaSuite 77100 and is the answer not in the manual?
Questions and answers