Honda HARMONY HRB215PXA Owner's Manual
Honda lawn mower user manual
Hide thumbs
Also See for HARMONY HRB215PXA:
- Owner's manual (100 pages) ,
- Owner's manual (90 pages) ,
- Owner's manual (94 pages)
Table of Contents
Advertisement
Quick Links
Advertisement
Chapters
Table of Contents

Related Manuals for Honda HARMONY HRB215PXA


Summary of Contents for Honda HARMONY HRB215PXA
- Page 2 The information and specifications included in this publication were in effect at the time of approval for printing. Honda Power Equipment Mfg., Inc. reserves the right, however, to discontinue or change specifications or design at any time without notice and without incurring any obligation whatever.
- Page 3 Congratulations on your selectionIof a Honda lawn mower. We are certain you will be pleased with y&r purchase of one of the finest lawn mowers on the market. We want to help you get the best results from your new mower and to operate it safely.
-
Page 4: Safety Messages
You will also see other important messages that are preceded by the word NOTICE. This word means: Your lawn mower or other property can be r--Eiq damaged if you don’t follow instructions. The purpose of these messages is to help prevent damage to your lawn mower, other property, or the environment. -
Page 5: Table Of Contents
Turn to the beginning of each chapter for a complete list of subjects. MOWER SAFETY ....... . . Important information about some specific hazards, and what you can do to prevent injury. -
Page 7: Mower Safety
This chapter explains what you need to know to operate your mower safely. IMPORTANT SAFETY INFORMATION Avoid Rotating Blades ... Clear Mowing Area ... Keep Shields in Place ... Refuel with Care..Wear Protective Clothing..Turn Engine Off When Not Mowing ... IMPORTANT MESSAGE TO PARENTS SAFETY LABEL LOCATIONS. -
Page 8: Important Safety Information
MOWER SAFETY IMPORTANT SAFETY INFORMATION Most accidents with walk-behind mowers can be prevented if follow all instructions in this manual and on the mower. The most common hazards, according to accident statistics, are discussed below, along with the best way to protect yourself and others. Avoid Rotating Blades Rotating blades can cause serious cuts and even amputate fingers, hands, toes, or feet. -
Page 9: Message To Parents
YOUR CHILDREN’S SAFETY IS VERY IMPORTANT to Honda. That’s why we urge you to read this message before letting your youngster operate this lawn mower. Lawn mowers are tools, not toys. As with any equipment, bad judgments can result in serious injuries. -
Page 10: Safety Label Locations
MOWER SAFETY SAFETY LABEL LOCATIONS The labels shown here contain important safety information. Please read them carefully. These labels are considered permanent parts of your mower. So if a label comes off or becomes hard to read, contact your dealer for a replacement. UNDER NORMAL USAGE. -
Page 11: Controls
This chapter shows the locations of controls and other important parts of your mower, and it tells you how the controls work. COMPONENT IDENTIFICATION DESCRIPTION ThrottleLever ... Blade Control Lever..Drive Clutch Lever (SXA & HXA)..Shift Lever (SXA & HXA)..HRM215SXA &... -
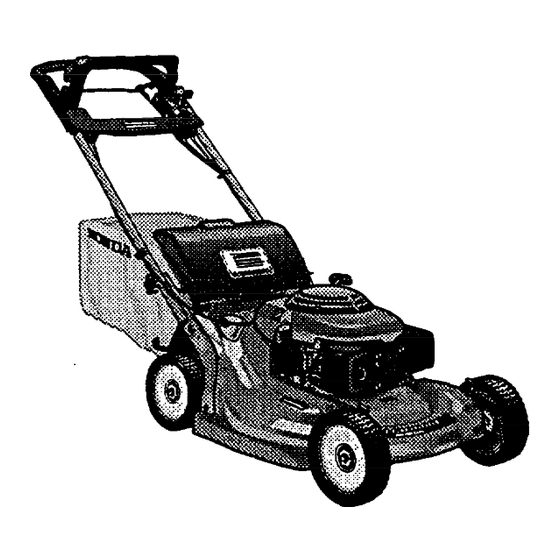
Page 12: Component Identification
CONTROLS COMPONENT IDENTIFICATION BLADE CONTROL BUTTON HANDLEBAR GRASS BAG (HRB215) CUTTING HEIGHT ADJUSTMENT LEVER OIL FILLER CA HRB215PXA: Manually propelled, high-lift blade, and grass bag. HRB215SXA: Self-propelled, high-lift blade, and grass bag. HRB215HXA: Self-propelled, hydrostatic transmission, high-lift blade; and grass bag. HRM215PXA: Manually propelled, mulching blades, and mulching plug. - Page 13 CUTTING HEIGHT ADJUSTMENT LEVER Record the frame and engine serial numbers in the space below. You will need these serial numbers when ordering parts and when making technical or warranty inquiries (see page 81). Frame serial number: Engine serial number: SHIFT LEVER (SXA, HXA) CARB?RETOR...
-
Page 14: Description Of Controls
CONTROLS DESCRIPTION OF CONTROLS Throttle Lever CHOKE -- FAST --- SLOW--- STOP --- & For starting a cold engine. For restarting a warm engine and for mowing. For idling the engine. For stopping the engine and closing the fuel valve. -
Page 15: Blade Control Lever
Blade Control Lever The blade control lever starts and stops blade rotation. Drive Clutch Lever (SXA & HXA) The drive clutch lever engages and disengages the transmission that drives the rear wheels. DRIVE CLUTCH LEVER (SXA, HXA) CONTROLS... -
Page 16: Shift Lever (Sxa & Hxa)
CONTROLS Shift Lever (SXA & HXA) The shift lever selects and controls the mower’s drive speed. HRM215SXA & HRB215SXA 1 (SLOW) - For mowing thick grass or maneuvering in small areas. 2 (FAST)- For maximum self-propelled speed in large, open areas, and for transport. -
Page 17: Cutting Height Adjustment Levers
CONTROLS Cutting Height Adjustment Levers There are six settings to choose from, as shown in the illustration. The cutting height figures are approximate. The actual height of cut grass will vary with lawn and soil conditions. HRB215 ADJUSTMENT LEVER HRM215 25 mm I1 in1 There is an adjustment lever on each wheel. -
Page 19: How To Fuel And Check Your Mower To Be Sure It Is
This chapter explains how to fuel and check your mower to be sure it is ready, and it tells you how to prepare your lawn and yourself before you begin mowing. CHECK YOUR LAWN..Objects ... People and Pets..Lawn ... -
Page 20: Check Your Lawn
BEFORE OPERATION CHECK YOUR LAWN For your safety and for the safety of others, always inspect the area before mowing. Objects Anything which can be picked up by the blades and thrown is a potential hazard to you and others. Look for things like stones, sticks, bones, and wire. - Page 21 A worn or damaged blade can break, causing blade pieces to be thrown from the mower. When a blade needs sharpening or replacement take the lawn mower to an authorized.Honda servicing dealer. Or, if you have a torque wrench, you can remove and install a blade yourself (see pages 60 - 61).
-
Page 22: Filler Cap
BEFORE OPERATION Engine Oil Level Check the engine oil level with the engine stopped and the mower on a level surface. 1. Remove the oil filler cap, and wipe the dipstick clean. Insert and remove the dipstick without screwing it into the filler neck. - Page 23 Fuel Fuel tank capacity: 1 .O 4 (0.26 US gal) Refuel in a well-ventilated area before starting the engine. If the engine has been running, allow it to cool. Refer to page 53 for fuel recommendations and page 82 for information about oxygenated fuels.
- Page 24 BEFORE OPERATION Air Cleaner Inspection Check that the air filters are clean and In good condition. Dirty air filters will restrict air flow to the carburetor, reducing engine performance. Refer to page 49 for air cleaner service. AIR CLEANER HOUSING PAPER FILTER COVER KNOB...
- Page 25 BEFORE OPERATION Handlebar Height Adjustment Adjust handlebar height for a comfortable operating position. 1. Loosen the lower handlebar locking knobs. 2. Spread the lower ends of the handlebar to release the locating pins. 3. Move the handlebar up or down, so the locating pins engage other holes on the handlebar mounting brackets.
-
Page 26: Grass Bag
BEFORE OPERATION Grass Bag (HRB215) A lawn mower works like a vacuum cleaner; it blows air through the bag, which traps the grass clippings. Always empty the grass bag before it becomes filled to the limit of its capacity. Bagging performance will diminish after the bag becomes about 90% filled. - Page 27 Mulching Plug (HRM215) The mulching plug contours the mower deck for efficient mulching. You can quickly remove the plug to install a grass bag’or side-discharge chute, which are available as optional equipment. Raise the discharge guard to remove or install the mulching plug.
- Page 28 BEFORE OPERATION ARE YOU Ready to Mow? Be sure to wear protective clothing. Long pants and eye protection can lower your risk of injury from thrown objects. Wear footwear that protects your feet and won’t let you slip if you mow on slopes or uneven ground.
-
Page 29: Operation
This chapter tells you how to operate the mower safely and effectively. MOWING PRECAUTIONS STARTING THE ENGINE ... OPERATING THE CONTROLS Throttle Lever..Blade Control Lever, ... Drive Clutch Lever (SXA & HXA)..HRM215SXA & HRB215SXA ... HRM215HXA & HRB215HXA ... Shift Lever (SXA &... -
Page 30: Mowing Precautions
OPERATION MOWING PRECAUTIONS Before operating the mower for the first time, please review the IMPORTANT SAFETY INFORMATION beginning on page 6 and the previous section, titled BEFORE OPERATION. Even if you have operated other mowers, take time to become familiar with how this mower works and practice in a safe area until you build up your skills. - Page 31 2. Place your foot on the mower deck step. Pull the starter grip lightly until you feel resistance, then pull briskly. Return the starter grip gently. 3. Move the throttle lever away from the CHOKE position as soon as the engine warms up enough to run smoothly without use of the choke.
-
Page 32: Operating The Controls For Mowing
OPERATION OPERATING THE CONTROLS Throttle Lever For best cut quality, always mow with the throttle lever in the FAST position. When the blade rotates at the preset fast speed, it creates a strong fan action that lifts and cuts grass more efficiently. Do not try to increase the preset engine speed, the blade could fracture and come apart. -
Page 33: Drive Clutch Lever (Sxa & Hxa)
Drive Clutch Lever (SXA & HXA) Pull the drive clutch lever up to propel the mower forward. For self-propelled mowing, press the button on top of the blade control lever, pull the blade control lever back to the handlebar, then pull the drive clutch lever up. -
Page 34: Shift Lever (Sxa & Hxa)
OPERATION Shift Lever (SXA & HXA) Use the shift lever to select the forward speed at which you wish to mow. Do not use the throttle lever to adjust your forward speed. The throttle lever must remain in the FAST position for good mowing performance. -
Page 35: Stopping The Engine
STOPPING THE ENGINE 1. Release the drive clutch lever and blade control lever. BLADE CONTROL LEVER DRIVE CLUTCH LEVER (SXA, HXA) 2. Move the throttle lever to the STOP position. OPERATION THROTTLE LEVER... -
Page 36: Safe Mowing Practices
OPERATION SAFE MOWING PRACTICES For your safety, keep all four wheels on the ground, and be careful to avoid losing your footing and your control of the mower. Keep a firm grip on the handlebar, and walk, never run, with the mower. Be very careful when mowing uneven or rough ground. -
Page 37: Obstacles
Obstacles Use the side of the mower to cut close to large obstacles, such as fences or walls. Release the drive clutch lever to disengage the drive when mowing around trees and other obstacles. Push the mower around obstacles for better directional control. Be careful when mowing over obstacles embedded in the lawn, such as sprinkler heads, paving, edging, etc. -
Page 38: Mowing Tips
OPERATION MOWING TIPS When to Mow Most grasses should be mowed when they have grown l/2 to 1 inch above their recommended height. More frequent mowing is required for mulching than for bagging. For best results, you may need to mow the lawn twice a week during the growing season. -
Page 39: Bladespeed
Blade Speed The blade must spin very fast to cut properly. Always use the FAST throttle setting, and keep the engine running at maximum rpm. If engine speed drops, it could mean the engine is being overloaded by the blade trying to cut too much grass. Mow a narrower swath, move the mower slower, or raise the cutting height. -
Page 40: Mowing Patterns
OPERATION Mowing Patterns Your Honda mower will work most efficiently if you use the following mowing patterns as much as possible. Mower deck and equipment design, and the direction in which the blade rotates, cause these mowing patterns to give the best results. Mulching Use a counterclockwise mowing pattern. - Page 41 This chapter explains how to load and carry your mower safely. BEFORE LOADING ......LOADING AND UNLOADING..
-
Page 42: Transporting
TRANSPORTING BEFORE LOADING If the engine has been running, allow it to cool for at least 15 minutes before loading the mower on the transport vehicle. A hot engine and exhaust system can burn you and can ignite some materials. Remove the grass bag. -
Page 43: Maintenance
This chapter explains when and how to perform routine inspection, service, and adjustments for do-it-yourself maintenance. More difficult maintenance tasks should be done by your dealer. Your dealer is best equipped and staffed to provide the level of service and safety you and your mower deserve. -
Page 44: The Importance Of Maintenance
MAINTENANCE THE IMPORTANCE Good maintenance is essential for safe, economical, and trouble-free operation. It will also help reduce air pollution. To help you properly care for your mower, the following pages include a maintenance schedule, routine inspection procedures, and simple maintenance procedures using basic hand tools. -
Page 45: Maintenance Safety
MAINTENANCE SAFETY Some of the most important safety precautions follow. However, we cannot warn you of every conceivable hazard that can arise in performing maintenance. Only you can decide whether or not you should perform a given task. Failure to properly follow maintenance instructions and precautions can cause you to be seriously hurt or killed. -
Page 46: Emission Control System
MAINTENANCE EMISSION CONTROL SYSTEM Source of Emlsslons The combustion process produces carbon monoxide, oxides of nitrogen, and hydrocarbons. Control of hydrocarbons and oxides of nitrogen is very important because, under certain conditions, they react to form photochemical smog when subjected to sunlight. Carbon monoxide does not react in the same way, but it is toxic. -
Page 47: Owner'sresponsibility
PROPER MAINTENANCE RESPONSIBILITY Replacement Parts The emission control systems on your new Honda engine were designed, built, and certified to conform with the California regulations. Honda recommends only the use of new, genuine Honda parts or their equivalent. The use of other replacement parts which are not of equivalent quality may impair the effectiveness of your emission control system. -
Page 48: Maintenance Schedule
MAINTENANCE MAINTENANCE SCHEDULE REGULAR SERVICE PERIOD (3) S ITEM Perform at every indicated interval Air Cleaner Emission related items. Replace the paper element only. Service more frequently when used in dusty areas. These items should be serviced by an authorized Honda servicing dealer, unless you have the proper tools and are mechanically proficient. -
Page 49: Engine Maintenance
ENGINE MAINTENANCE Engine Oil Change Drain the used oil while the engine is warm. Warm oil drains quickly and completely. 1. Put the throttle lever in the STOP position to shut off the fuel valve. This will reduce the possibility of fuel leakage (see page 33). 2. - Page 50 MAINTENANCE Using nondetergent oil can shorten the engine’s service life, and using 2-stroke oil can damage the engine. SAE 1 OW-30 is recommended for general use. Other viscosities shown in the chart (previous page) may be used when the average temperature in your area is within the indicated range.
-
Page 51: Air Cleaner Service
Air Cleaner Service Dirty air filters will restrict air flow to the carburetor, reducing engine performance. If you operate the mower in very dusty areas, clean the air filters more often than specified in the MAINTENANCE SCHEDULE. 1 NOTICE Operating the engine without air filters, or damaged filters, will allow dirt to enter the engine, causing rapid engine wear. -
Page 52: Spark Plug Service
MAINTENANCE 5. Wipe dirt from the inside of the air cleaner housing and cover, using a moist rag. Be careful to prevent dirt from entering the air duct that leads to the carburetor. 6. Reinstall the filters and cover. Tighten the cover screw securely. Spark Plug Service RECOMMENDED SPARK PLUGS... - Page 53 2. Remove the spark plug with a 21 mm (13/ls in) spark plug wrench. 3. Inspect the spark plug. Replace it if the electrodes are worn, or if the insulator is cracked or chipped. Clean the spark plug with a wire brush if you are going to reuse it.
-
Page 54: Carburetor Adjustment
MAINTENANCE Carburetor Adjustment 1. Start the engine outdoors, and allow it to warm up to normal operating temperature. 2. Set the throttle lever in the SLOW position. 3. Turn the throttle stop screw to obtain the standard idle speed. Standard idle speed: 2,i 00 f 150 rpm Carburetor Modification... -
Page 55: Fuelrecommendations
Fuel Recommendations Use unleaded gasoline with a pump octane rating of This engine is certified to operate on unleaded gasoline. Unleaded gasoline produces fewer engine and spark plug deposits and extends exhaust system life. Never use stale or contaminated gasoline or an oil/gasoline mixture. Avoid getting dirt or water in the fuel tank. -
Page 56: Control Cable Adjustments
MAINTENANCE CONTROL CABLE ADJUSTMENTS Blade Control Cable Adjustment Measure free play at the top of the lever, while holding the button down. Free play should be 20 - 25 mm (3/4 - 1 in). If adjustment is necessary: 1. Loosen the locknuts with a 10 mm wrench, and move the adjuster up or down as required. -
Page 57: Drive Clutch Cable Adjustment (Sxa)
Drive Clutch Cable Adjustment (SXA) Measure free play at the top of the lever, as shown. Free play should be 1 - 4 mm (I& - 3/s in). If adjustment is necessary: 1. Loosen the lock nuts with a 10 mm wrench, and move the adjuster up or down as required. -
Page 58: Shift Cable Adjustment (Sxa)
MAINTENANCE Shift Cable Adjustment (SXA) Shift cable adjustment is necessary if the shift lever does not operate smoothly or does not shift properly into a gear, With the transmission in 1st gear, pull the gear shift lever all the way back and release it;... -
Page 59: Drive Clutch Cable Adjustment (Hxa)
Drive Clutch Cable Adjustment (HXA) 1. With the engine stopped, position the control cable bands as shown. Pull the shift lever all the way back to the neutral position. Start the engine and move the throttle lever to the FAST position. - Page 60 MAINTENANCE 5. Loosen the top and bottom drive clutch cable lock nuts with a 10 mm wrench. Move the adjuster up or down, as required, until the mower operates as outlined in step 4. Tighten the lock nuts. 6. Move the throttle lever to the STOP position and move the shift lever to the fastest position.
-
Page 61: Thro-Itle Cable Inspection
THRO-ITLE CABLE INSPECTION Throttle cable adjustment is necessary if the throttle lever does not operate the choke properly. You can inspect choke operation by observing the movement of the choke arm, which is located on top of the carburetor. 1. Move the throttle lever to the CHOKE position. -
Page 62: Blade Removal And Installation
MAINTENANCE BLADE REMOVAL If you remove the blade(s) for sharpening or replacement, you will need a torque wrench for installation. Wear heavy gloves to protect your hands, BLADE SHARPENING: To avoid weakening the blade(s), or causing imbalance or poor cutting, the blade(s) should be sharpened by trained staff at an authorized Honda servicing dealer. -
Page 63: Blade Installation
Blade Installation 1. Clean dirt and grass from around the blade mounting area. 2. install the blade(s) using the two blade bolts and special washers as shown. Be sure to install the special washers with the concave side toward the blade(s) and the convex side (marked OUT) toward the bolts. The blade bolts are specially designed for this application and must not be replaced with other bolts. -
Page 64: Grass Bag Cleaning And Replacement (Hrb215)
GRASS BAG CLEANING AND REPLACEMENT (HRB215) Grass Bag Cleaning Wash the bag with a garden hose, and allow it to dry completely before use; a wet bag will clog quickly. Grass Bag Replacement Replace a worn or damaged bag with a Honda replacement bag or its equivalent. -
Page 65: What To Check If You Have A Problem With Your Mower
This chapter shows what to check if you have a problem with your mower. ENGINE PROBLEMS Engine will not start ... Lossofpower ... VIBRATION PROBLEMS MOWING AND BAGGING PROBLEMS. TROUBLESHOOTING... -
Page 66: Engine Problems
TROUBLESHOOTING ENGINE PROBLEMS Engine Will Not Start 1. Check throttle lever position. 2. Check fuel. 3. Remove and inspect spark plug. 4. Take the mower to an authorized Honda servicing dealer, or refer to shop manual. Loss of Power 1. Check throttle position. 2. -
Page 67: Mowing And Bagging Problems
Vl6RATlON PROBLEMS Excessive Vibration 1. Check mower deck and blade(s). 2. Take the mower to an authorized Honda servicing dealer for repair. MOWING AND BAGGING PROBLEMS Poor Cut Quality or Poor Mowing/Bagging Performance 1. Check that the throttle lever is in the FAST position. -
Page 69: Storage
This chapter explains how to protect your mower from rust and corrosion, and ensure that it will start easily when you want to use it again. STORAGE PREPARATION Cleaning...; Engine.. MowerDeck ... Grass Bag (HRB215)..Fuel ... Adding fuel stabilizer to extend fuel storage life ... Draining the Fuel Tank and Carburetor. -
Page 70: Storage Preparation
Cleaning 1. Wash the lawn mower, including the underside of the mower deck. Engine Wash the engine by hand, and be careful to prevent water from entering the air cleaner. - Page 71 5. Stop the engine and allow it to cool. 6. After the lawn mower is clean and dry, touch up any damaged paint, and coat other areas that may rust with a light film of oil. Lubricate the control cable cores with a silicone spray lubricant.
-
Page 72: Fuel
STORAGE Fuel Gasoline will oxidize and deteriorate in storage. Old gasoline will cause hard starting, and it leaves gum deposits that clog the fuel system. If the gasoline in your mower deteriorates during storage, you may need to have the carburetor and other fuel system components, serviced or replaced. -
Page 73: Draining The Fuel Tank And Carburetor
Draining the Fuel Tank and Carburetor: 1. Remove the carburetor drain bolt with a 10 mm wrench, and drain the carburetor bowl fuel into an approved container. Gasoline is highly flammable and explosive and you can be burned or seriously injured when handling fuel. -
Page 74: Engine Cylinder
STORAGE Engine Cylinder Remove the spark plug (see page clean engine oil into the cylinder. Pull the starter rope several times to distribute the oil in the cylinder, Reinstall the spark plug. Pull the starter rope slowly until resistance Is felt then return the starter grip gently. -
Page 75: Handlebar Folding
Handlebar Folding The handlebar can be folded for storage or transport by loosening the handlebar locking knobs. 1. Remove the grass bag, if so equipped. You can place it on top of the engine, with the bag opening to the front. 2. -
Page 76: Placing In Storage
STORAGE PLACING IN STORAGE If your mower will be stored with gasoline in the fuel tank and carburetor, it is important to reduce the hazard of gasoline vapor ignition. Select a well-ventilated storage area away from any appliance that operates with a flame, such as a furnace, water heater, or clothes dryer. -
Page 77: Dimensions, Capacities, And Other Technical Information
This chapter gives dimensions, capacities, and other technical information. MOWER MODEL ... DIMENSION, WEIGHTS, AND CAPACITIES. ENGINE DESIGN AND PERFORMANCE TRANSMISSION MAINTENANCE TUNEUP SPECIFICATIONS DESIGN AND PERFORMANCE... -
Page 78: Mower Model
SPECIFICATIONS MOWER MODEL HRB215PXA: Manually propelled, high-lift blade and grass bag HRB215SXA: Self-propelled, HRB215HXA: Self-propelled, HRM215PXA: Manually propelled, HRM215SXA: Self-propelled, HRM215HXA: Self-propelled, mulching plug DIMENSIONS, WEIGHTS, AND CAPACITIES Maximum Length (handlebar extended) Minimum Length (handlebar folded) Width at Mower Deck Overall height (with cutting height set at 64 mm (2% in ) Dry weight... -
Page 79: Engine Design And Performance
ENGINE DESIGN AND PERFORMANCE Engine Model Engine Type Displacement Bore and Stroke Compression Ratio Ignition System Maximum Horsepower Maximum Torque TRANSMISSION DESIGN AND PERFORMANCE HRB215SXA & HRM215SXA Transmission Type Mower Ground Speed (with engine at 3,300 rpm) HRB215HXA & HRM215HXA Transmission Type Mower Ground Speed... -
Page 80: Maintenance
SPECIFICATIONS MAINTENANCE Fuel Engine Oil Transmission Spark Plug Type Maximum Governed Speed Blade Control Cable Drive Clutch Cable (SXA) Shift Cable (SXA) ’ Drive Clutch Cable (HXA) Throttle Cable Blade Bolt Torque TUNEUP Spark Plug Gap Idle Speed (blade control disengaged) Valve Clearance (cold) I ~~... -
Page 81: Warranty Repair Problem
ADDITIONAL INFORMATION This chapter contains additional information, Honda publications available to you, and tells you how to contact us if you have a question or a warranty repair problem. HONDA PUBLICATIONS ShopManual... Parts Catalog ........80 CUSTOMER SERVICE INFORMATION.. -
Page 82: Honda Publications
HONDA PUBLICATIONS These publications will give you additional information for maintaining and repairing your mower. You may order them from your Honda lawn mower dealer. Shop Manual This manual covers complete maintenance and overhaul procedures. It is intended to be used by a skilled technician. -
Page 83: Customer Service Information
CUSTOMER SERVICE INFORMATION Honda Power Equipment dealership personnel are trained professionals. They should be able to answer any question you may have. If you encounter a problem that your dealer does not solve to your satisfaction, please discuss it with the dealership’s management. - Page 84 When you write or call, please provide the following information: • Model and serial numbers • Name of the dealer who sold the Honda power equipment to you • Name and address of the dealer who services your equipment •...
-
Page 85: Oxygenated Fuels
ADDITIONAL INFORMATION OXYGENATED FUELS Some conventional gasolines are being blended with alcohol or an ether compound. These gasolines are collectively referred to as oxygenated fuels. To meet clean air standards, some areas of the United States and Canada use oxygenated fuels to help reduce emissions. -
Page 86: Spark Arrester Service
SPARK ARRESTER The engine in your lawn mower is not factory-equipped with a spark arrester. In some areas, it is illegal to operate an engine without a spark arrester. Check local laws and regulations. A spark arrester is available from an authorized Honda servicing dealer. -
Page 88: Index
Air Cleaner Inspection..22 Air Cleaner Service ..49 Blade: Inspection ... 19 Installation ... 61 Removal ... 60 Blade Control Lever: Cable Adjustment..54 Operation ..13 & 30 Carburetor: Adjustment ..52 High Altitude Operation...5 2 Choke.. - Page 89 INDEX Gasoline Recommendations..5 3 Grass Bag: Cleaning ..62 8, 68 Inspection ... 24 Removal and Installation...2 4 Replacement..62 Handlebar Height Adj..23 Handlebar Folding..73 High Altitude Operation..52 Inspection Before Mowing: Lawn ... 18 Mower..
- Page 90 Spark Arrester Service (Optional Part) ..e ... 83 Spark Plug Recommendations & Service ......50 Specifications: Capacities .
-
Page 91: Quick Reference Information
Quick Reference Information Type Fuel Capacity Type Engine Oil Capacity Type Spark Plug Torque Blade bolts Idle speed Carburetor Before each Maintenance First 20 hours Subsequent Unleaded gasoline with pump octane rating of 88 or higher (page 53). 1 .O P (0.28 US gallons) SAE lOW-30, API SF, SG, or equivalent 0.8 P (0.83 US quarts) Regular:...
Need help?
Do you have a question about the HARMONY HRB215PXA and is the answer not in the manual?
Questions and answers