
Related Manuals for Honda HA4118H38A


Summary of Contents for Honda HA4118H38A
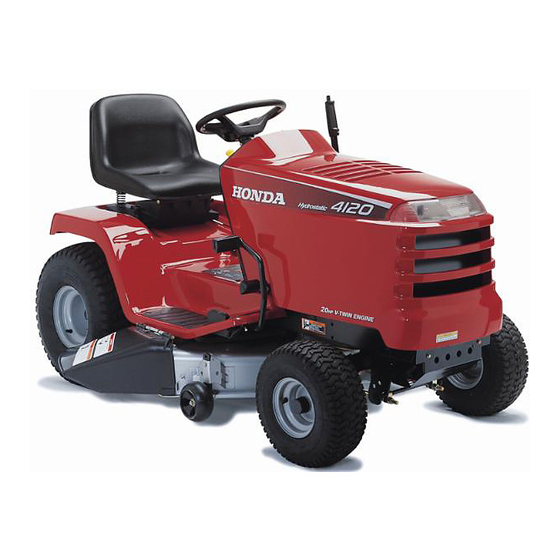
- Page 1 Owner's Manual LAWN TRACTOR HA4118H38A HA4120H48A ©1998 American Honda Motor Co., Inc. — All Rights Reserved...
- Page 2 The information and specifications effect at the time of approval for printing. Honda Power Equipment Mfg., Inc. reserves the right, however, to discontinue or change specifi- cations or design at any time without notice and without incurring any obligation whatever.
- Page 3 Congratulations on your selection of the Honda HA41 18H38A or HA4120H48A lawn tractor. We are certain you will be pleased with your purchase. We want to help you get the best results from your new lawn tractor and to operate it safely. This manual contains all the information on how to do that;...
-
Page 4: A Few Words About Safety
INTRODUCTION A FEW WORDS ABOUT SAFETY Your safety and the safety of others is very important. And using this lawn tractor safely is an important responsibility. To help you make informed decisions about safety, we have provided operating procedures and other information on labels and in this manual. - Page 5 Turn to the beginning of each chapter for a complete list of subjects. LAWN TRACTOR SAFETY ..............5 Important information about some specific hazards, and what you can do to prevent injury.
- Page 6 INTRODUCTION...
-
Page 7: Lawn Tractor Safety
This chapter explains what you need to know to operate your lawn tractor safely. IMPORTANT SAFETY INFORMATION Avoid Rotating Blades ... Clear Mowing Area..Keep Shields in Place ... Refuel with Care ... Wear Protective Clothing ... Turn Engine Off When Not Operating the Lawn Tractor ... -
Page 8: Important Safety Information
LAWN TRACTOR SAFETY IMPORTANT SAFETY INFORMATION Most accidents with lawn tractors can be prevented if you follow all instructions in this manual and on the lawn tractor. The most common hazards, according to accident statistics, are discussed below, along with the best way to protect yourself and others. Avoid Rotating A rotating blade can cause serious cuts and even amputate fingers, hands, toes, or feet. -
Page 9: Turn Engine Off When Not Operating The Lawn Tractor
Refuel with Care Gasoline is extremely flammable, and gasoline vapor can explode. Allow the engine to cool if the lawn tractor has been in operation. Refuel only outdoors in a well-ventilated Never fill the fuel tank beyond the maximum fill mark. Never smoke near gasoline, and keep other flames and sparks away. -
Page 10: Safety Label Locations
LAWN TRACTOR SAFETY SAFETY LABEL LOCATIONS These labels warn you of potential hazards that can cause serious injury. Read them carefully. If a label comes off or becomes hard to read, contact your Honda lawn tractor dealer for a replacement. Stay away if engine has been running. - Page 11 LAWN TRACTOR SAFETY...
-
Page 12: Important Message To Parents
LAWN TRACTOR SAFETY IMPORTANT MESSAGE TO PARENTS YOUR CHILD’S SAFETY IS VERY IMPORTANT to Honda. Read this message if you decide to permit your youngster to operate this lawn tractor. Lawn tractors are tools, not toys. As with any equipment, bad judgments can result in serious injuries. -
Page 13: Table Of Contents
This section helps you to identity the lawn tractor controls, what they do, and how they work. CONTROL LOCATIONS. DESCRIPTION Fuel Valve ... Ignition Switch ... Indicator Lamps ... Travel Pedals..BrakePedal... Parking Brake..Throttle Lever / Choke ... PTOKnob Mower Deck Lift Lever. -
Page 14: Control Locations
CONTROLS CONTROL LOCATIONS Use the two illustrations on these pages to locate and identify the most frequently used controls. THROlTLE WEL VALVE Iunder hood) CHOKE CUTTING HEIGHT ADJUSTMENT KNOB... - Page 15 INDICATOR HEADLIGHT SWITCH RELEASE LIGHT PARKING BRAKE CONTROLS REVERSE TRAVEL PEDAL...
-
Page 16: Description Of Controls
CONTROLS DESCRIPTION OF CONTROLS Your lawn tractor uses colors to identify control types. Orange levers and knobs are used to control the movement of the lawn tractor. For example, the parking brake lever and throttle are color coded orange. Yellow controls identify attachment controls, such as the PTO clutch knob, which is used to start and stop the mower deck blades. -
Page 17: Travel Pedals
Travel Pedals The travel pedals are used to control the forward and reverse movement of the lawn tractor. The farther the pedal is pushed, the greater the speed. The pedals are linked, so only one pedal may be pressed at one time. REVERSE Brake Pedal The brake pedal is located on the right side... -
Page 18: Parking Brake
CONTROLS Parking Brake This lever, located under the ignition switch, is used to prevent movement of the lawn tractor when parked. The lever can be set or released only when the brake pedal is fully pressed. The parking brake lever should always be set before getting off the lawn tractor. -
Page 19: Ptoknob
PTO Knob PTO stands for Power Takeoff. The PTO knob is used to apply power.to the mower deck (or other attachment). The PTO knob has three positions: OFF, ON and REVERSE IMPLEMENT. ON and OFF are used for normal operation when moving forward. The spring-loaded REVERSE IMPLEMENT position allows the... -
Page 20: Cutting Height Adjustment Knob
CONTROLS Cutting Height Adjustment Lift lever must be in the TRANSPORT position before turning cutting height knob. Cutting height can be adjusted from approximately 1 - 4 inches (25 - 100 mm). When lift lever is in TRANSPORT position (lift lever all the way back), cutting height is approximately mm). - Page 21 This chapter explains how to fuel and check your lawn tractor to be sure it is ready, and it tells you how to prepare your lawn and yourself before you begin mowing. CHECK YOUR LAWN ... Objects...2 People and Pets..Lawn...2 CHECK YOUR LAWN TRACTOR ...
-
Page 22: Before Operation
BEFORE OPERATION There are three areas to be checked before using the lawn tractor: Check your lawn Check your lawn tractor Are you ready to mow? These are described in the following sections. CHECK YOUR LAWN For your safety and the safety of others, always inspect the area before mowing. -
Page 23: Check Your Lawn Tractor
CHECK YOUR LAWN TRACTOR For your safety and the service life of your equipment, always inspect your lawn tractor before using it. Before beginning your pre-operation checks, be sure: The lawn tractor is parked on a level surface. The PTO clutch knob is OFF. The ignition switch is OFF and the key is removed. -
Page 24: Engine Oil Level
BEFORE OPERATION Engine Oil Level Raise the engine hood. The oil filler cap is located on the left side of the engine. Clean the area around the oil filler cap, unscrew it, and wipe the dipstick with a clean cloth. Insert the dipstick (don’t screw it back in) and remove it. -
Page 25: Parking Brake
Parking Brake Make sure the brake pedal remains locked down when the parking brake is set. Hydrostatic Transmission The hydrostatic fluid level should be between the 2 marks on the reservoir. If the fluid is below the bottom line, add lOW30 API SE, CC, or CD oil to bring the level to the upper line. -
Page 26: Fuel
BEFORE OPERATION Fuel Capacity: 2.5 US gal (9.5 liters) Minimum pump octane rating: 86 Refuel in a well-ventilated has been running, allow it to cool before refueling. Avoid overfilling or spilling fuel. Fuel the lawn tractor with pump octane 86 or higher unleaded fuel. -
Page 27: Cooling Air Intake Path And Air Filters
Cooling Air Intake Path and Air Filters Raise the engine hood, then make sure the cooling air intake screen on the top of the engine is clear of grass and debris and is securely installed. Never operate the lawn tractor without the screen installed. -
Page 28: Are You Ready To Mow
BEFORE OPERATION ARE YOU READY TO MOW? Your safety is your responsibility. significantly reduce your risk. Knowledge Read and understand this manual. Know what the controls do and how to operate them. Familiarize yourself with the lawn tractor and its operation before you begin mowing. -
Page 29: Operation
This chapter tells you how to operate the lawn tractor safely and effectively. MOWING PRECAUTIONS STARTING THE ENGINE..Checking Indicator Lamps ... DRIVING THE LAWN TRACTOR. Setting and Releasing the Parking Brake ... Steering...3 Direction of Travel and Ground Speed..Mowing...3 Adjusting Cutting Height. - Page 30 OPERATION Cleaning Other Areas ... TOWING ... ,Towing Safety ... Towing Weight Limits ...
-
Page 31: Mowing Precautions
MOWING PRECAUTIONS Before operating the lawn tractor for the first time, please review both the LAWN TRACTOR SAFETY section and the BEFORE OPERATION section. Even if you have operated other lawn tractors, take time to become familiar with how this lawn tractor works, and practice in a safe area until you build up your skills. -
Page 32: Starting The Engine
OPERATION STARTING THE ENGINE Start the engine outside in an open area with good ventilation. Locate the fuel valve on the left side of the engine, under the engine hood. Move the fuel valve to ON. Lower the engine hood and sit in the operator’s seat. -
Page 33: Checking Indicator Lamps
Holding the ignition key in the start position for more than five seconds may damage the starter. If the engine fails to start, wait at least ten seconds before trying again. If you can’t get the engine to start after multiple tries, refer to the TROUBLESHOOTING After the engine has started, gradually push the choke knob in to the OFF position. -
Page 34: Driving The Lawn Tractor
OPERATION DRIVING THE LAWN TRACTOR Once your lawn tractor is started, you will need to know how to set and release the parking brake, steer correctly, change the direction of travel, adjust ground speed, begin mowing (including raising and lowering the mower deck and adjusting the cutting height and mower wheels), and you will need to know how to stop your lawn tractor. -
Page 35: Direction Of Travel And Ground Speed
After using the lawn tractor for a while, you’ll get a better feel for how much effort to use on the steering wheel for a particular turn. The speed of the lawn tractor greatly affects how the steering responds. For this reason, you should use a lower ground speed before entering turns. -
Page 36: Mowing
OPERATION MOWING When you are ready to begin mowing, approach the mowing area at a reduced ground speed. Bring the lawn tractor to a full stop, and adjust the cutting height of the mower (see Adjusting To begin mowing, make sure the throttle is set to FAST, then engage the blades by pulling up on the PTO knob. - Page 37 48 Inch Mower Deck Check tractor tire pressure (page 82). Pull out on the J-pin to move the anti- scalp rollers up or down until the wheels are approximately mm) above the mowing surface. Adjust the anti-scalp rollers to match in height or, if desired, adjust the anti- scalp rollers to roll on the ground.
-
Page 38: Stopping The Lawn Tractor
OPERATION STOPPING THE LAWN TRACTOR Emergency Stop 1. Press the brake pedal all the way down and hold it there. 2. Turn the ignition switch off. Push the PTO clutch knob to OFF. 3. Set the parking brake. Normal Stop 1. -
Page 39: Safe Mowing Practices
SAFE MOWING PRACTICES For your safety, keep all four wheels on the ground, and be careful to avoid losing control of the lawn tractor. Keep a firm grip on the steering wheel. Be very careful when mowing uneven or rough ground. Do not operate the lawn tractor near embankments, ditches. -
Page 40: Operation On Slopes
OPERATION Operation on Slopes Never mow on a sloped surface greater than 10 degrees (17% grade), since this can cause the lawn tractor to tip over. Use a slower speed for better control, and avoid sudden stops or starts when on a sloped surface. -
Page 41: Obstacles
Starting on a Sloped Surface Improper starting on sloped surfaces can cause the lawn tractor to lose traction and tip over. The lawn tractor can fall on you and cause serious inju- or death. Use the following procedure if you must start the lawn tractor on a sloped surface. -
Page 42: Gravel And Loose Objects
OPERATION A worn, cracked, or damaged blade can break, and pieces of the damaged blade can become dangerous projectiles. Thrown objects can cause serious injury. Inspect the blade regularly, and do not operate the lawn tractor with a worn or damaged blade. -
Page 43: Mowing Tips
MOWING TIPS Here are some tips for getting a quality cut with your lawn tractor. When to Mow A well-groomed lawn requires mowing at short, regular intervals. During the growing season, a lawn may require mowing twice a week. Cutting Height To prevent possible damage to the mower deck, always raise it to the TRANSPORT position when driving the lawn tractor to and from the... -
Page 44: Cutting Width
OPERATION Cutting Width Allow an adequate amount of cutting path when mowing. Four to six inches is recommended; same width as a front tire. When overlapping in a curve, use a lower speed, and overlap the previous cut by 50%, or about half the width of the mower deck. -
Page 45: Fallenleaves
Fallen Leaves When equipped with an optional grass bag kit, your lawn tractor can be used to pick up fallen leaves for disposal. Adjust the height of the mower deck as needed to get the best results. When equipped with an optional mulching kit, you can mulch fallen leaves into your lawn. -
Page 46: Trimmingtips
OPERATION Trimming Tips Turn to the left around trees, bushes, etc. Drive slowly. Avoid hitting trees, bushes, etc. If ground slopes up to a tree or bush, you may have to approach the tree or bush straight-on to avoid scalping. To Avoid Scalping Pay attention to the way you drive. -
Page 47: After Mowing
AFTER MOWING Under most conditions, the lawn tractor accumulates dirt and other debris on the mower deck and other areas. Frequently, such debris contains moisture, which if allowed to remain on the mower frame, mower deck or other metal parts, can form rust. Regular cleaning not only helps prevent such rusting, but also makes the lawn tractor operate better. -
Page 48: Towing
OPERATION TOWING An optional rear hitch kit is specifically designed for your lawn tractor. Do not use any other type of hitch on the lawn tractor. Towing Safety When the optional hitch is installed and you use a trailer or other attachment, pay attention to these important points for safe operation. -
Page 49: Towing Weight Limits
Towing Weight Limits Always adhere to the weight limits when towing a trailer or attachment with the lawn tractor. Maximum Allowable Maximum allowable weight for the trailer or attachment and any items carried by the trailer or attachment: On a flat surface: On a grade (10 degrees or less): 200 lb (90 kg) Maximum Tongue Weight... - Page 50 OPERATION...
- Page 51 TRANSPORTING This section explains how to load and transport your lawn tractor safely. BEFORE LOADING ......so LOADING AND UNLOADING.
-
Page 52: Before Loading
TRANSPORTING BEFORE LOADING 1. If your lawn tractor is equipped with an optional grass bag kit, remove the bags, hopper cover, lower and upper chute. 2. If the engine has been running, allow it to cool for at least 15 min- utes before loading the lawn tractor. -
Page 53: Maintenance
This chapter explains when and how to perform routine inspection, service, and adjustments for do-it-yourself maintenance tasks should be done by a servicing Honda lawn tractor dealer. This dealer is best equipped and staffed to provide the level of service and safety you and your lawn tractor deserve. THE IMPORTANCE MAINTENANCE SAFETY... - Page 54 MAINTENANCE Cleaning or Replacing Mower Deck (secondary) mower deck) ... BLADES Blade Inspection Removing and Installing Mower Blades Blade Sharpening Left-to-Right Inspection Adjustment TIRES AND WHEELS. Lifting Points ... Removing Mower Deck..Installing Mower..Points ... Lubrication TRANSMISSION Belt (48 inch ..7 5...
-
Page 55: The Importance Of Maintenance
THE IMPORTANCE OF MAINTENANCE Good maintenance is essential for safe, economical, and trouble-free operation. It will also help reduce air pollution. Improper maintenance, correct a problem before operation, can cause a malfunction in which you can be seriously hurt or killed. Always follow the inspection and maintenance schedules in this owner’s manual. -
Page 56: Maintenance Safety
MAINTENANCE MAINTENANCE Some of the most important safety precautions follow. However, we cannot warn you of every conceivable performing maintenance. should perform a given task. Failure to properly follow maintenance instructions cause you to be seriously hurt or killed. Always follow the procedures and precautions Safety Precautions Make sure the engine is off before you begin any maintenance... - Page 57 Read the instructions before you begin, and make sure you have the tools and skills required. To reduce the possibility of fire or explosion, be careful when working around gasoline. Use only a nonflammable gasoline, to clean parts. Keep cigarettes, sparks, and flames away from all fuel-related parts.
-
Page 58: Emission Control System
MAINTENANCE EMISSION CONTROL SYSTEM Source of Emissions The combustion process produces carbon monoxide, oxides of nitrogen, and hydrocarbons. nitrogen is very important because, under certain conditions, they react to form photochemical monoxide does not react in the same way, but it is toxic. Honda uses lean carburetor settings and other systems to reduce the emissions of carbon monoxide, oxides of nitrogen, and hydrocarbons. -
Page 59: Replacement Parts
Replacement Parts The emission control systems on your new Honda engine were designed, built, and certified to conform with EPA and California emission regulations. We recommend the use of genuine Honda parts whenever you have maintenance replacement parts are manufactured to the same standards as the original parts, so you can be confident of their performance. -
Page 60: Maintenance Schedule
MAINTENANCE MAINTENANCE SCHEDULE ’ Service every IO hours or daily when used in dusty areas 2 Replace paper filter element only 3 These items should only be serviced by an authorized Honda servicing lawn tractor dealer unless you are mechanically proficient and have the proper tools. -
Page 61: Maintenance Access Points
MAINTENANCE MAINTENANCE ACCESS POINTS Refer to the illustrations on this page for the locations of specific maintenance items and service points. HYDROSTATIC FLUID RESERVOIR CARBURETOR OIL DIPSTICK I FILLFR LF’=- OIL FILTER MUFFLER I SPARK ARRE L DRAIN BOLT TENSION LEVEh FRONT BRiCKET (mower deck removal) (mower deck removal) -
Page 62: Seat
MAINTENANCE SEAT Adjusting the Seat 1. Tip seat forward and loosen two knobs to slide seat assembly for- ward or back to the most comfort- able position. 2. Tighten knobs after adjustment to keep seat in place. ENGINE Engine Hood The engine hood must be raised to perform some maintenance procedures on the lawn... -
Page 63: Air Cleaner Service
Air Cleaner Service Check that the air cleaner elements are clean and in good condition. A dirty air cleaner will restrict air flow to the engine, reducing performance. A damaged air cleaner will allow dirt to enter the engine, causing rapid engine wear. 1. - Page 64 MAINTENANCE Gasoline is highly flammable and explosive. You can be burned or seriously injured. Never use gasoline to clean engine parts. Use a nonflammable Oil the foam element by dipping it in clean engine oil and squeez- ing out all excess oil. If too much oil is left in the foam, the engine will smoke when you first start it.
-
Page 65: Engineoil
Engine Oil Engine oil capacity: 2.2 US quarts (2.1 liters) with filter change Recommended Oil is a major factor affecting performance and service life. Use a 4- stroke motor oil that meets or exceeds the requirements service classification service label on the oil container to be sure it includes the SJ, or equivalent. - Page 66 MAINTENANCE Changing the Oil Change the oil at the recommended extreme operating conditions. Drain the oil while the engine is warm to assure rapid and complete draining. Raise the engine hood. Clean the area around the oil filler cap and unscrew it. Near the bottom of the oil filler tube is the oil drain valve.
-
Page 67: Oil Filter Change
Oil Filter Change See page 114 for replacement part numbers. Drain the engine oil. Remove the oil filter with a filter wrench and let the remaining oil drain out. Discard the oil filter. Clean the filter base. Coat the O-ring on the new filter with clean engine oil. -
Page 68: Sparkplugs
MAINTENANCE Spark Plugs Removal, Inspection For good performance, the spark plugs should have the correct gap and be free of deposits. Follow these steps for each spark plug. 1. Remove the spark plug cap. Clean any dirt from around the spark plug base. -
Page 69: Fuel System
FUEL SYSTEM Changing the Fuel Filter We suggest you perform this procedure when the fuel tank is nearly empty. Change the fuel filter at the recommended 114 for replacement part numbers. Start the lawn tractor, and engage the parking brake. Turn the fuel valve to the OFF position. -
Page 70: Fuel Recommendations
MAINTENANCE Even with carburetor modification, engine horsepower will decrease about 3.5% for each 1 ,OOO-foot (300-meter) increase in altitude. The effect of altitude on horsepower will be greater than this if no carburetor modification is made. l--mTim When the carburetor has been modified for high altitude operation, the air-fuel mixture will be too lean for low altitude use. -
Page 71: Wear Protective Clothing
ELECTRICAL Battery Service Your lawn tractor charging system charges the battery while the engine is running. However, if the lawn tractor is only used periodically, the battery must be charged monthly to maintain the battery service life. The battery contains sulfuric acid (electrolyte) which is highly corrosive and poisonous. - Page 72 MAINTENANCE Inspection 1. Raise the hood. Remove the battery cell caps. 2. Inspect the electrolyte level of each cell. The electrolyte liquid should cover all the plates. 3. If any plates are not covered, add distilled water as necessary. Removal To charge the battery, follow the procedures below.
-
Page 73: Fuse Replacement
6a ttery Ins talla tion 1. With the hood raised, install battery in the battery tray with positive terminal to right side of lawn tractor. 2. Install rubber retaining strap. 3. Install positive (+) cable on battery positive (+) terminal, then install negative (-) cable on battery negative (-) terminal. -
Page 74: Mowerdeck
MAINTENANCE MOWER DECK Replacing Mower Drive (primary) The primary belt runs from the crankshaft pulley on the engine back to the main pulley on the mower deck. Cleaning and replacing drive belt steps are similar for both 38 inch and 48 inch mowers. See page 114 for replacement part numbers. -
Page 75: Replacing Mower Deck (Secondary) Belt (38 Inch Mower Deck)
Replacing Mower Deck (secondary) (38 inch mower deck) The secondary belt is the belt on the mower deck only. See page 114 for replacement part numbers. Remove mower deck (page 83). Remove belt guard cover. Disconnect idler spring with a spring removal tool or self- locking pliers. - Page 76 MAINTENANCE Cleaning or Replacing Belt (48 inch mower deck) See page 114 for replacement part numbers. 1. Remove mower deck. (See the Removing 2. Remove cover (right-hand side) by loosening the cap screws. 3. Remove belt guard cover (left-hand side) by loosening the cap screws.
-
Page 77: Blades
BLADES Inspect, check bolt tightness, remove, sharpen, and replace the blades as described in this section. Always complete these steps before working around the mower blades: 1. Move the PTO clutch knob to OFF. Engage the parking brake. 2. Turn the ignition switch to OFF and remove the key. 3. - Page 78 MAINTENANCE Inspecting For A Bent Blade Perform this inspection prior to attempting any mower deck leveling adjustments. Wearing heavy gloves, then position the right (discharge) side blade so it is parallel to the front axle. Measure the height of the right side blade at point B and record this mea- surement.
-
Page 79: Removing And Installing Mower Blades
Blade Bolt Tightness Blade bolt tightness should be checked as specified in the MAINTENANCE SCHEDULE section. The blades are sharp, and spin at high speed. A spinning blade can cut you severely and can amputate fingers and toes. Wear protective footwear. Keep your hands and feet away from the mower deck while the engine is running. - Page 80 MAINTENANCE Remove bolt, washer, and blade. If a blade is dull, have it sharpened and ,balanced. If a blade is damaged, install a new blade. See page 114 for replacement part numbers. 48 inch mower only: Make sure deflector cups are in place between spindle and blade.
-
Page 81: Blade Sharpening
Blade Sharpening A dull blade may be sharpened, but a blade that is worn out, bent, cracked, or otherwise damaged must be replaced. Always use a genuine Honda replacement blade or high-quality page 114 for replacement part numbers. Sharpening Guidelines Maintain the original angle of the blade (about 30”). -
Page 82: Left-To-Right Inspection Adjustment
MAINTENANCE Left-to-Right Inspection Move the lift lever to TRANSPORT. Set the height adjustment knob to the 2” (two inch) position. Set the anti-scalp rollers to their highest position (page 34) Move the lift lever to the LOCKOUT position. 5. Rotate the left and right side blades so they are parallel to the front axle. -
Page 83: Mower Deck Lift Lever
Front-to-Rear Inspection Pull the mower deck lift lever all the way back to the TRANSPORT Turn the mower deck height adjustment position. Move the mower deck lift lever forward to the LOCKOUT position. 3. Move the left and right side blades so they are perpendicular to the front axle. -
Page 84: Tires And Wheels
MAINTENANCE TIRES AND WHEELS Tires should be kept at the proper inflation pressure and periodically inspected for tread wear or damage. Keeping the tire treads clean and free of mud and other debris improves traction and steering control. Tire pressure: Front: 10 psi (69 kPa) Rear: 8 psi (55 kPa) Lifting Points... -
Page 85: Removing Mower Deck
Removing Mower Deck The procedure for removing the mower deck is similar for both’the 38 inch mower deck and the 48 inch mower deck, except for the positioning of the anti-scalp rollers on the 48 inch mower deck. Park the lawn tractor on a level surface. Stop the engine. Engage the parking brake. - Page 86 MAINTENANCE 5. Push lift lever all the way forward to LOCKOUT (lower) position. 6. Disconnect drive belt tension lever from hook bracket by pulling lever out of hole on bracket, then up and toward you to relieve belt tension. 7. Remove drive belt from tractor and mower pulleys.
- Page 87 Remove the lift rod attaching assembly from tractor and mower. Pull out on rear attaching J-pins on each side of mower and turn pins to unlocked position to disconnect mower from tractor. It may be necessary to manually lift up on the rear of the mower deck to pull out the J-pins.
-
Page 88: Installing Mower
MAINTENANCE Installing Mower Refer to the removal steps and illustrations. 1. Put the lift lever in the TRANSPORT position. 2. Push mower under tractor. Turn the height adjustment knob to blank mark on knob. Move the lift lever in the LOCKOUT position. Install the rear mower deck lift brackets to lift arms with the J-pins. -
Page 89: Lubrication Points
Lubrication Points Lubricate the following,points. Front wheel spindles (turn steering wheel to distribute grease) Blade spindles 48” DECK (belt covers Rear anti-scalp rollers (48” deck only) and J-Pins (all decks) Use NGLI #2 Lithium Base EP grease removed for clarity) MAINTENANCE 36”... -
Page 90: Transmission
MAINTENANCE TRANSMISSION To prevent contamination hydrostatic transmission SAE lOW30 engine oil with API classifications recommended in the transmission. fluid. Checking Hydrostatic 1. Check transmission 2. Park tractor on level surface. 3. Oil must be between FILL and ADD marks on reservoir. FILL 4. -
Page 91: Troubleshooting
This section helps you to identify the problems, their causes and some corrective actions. ENGINE PROBLEMS. DRIVE PROBLEMS VIBRATION........a MOWER DECK PROBLEMS. -
Page 92: Engine Problems
TROUBLESHOOTING ENGINE PROBLEMS Starter does not operate Check that brake is applied. Check PTO knob position. Safety interlock system operating. No electric current to starter. Indicator lamps BATTERY DISCHARGE lamp stays on when engine is running. @JfgfgJ LOW OIL PRESSURE lamp stays on when engine is running Possible... - Page 93 Starter operates, but engine will not start Check throttle position and choke. Check fuel delivery to engine. Check fuel condition. Check for spark. TROUBLESHOOTING Possible cause Throttle not in proper position. Fuel valve is OFF. Fuel filter clogged. Stale or old fuel. Spark plug cap(s) Off.
- Page 94 TROUBLESHOOTING Engine has low power Check ground speed. Check mower deck height. Check mower deck. Check air cleaner. Check spark plugs. Check engine cooling. Possible cause Fast ground speed when mowing tall grass puts excessive load on engine. Too low mower deck height for grass puts excessive load on engine.
-
Page 95: Drive Problems
Engine has low power Check spark arrester (optional part). Check choke position. DRIVE PROBLEMS Engine runs, but lawn tractor doesn’t move Check speed/ direction control. Check parking brake. Check pedal position. Check drive belt. Check transmission release TROUBLESHOOTING Possible cause Optional spark arrester clogged or dirty. -
Page 96: Vibration
TROUBLESHOOTING VIBRATION Lawn tractor vibrates Check blades. Check mower deck. Check blade belt. MOWER DECK PROBLEMS Won’t cut grass Check PTO knob position. Check deck height adjustment lever. Check blade belt and primary belt. Possible cause Blades not in good condition. - Page 97 Poor cut quality Check throttle position. Check mower deck. Check travel speed. Check mower deck height. Check grass conditions. Check mower deck level. Check blades. Check blade belt. Check tire pressure. Check anti-scalp rollers High effort required to lift and latch deck lift handle.
- Page 98 TROUBLESHOOTING Grass not discharging properly Check throttle position. Check deck height adjustment lever. Check blade belt and primary belt. Check grass conditions. Check mowing overlap. Check ground speed. Check blades. Possible cause Blades spinning too slowly. Deck set too high up. Blade belt worn, not on pulleys or not properly installed.
- Page 99 Engine stalls when PTO clutch lever is set to ON Check throttle position. Check mower deck. Check optional grass bag chute. Oberator not in operator position. TROUBLESHOOTING Possible cause Engine running too slow. Blades obstructed by grass, mud, etc. Blades obstructed by clog in grass bag chute.
- Page 100 TROUBLESHOOTING...
- Page 101 This section explains how to protect your lawn tractor from rust and corrosion, and ensure that it will start easily when you want to use it again. STORAGE PREPARATION Cleaning...10 Fuel ... Engine Oil..Grease...10 Tires...10 Battery...10 PLACING IN STORAGE ... REMOVAL FROM STORAGE ...
-
Page 102: Storage Preparation
STORAGE STORAGE PREPARATION Proper storage preparation is essential for keeping your lawn tractor trouble free and looking good. The following steps will help to keep rust and corrosion from impairing your lawn tractor’s function and appear- ance, and will make the engine easier to start when you use the lawn tractor again. - Page 103 Grass Bag (optional kit) Remove the grass bags from the hopper frame, and wash them with a garden hose or pressure washing equipment. Allow the bags to completely dry before storage. After washing the lawn tractor, wipe dry all accessible surfaces. Start the engine outdoors, and let it run until it reaches normal operating temperature to evaporate any water remaining on the engine.
- Page 104 STORAGE Fuel Gasoline will oxidize and deteriorate in storage. Old gasoline will cause hard starting, and it leaves gum deposits that clog the fuel system. If the gasoline in your lawn tractor deteriorates during storage, you may need to have the carburetor and other fuel system components ser- viced or replaced.
- Page 105 Engine Oil 1. Change the engine oil and filter (page 64). 2. Remove the spark plugs (page 66). 3. Pour a tablespoon (5 - 10 cc) of clean engine oil into each cylinder. 4. Operate the electric starter for a few seconds to distribute the oil in the cylinder.
-
Page 106: Placing In Storage
STORAGE PLACING IN STORAGE If your lawn tractor will be stored with gasoline in the fuel tank and car- buretor, it is important to reduce the hazard of gasoline vapor ignition. Select a well-ventilated operates with a flame, such as a furnace, water heater, or clothes dryer. -
Page 107: Removal From Storage
REMOVAL FROM STORAGE Check your lawn tractor as described in the section. If the fuel was drained during storage preparation, fill the tank with fresh gasoline. If you keep a container of gasoline for refueling, be sure that it contains only fresh gasoline. Gasoline oxidizes and deteriorates over time, causing hard starting. - Page 108 STORAGE...
- Page 109 This chapter gives dimensions, capacities, and other technical information. LAWN TRACTOR MODEL..... . .108 DIMENSIONS, WEIGHTS, AND CAPACITIES. ENGINE ........I09 TRANSMISSION PERFORMANCE.
-
Page 110: Lawn Tractor Model
SPECIFICATIONS LAWN TRACTOR MODEL HA41 18H38A HA41 20H48A DIMENSIONS, WEIGHTS, AND CAPACITIES Length Width Height Wheel Base Weight Front Tires Rear Tires Hydrostatic transmission, American model, 18 HP engine, 38 inch deck Hydrostatic transmission, American model, 20 HP engine, 48 inch deck 68.4 inches (1724 mm) 49.7 inches (1262 mm) (38”... -
Page 111: Engine
ENGINE Model Engine Horsepowerfrpm Maximum No-Load Governed Speed Idle Speed Ignition System Valve Clearance (cold): Intake Exhaust Spark Plugs Spark Plug Gap Fuel Fuel Tank Capacity Engine Oil Engine Oil Capacity SPECIFICATIONS HA41 18H38A GXV610 18 hp/3600 rpm 3,200 +150 rpm 1400 +150 Transistorized magneto... -
Page 112: Design And Performance
SPECIFICATIONS TRANSMISSION PERFORMANCE Type Hydrostatic, fluid drive Infinitely variable Speeds Ground Forward: 0 - 5 mph (0 - 8.0 km/h) Speeds Reverse: 0 - 2.4 mph (0 - 3.8 km/h) Lube 3.6 quarts (3.4 liters) SAE 1 OW-30 SH only MOWER DECK DESIGN AND PERFORMANCE Type... -
Page 113: Maintenance
MAINTENANCE Fuel Engine Oil Spark Plug Type Maximum Governed Engine Speed Blade Bolt Torque TUNEUP Spark Plug Gap Engine Idle (PTO OFF) Valve Clearance (cold) Other Specifications MISCELLANEOUS Minimum Uncut Grass Diameter (left turn) Minimum turning radius Battery Fuse SPECIFICATIONS Unleaded gasoline with a pump octane rating of 86 or higher SAE lOW-30;... - Page 114 SPECIFICATIONS...
- Page 115 This chapter contains additional information, including replacement part number, serial number locations, Honda publications you, and tells you how to contact us if you have a question or warranty repair problem. REPLACEMENT HONDA PUBLICATIONS ShopManual... Parts Catalog.. WARRANTY SERVICE INFORMATION. OXYGENATED SPARK ARRESTER SERVICE (optional PARTS .
- Page 116 ADDITIONAL REPLACEMENT Replacement parts may be purchased from an authorized servicing Honda lawn tractor dealer. Description Belt, blade Belt, PTO to mower deck High lift blade, left side High lift blade, right side High lift blade (left, right or center) Blade bolt Blade bolt washer Air filter, paper element with large and small...
-
Page 117: Serial Number Locations
SERIAL NUMBER LOCATIONS Your lawn tractor has both a frame and engine serial number. The frame serial number is on the back frame, between the rear wheels. The engine serial number is next to the starter motor, on the right rear side of the engine. - Page 118 ADDITIONAL WARRANTY SERVICE INFORMATION Honda Power Equipment dealership personnel are trained profession- als. They should be able to answer any question you may have. If you encounter a problem that your dealer does not solve to your satisfac- tion, please discuss it with the dealership’s management. The Service Manager or General Manager can help.
-
Page 119: Oxygenated Fuels
OXYGENATED Some conventional gasolines are being blended with alcohol or an ether compound. These gasolines are collectively genated fuels. To meet clean air standards, some areas of the United States and Canada use oxygenated fuels to help reduce emissions. If you use an oxygenated fuel, be sure it is unleaded and meets the minimum octane rating requirement. -
Page 120: Spark Arrester Service
ADDITIONAL SPARK ARRESTER SERVICE (optional The spark arrester is not standard on your lawn tractor, but may be required for legal operation in some areas. A spark arrester must be inspected, cleaned every 100 hours of operation. Park the lawn tractor on a flat, level surface. Set the parking brake ON and remove the ignition key. - Page 121 air cleaner ... air intake screen ..25 anti-scalp rollers, adjusting ..34 bagging ... battery charging emergency procedures lamp ... service ... belt, mower primary ..72 belt, mower, secondary blades bolt tightness ..77 inspection removal & installation sharpening ...
- Page 122 INDEX lamps checking indicator ... 31 lamps, indicator ... latch, hood ... leaves ... lift lever ... lifting points ... light headlight swtich ... 18 lights indicator lamps ... 14 loading lubrication points ... maintenance access points ... schedule mower height adjustment knob ...
- Page 123 specifications starting the engine ..30 stopping the lawn tractor emergency ..36 normal ... storage throttle tie-downs tire, pressure towing ... transmission checking oil level ..23 .108 transmission transpdrting trimming tips ... troubleshooting drive ... engine mower deck ..94 vibration ...
- Page 124 INDEX...
- Page 125 Quick Reference Information =uel >apacity Engine Oil ‘we Zapacity Spark Plug ilectrode 3lade Bolt rorque dle Speed >arburetor PTO clutch lever OFF) +ont Tires 3ear 3efore Each Use Maintenance -irst 20 Hours subsequent Part Number iigh lift blade, 38” iigh lift blade, 48” Xl filter %el filter Spark plug, NGK...
- Page 126 31V09610 00X31-V09-6100 Printed on Recycled Paper POM52882-A 50009903 PRINTED IN U.S.A.
Need help?
Do you have a question about the HA4118H38A and is the answer not in the manual?
Questions and answers