
Subscribe to Our Youtube Channel
Related Manuals for Manhattan 130288


Summary of Contents for Manhattan 130288
-
Page 1: User Manual
DRIVE ENCLOSURE USER MANUAL MODEL 130288 manhattan-products.com MAN-130288-UM-0712-01... -
Page 2: Hardware And Driver Installation
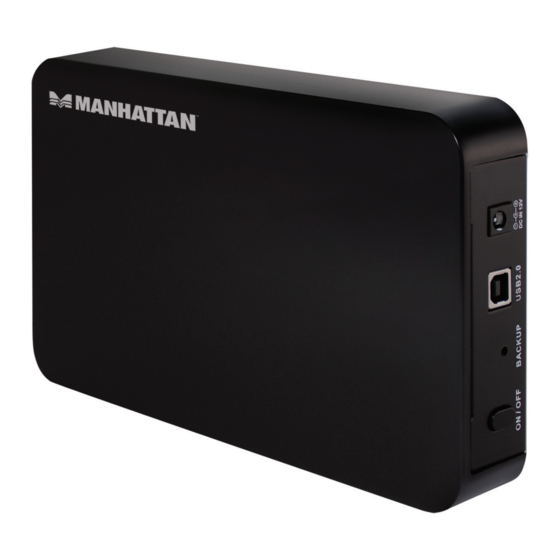
Drive Enclosure, Model 130288. ® Install an idle or new hard disk drive into a MANHATTAN Drive Enclosure to expand storage capacities for desktop and notebook computers. With support for large-capacity 3.5-inch SATA drives up to 2 TB and Hi-Speed USB data transfer rates of up to 480 MBps, this MANHATTAN Drive Enclosure helps optimize high- performance personal computer storage applications. -
Page 3: Software Installation
1. Remove the 4 screws on the bottom of the enclosure (A) and lift off the top (B). 2. Connect the hard drive to the SATA data and power connectors on the enclosure, then secure it to the enclosure using the included screws (C). 3. - Page 4 2. When the License and Warranty Agreement displays, click “Agree” to continue. 3. Enter the desired pathway for the installation or click “Browse” to find a current folder. Click “Install” to continue. 4. The final Setup screen will display a progress status bar. When finished, the wizard will display an “Install complete!”...
-
Page 5: Creating Partitions
5. The PC Clone EX icon will appear in the system tray. To open the program, you can double-click the icon or right-click to display the menu option for selection. CREATING PARTITIONS NOTE: If the hard drive you have placed in the enclosure (the drive that you are copying data to) has already been partitioned, you can proceed to the next section. - Page 6 2. In the left-hand file directory, click/select “Disk Management” so its screen displays on the right. Right-click on the disk identified as “Unallocated,” then click/select “New Partition...” from the pop-up menu. NOTE: To confirm that the drive you’ve placed in the enclosure is indeed the unallocated disk, disconnect the USB cable and see if the corresponding “Unallocated”...
-
Page 7: Fat32 Format Utility
OPTION: An alternative pathway for accessing the formatting options is through Start on your desktop, then All Programs / PCCloneEX / FNet FAT32 Format. The formatting details and instructions will appear on the screens that display. FAT32 FORMAT UTILITY With the increases in drive capacities, the FAT32 Format Utility in older operating systems is unable to support data transfers in excess of 32 GB. - Page 8 3. Confirm that the fields for USB Device and Drive to Format display your preferences and click Start. 4. Select “Quick Format” and click Start. Remember, all data previously loaded on the receiving HDD will be deleted.
- Page 9 5. A Status screen will display the progress of the formatting. 6. When the Format Complete message displays, click OK. The selected disk has been formatted with the FAT32 file system.
- Page 10 ONE-TOUCH BACKUP FUNCTION To use any of the features available with this function, be sure the enclosure is plugged into a USB port on your computer and powered on, and that a backup drive has been properly loaded in the enclosure. NOTE: Before backing up files for the first time using this device, it’s recommended that the function parameters be set on the File Backup Settings screen in the PC Clone EX program.
-
Page 11: Quick Launch
Quick Launch The Quick Launch screen displays automatically when the PC Clone EX program is opened. From here, you can directly execute the File Backup function by clicking on the boxed icon (5 in the image below) or select one of the other menu options: 1 Quick Launch 3 File Manager 5 Quick File Backup... -
Page 12: File Manager
3. When the file backup begins, a status bar displays to indicate the progress of the procedure. When the “Backup finished!” prompt displays, click “OK.” File Manager Managing files in PC Clone EX is just like managing files in Windows Explorer. Just drag files between the fixed device and the drive ined to the enclosure. -
Page 13: File Backup
Files Backup Type Select “Add files to existing backup” to back up additional files; select “Discard and replace existing backup” to completely re-copy selected files. Other You can select “Quick file backup double confirm” so that a confirmation box will display whenever you use a hot key to initiate a backup. - Page 14 2. With your files selected for backup, click OK when prompted. 3. When the file backup begins, a status bar displays to indicate the progress of the procedure. When the “Backup finished!” prompt displays, click “OK.” 4. Confirm that the selected items now appear in the right-hand (USB Device) window.
- Page 15 IMPORTANT: A root directory (FNet) folder will display in the USB Device window. This is where all the backed-up files are stored, so be careful not to delete it unintentionally. Restoring Files 1. In the event you need to copy files from the backup drive to the original source device (to replace lost or damaged originals, for example), select the items in the right-hand (USB Device) window and click the Restore icon (2).
- Page 16 2. When the “Are you going to restore?” prompt displays, click OK. 3. When the “Restore Finished!” message displays, click OK. The selected items will appear in the left-hand (File Backup) window. Deleting Files 1. Select a file (or files) you want to delete in the USB Device window. 2.
- Page 17 OPTION: To remove all files that have been backed up, you can simply select the root directory (FNet) folder, then right-click for the delete option.
-
Page 18: Specifications
SPECIFICATIONS Standards and Certifications • USB 2.0 to SATA interface • CE • FCC General • JM-20329 chipset • SATA 7P + 15P internal data and power connections • DC single-post power input (power adapter included) • Power adapter: input, 100 – 240 V, 50 – 60 Hz, 0.8 A; output, 12 V / 2 A; cable, 1.5 m (5 ft.) •... -
Page 19: Waste Electrical And Electronic Equipment
WASTE ELECTRICAL & ELECTRONIC EQUIPMENT Disposal of Electric and Electronic Equipment (applicable in the European Union and other European countries with separate collection systems) ENGLISH This symbol on the product or its packaging indicates that this product shall not be treated as household waste. - Page 20 ITALIANO Questo simbolo sui prodotto o sulla relativa confezione indica che il prodotto non va trattato come un rifiuto domestico. In ottemperanza alla Direttiva UE 2002/96/EC sui rifiuti di apparecchiature elettriche ed elettroniche (RAEE), questa prodotto elettrico non deve essere smaltito come rifiuto municipale misto. Si prega di smaltire il prodotto riportandolo al punto vendita o al punto di raccolta municipale locale per un opportuno riciclaggio.
-
Page 21: Warranty Information
ITALIANO: Per informazioni sulla garanzia, accedere a manhattan-products.com/warranty. EN MÉXICO: Póliza de Garantía MANHATTAN — Datos del importador y responsable ante el consumidor IC Intracom México, S.A. de C.V. • Av. Interceptor Poniente # 73, Col. Parque Industrial La Joya, Cuautitlán Izcalli, Estado de México, C.P. 54730, México. •... -
Page 22: Regulatory Statements
REGULATORY STATEMENTS FCC Class B This equipment has been tested and found to comply with the limits for a Class B digital device, pursuant to Part 15 of Federal Communications Commission (FCC) Rules. These limits are designed to provide reasonable protection against harmful interference in a residential installation. - Page 23 Copyright © MANHATTAN...
Need help?
Do you have a question about the 130288 and is the answer not in the manual?
Questions and answers