Table of Contents
Advertisement
Quick Links
OPERATOR'S MANUAL
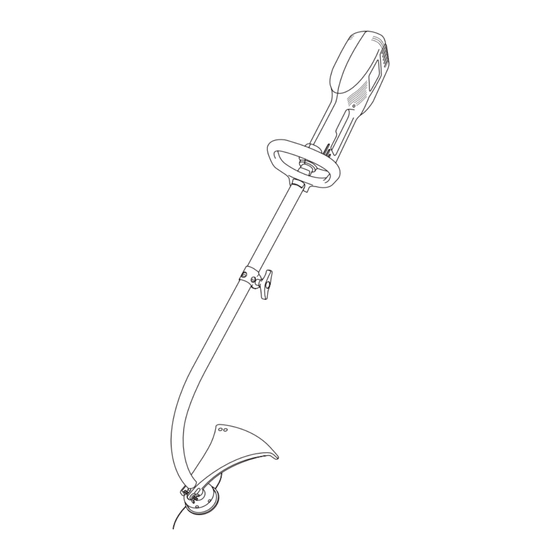
VersaLite™ Electric String Trimmer
Model No. UT41002
Your trimmer has been engineered and manufactured to Homelite's high standard for dependability, ease of
operation, and operator safety. When properly cared for, the trimmer will give you years of rugged, trouble-free
performance.
WARNING:
To reduce the risk of injury, the user must read and understand the operator's manual.
Thank you for buying a Homelite product.
SAVE THIS MANUAL FOR FUTURE REFERENCE
Advertisement
Table of Contents

Subscribe to Our Youtube Channel
Summary of Contents for Homelite VERSALITE UT41002
- Page 1 VersaLite™ Electric String Trimmer Model No. UT41002 Your trimmer has been engineered and manufactured to Homelite's high standard for dependability, ease of operation, and operator safety. When properly cared for, the trimmer will give you years of rugged, trouble-free performance.
-
Page 2: Table Of Contents
Customer Service Information ... 18 Your trimmer has many features that make using this product more pleasant and enjoyable. We have given safety, performance, and dependability top priority in the design of this product, making it easy to maintain and operate. -
Page 3: Safety
Maintain a firm grip on both handles while trimming. Keep the trimmer head below waist level. Never cut with the trimmer head over 30 in. (76 cm) or more above the ground. ELECTRICAL SAFETY RULES... -
Page 4: Safety
Inspect the unit’s power connection. Any part that is damaged should be properly repaired or replaced by a Homelite autho- rized service center. Keep the product clean of grass clippings and other materials that may become lodged in the cutting lines. -
Page 5: Symbols
Some of the following symbols may be used on your tool. Please study them and learn their meaning. Proper interpretation of these symbols will allow you to operate the tool more safely and effectively. SYMBOL NAME Safety Alert Ricochet Eye Protection Bystanders Alert No Blade Class II Construction... -
Page 6: Specifications
MOTOR Motor Type ... 120 V AC Operating RPM ... 6500 Amperage ... 6 amps DRIVE SHAFT AND CUTTING HEAD Drive Shaft ... 1/4 in. Flex Shaft Cutting Head ... Bump Line Release Cutting Path Diameter ... 15 in. (381 mm) Drive Shaft Housing ... -
Page 7: Features
The trimmer includes a grass deflector that helps protect you from flying debris. ERGONOMIC DESIGN The design of the trimmer provides for easy handling. It is designed for comfort and ease of grasp when operating in different positions and at different angles. -
Page 8: Assembly
Follow these steps to remove the attachment from the upper shaft. 1. Release the trigger and allow the trimmer to coast to a stop. 2. Unplug the trimmer. 3. Loosen the locking knob by turning it counterclock- wise. -
Page 9: Attaching The Grass Deflector
ATTACHING THE GRASS DEFLECTOR See Figure 4. WARNING: The line cutting blade on the grass deflector is sharp. Avoid contact with the blade. Failure to avoid contact can result in serious personal injury. Follow these steps to attach the grass deflector. 1. -
Page 10: Operation
Note: Keep a firm grip with both hands during operation. 3. Place the trimmer on the right side of your body with the engine behind and away from your body. 4. Press the trigger to start the trimmer. - Page 11 Follow these steps to advance the cutting line manually. 1. Release the trigger and allow the trimmer to coast to a stop. 2. Unplug the trimmer.
-
Page 12: Maintenance
SERVICING THE TRIMMER Check all fasteners and tighten as necessary. If any part is damaged or lost, repair it or replace it. Any other service should be performed at a Homelite Authorized Service Dealer. REPLACING THE CUTTING LINE See Figures 9a and 9b. -
Page 13: Replacing The Spool
11. Insert the lines into the eyelets in the trimmer head. 12. Place the spool on the drive shaft. Note: To install the spool, you may need to rotate it slightly. -
Page 14: Troubleshooting
TROUBLESHOOTING SOLUTION 1. Lubricate with Homelite silicone spray. 2. Install more line (Refer to “Replacing the Cutting Line” earlier in this manual). 3. Pull lines while alternately pressing down on and releasing spool retainer. -
Page 15: Accessories
ACCESSORIES String Head (RH Thread) .080 in. (2 mm) ... DA03001A String Head (LH Thread) .080 in. (2 mm) ... DA04592A Spool & Line .080 in. (2 mm) ... UP00145 String Refill .080 in. (2 mm); 390 ft. (118 mm) ...D06511 String Refill .080 in. -
Page 16: Warranty
HOMELITE operator's manual. This warranty does not apply to any damage to the HOMELITE product that is the result of improper maintenance or to any... - Page 17 NOTES Page 17...
-
Page 18: Customer Service Information
Model No. UT41002 CUSTOMER SERVICE INFORMATION For parts or service, contact your nearest Homelite authorized service dealer. Be sure to provide all relevant information when you call or visit. For the location of the authorized service dealer nearest you, please call 1-800-chainsaw (1-800-242-4672) or visit us online at www.homelite.com.


Need help?
Do you have a question about the VERSALITE UT41002 and is the answer not in the manual?
Questions and answers