
Related Manuals for Miele H6361BP


Summary of Contents for Miele H6361BP
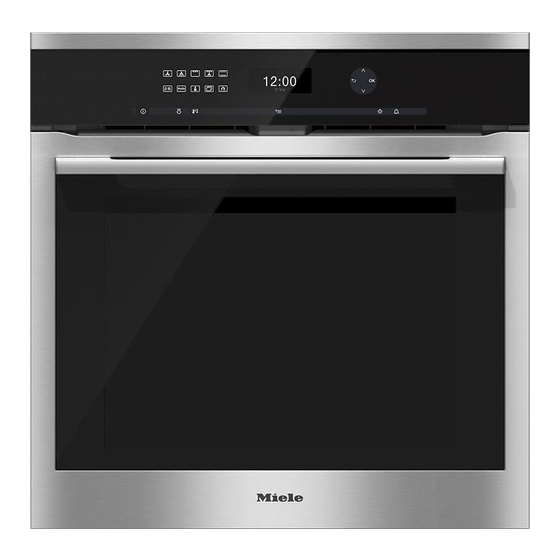
- Page 1 Operating and installation instructions Oven To avoid the risk of accidents or damage to the appliance it is essential to read these instructions before it is installed and used for the first time. en - GB M.-Nr. 09 876 820...
-
Page 2: Table Of Contents
Contents Warning and Safety instructions ........6 Caring for the environment . - Page 3 Contents Lighting ............41 Display brightness .
- Page 4 Contents Changing an entered cooking time ....... . . 57 Cancelling cooking .
- Page 5 Contents Gentle bake ........... 90 Defrosting .
-
Page 6: Warning And Safety Instructions
They contain important notes on installation, safety, use and maintenance. Miele cannot be held liable for non-compliance with these instructions. Keep these instructions in a safe place and ensure that new users... - Page 7 Warning and Safety instructions Correct application This oven is intended for use in domestic households and similar working and residential environments. The oven is not intended for outdoor use. It is intended for domestic use only to cook food, and in particular to bake, roast, grill, cook, defrost and dry food.
- Page 8 Warning and Safety instructions Safety with children Children under 8 years of age must be kept away from the appliance unless they are constantly supervised. Children 8 years and older may only use the oven unsupervised if they have been shown how to use it safely and recognise and understand the consequences of incorrect operation.
- Page 9 Warning and Safety instructions Danger of burning. Children's skin is far more sensitive to high temperatures than that of adults. External parts of the oven such as the door glass, control panel and the vents become quite hot during use. Do not let children touch the oven whilst it is in use.
- Page 10 Unauthorised installation, maintenance and repairs can cause considerable danger for the user. Installation, maintenance and repairs must only be carried out by a Miele authorised technician. Never use a damaged oven. It could be dangerous. Check it for visible signs of damage before using it.
- Page 11 While the appliance is under guarantee, repairs should only be undertaken by a Miele authorised service technician. Otherwise the guarantee is invalidated. Miele can only guarantee the safety of the appliance when genuine original Miele replacement parts are used. Faulty components must only be replaced by Miele spare parts.
- Page 12 Warning and Safety instructions In order to function correctly, the oven requires an adequate supply of cool air. Ensure that the supply of cool air is not impaired (e.g. by heat insulation strips in the housing unit). Please also ensure that the cool air supply is not unduly heated by other heat sources such as a solid fuel stove.
- Page 13 Warning and Safety instructions Correct use Danger of burning. The oven becomes hot when in use. You could burn yourself on the heating elements, oven interior, cooked food or oven accessories. Wear oven gloves when placing food in the oven, turning or removing it and when adjusting oven shelves etc.
- Page 14 Warning and Safety instructions Some types of food dry out quickly and can self-ignite if high grill temperatures are used. Never use the grill to finish baking part- cooked rolls or bread or to dry flowers or herbs. Use Fan plus U or Conventional heat V for this type of procedure.
- Page 15 Warning and Safety instructions If cold liquid is poured onto a hot surface steam will occur, which can cause scalding. The sudden change in temperature can also damage enamel surfaces. Do not pour cold liquid directly onto hot enamelled surfaces. During cooking processes using moisture and during the residual moisture evaporation process, steam is produced which can cause serious injury by scalding.
- Page 16 Warning and Safety instructions Cleaning and care Do not use a steam cleaning appliance to clean this appliance. The steam could reach electrical components and cause a short circuit. Scratches on the door glass can result in the glass breaking. Do not use abrasive cleaners, hard sponges, brushes or sharp metal tools to clean the door glass.
- Page 17 Never place a Miele oven dish on the top rail of Shelf level 1 as it will not be held securely in this position by the anti-tip notches on the runners.
-
Page 18: Caring For The Environment
Caring for the environment Disposal of the packing Disposing of your old material appliance The packaging is designed to protect Electrical and electronic appliances the appliance from damage during often contain valuable materials. They transportation. The packaging materials also contain materials which, if handled used are selected from materials which or disposed of incorrectly, could be are environmentally friendly for disposal... -
Page 19: Oven Overview
Oven overview Oven controls Door lock - Pyrolytic cleaning Top heat/grill element Steam inlet openings Water intake pipe for the steam injection system Air inlet for the fan with ring heating element behind it Side runners with 5 shelf levels Oven floor with bottom heat element underneath it Front frame with data plate Door... -
Page 20: Oven Controls
Oven controls On/Off sensor Sensors for selecting oven functions Display Arrow sensors Y, X and OK, sensors Sensors for *, R,... -
Page 21: On/Off Sensor
Oven controls On/Off sensor Sensor controls The On/Off sensor is recessed and The sensors react to touch. Each touch reacts to touch. is confirmed with a keypad tone. This keypad tone can be switched off It is used for switching the oven on and (see "Settings –... - Page 22 Oven controls Other sensors Sensor Function Notes For scrolling The arrow sensors are used for scrolling up or down through the lists through the lists of options. The options are of options highlighted one after the other as you scroll through the list.
- Page 23 Oven controls Sensor Function Notes For switching the If the time of day display is visible, the oven interior oven interior lighting can be switched on and off by touching the lighting on and off sensor, for example when cleaning the oven. If the display is dark, the sensor will not react until the oven is switched on.
-
Page 24: Display
Oven controls Display If the time of day is visible and you have not selected a function, a list The display is used for showing the with the following options will appear time of day or information about in the display: functions, temperatures, cooking durations, automatic programmes and –... - Page 25 Oven controls The following symbols may also appear in the display in addition to the text: Symbol Explanation Minute minder If two or three options are available arrows will appear on the right hand side of the display. Use the arrow sensors to scroll through the list. The options will be highlighted one after the other as you scroll through them.
-
Page 26: Features
Miele appliances. Please have this information to hand, should you need to contact Miele These can be ordered via the internet regarding any questions or problems. at www.miele-shop.com, from Miele... -
Page 27: Side Runners
Features Side runners Baking tray, universal tray and rack with non-tip notches Side runners for trays, racks and Miele oven dishes are fitted on either side of Baking tray HBB71: the oven cavity for shelf levels ‡. The numbers for the shelf levels are marked on the front frame. -
Page 28: Flexiclip Telescopic Runners Hfc72
The FlexiClip telescopic runners can be shelf level. used with any shelf level. The FlexiClip runner with the Miele logo Push the FlexiClip telescopic is fitted on the right. runners right into the oven before placing accessories on them. - Page 29 Features Perforated baking tray HBBL 71 The perforated baking tray has been specially designed for baking fresh yeast and quark dough items, bread ^ Then secure the FlexiClip runner to and rolls. the lower of the two rails as illustrated The fine perforations help to brown the (3).
- Page 30 It also has a non-stick coating. and savoury tarts, baked desserts, flat The Miele oven dishes are either 22 cm bread, and can also be used for frozen or 35 cm deep. The width and height cakes and pizzas.
- Page 31 Miele oven cleaner The handle makes it easier to take the universal tray, baking tray and rack out Miele oven cleaner is suitable for of the oven, or to put them into it. The removing very stubborn soiling. It is not...
-
Page 32: Oven Controls
Features Oven controls Cooling fan In addition to operating the various The cooling fan will come on cooking functions for baking, roasting automatically when a cooking and grilling, the oven controls are also programme is started. The cooling fan used for: mixes hot air from the oven cavity with cool room air before venting it out into –... -
Page 33: Perfectclean Treated Surfaces
Features PerfectClean treated surfaces Pyrolytic accessories PerfectClean surfaces have very good The following accessories can be left in non-stick properties and are much the oven during the Pyrolytic cleaning easier to keep clean than conventional programme. enamel surfaces, if cleaned regularly. –... -
Page 34: Using For The First Time
^ Touch the OK sensor. Welcome screen Set the time (of day) The greeting "Miele Willkommen" will Now set the time of day using the 24 appear in the display, and you will then hour clock. be requested to select some basic settings which are needed before the ^ Set the hours and the minutes. - Page 35 Using for the first time ^ Touch the OK sensor. Time of day display You will then be asked when you want The message "Set up successfully the time of day to show in the display completed" will appear in the display. when the oven is switched off (see ^ Touch the OK sensor.
-
Page 36: Heating Up The Oven For The First Time And Rinsing The Steam Injection System
Using for the first time Heating up the oven for the This temperature will be automatically first time and rinsing the steam accepted within a few seconds and injection system the option to select a burst of steam New ovens can give off an unpleasant will then appear. - Page 37 Using for the first time ^ Touch the OK sensor. After heating up for the first time The water intake process will begin. Danger of burning. Allow the The amount of water actually drawn up oven interior to cool down before into the oven may be less than the cleaning by hand.
-
Page 38: Settings
Settings Settings overview Settings cannot be altered while a cooking programme is in progress. Factory default settings are shown in bold in the chart. Setting Options Language J [...] deutsch ... / Deutschland / Luxemburg / ... english ... / Australia / United Kingdom / ... [...] Time Display... - Page 39 Settings Setting Options Cooling fan run-on Temp. controlled Time controlled Pyrolytic With reminder Without reminder Recommended Recommended temperatures can be altered within the range temperatures specified. Safety System lock Sensor lock Showroom Demo mode programme Factory default Settings Reset / Do not reset User programmes Delete / Do not delete Recommended...
-
Page 40: Opening The Settings Menu
Settings Language J Opening the Settings menu ^ Switch the oven on. You can set the language and the country you want. ^ Touch After selecting and confirming your A list of settings will appear in the choice, the language you have display. -
Page 41: Time
Settings Time Set the hours and the minutes. Display If there is an interruption to the Select how you want the time of day to show in the display when the oven is power supply, the current time of switched off: day will reappear once power has been restored. -
Page 42: Display Brightness
Settings Display brightness Solo tone The brightness is represented by a bar At the end of a process, a continuous with seven segments. tone will sound for a period of time. The pitch of this tone is represented by a segment bar. Use the X arrow sensor to make the display appear darker and the Y sensor to make it brighter. -
Page 43: Units
Settings Units Cooling fan run-on The cooling fan will continue to run for a Weight while after the oven has been switched off to prevent any humidity building up – g Weight in Automatic programmes is in the oven, on the control panel or in set using grammes. -
Page 44: Pyrolytic
Settings Pyrolytic Safety – With reminder System lock A reminder to run the pyrolytic cleaning programme will appear in The system lock prevents the oven the display. being switched on by mistake. – Without reminder The system lock will remain activated You will not be reminded to run the even after an interruption to the pyrolytic cleaning programme. -
Page 45: Sensor Lock
Settings Showroom programme Sensor lock The sensor lock prevents the oven This function enables the oven to be being switched off by accident or demonstrated in showrooms without settings being altered whilst food is heating up. It should not be set for cooking. -
Page 46: Minute Minder
Minute minder ^ Touch Using the minute minder The minute minder can be used to time "0 : 00 : 00" will appear (h : min : sec). other activities in the kitchen, e.g. The hour block will light up. boiling eggs. -
Page 47: To Change The Duration Set For The Minute Minder
Minute minder At the end of the minute minder To change the duration set for the duration minute minder ^ Touch – will flash, – the display will show the time "Minute minder" will appear and counting upwards, "Change" will be highlighted. ^ Touch the OK sensor. -
Page 48: Overview Of Functions
Overview of functions Intensive bake O Your oven has a range of oven functions for preparing food. (Ring heat element + fan + bottom heat Depending on the function selected, element) different heating elements are switched For baking cakes with moist toppings. on and sometimes combined with the Intensive bake is not suitable for baking fan (see details in brackets). -
Page 49: Moisture Plus D
Overview of functions Moisture plus d The following are selected via Further programmes (Ring heat element* + fan* + steam injection system) Auto roast For baking and roasting with moisture (Ring heat element + fan) injection. This used for roasting. * Equates to Fan plus. -
Page 50: Using The Oven - Getting Started
Using the oven - Getting started Tips on saving energy Using residual heat – Remove any accessories from the You can switch a cooking programme oven that you do not require for off approx. 5 minutes before the end of cooking. -
Page 51: Simple Operation
Using the oven - Getting started Simple operation Cooling fan ^ Switch the oven on. The cooling fan will continue to run for a while after a cooking process to ^ Place the food in the oven. prevent moisture building up in the ^ Select the function you want. -
Page 52: Using The Oven - Further Functions
Using the oven - Further functions Changing the function You have placed the food in the oven, selected a function and set the You can change the cooking function temperature. during operation. ^ Touch ^ Select the function you want. Further options will appear in the ^ When "Change function?"... -
Page 53: Changing The Temperature
Using the oven - Further functions Changing the temperature You can also permanently reset the As soon as a cooking function is recommended temperature to suit selected, a recommended temperature your personal cooking preferences. will appear in the display together with See "Settings - Recommended its possible range. -
Page 54: Rapid Heat-Up
Using the oven - Further functions Rapid heat-up Pre-heating the oven Rapid heat-up can be used to speed It is only necessary to pre-heat the oven up the heating up phase. in a few instances. Rapid heat-up R switches on Most dishes can be placed in a cold automatically when the temperature is oven. -
Page 55: Setting The Duration
Using the oven - Further functions Setting the duration Switching off automatically You have placed the food in the oven, Example: selected a function and set the It is 11:45. Your food needs 30 minutes temperature. to cook and should be ready at 12:15. You can set the programme to switch Select "Duration"... -
Page 56: Switching On And Off Automatically
Using the oven - Further functions Switching on and off automatically Sequence of a programme that switches on and off automatically We recommend using automatic Up until the start time the function, the switching on and off when roasting. selected temperature, "Start at" and the For baking do not delay the start for start time will appear in the display. -
Page 57: Changing An Entered Cooking Time
Using the oven - Further functions Changing an entered cooking time ^ Touch All options that can be changed will appear. ^ Scroll through the list until the setting you want is highlighted. ^ Touch the OK sensor. "Change" will be highlighted. ^ Touch the OK sensor. -
Page 58: Moisture Plus D
Moisture plus d Your oven is equipped with a steam Fresh tap water is taken into the steam injection system for cooking with system via the tube underneath the moisture. Baking, roasting and cooking control panel on the left. with Moisture plus d guarantees optimised steam and air conduction for Use only fresh tap water when excellent cooking and browning results. - Page 59 Moisture plus d The number of bursts of steam and Type of heating when they are injected will depend on The Moisture plus programme d uses the type of food being cooked: "Fan heat" together with the addition of – Yeast mixtures will rise better if moisture.
-
Page 60: Moisture Plus Function D
Moisture plus d Moisture plus function d Setting the temperature ^ Set the required temperature. It is quite normal for condensation to ^ Touch the OK sensor. form on the inside of the door during steam injection. This will dissipate during the course of the cooking Setting the number of bursts of programme. -
Page 61: When To Add The Steam
Moisture plus d When to add the steam Preparing and starting the water intake process This option will only appear in the ^ Fill a suitable container with the display after you have selected 1, 2 required amount of fresh tap water. or 3 bursts of steam. -
Page 62: Changing The Type Of Heating
Moisture plus d ^ Remove the water container after the Changing the type of heating water intake process. With some recipes it is advisable to ^ Confirm the message showing that change the function. the process has finished with OK ^ Touch sensor. -
Page 63: Automatic Steam
Moisture plus d Steam can cause injury by scalding. Do not open the door while the burst of steam is being injected. Condensation on the sensors will make them react more slowly. Automatic steam 1, 2 or 3 bursts of steam Once the heating-up phase has been –... -
Page 64: Residual Water Evaporation
Moisture plus d Residual water evaporation To start residual water evaporation immediately When cooking using the addition of moisture, the water will be equally Steam can cause scalding injuries. distributed between the number of Do not open the door during the bursts of steam and used up as long as evaporation process. -
Page 65: To Skip Residual Moisture Evaporation
Moisture plus d At the end of the residual water To skip residual moisture evaporation process "Process finished" evaporation appears in the display. Do not cancel the prompt for ^ Touch residual moisture evaporation A cooking process using the Moisture unless you have to, as this could, in plus function d or an Automatic certain circumstances, cause the... -
Page 66: Automatic Programmes
Automatic programmes To use an Automatic Your oven has a wide range of programme Automatic programmes to enable you ^ Select c. to achieve excellent results with ease. Simply select the appropriate A list of food types will appear in the programme for the type of food you display. -
Page 67: Notes On Using These Programmes
Automatic programmes Notes on using these programmes – Some programmes require the addition of liquid or vegetables – When using the Automatic during cooking. You will be programmes the recipes provided prompted by a message in the are designed as a guide only. display when this needs to be done You can use them for other similar (e.g. -
Page 68: User Programmes
User programmes To create a User programme You can create and save up to 20 of your own programmes. ^ Select – Each one can have up to 10 cooking To create the first User programme: stages. This enables you to save your most frequently used recipes The first time you create a User very accurately. - Page 69 User programmes You can add more cooking stages, for Finally give the programme a name. example, if you want to add another The following symbols appear next to cooking function to follow on from the the alphabet: first. Symbol Explanation If further cooking stages are required: Space ƒ...
-
Page 70: To Start A User Programme
User programmes To start a User programme The option to "Change cooking ^ Select stages" is described in "To change User programmes". The programme names will appear in the display with "Edit programmes" ^ Scroll through the list until the option underneath. -
Page 71: To Change User Programmes
User programmes ^ Change the programme as you wish To change User programmes (see "To create a User programme"). Change cooking stages ^ Touch the OK sensor. ^ Check the settings and then confirm Cooking stages in an Automatic programme that you have renamed them with OK. -
Page 72: Change Name
User programmes ^ Enter a new name (see "To create a Change name User programme"). ^ Select ^ After entering a new name, scroll The programme names will appear in through the list until is highlighted. the display with "Edit programmes" ^ Touch the OK sensor. -
Page 73: To Delete User Programmes
User programmes To delete User programmes ^ Select The programme names will appear in the display with "Edit programmes" underneath. ^ Touch the OK sensor. ^ Scroll through the list until "Delete programme" is highlighted. ^ Touch the OK sensor. ^ Scroll through the list until the programme you want is highlighted. -
Page 74: Baking
Fan plus U, Baking paper, greasing the tin Intensive Bake O, Moisture plus d or Conventional heat V. All Miele accessories (baking tray, universal tray, perforated baking tray Bakeware and the round baking tray) are treated with PerfectClean enamel. -
Page 75: Notes On The Baking Chart
Baking Shelf levels ‡ Notes on the baking chart The shelf level on which you place your Temperature food for baking depends on the oven function and number of trays being As a general rule, select the lower temperature given in the chart. used. -
Page 76: Baking Chart
Baking Baking chart Cakes / biscuits ‡ [°C] [min] Creamed mixture Sponge cake 150–170 60–70 Ring cake 150–170 65–80 Muffins (1 [2] tray(s)) 150–170 2 [1+3 30–50 1) 2) Small cakes (1 tray) 25–40 1) 2) Small cakes (2 trays) 25–40 Foam cake (tray) 150–170... - Page 77 Baking ‡ ‡ [°C] [min] [°C] [min] 150–170 60–70 – – – 150–170 65–80 – – – 160–180 25–45 – – – 25–35 – – – – – – – – – 170–190 25–40 – – – 150–170 60–80 – –...
- Page 78 Baking Baking chart Cakes / biscuits ‡ [°C] [min] Sponge mix Tart / flan base (2 eggs) 170–190 15–20 Sponge cake (4 to 6 eggs) 175–195 22–30 1) 2) Whisked sponge cake 25–35 Swiss roll 160–180 15–25 Yeast mixtures and quark dough Proving dough 15–30 Gugelhupf...
- Page 79 Baking ‡ ‡ [°C] [min] [°C] [min] 170–190 10–20 – – – 170–190 20–40 – – – – – – 150–180 20–45 170–190 15–20 – – – 15–30 – – 160–180 50–60 – – 150–170 55–65 – – 170–190 35–45 –...
-
Page 80: Roasting
When cooking with Fan plus U, You can use any heat-resistant dishes: Moisture plus d or Auto roast [ Miele Gourmet oven dishes, roasting select a temperature approx. 20 °C pans, ovenproof glass dishes, roasting lower than for Conventional heat V. -
Page 81: Useful Tips
Roasting Useful tips Roasting duration The traditional British method for Browning calculating the roasting time is to allow 15 to 20 minutes per lb/450 grammes, Browning only occurs towards the end according to type of meat, plus approx. of the roasting time. Remove the lid 20 minutes, adjusting the length of time about halfway through the roasting time as roasting proceeds to obtain the... -
Page 82: Roasting Chart
Roasting Roasting chart U / [ Meat/Fish [°C] [min] Topside of beef, approx. 1 kg 170–190 100–130 Beef fillet or sirloin joint, approx. 1 kg 200–220 45–55 Venison, approx. 1 kg 140–160 100–120 Pork joint, approx.1 kg 160–180 100–120 Pork joint with crackling, approx. 2 kg 160–180 130–160 Gammon joint, approx. - Page 83 Roasting [°C] [min] [°C] [min] – – 190–210 110–140 – – 200–220 45–55 140–160 100–120 150–170 100–120 160–180 110–130 180–200 100–120 170–190 130–160 190–210 130–160 160–180 60–80 170–190 80–100 170–190 60–70 190–210 60–70 170–190 90–110 190–210 100–120 170–190 90–120 200–220 90–120 –...
-
Page 84: Low Temperature Cooking
Low temperature cooking Procedure This method is ideal for cooking beef, pork, veal or lamb when a tender result is required. Use the universal tray with the rack placed on top of it. First sear the meat all over at a high temperature on the hob in order to seal Do not use the Rapid heat-up function to pre-heat the oven. - Page 85 Low temperature cooking ^ Touch Cooking duration / Core temperatures "Temperature" will be highlighted. Meat Duration Core tem- ^ Touch OK-Taste and reduce the perature** temperature to 100 °C. [min] [°C] ^ Continue cooking until the end of the Sirloin joint cooking duration.
-
Page 86: Grilling
Grilling Trays and racks Danger of burning. Grill with the oven door closed. If you grill with the door open, hot air will escape from the oven instead of being cooled by the cooling fan. The controls will get hot. Functions Full grill Y Use the universal tray with the rack or... -
Page 87: Notes On The Grilling Chart
Grilling Notes on the grilling chart Testing to see if cooked One way of finding out how well a piece Temperature of meat has been cooked is to press down on it with a spoon: As a general rule, select the lower temperature given in the chart. -
Page 88: Preparing Food For Grilling
Grilling Preparing food for grilling Grilling ^ Place the rack or the anti-splash Trim the meat. Do not season meat with salt before grilling as this draws the insert (if available) in the universal juices out. tray. ^ Place the food on top. Add a little oil to lean meat if necessary. -
Page 89: Grilling Chart
Grilling Grilling chart The data for the recommended function is printed in bold. Pre-heat the grill for approx. 5 minutes with the door closed, unless advised otherwise. Turn the food halfway through grilling. Check the food after the shortest duration quoted. Food to be grilled ‡... -
Page 90: Further Applications
Further applications Further programmes Gentle bake The Gentle bake function is ideal for The table contains a few examples. bakes and gratins which require a crisp ‡ Food top. [°C] [min] The temperature can be set between Lasagne 45–60 100 and 250 °C. Potato gratin 55–65 ^ Select... -
Page 91: Defrosting
Further applications Defrosting Defrosting durations Use the Defrost function to gently The duration needed for defrosting defrost frozen food. depends on the type and weight of the food, and at what temperature it was The temperature can be set between deep frozen. -
Page 92: Drying Food
Further applications Drying food Food Drying time This programme is designed for Fruit 2–8 hours traditional style drying of food to Vegetables 3–8 hours preserve it. Herbs* 50–60 minutes The temperature can be set between * Because this programme uses the 80 and 100 °C. -
Page 93: Reheat
Further applications Reheat Proving dough This programme uses moisture and is This programme does not use designed for reheating plated meals. additional moisture and is designed for proving yeast dough. You can select: – Meat + veg The temperature can be set between –... -
Page 94: Pizza
Further applications Pizza Heat crockery This programme is designed This programme is designed to pre- specifically for baking pizza. heat your crockery. The temperature can be set between The temperature can be set between 160 and 250 °C. 50 and 80 °C. ^ Select Use heat-resistant crockery. -
Page 95: Frozen Food / Ready Meals
Further applications Frozen food / Ready meals Method Eating food which has been cooked Tips correctly is important for good Cakes, pizza, baguettes health. – Large frozen items such as cakes, pizzas or baguettes cover an Only bake cakes, pizza, chips etc. extensive area of the baking tray or until they are golden. -
Page 96: Note For Test Institutes
Note for test institutes Test food acc. to EN 60350 ‡ Test food Tray / tin Function Pre-heat [°C] [min] Drop cookies 1 tray 30–40 (8.4.1) 2 trays 1 + 3 30–45 1 tray 15–33 Small cakes 1 tray 25–40 (8.4.2) 2 trays 2 + 4... -
Page 97: Cleaning And Care
Cleaning and care Unsuitable cleaning agents Danger of burning. Make sure To avoid damaging the surfaces, do not the oven heating elements are use: switched off and that the oven cavity – cleaning agents containing soda, is cool. ammonia, acids or chlorides, –... -
Page 98: Useful Tips
Cleaning and care Normal soiling Soiling might become impossible to remove if it is not dealt with. There is a fibreglass seal around the Continued use of the oven without oven interior which seals the inside regular cleaning will make it much of the door. -
Page 99: Stubborn Soiling (Does Not Apply To The Flexiclip Runners)
Cleaning and care Stubborn soiling (does not Non-Miele oven spray must only be apply to the FlexiClip runners) used on cold surfaces and for no longer than a maximum of Spilt fruit and roasting juices may 10 minutes. cause lasting discolouration or matt patches on enamelled surfaces. -
Page 100: Pyrolytic Cleaning ^ Of The Oven Interior
Cleaning and care Pyrolytic cleaning ^ of the Setting up for pyrolytic cleaning oven interior The high temperatures used during Instead of cleaning the oven manually pyrolytic cleaning will damage you can run the Pyrolytic cleaning accessories that are not designed programme ^. -
Page 101: Starting Pyrolytic Cleaning
Cleaning and care Starting Pyrolytic cleaning "Start now" To start pyrolytic cleaning straight Danger of burning. away: The oven door gets much hotter ^ Touch the OK sensor. during pyrolytic operation than during normal use. Pyrolytic cleaning will now start. Make sure children cannot touch the The door locks automatically. -
Page 102: At The End Of Pyrolytic Cleaning
Cleaning and care The door will lock automatically. or with hot water and a little washing- up liquid on a clean sponge. "Start at" and the start time set will appear in the display. Depending on how dirty the oven was there may be a visible layer of As soon as the start time is reached, soiling across the inner glass pane... -
Page 103: If Pyrolytic Cleaning Is Cancelled
Cleaning and care If pyrolytic cleaning is cancelled If pyrolytic cleaning is cancelled the oven door will remain locked until the temperature inside the oven drops to below 280 °C. The following will cause pyrolytic cleaning to be cancelled: – Switching the oven off. –... -
Page 104: Removing The Door
Cleaning and care Removing the door Do not attempt to take the door off the retainers when it is in the horizontal position as the retainers will spring back against the oven. Do not use the handle to pull the door off the retainers as the handle could break. -
Page 105: Dismantling The Door
Cleaning and care Dismantling the door Take particular care as scratches The oven door is an open system with can damage the glass. four glass panes which have a heat- When cleaning the glass panes do reflective coating on some of their not use abrasive cleaning agents, surface. - Page 106 Cleaning and care You can now remove the inner pane and the two middle panes one after the Danger of injury. Always remove the door before other. dismantling it. ^ Place the door on a protective surface (e.g. on a tea towel) to prevent it getting scratched.
- Page 107 Cleaning and care Then reassemble the door carefully: The two middle panes are identical. To help you put them back in correctly the material number is printed on the panes. ^ Refit the lower of the two middle panes in such a way that the material number is legible.
- Page 108 Cleaning and care ^ Refit the seal. ^ Flip both the glass pane retainers inwards to close them. The door is now reassembled and is ready to fit back on the oven. ^ Push the inner pane with the matt printed side facing downwards into the plastic strip and place it between the retainers.
-
Page 109: Refitting The Door
Cleaning and care ^ Open the door fully. Refitting the door It is essential that the locking clamps lock securely when the door is refitted after cleaning. Otherwise the door could could work loose from the retainers and be damaged. ^ Flip both locking clamps back up as ^ Hold the door securely at both sides far as they will go into a horizontal... -
Page 110: Removing The Side Runners
Cleaning and care Removing the side runners Remove the side runners for cleaning. Danger of injury. Do not use the oven without the side runners. You can remove the side runners together with the FlexiClip runners (if present). If you wish to remove the FlexiClip runners separately beforehand, please ^ Pull the runners out of holder (1) at follow the instructions in "Features –... -
Page 111: Lowering The Top Heat/Grill Element
Cleaning and care Lowering the top heat/grill element Danger of burning. Make sure the oven heating elements are switched off and cool. ^ Remove the side runners. ^ Undo the wing nut. Do not use force to lower the top heat/grill element as this can cause it to break. -
Page 112: Descaling The Steam Injection System
Cleaning and care Descaling the steam injection Sequence of a descaling cycle system Once the descaling process has been started it must be completed When to run the descaling process through to the end. It cannot be The frequency of descaling will depend cancelled. -
Page 113: Preparation
If the Moisture plus d function and Miele descaling tablets are available to the Automatic programmes that use order from Miele or via the internet at moisture are already locked, the www.miele-shop.com. descaling process can be started You will need a container of approx. 1 immediately by touching the "OK"... - Page 114 Cleaning and care The amount of solution specified can be more than the amount which is actually taken in. Some of the solution may therefore be left in the container at the end of descaling. A message will appear in the display when the intake process is finished.
- Page 115 Cleaning and care At the end of the activation phase the The intake process for the first rinse steam injection system will need to be starts. cleaned to remove all traces of Water will be flushed through the steam descaling solution. injection system and will then collect in Cleaning is carried out by flushing the universal tray.
- Page 116 Cleaning and care Close the door. Danger of burning. Touch the OK sensor. Allow the oven interior and The Evaporate residual moisture accessories to cool down before process will then start. cleaning them. Steam can cause scalding injuries. Remove the universal tray and empty Do not open the door during the it.
-
Page 117: Problem Solving Guide
With the aid of the following guide, minor problems can be easily corrected without contacting Miele. If having followed the suggestions below, you still cannot resolve the problem, please contact Miele (see end of manual for contact details). Danger of injury. - Page 118 The Pyrolytic cleaning programme door lock is not the display. locking. ^ Switch the oven off and then back on again. Then restart the Pyrolytic cleaning programme. If the fault code appears in the display again call the Miele Service Department.
- Page 119 The door lock for the Pyrolytic cleaning programme is the display. not being released. ^ Switch the oven off and then back on again. If the door lock still does not release itself call the Miele Service Department. " Fault: F XX" appears There is a problem that you cannot resolve.
- Page 120 Problem solving guide Problem Possible cause and remedy A noise can be heard The fan remains switched on after a cooking after a cooking process. programme (see "Settings - Cooling fan run-on"). The rack and other The pyrolytic resistant surface of the side runners accessories make a creates friction when accessories are being pushed noise when being...
- Page 121 Problem solving guide Problem Possible cause and remedy The oven lighting The oven lighting is set to switch off after 15 seconds switches off after a short (default setting). time. You can change the default setting for this (see "Settings - Lighting"). The oven lighting does The halogen lamp needs replacing.
-
Page 122: After Sales / Guarantee
For further information on the appliance cannot remedy yourself, or if the guarantee specific to your country appliance is under guarantee, please please contact Miele. See end of contact manual for contact details. – your Miele Dealer This appliance is guaranteed for 2 years from the date of purchase. -
Page 123: Electrical Connection
Ensure that these match the mains Installation, repairs and other work supply. by unqualified persons could be dangerous. Miele cannot be held When contacting Miele, please quote liable for unauthorised work. the following: Ensure power is not supplied to the –... - Page 124 Electrical connection Oven Ovens are supplied for connection with an approx. 1.7 m long 3-core cable for connection to a 230 V, 50 Hz supply. The wires in the mains lead are coloured as follows: Green/yellow = earth; Blue = neutral; Brown = live WARNING, THIS APPLIANCE MUST BE...
-
Page 125: Building-In Diagrams
Building-in diagrams Appliance and niche dimensions Dimensions are given in mm. Installation in a base unit * Ovens with glass front ** Ovens with metal front... - Page 126 Building-in diagrams Installation in a tall unit * Ovens with glass front ** Ovens with metal front...
-
Page 127: Front Dimensions
Building-in diagrams Front dimensions Dimensions are given in mm. A H63xx: 45 mm H64xx: 42 mm B Ovens with glass front: 2.2 mm Ovens with metal front: 1.2 mm... -
Page 128: Installing The Oven
Installing the oven Lifting the oven by the door handle The oven must not be operated until it has been correctly installed in can damage the door. Use the its housing unit. handle recesses on the side of the casing. It is advisable to dismantle the door In order to function correctly, the before installing the appliance (see... - Page 132 H6361BP; H6461BP en - GB M.-Nr. 09 876 820 / 00...
Need help?
Do you have a question about the H6361BP and is the answer not in the manual?
Questions and answers