
Subscribe to Our Youtube Channel
Related Manuals for SecurityMan AVLCD


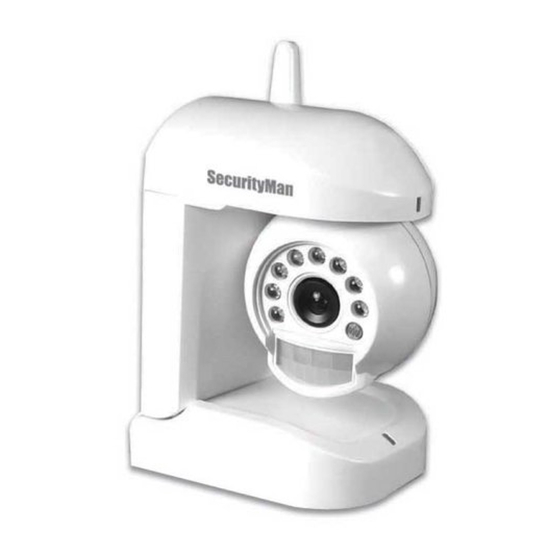
Summary of Contents for SecurityMan AVLCD
- Page 1 SecurityMan ® S e c u r i t y M AVLCD Day/Night Motion/Audio sensor 2.4GHz Wireless LCD Monitoring Kit User Guide...
- Page 2 The content of this manual is furnished for informational use only, is subject to change without notice, and should not be construed as a commitment by SecurityMan. SecurityMan assumes no responsibility or liability for any errors or inaccuracies that may appear in this book.
- Page 3 Limitation of Liability The liability of SecurityMan arising from this warranty and sale shall be limited to a refund of the purchase price. In no event shall SecurityMan be liable for costs of procurement of substitute prod- ucts or services, or for any lost profits, or for any consequential, incidental, direct or indirect dam- ages, however caused and on any theory of liability, arising from this warranty and sale.
- Page 4 1 feet away from any heart pacemaker. Radio waves might potentially influence heart pacemaker and lead to respiratory disturbance. DO NOT use this product for any illegal activities. SecurityMan shall not be responsible for any consequences of illegal conducts by users.
- Page 5 Conditions Please read the following messages to make sure whether your working envi- ronment is suitable. • Ensure there is enough space around the receiver for ventilation. • The temperature should be kept between –20˚C and 50˚C (-4F – 122˚F). The relative humidity should remain from 20% to 80%.
-
Page 6: Table Of Contents
Contents Introduction Package Contents Technical Support SM-850 Camera Features SM-713 Receiver Features Product Basics Installation Diagram Adapter & Battery Adapter Battery Add-on Battery Pak (optional) Installation Camera Channel Setup Hanging Bracket Alarm Setup Alarm Setting Switch Alarm Indicator Snooze button on Receiver Mode Control Setup Channel Set Channel-Scan Set... -
Page 7: Introduction
Introduction Thank you for purchasing AVLCD Day/Night Motion/Audio Sensor Wireless LCD Monitoring Kit. It consists of a vivid CMOS Color Camera with night vision (B/W), and a handheld portable design LCD display Monitor. The Camera converts the video and audio signals into radio sig- nals and transmits them to the LCD display Monitor. -
Page 8: Sm-850 Camera Features
SM-850 Camera Features: • Vivid CMOS color camera with night vision (B/W) • Selectable motion or audio detection triggers recorder alarm • 3 channels available to avoid possible interference • Special bracket for desktop and wall-mount • Up to 300ft. video transmission (up to 100ft for indoor and up to 300ft for clear line of sight.) •... -
Page 9: Product Basics
Product Basics Camera Antenna Alarm Setting Switch PIR Motion Audio Sensor Sensor Alarm Indicator Camera Lens IR light PIR Motion Sensor Power Indicator DC8V Desktop Base ON/OFF DC Power Jack Power ON/OFF Earphone Jack LCD Monitor/Receiver Indicator Antenna Volume Screen Control Channel Brightness... -
Page 10: Installation Diagram
Installation Diagram DC Power Add-on Battery Box (Optional) DC Power WARNING: When using power adapter, make sure the voltage indica- tions on the adapters are compatible to the devices to avoid potential damages for incorrect usage of power. Adapter & Battery Adapter 2.4GHz wireless heat detection monitor kit always conform to the authenticated AC adapter. -
Page 11: Battery
Battery The camera and receiver could be powered by 4 AAA batteries (includ- ed) for temporary use. (Batteries life: SM-850 camera, approximately 1.5hr ; SM-713 monitor/receiver, approximately 1hr) ALARM ON ALARM OFF 1 2 3 L Camera Bottom View LCD Monitor/Receiver Back View Optional Add-on Battery Pak (optional) The receiver can be powered by rechargeable add-on battery pak. -
Page 12: Installation
Installation Connect the power jack of adapter (DC 8V 300mA) or insert 4 AAA batteries to camera. Turn on the power switch, and the red power indicator light will on. Power Outlet Camera Bottom View Connect the power jack of adapter (DC 9V 400mA), insert 4 AAA batteries or attach the add-on battery pak to receiver. - Page 13 Set the camera to desired Channel, and place the camera at desired location. PIR Motion Audio PIR Motion Audio Sensor Sensor Sensor Sensor Push Push CH1: 2,414MHz CH2: 2,432MHz CH3: 2,468MHz DC8V ON/OFF DC8V ON/OFF Press the Channel button on the receiver until the Channel LED indication match to the channel on the corresponding camera, and the LED monitor will display pictures.
- Page 14 Adjust the brightness and volume control to get satisfied effect. Volume Control Brightness Control Receiver can also be powered by an add-on battery pak (optional) for portable usage. The add-on battery pak can be recharged individually by connecting the adapter (DC 9V 1500mA) directly to the battery pak itself, with or without removing the battery pak from receiver.
-
Page 15: Camera Channel Setup
Camera Channel Setup The camera has 3 selectable channel to avoid possible interference from other nearby wireless devices. PIR Motion Audio PIR Motion Audio Sensor Sensor Sensor Sensor Push Push CH1: 2,414MHz CH2: 2,432MHz CH3: 2,468MHz DC8V ON/OFF DC8V ON/OFF Hanging Bracket The camera can be mounted on the wall by using the hanging bracket in the package. -
Page 16: Alarm Setup
Alarm Setup The camera provides either Heat-detection or Voice-detection alarm. You can change alarm method via the alarm setting switch. Alarm Setting Switch PIR Motion Sensor Camera will be set as Heat-detection alarm Audio Sensor PIR Motion Audio PIR Motion Audio Sensor Sensor... -
Page 17: Mode Control Setup
Mode Control Setup The receiver can support up to 3 cameras working at the same time. You can adjust the mode control to set the working status as described below. The mode control has the highest priority. Default Setting ALARM ON ALARM OFF 1 2 3 L ALARM ON... -
Page 18: Channel Set
Channel Set: You can confirm which channel is set to receive signal from correspon- ding camera. (Note: This channel set mode is recommended for channel setting on the receiver than channel switch.) Channel-Scan Set: The Channel-Scan function support multi-camera usage. When the cam- era turn on, all available channels will display one by one looping in turn per 5 second. -
Page 19: Troubleshooting
Troubleshooting Abnormal Phenomena Possible Reasons/Solutions *Check the camera / receiver connected to power supplies, and power on. *Check if the channel of receiver is corresponding to camera; *Check the distance and blocks. *Interfered by other sources; *Check the distance and blocks. *Mismatching system of PAL TV and NTSC cameras or vice versa. - Page 20 www.securitymaninc.com...
Need help?
Do you have a question about the AVLCD and is the answer not in the manual?
Questions and answers