Advertisement
Quick Links
Download this manual
See also:
Quick Manual
Advertisement

Subscribe to Our Youtube Channel
Related Manuals for SecurityMan DigioutLCD


Summary of Contents for SecurityMan DigioutLCD
- Page 1 Digital Wireless Outdoor Camera DigioutLCD User’s Manual Digital Wireless Security System 7” LCD/SD Recorder & One Digital Wireless Outdoor Camera with Night Vision and Audio...
- Page 2 SecurityMan. The content of this manual is furnished for informational use only, is subject to change without notice, and should not be construed as a commitment by SecurityMan.
- Page 3 The liability of SecurityMan Inc, arising from this warranty and sale shall be limited to a refund of the purchase price. In no event shall SecurityMan be liable for costs of procurement of substitute products or services, or for any lost profits, or for any consequential, incidental, direct or indirect damages, however caused and on any theory of liability, arising from this warranty and sale.
- Page 4 Table of Contents Introduction Important Restrictions Package Contents Features Product Basics Camera (SM-804DT) LCDDVR/Receiver (SM-371DR) Quick Start On-Screen Display Single Channel Full Screen Display Quad Screen Display Playback Screen Display Operation Snap Shot button Record button Camera button Quad Screen button Menu button Exit button Volume Control (up/down/left/right buttons)
- Page 5 Introduction Thank you for choosing our DigioutLCD. The DigioutLCD is a complete “Do it yourself” (DIY) digital wireless security system. The DigioutLCD comes with one weatherproof digital wireless camera and a 7” LCD/SD DVR combo. Compared to full version digital video recording (DVR) systems, the DigioutLCD is much less complicated to operate, much more affordable and can be installed in minutes.
- Page 6 2. Monitoring related to people’s antiques or rare articles. For it Is not designed and manufactured for these purposes. • DO NOT use this product to carry out any illegal activities. SecurityMan shall not be responsible for any consequences of illegal conducts made by users.
- Page 7 • DO NOT use it aboard airplane; please abide by the airway’s provision. It might influence communication and the flying apparatus if departing from airway’s regulation. This will result in accident, sever physical injuries, and possible death. • DO NOT put the camera in wet places where water might splash or where rainwater and mist might erode(except weather-proof) •...
- Page 8 • DO NOT use the receiver on the surface of thermo labile material. Please embed thermal insulating material when using on the surface of the thermo labile. • DO NOT place or use the AC adapter on temperature sensitive materials. The above practice might cause the plastic distortion, fading or sticking on the surface.
- Page 9 • DO NOT use the camera in the places which are covered with metal. The around metal, such as elevator and cabin, might shield the electromagnetic wave, and result in inability to received signals.
-
Page 10: Package Contents
Package Contents 1x Monitor 2 x AC/DC Adapters 1x Camera (SM-371DR) (12VDC/ 1.0A) (visor/bracket) User’s Manual Mounting Screws... - Page 11 Features • Do-it-yourself (D.I.Y) easy to setup and use 2.4GHz digital wireless recording system • Space saving 7” LCD monitor with an Integrated SD digital video recorder (SD card not included) • Simple installation. No video cables required. • Night vision up to 120ft (B/W) •...
-
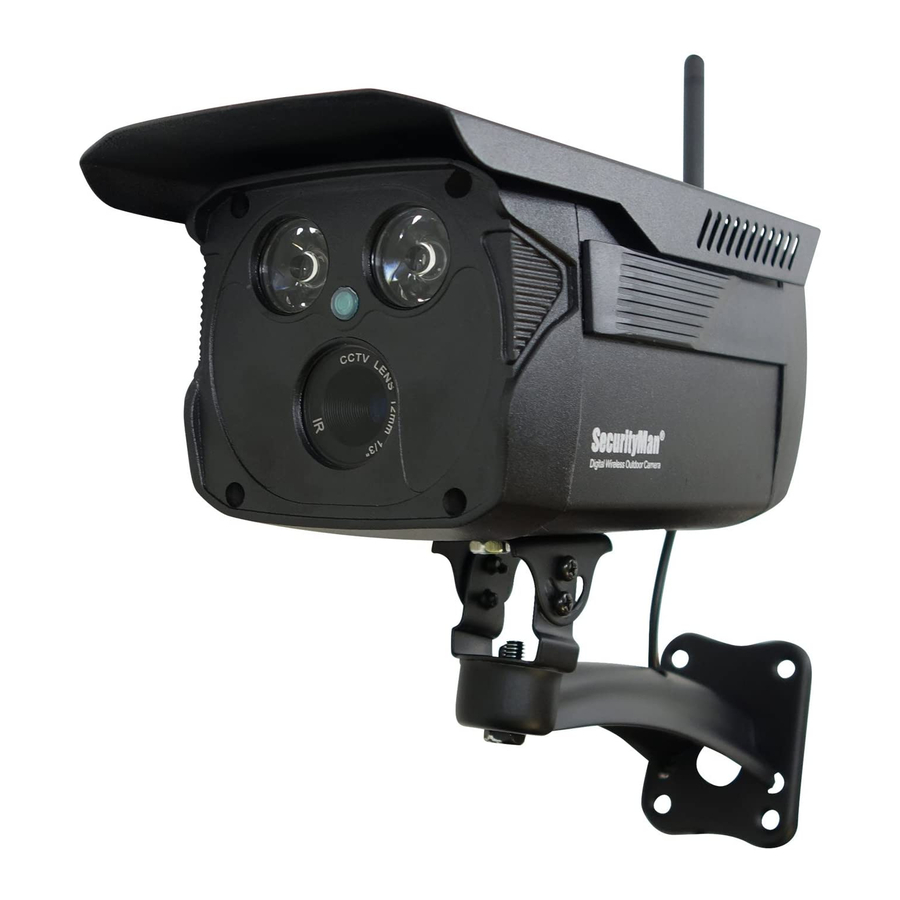
Page 12: Product Basics
Product Basics Camera (SM-804DT) Sun Visor Light Sensor Camera Digital Wireless Outdoor Camera Antenna Pairing button Power LED Power Cable Mounting bracket... - Page 13 LCDDVR/Receiver (SM-371DR) LCD Stand (fold-in) Antenna ON/OFF Switch 7” LCD SD Card Slot AV Out DC IN 12V...
-
Page 14: Quick Start
Quick Start 1. Fasten the antennas to the cameras, and mount the cameras in the desired location. Then connect the power adapters to the cameras. The power adapters for the cameras are 12VDC/ 1.0A CAUTION: To prevent electric shock or Digital Wireless Outdoor Camera damages to the cameras, please make sure to properly insolate the camera’s... -
Page 15: On-Screen Display
3. You will see a brief start up screen followed by a live image and be able to hear audio from the camera’s microphone as show below. Press the Snap Shot button or the Record button to initiate manual recording. On-Screen Display Single Channel Full Screen Display Snap Shot... - Page 16 Date and Time The Date and Time is displayed in the following format: Year/Month/Date Day HR:Min Note: Please refer to System Settings in the user’s manual for information on how to change the time and date. Snap Shot A small camera icon will appear at the top of the screen during manual or motion detected Snap Shot recording.
- Page 17 Quad Screen Display Black Screen Camera Camera In “Quad Screen”, the camera numbers located in the center of the screen corresponds to each of the 4 channels available on the LCDDVR. You can toggle between cameras by simply pressing the Camera button on the LCDDVR until the desired camera number is highlighted.
- Page 18 Playback Screen Display Loop Video Duration/Length Play Image Number File Name File Name The File Name identifies the current video/picture being played. The File Name is also the starting time of the video, in the format of HH-MM-SS. The number after the last dash represents the camera channel number of the recorded file being played.
-
Page 19: Operation
Image Number The image number is only viewable during photo playback and represents the total amount of files in the current folder and the current file being viewed. Operation Antenna 7” LCD Direction Key Snap Shot button The Snap Shot button gives you the ability to take an instant manual photo (jpeg) of activities showed on the LCD screen and are automatically stored on the SD card. - Page 20 • In Single Channel Full Screen Display you can use the Camera button on the LCDDVR to toggle through all four cameras in single channel full screen display and then press the Record button to start recording when the desired camera is being displayed on the screen. NOTE: Recording in single camera independently will lock the LCDDVR to that channel preventing it from being able to toggle to any other available cameras.
-
Page 21: Menu Setup
Menu Setup Press the Menu button on the DVR/Receiver at any time to enter the Main Menu Setup window as shown below. Then use the UP, DOWN, LEFT, and RIGHT buttons to toggle through the menu options, press the OK button to select, save the changes, and press the EXIT button to exit from the selected menu screen. - Page 22 • Brightness To adjust the brightness level of the DVR/Receiver, simply highlight and press OK on the Brightness option in the system settings. Use the UP, DOWN, LEFT, and RIGHT buttons to make your adjustments and press the OK button to save your changes. •...
- Page 23 • • Sensitivity In the Motion Detection submenu, highlight and press OK on Sensitivity to adjust the sensitivity option for the motion detection recording feature. Options include: Never (off), Low (17’), Medium (25’), and High (30’). NOTE: Multi –channel motion detection recording only works in “Quad”...
- Page 24 • • Motion Detection Alert In the Motion Detection submenu, highlight and press OK on Motion Detection Alert to enable or disable the audible alert notification that can be heard whenever motion is detected. Options include: ON and Off. • Date and Time It is highly recommended to set the date and time on the system prior to recording.
- Page 25 • TV Standard To change the TV Standard on your LCDDVR, simply highlight and press OK on the TV Standard option. Use the UP, DOWN, LEFT, and RIGHT buttons to make your selection and press the OK button to save your changes.
- Page 26 • System Information The System Information option displays important information about your LCDDVR such as: System ID, Firmware, Total Size, and Free Space available on your SD card. To view this information simply highlight and press OK on the System Information option. Playback/SD Card The Playback/SD Card menu consists of 3 options: the Play Folder (used to view and playback recorded files), SD Unmount (used prior...
- Page 27 • Play Folder (Playback from Recorder) The Play Folder is used to view and playback recorded events stored on your SD Card and consist of 2 subfolders labeled Movies and Photos. To playback or view the recorded files stored on your SD card simply highlight and press OK on the Play Folder option to access the subfolders.
- Page 28 Once inside, you can use the Up and Down buttons to highlight the dated folder that you would like to review and press the OK button to view its recorded events. At this point you can now highlight and select the recorded video file that you would like to playback by pressing the OK button on the selected file.
- Page 29 Once inside, you can use the Up and Down buttons to highlight the dated folder that you would like to review and press the OK button to view its recorded events. At this point you can now highlight and select the photo that you would like to view. While viewing an image you can use the LEFT and RIGHT buttons to skip or go back to the next/previous file.
- Page 30 • PC Playback Since DigiLCDDVR stores recorded data into an SD memory card, playback recorded files can be played back on the DigiLCDDVR system or the SD card can be ejected from the DigiLCDDVR and plug into a media card reader on a PC to read, playback, delete, and backup files(s).
- Page 31 • SD Format SD Format is an important feature that should always be used whenever a NEW SD card card is being used prior to recording to ensure proper compatibility format between the LCDDVR and the card. To utilize this feature simply highlight the SD Format option and press the OK button.
- Page 32 • Auto Scan Auto Scan is used to set up an automatic camera rotation period between cameras 1-4. Simply highlight and press OK on Auto Scan. Use the Up and Down buttons to make your selection and press the OK button to save your changes. Options include: Never (default), 5 seconds, 10 seconds, 15 seconds, and 20 seconds.
- Page 33 • • Adding Cameras To add a camera to your system simply highlight any of the available cameras/channels (unlocked) and press the OK button on the LCDDVR. Once selected, a confirmation screen will pop up asking you to confirm (YES) or cancel (NO) your selection, use the LEFT and RIGHT buttons to make your selection and press the OK button to confirm.
- Page 34 • • Removing Cameras To remove a camera from your system, simply highlight the selected camera to be removed and press the OK button on the receiver. Once selected, a confirmation screen will pop up asking you to confirm (YES) or cancel (NO) your selection, use the LEFT and...
- Page 35 RIGHT buttons to make your selection and press the OK button to confirm the removal. • Refresh Rate Refresh Rate is a video filter that reduces flickering effects in the interlaced video and eliminates flash caused by fluorescent lights. Use the Up, Down, LEFT and RIGHT buttons to make your selection and press the OK button to save your changes.
-
Page 36: Specifications
Specifications Image Sensor 1/3” CMOS Color Resolution 640 x 480 pixels (NTSC/PAL selectable) Viewing Angle 20 degree Lens 12mm IR-CUT Audio Microphone built-in (audio monitoring up to 30ft) SM-804DT Minimum Illumination 2 Lux (IR off); 0 Lux (IR on) IR LED Night Vision Range Up to 120ft (B/W) (camera) Weatherproof Rating...
Need help?
Do you have a question about the DigioutLCD and is the answer not in the manual?
Questions and answers