Table of Contents
Advertisement
Quick Links
Advertisement
Table of Contents

Related Manuals for Toshiba TRST-A15 SERIES


Summary of Contents for Toshiba TRST-A15 SERIES
- Page 1 TOSHIBA REMOTE RECEIPT PRINTER TRST-A15 SERIES Owner's Manual...
- Page 2 Changes or modifications not expressly approved by manufacturer for compliance could void the user’s authority to operate the equipment. Copyright © 2007 < For EU Only > by TOSHIBA TEC CORPORATION TOSHIBA TEC Europe Retail Information Systems S.A. All Rights Reserved Rue de la Célidée 33 BE-1080 Brussels 570 Ohito, Izunokuni-shi, Shizuoka-ken, JAPAN...
-
Page 3: Safety Summary
Do not attempt to effect repairs or modifications to this equipment. If a fault occurs that cannot be rectified using the procedures described in this manual, turn off the power, unplug the machine, then contact your authorised TOSHIBA TEC representative for assistance. Meanings of Each Symbol This symbol indicates warning items (including cautions). - Page 4 • Utilize our maintenance services. After purchasing the machine, contact your authorised TOSHIBA TEC representative for assistance once a year to have the inside of the machine cleaned. Otherwise, dust will build up inside the machines and may cause a fire or a malfunction. Cleaning is particularly effective before humid rainy seasons.
-
Page 5: Table Of Contents
CAUTION! 1. This manual may not be copied in while or in part without prior written permission of TOSHIBA TEC. 2. The contents of this manual may be changed without notification. 3. Please refer to your local Authorized Service representative with regard to any queries... -
Page 6: Product Overview
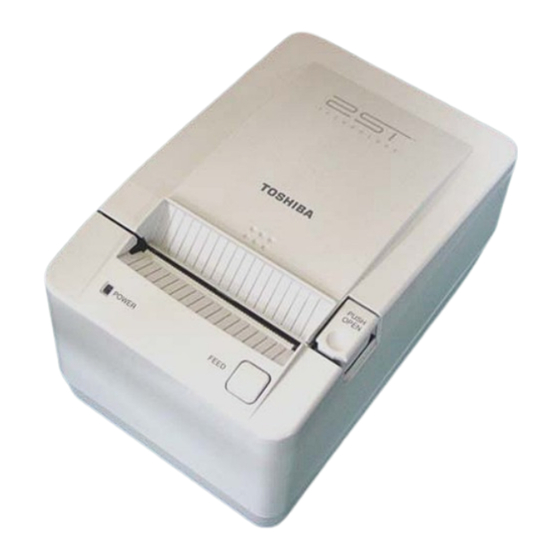
Thank you for purchasing the TOSHIBA TRST-A15 Series Thermal Printer. This printer is a compact line thermal printer designed to be connected to a TOSHIBA POS terminal or used as a kitchen printer, etc. It prints both 80 mm-wide and 58 mm-wide receipts at the maximum print speed of 170 mm/sec. The body color is selectable from Fair White (F) and Cool Black (C) so that it is possible to coordinate the color with the TOSHIBA POS terminal. -
Page 7: Specifications
EO1-13021 2. SPECIFICATIONS 2.1 Printer 2. SPECIFICATIONS 2.1 Printer Item Description Printing method Line thermal dot printing method Printing width 80 mm (576 dots) 58 mm (432 dots) Resolution 203.2 dpi x 203.2dpi Printing speed Max. 6.7 ips max (170 mm/sec) for 75W mode 4.0 ips max (101 mm/sec) for 55W mode 2 color printing Max 50 mm/sec... -
Page 8: Options
2.2 Options 2.2 Options Option Model Description AC Adapter This AC adapter is for the exclusive use of the TRST-A10/A15 TOSHIBA KIT-A10-ACA-QM-R remote receipt printer. KIT-A10-ACB-QM-R KIT-A10-ACB type is conformed to Level 4 of the California Energy Commission (CEC). Parallel Interface Board... -
Page 9: Receipt Roll
• A contact of chemical or oil may discolor or erase the printed record. • Rubbing the paper hard with nail or hard object may discolor the paper. • The paper end should not be pasted to the core. For further information please contact your authorized TOSHIBA TEC representative or authorized paper manufacturer. -
Page 10: Appearance
EO1-13021 3. APPEARANCE 3.1 Front/Rear View 3. APPEARANCE 3.1 Front/Rear View Front View Rear View Printer Cover Top Cover Cover Open Power Switch Feed Button Button 3.2 LED and Feed Button POWER LED (Blue) Lights when the power is turned on. ERROR LED (Blinking Blue) The Error LED indicates an error by blinking FEED Button... - Page 11 Tear off any excess paper against the tear-off blade. NOTE: If other LED status except for the above occurs, turn the power off, and then on. If this does not restore the LED, contact your nearest TOSHIBA TEC representative for assistance .
-
Page 12: Connectors
A drawer cable which connects the printer to a drawer is connected to this connector. To this connector, a TOSHIBA drawer can be connected. Do not connect anything other than the connectable drawer. NOTE: For connectable drawers, refer to your nearest authorized TOSHIBA TEC representati ve. -
Page 13: Set Up Procedure
This printer has the following requirements: Serial Interface Type • The TOSHIBA POS terminal or Personal Computer to be connected must have a serial port. • To communicate with the TOSHIBA POS terminal or Personal Computer, an RS-232C interface cable is required. - Page 14 EO1-13021 4. SET UP PROCEDURE 4.1 Requirements for Operation RS-232C cable pin configuration TRST – A15 9 Pin Female 9 Pin Female...
- Page 15 EO1-13021 4. SET UP PROCEDURE 4.1 Requirements for Operation USB cable connector Printer View End Parallel Interface Type (Option) IEEE 1284-B receptacle PIN No. Signal /STROBE PD1-8 /ACK BUSY PERROR SELECT /AUTOFD /INIT /FAULT /SELECTIN 19-30 15-18 N.C. 33-35 N.C.
-
Page 16: Setting Up The Printer
2) Connect the interface cable to the printer. 3) Insert the power cord into the AC inlet. 4) Connect the interface cable to a TOSHIBA POS terminal, and plug in the power cord to the AC outlet. 5) If a drawer is desired to be connected, connect the drawer interface cable to the printer. -
Page 17: Installation Procedure
6. Do not connect the power cord to the AC outlet provided on the POS terminal such as ST- 5600, ST-5500, etc. CAUTION! 1. When separating the AC adapter, please contact your authorized TOSHIBA TEC representative. 2. The built-in AC adapter is exclusively for this printer. Do not use it for any other machines. -
Page 18: Connecting The Power Cord And Interface Cable
EO1-13021 5. INSTALLATION PROCEDURE 5.1 Connecting the Power Cord and Interface Cable 5.1 Connecting the Power Cord and Interface Cable CAUTION! Be sure to hold the connector when plugging in or unplugging the AC adapter cable. Insert the AC adapter cable and the power cord firmly. 1) Turn the printer power OFF. - Page 19 EO1-13021 5. INSTALLATION PROCEDURE 5.1 Connecting the Power Cord and Interface Cable Connect the interface cable to the TOSHIBA POS terminal or Personal Computer, and then plug in the power cord to the AC outlet. Interface cable...
-
Page 20: Connecting The Drawer
[Drawer interface connector] (6-pin modular connector) A Drawer cable which connects the printer to a drawer is connected to this connector. To this connector, a TOSHIBA drawer can be connected. Do not connect anything other than the connectable drawer. NOTE: For connectable drawers, refer to your nearest authroized TOSHIBA TEC representative. -
Page 21: Loading The Receipt Roll
EO1-13021 5. INSTALLATION PROCEDURE 5.3 Loading the Receipt Roll 5.3 Loading the Receipt Roll When you use this printer for the first time or when the receipt paper has been used up, load a receipt roll in the following procedures while the printer power is set to ON. A thermal printer prints thermal receipt paper by applying heat to the paper to react with the chemicals on the paper surface. - Page 22 Print Cover Receipt Roll CAUTION! 1. Use only TOSHIBA TEC specified paper. Use of non-specified paper may shorten the print head life resulting in problems with print quality, cause a paper feed failure, or shorten the cutter life. 2. Do not subject the thermal receipt roll to water, oil, or heat source as this will darken the paper.
-
Page 23: Self Test Print
EO1-13021 5. INSTALLATION PROCEDURE 5.4 Self Test Print 5.4 Self Test Print To perform the printer self test, use the Mfg Adjustment menu feature. This feature prints instructions on the receipt for selecting any type of print pattern needed. CAUTION! Be extremely careful when changing any of the printer settings to avoid changing other settings that might affect the performance of the printer. - Page 24 EO1-13021 5. INSTALLATION PROCEDURE 5.4 Self Test Print Rolling ASCII print test (Receipt) This option let you run rolling ASCII printing test. The printer prints the resident character set in standard pitch continuously. When Rolling ASCII Print (Rcpt) is selected, printer prints the following menu.
- Page 25 EO1-13021 5. INSTALLATION PROCEDURE 5.4 Self Test Print H print test (Receipt) This option let you run H printing test. The printer prints the ‘H’ character in standard pitch continuously. When H Print Test (Rcpt) is selected, printer prints the following menu. After selection of the printing side, test print will start.
- Page 26 EO1-13021 5. INSTALLATION PROCEDURE 5.4 Self Test Print Duty check print test (Receipt) This option let you run duty check printing test. The printer prints the 12.5%, 25%, 50% and 100% duty original pattern. When Duty Check Print (Rcpt) is selected, printer prints the following menu. After selection of the printing side, test print will start.
- Page 27 EO1-13021 5. INSTALLATION PROCEDURE 5.4 Self Test Print Print current setting This option let you print current setting on receipt. Press the Paper Feed Button to start the test. ** START CURRENT SETTING PRINTING? Return Main Menu > Short Click Start Printing >...
-
Page 28: General Maintenance
EO1-13021 6. GENERAL MAINTENANCE 6.1 Cleaning 6. GENERAL MAINTENANCE WARNING! 1. Be sure to disconnect the power cord prior to performing any maintenance. 2. DO NOT POUR WATER directly onto the printer, as this may cause electric shock or fire. 3. -
Page 29: Removing Jammed Paper
EO1-13021 6. GENERAL MAINTENANCE 6.2 Removing Jammed Paper 6.2 Removing Jammed Paper 1) Turn the power OFF. 2) Open the printer cover. 3) Remove the jammed paper. DO NOT USE any sharp implement or tool as these will damage the printer. 4) Clean the print head and platen, then remove any further dust or foreign objects. -
Page 30: Troubleshooting
Refer to Section 2.3 print used? and use the TOSHIBA TEC specified paper. • • Is the paper Do not use dampened dampened? paper NOTE: If any problem occurs other than the above, please contact your authorized TOSHIBA TEC representative. - Page 31 English Waste Recycling information for users: Following information is only for EU-member states: The crossed out wheeled bin symbol is used to indicate that the product must not be treated as general household waste. By ensuring that this product is disposed of correctly you will be helping to prevent potentially negative consequences for the environment and human health, which could otherwise be caused by incorrect waste handling of this product.
- Page 32 EO1-13021A...
Need help?
Do you have a question about the TRST-A15 SERIES and is the answer not in the manual?
Questions and answers