BenQ MX819ST User Manual
Hide thumbs
Also See for MX819ST:
- Limited warranty (2 pages) ,
- Quick start manual (31 pages) ,
- Specifications (2 pages)
Table of Contents
Advertisement
Advertisement
Table of Contents

Subscribe to Our Youtube Channel
Related Manuals for BenQ MX819ST


Summary of Contents for BenQ MX819ST
- Page 1 MX819ST/TS819ST/MW820ST/ TW820ST Digital Projector User Manual...
-
Page 2: Table Of Contents
Table of contents Important safety Using the teaching templates ....35 Shutting down the projector ....36 instructions ....3 Direct power off........36 Introduction....7 Menu operation ........37 Projector features........7 Maintenance ....46 Shipping contents ........8 Care of the projector......46 Projector exterior view......9 Lamp information ........ -
Page 3: Important Safety Instructions
Important safety instructions Your projector is designed and tested to meet the latest standards for safety of information technology equipment. However, to ensure safe use of this product, it is important that you follow the instructions mentioned in this manual and marked on the product. Safety Instructions Please read this manual before In some countries, the line voltage is... - Page 4 Safety Instructions (Continued) The lamp becomes extremely hot Do not place this product on an during operation. Allow the projector unstable cart, stand, or table. The to cool for approximately 45 minutes product may fall, sustaining serious prior to removing the lamp assembly damage.
- Page 5 Safety Instructions (Continued) Do not place this projector in any of Do not block the ventilation holes. the following environments. - Do not place this projector on a blanket, bedding or any other soft - Space that is poorly ventilated or surface.
- Page 6 If you intend to mount your projector on the ceiling, we strongly recommend that you use a proper fitting BenQ projector ceiling mount kit and that you ensure it is securely and safely installed.
-
Page 7: Introduction
3D Function supported Various 3D formats make the 3D function more flexible. By presenting the depth of the images, you can wear BenQ 3D glasses to enjoy the 3D movies, videos and sporting events in a more realistic way. •... -
Page 8: Shipping Contents
Shipping contents Carefully unpack and verify that you have all of the items shown below. If any of these items are missing, please contact your place of purchase. Standard accessories The supplied accessories will be suitable for your region, and may differ from those illustrated. *The warranty card is only supplied in some specific regions. -
Page 9: Projector Exterior View
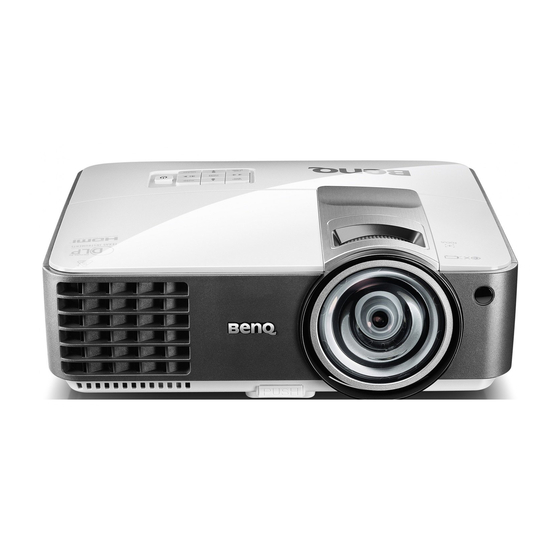
Projector exterior view External control panel Front/upper side (See "Controls and functions" on page for details.) Lamp cover Vent (heated air exhaust) Quick-release button Focus ring Vent (cool air intake) Speaker grill Front IR remote sensor Projection lens Lens cap AC power jack RS232 control port RJ45 LAN input jack... -
Page 10: Controls And Functions
Controls and functions Projector Focus ring 10. AUTO Adjusts the focus of the projected image. Automatically determines the best picture timings for the displayed image. LAMP indicator light Indicates the status of the lamp. Lights up POWER or flashes when the lamp has developed a Toggles the projector between standby problem. -
Page 11: Remote Control
Remote control ZOOM+/ZOOM- Magnifies or reduces the projected picture Toggles the projector between standby size. mode and on. PAGE +/PAGE - Source selection buttons Operate your display software program (COMPUTER 1, COMPUTER 2, (on a connected PC) which responds to VIDEO, S-VIDEO, HDMI page up/down commands (like Microsoft Selects an input source for display. -
Page 12: Remote Control Effective Range
22. Numeric buttons Right/ Enters numbers in network settings. Increases the projector volume. Operating the LASER pointer When the On-Screen Display (OSD) menu is activated, the #4, #6, and #14 keys are The Laser Pointer is a used as directional arrows to select the presentation aid for professionals. -
Page 13: Replacing The Remote Control Batteries
Replacing the remote control batteries To open the battery cover, turn the remote control over to view its back, push on the finger grip on the cover and slide it up in the direction of the arrow as illustrated. The cover will slide off. Remove any existing batteries (if necessary) and install two AAA batteries observing the battery polarities as indicated in the base of the battery compartment. -
Page 14: Positioning Your Projector
Note that a special rear projection screen portability. and the BenQ Projector Ceiling Mount Kit are required for this installation location. Set Rear Ceiling in the SYSTEM SETUP: Basic > Projector Installation menu after you turn the projector on. -
Page 15: Obtaining A Preferred Projected Image Size
Refer to "Dimensions" on page 55 for the center of lens dimensions of this projector before calculating the appropriate position. MX819ST/TS819ST Screen Center of lens The screen aspect ratio is 4:3 and the projected picture is in a 4:3 aspect ratio... - Page 16 All measurements are approximate and may vary from the actual sizes. BenQ recommends that if you intend to permanently install the projector, you should physically test the projection size and distance using the actual projector in situ before you permanently install it, so as to make allowance for this projector's optical characteristics.
-
Page 17: Connection
Connection When connecting a signal source to the projector, be sure to: Turn all equipment off before making any connections. Use the correct signal cables for each source. Ensure the cables are firmly inserted. • In the connections shown below, some cables may not be included with the projector (see "Shipping contents"... -
Page 18: Connecting Video Source Devices
• If you wish to use this connection method when the projector is in standby mode, make sure the Monitor Out function is turned on in the SYSTEM SETUP: Advanced menu. See "Standby Settings" on page 45 for details. Connecting video source devices You need only connect the projector to a video source device using just one of the connecting methods, however each provides a different level of video quality. -
Page 19: Operation
Operation Starting up the projector Plug the power cord into the projector and into a power outlet. Turn on the power outlet switch (where fitted). Check that the POWER indicator light on the projector lights orange after power has been applied. Please use the original accessories (e.g. -
Page 20: Adjusting The Projected Image
Adjusting the projected image Adjusting the projection angle To adjust the projector: Press the quick-release button and lift the front of the projector. Once the image is positioned where you want it, release the quick-release button to lock the foot in position. Screw the rear adjuster foot to fine-tune the Do not look into the lens while the horizontal angle. -
Page 21: Correcting Keystone
Correcting keystone Keystoning refers to the situation where the projected image is noticeably wider at either the top or bottom. It occurs when the projector is not perpendicular to the screen. To correct this, follow ONE of these steps: • Press on the projector or remote control to display the Keystone correction page. -
Page 22: Using The Menus
Front Table Position Menu Settings Phase Operation Settings H. Size Remote Receiver Front+Rear Digital Zoom Panel Key Lock Background Color BenQ Teaching Template Splash Screen BenQ Analog RGB MENU Exit Analog RGB Exit MENU Press to select a to highlight the SYSTEM preferred language and press SETUP: Basic menu. -
Page 23: Securing The Projector
Securing the projector Using a security cable lock The projector has to be installed in a safe place to prevent theft. Otherwise, purchase a lock, such as the Kensington lock, to secure the projector. You can locate a Kensington lock slot on the rear side of the projector. See item 22 on page for details. -
Page 24: If You Forget The Password
BenQ Customer Center. Write down the number and turn off your projector. Recall Code: Seek help from the local BenQ service 255 255 255 255 center to decode the number. You may be required to provide proof of purchase MENU... -
Page 25: Switching Input Signal
• The native display resolution of this projector is in a 4:3 (MX819ST/TS819ST)/16:10 (MW820ST/TW820ST) aspect ratio. For best display picture results, you should select and use an input signal which outputs at this resolution. Any other resolutions will be scaled by the projector depending upon the “aspect ratio”... -
Page 26: Magnifying And Searching For Details
Press to highlight Color Space Conversion and press to select a suitable color space. This function is only available when the HDMI-input port is in use. Magnifying and searching for details If you need to find the details on the projected picture, magnify the picture. Use the direction arrow keys for navigating the picture. - Page 27 OSD menus can be displayed on those unused black areas. Auto Scales an image proportionally to fit the projector's native resolution MW820ST MX819ST/ in its horizontal or vertical width. This /TW820ST TS819ST is suitable for the incoming image which is neither in 4:3 nor 16:9 and...
-
Page 28: Optimizing The Image
Optimizing the image Using Wall Color In the situation where you are projecting onto a colored surface such as a painted wall which may not be white, the Wall Color feature can help correct the projected picture’s colors to prevent possible color difference between the source and projected pictures. To use this function, go to the DISPLAY >... -
Page 29: Adjusting Brightness
Press to select a menu item to be changed and adjust the value with . See "Fine-tuning the image quality in user modes" below for details. Fine-tuning the image quality in user modes According to the detected signal type and selected picture mode, some of the below functions may not be available. -
Page 30: Setting A Preferred Color Temperature
Setting a preferred color temperature To set a preferred color temperature: Highlight Color Temperature and select Warm, Normal or Cool by pressing on the projector or remote control. Press to highlight Color Temperature Fine Tuning and press MODE/ ENTER. The Color Temperature Fine Tuning page displays. Press to highlight the item you want to change and adjust the values by pressing... -
Page 31: Setting The Presentation Timer
Please refer to the illustration to the right for how the colors relate to each other. For example, if you select Red and set its range at 0, only pure red in the projected Yellow GREEN picture will be selected. Increasing its range will include red close to yellow and red close to magenta. -
Page 32: Remote Paging Operations
Press to highlight Timer Position and set the timer position by pressing Top-Left Bottom-Left Top-Right Bottom-Right Press to highlight Timer Counting Direction and select your desired counting direction by pressing Selection Description Count Up Increases from 0 to the preset time. Count Down Decreases from the preset time to 0. -
Page 33: Hiding The Image
Hiding the image In order to draw the audience's full attention to the presenter, you can use ECO BLANK on the projector or remote control to hide the screen image. When this function is activated with an audio input connected, the audio can still be sheard. You can set the blank time in the SYSTEM SETUP: Basic >... -
Page 34: Adjusting The Sound
Adjusting the sound The sound adjustments made as below will have an effect on the projector speaker(s). Be sure you have made a correct connection to the projector audio input. See "Connection" on page 17 for how the audio input is connected. Muting the sound To temporarily turn off the sound: Press MENU/EXIT and then press... -
Page 35: Using The Teaching Templates
Using the teaching templates The projector provides several preset patterns for various teaching purposes. To activate the pattern: Open the OSD menu and go to the DISPLAY > Teaching Template menu and press to select Blackboard or Whiteboard. Press to choose the pattern you need. Press MODE/ENTER to activate the pattern. -
Page 36: Shutting Down The Projector
Shutting down the projector Press POWER or OFF and a confirmation message will display prompting you. If you don't respond in a few seconds, the message will disappear. Press POWER or OFF a second time. The POWER indicator light flashes orange, the projection lamp shuts down, and the fans will continue to run for approximately 90 seconds to cool down the projector. -
Page 37: Menu Operation
Menu operation Menu system Please note that the on-screen display (OSD) menus vary according to the signal type selected and the projector model you are using. Main menu Sub-menu Options Off/Light Yellow/Pink/Light Green/Blue/ Wall Color Blackboard Aspect Ratio Auto/Real/4:3/16:9/16:10 Keystone Position Phase H. - Page 38 Quick Cooling On/Off Settings Instant Restart On/Off Disable/5 min/10 min/15 min/20 min/25 Blank Timer min/30 min Disable/30 min/1 hr/2 hr/3 hr/4 hr/8 hr/ Sleep Timer 12 hr Remote Receiver Front+Rear/Front/Rear Panel Key Lock On/Off Background Color BenQ/Black/Blue/Purple Splash Screen BenQ/Black/Blue Operation...
- Page 39 Main menu Sub-menu Options High Altitude On/Off Mode Mute On/Off Volume Audio Settings Power On/Off On/Off Ring Tone Normal/Economic/SmartEco/ Lamp Mode LampSave Lamp Settings Reset Lamp Timer Equivalent Lamp Change Password Security Change Security Settings Power On Lock Settings 2400/4800/9600/14400/19200/ Baud Rate 38400/57600/115200 Test Pattern...
-
Page 40: Description Of Each Menu
Description of each menu Function Description Corrects the projected picture’s color when the projection surface is Wall Color not white. See "Using Wall Color" on page 28 for details. There are several options to set the image's aspect ratio depending on Aspect Ratio your input signal source. -
Page 41: Function Description
Function Description Pre-defined picture modes are provided so you can optimize your Picture Mode projector image set-up to suit your program type. See "Selecting a picture mode" on page 28 for details. Selects a picture mode that best suits your need for the image quality Reference and further fine-tune the image based on the selections listed on the same page below. -
Page 42: Function Description
Function Description Presentation Reminds the presenter to finish the presentation within a certain time frame. See "Setting the presentation timer" on page 31 for details. Timer Sets the language for the On-Screen Display (OSD) menus. See "Using Language the menus" on page 22 for details. - Page 43 Function Description Remote Allows you to enable all the remote receivers or one specific remote receiver on the projector. Receiver Panel Key Disables or enables all panel key functions except POWER on the projector and keys on the remote control. See "Locking control keys"...
-
Page 44: Monitor Out
"Connection" on page 17 for how to make the connection. Enabling this function slightly increases the standby power consumption. Wired LAN BenQ Network Projector Operation Guide for details. AMX Device Discovery Network When AMX Device Discovery is On, the projector can be detected Settings by AMX controller. - Page 45 Function Description Source Shows the current signal source. Picture Mode Shows the selected mode in the PICTURE menu. Lamp Mode Shows the current lamp mode. Resolution Current Shows the native resolution of the input signal. System 3D Format Status Shows the current 3D mode. Color System Shows input system format: NTSC, PAL, SECAM, YUV, or RGB.
-
Page 46: Maintenance
Maintenance Care of the projector Your projector needs little maintenance. The only thing you need to do on a regular basis is to keep the lens and case clean. Never remove any parts of the projector except the lamp. Contact your dealer if other parts need replacing. -
Page 47: Lamp Information
Lamp information Getting to know the lamp hour When the projector is in operation, the duration (in hours) of lamp usage is automatically calculated by the built-in timer. To obtain the lamp hour information: Press MENU/EXIT and then press to highlight the SYSTEM SETUP: Advanced menu. -
Page 48: Timing Of Replacing The Lamp
47), you may continue to operate the Lamp>XXXX Hours projector until the next hour lamp warning appears. Order a new lamp at lamp.benq.com Press MODE/ENTER to dismiss the message. It is strongly recommended that you replace the Notice lamp at this age. The lamp is a consumable item. -
Page 49: Replacing The Lamp
Replacing the lamp • To reduce the risk of electrical shock, always turn the projector off and disconnect the power cord before changing the lamp. • To reduce the risk of severe burns, allow the projector to cool for at least 45 minutes before replacing the lamp. - Page 50 Use the handle to slowly pull the lamp out of the projector. • Pulling it too quickly may cause the lamp to break and scatter broken glass in the projector. • Do not place the lamp in locations where water might splash on it, children can reach it, or near flammable materials.
-
Page 51: Resetting The Lamp Timer
Tighten the screw(s) that secures the lamp cover. • Loose screw may cause a bad connection, which could result in malfunction. • Do not over tighten the screw. Connect the power and restart the projector. Do not turn the power on with the lamp cover removed. Resetting the lamp timer After the startup logo, open the On-Screen Display (OSD) menu. - Page 52 Indicators Light Status & Description Power events Stand-by mode. Orange Green Powering up. Flashing Green Normal operation. Orange Normal power-down cooling Flashing Download CW start fail Green Scaler shutdown fail (data abort) Red Flashing LAN download fail LAN download processing Green Burn-in ON Green...
-
Page 53: Troubleshooting
Troubleshooting The projector does not turn on. Cause Remedy Plug the power cord into the AC power jack on the projector, and plug the power cord into the There is no power from the power cord. power outlet. If the power outlet has a switch, make sure that it is switched on. -
Page 54: Specifications
Specifications Projector specifications All specifications are subject to change without notice. Optical Control Resolution RS-232 serial control (MX819ST/TS819ST) 9 pin x 1 1024 x 768 XGA LAN control (MW820ST/TW820ST) RJ45 x 1 1280 x 800 WXGA IR receiver x 2... -
Page 55: Dimensions
Dimensions 287.3 232.6 114.4 Unit: mm Ceiling mount installation Ceiling Mount screw: M4 (Max L = 25 mm; Min L = 20 mm) 199.6 68.27 83.39 127.74 142.89 241.35 Unit: mm 285.78 Specifications... -
Page 56: Wall Mount Installation
Wall mount installation Minimum installation requirements Computer Resolution: SMART Smart Promethean Promethean Hitachi Diagram StarBoard Board Board ActivBoard ActivBoard ClassBoard2 StarBoard Image Reference FX-77 77.5 FX-63 Resolution: Image Diagonal (inches) Image 1173 1189 1181 1173 Height (mm) Image 1300 1565 1300 1585 1575... - Page 57 Computer Resolution: SMART Promethean Hitachi Hitachi Diagram WXGA Board ActivBoard FX-TRIO- FX-DUO- Reference Image Resolution: WXGA Image Diagonal (inches) 1171 1171 1181 1181 Image Height (mm) 1874 1874 1887 1887 Image Width (mm) Distance from floor to bottom of image (mm) Distance from screen surface to projector lens (mm) Distance from top case to...
- Page 58 The dimensions are based on the BenQ wall mount (P/N: 5J.J4R10.001). • All measurements are approximate and may vary from the actual sizes. BenQ recommends that if you intend to permanently install the projector, you should physically test the projection size and distance using the actual projector in situ before you permanently install it, so as to make allowance for this projector's optical characteristics.
-
Page 59: Timing Chart
1024 x 768 XGA_85 84.997 68.667 94.500 XGA_120** 119.989 97.551 115.5 (Reduce Blanking) 1152 x 864 1152 x 864_75 67.5 BenQ Notebook 1024 x 576 60.0 35.820 46.966 Timing BenQ Notebook 1024 x 600 64.995 41.467 51.419 Timing 1280 x 720 1280 x 720_60* 45.000... - Page 60 (Reduce Blanking) 1152 x 864 1152 x 864_75 67.5 1280 x 768 1280 x 768_60* 59.87 47.776 79.5 1024 x 576@60Hz BenQ Notebook Timing 60.00 35.820 46.996 1024 x 600@65Hz BenQ Notebook Timing 64.995 41.467 51.419 1280 x 720 1280 x 720_60* 45.000...
- Page 61 Vertical Horizontal Pixel Timing Resolution Frequency Frequency Frequency Remark (Hz) (kHz) (MHz) 480i* 720 x 480 59.94 15.73 HDMI only 480p 720 x 480 59.94 31.47 HDMI only 576i 720 x 576 15.63 HDMI/DVI 576p 720 x 576 31.25 HDMI/DVI 720/50p** 1280 x 720 37.5...
-
Page 62: Warranty And Copyright Information
Proof of purchase date will be required with any warranty claim. In the event this product is found to be defective within the warranty period, BenQ's only obligation and your exclusive remedy shall be replacement of any defective parts (labor included). To obtain warranty service, immediately notify the dealer from which you purchased the product of any defects.
Need help?
Do you have a question about the MX819ST and is the answer not in the manual?
Questions and answers