Table of Contents
Advertisement
Electrolux Professional S.p.A.
Ovens Platform Customer Support
Technical Training & Service
CONTENTS:
PROJECT REF:
AUTHORS:
CONTRIBUTION BY:
DOCUMENT HISTORY:
Rel.
Date:
File: AOSpeed service manual (ENG).001
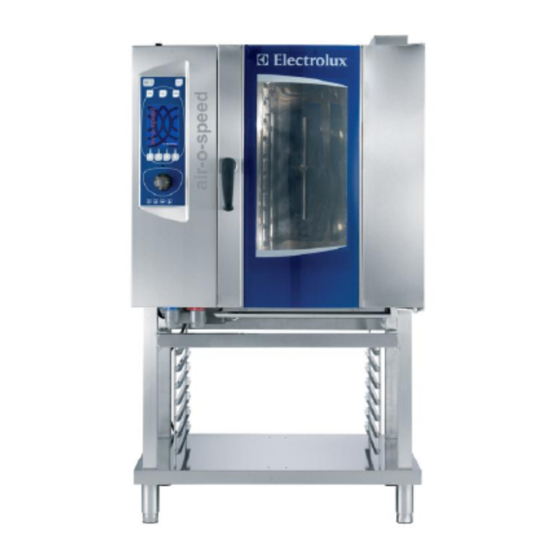
Air-O-Speed OVEN
- Service Manual -
This document contains the information about parameters that can be
read and/or modified by means of user interface, service utilities, ...
AOS ovens
F.Ornella
File:
©Copyright 2002 by Electrolux Professional
AOSpeed OVENS
Service Manual
(593800300 - ENG)
Author:
Note:
P.1/20
Advertisement
Table of Contents

Related Manuals for Electrolux Air-O-Speed 593800300


Summary of Contents for Electrolux Air-O-Speed 593800300
- Page 1 This document contains the information about parameters that can be read and/or modified by means of user interface, service utilities, ... PROJECT REF: AOS ovens AUTHORS: F.Ornella CONTRIBUTION BY: DOCUMENT HISTORY: Rel. Date: File: Author: Note: File: AOSpeed service manual (ENG).001 ©Copyright 2002 by Electrolux Professional P.1/20...
-
Page 2: Table Of Contents
APPENDIX A – WATER BOILING POINT..................14 APPENDIX B – CONTACTORS DIAGRAM ..................15 APPENDIX C – CONNECTIONS ON MAIN BOARD...............16 APPENDIX D – LAMBDA PROBE ....................19 APPENDIX E – WATER TREATMENT....................20 File: AOSpeed service manual (ENG).001 ©Copyright 2002 by Electrolux Professional P.2/20... -
Page 3: Programming The Default Parameters
At this point release the left buttons keeping pressed the middle one (fig. 5) till you hear 2 beeps. Release the middle button and wait until the standard page for selecting cycles in “Manual mode” appear and the cavity lights are on. File: AOSpeed service manual (ENG).001 ©Copyright 2002 by Electrolux Professional P.3/20... -
Page 4: Advanced Programming
Press then the left service buttons and wait for other two beeps (fig. 10). Fig. 9 Fig. 10 Release the buttons and on the display you will see the following (fig. 11). File: AOSpeed service manual (ENG).001 ©Copyright 2002 by Electrolux Professional P.4/20... - Page 5 By pressing again the button P1 you store the new value and go again to the displaying of the number of the parameter. Repeat steps from n.2 to n.4 to change all the parameters you need. Switch off the oven to exit from advanced programming. Fig.11 Fig.12 File: AOSpeed service manual (ENG).001 ©Copyright 2002 by Electrolux Professional P.5/20...
-
Page 6: Lambda Probe Calibration
This calibration is very important and has to be done with care. If the dry point (0% of humidity) is not correctly stored, the reading of the relative humidity could be overestimated or underestimated. Fig. 13 Fig.14 Fig.15 File: AOSpeed service manual (ENG).001 ©Copyright 2002 by Electrolux Professional P.6/20... -
Page 7: Offset Calibration Of Cavity Probe
Ebyp: by-pass probe in open circuit (only hot air, regeneration or low temperature steam cycle can be selected) Entc: NTC probe in short or open circuit ECAD: A/D converters not working See Appendix A File: AOSpeed service manual (ENG).001 ©Copyright 2002 by Electrolux Professional P.7/20... -
Page 8: Warnings
The following warnings are showed by an icon on the top right side of the screen: Safety level probe of the boiler out of water Preheating phase of the boiler Boiler to be descaled Door open File: AOSpeed service manual (ENG).001 ©Copyright 2002 by Electrolux Professional P.8/20... -
Page 9: Identity Card (Firmware Version)
The status of the oven can be displayed every time by pressing the maintenance icon (Button P4) Then choose “oven status” (fig.18)by pressing the button P2 ( ) and confirm with button P3 (OK). The following page will be displayed (fig.19): Fig.18 Fig.19 File: AOSpeed service manual (ENG).001 ©Copyright 2002 by Electrolux Professional P.9/20... -
Page 10: Service Utilities
Automatic mode, manual mode, boiler drain (fig. 21): activation of rinser pump • Automatic mode, manual mode, cooling down (fig. 22): activation of water valve of the cleaning system Detergent pump Rinse pump Water valve (Fig.20) (Fig.21) (Fig.21) File: AOSpeed service manual (ENG).001 ©Copyright 2002 by Electrolux Professional P.10/20... -
Page 11: Utilities That Can Be Activated In Parameter Programming
It is possible to select a language for the menu of the recipes. To select the language, set parameter LanG to the correct value for the desired language (see the relevant parameter list). File: AOSpeed service manual (ENG).001 ©Copyright 2002 by Electrolux Professional P.11/20... -
Page 12: Cleaning Cycle
Board cooling: The cooling fan is activated starting from the temperature defined in parameter Sbc. At the beginning of each phase the cavity is brought at a certain temperature with a COOLING phase without water or with an hot air cycle File: AOSpeed service manual (ENG).001 ©Copyright 2002 by Electrolux Professional P.12/20... -
Page 13: Change Of The Microprocessor Board
In case of changing of the microprocessor board, the following operations/calibrations have to be done: 1) Default parameter programming 2) Change parameters according parameter list 3) Lambda probe calibration File: AOSpeed service manual (ENG).001 ©Copyright 2002 by Electrolux Professional P.13/20... -
Page 14: Appendix A - Water Boiling Point
Ovens Platform Customer Support Technical Training & Service APPENDIX A – WATER BOILING POINT Height (m) Water boiling point (°C) 100.00 98.90 98.30 97.50 1000 96.80 1500 95.00 2000 93.50 File: AOSpeed service manual (ENG).001 ©Copyright 2002 by Electrolux Professional P.14/20... -
Page 15: Appendix B - Contactors Diagram
Service Manual Electrolux Professional S.p.A. (593800300 - ENG) Ovens Platform Customer Support Technical Training & Service APPENDIX B – CONTACTORS DIAGRAM Contactors used 100% 100% 100% HOT AIR COMBI STEAM File: AOSpeed service manual (ENG).001 ©Copyright 2002 by Electrolux Professional P.15/20... -
Page 16: Appendix C - Connections On Main Board
(593800300 - ENG) Ovens Platform Customer Support Technical Training & Service APPENDIX C – CONNECTIONS ON MAIN BOARD Put a jumper to make a short in the not used connections. File: AOSpeed service manual (ENG).001 ©Copyright 2002 by Electrolux Professional P.16/20... - Page 17 AOSpeed OVENS Service Manual Electrolux Professional S.p.A. (593800300 - ENG) Ovens Platform Customer Support Technical Training & Service X1-1 X10/11-1 X25/26-1 X24-1 X12/13-1 X28-1 X9-1 X2/3-1 X4/5-1 X8-1 X6/7-1 File: AOSpeed service manual (ENG).001 ©Copyright 2002 by Electrolux Professional P.17/20...
- Page 18 Connection of second cavity probe Connection of second boiler probe X20, X21, X22 Connections of multi point probe Connection of lambda probe X25/26 Connections of water level probes RS485 connection File: AOSpeed service manual (ENG).001 ©Copyright 2002 by Electrolux Professional P.18/20...
-
Page 19: Appendix D - Lambda Probe
90 100 water percentage Connections on the lambda probe: Pin 1: not used Pin 2-3: connections to the main board (connector X23) Pin 4-5: connections to the switching feeder File: AOSpeed service manual (ENG).001 ©Copyright 2002 by Electrolux Professional P.19/20... -
Page 20: Appendix E - Water Treatment
Graph Not required Not required Nanofilter Nanofilter Osmotizer Osmotizer < 5°F > 5°F < 5°F >5°F < 5°F > 5°F Hardness Treatment Not required Softener Nanofilter Nanofilter Osmotizer Osmotizer File: AOSpeed service manual (ENG).001 ©Copyright 2002 by Electrolux Professional P.20/20...
Need help?
Do you have a question about the Air-O-Speed 593800300 and is the answer not in the manual?
Questions and answers