Dell Latitude C640 User Manual
Hide thumbs
Also See for Latitude C640:
- System information manual (192 pages) ,
- Specifications (2 pages) ,
- Service manual (79 pages)
Table of Contents
Advertisement
Quick Links
Dell™ Latitude™ C540/C640 User's Guide
Click the links to the left for information on the features and operation of your computer. For information on
other documentation included with your computer, see
CAUTION:
Follow the safety instructions in the System Information Guide to help protect
your computer from damage and ensure your own personal safety.
Notes, Notices, and Cautions
NOTE:
A NOTE indicates important information that helps you make better use of your computer.
NOTICE:
A NOTICE indicates either potential damage to hardware or loss of data and tells you how to
avoid the problem.
CAUTION:
A CAUTION indicates a potential for property damage, personal injury, or death.
Abbreviations and Acronyms
For a complete list of abbreviations and acronyms, see the Glossary.
____________________
Information in this document is subject to change without notice.
© 2002–2003 Dell Computer Corporation. All rights reserved.
Reproduction in any manner whatsoever without the written permission of Dell Computer Corporation is strictly forbidden.
Trademarks used in this text: Dell, the DELL logo, AccessDirect, Latitude, Dell Precision, OptiPlex, Inspiron, Dimension, Dell
TravelLite, and DellNet are trademarks of Dell Computer Corporation; Intel, Pentium, and Celeron are registered trademarks and
Intel Speedstep is a trademark of Intel Corporation; Microsoft, Windows, Windows NT, and MS-DOS are registered trademarks of
Microsoft Corporation; ENERGY STAR is a registered trademark of the U.S. Environmental Protection Agency. As an ENERGY STAR
Partner, Dell Computer Corporation has determined that this product meets the ENERGY STAR guidelines for energy efficiency.
Other trademarks and trade names may be used in this document to refer to either the entities claiming the marks and names or
their products. Dell Computer Corporation disclaims any proprietary interest in trademarks and trade names other than its own.
Model Number PP01L
April 2003 P/N 2P726 Rev. A03
"Finding
Information."
Advertisement
Table of Contents

Subscribe to Our Youtube Channel
Related Manuals for Dell Latitude C640


Summary of Contents for Dell Latitude C640
- Page 1 Other trademarks and trade names may be used in this document to refer to either the entities claiming the marks and names or their products. Dell Computer Corporation disclaims any proprietary interest in trademarks and trade names other than its own.
-
Page 2: Finding Information
Finding Information Safety Instructions Documentation Updates Using Microsoft® Windows® Using Devices Using the Drivers and Utilities CD Fixing Problems Installing Parts Safety Instructions CAUTION: For precautions on safely handling and using your computer and preventing electrostatic discharge, see the safety instructions in the System Information Guide. Documentation Updates Documentation updates are sometimes included with your computer to describe changes to your computer or software. -
Page 3: Using The Drivers And Utilities Cd
In Windows 2000, click the Start button, point to Programs, and click User's Guides. Using the Drivers and Utilities CD The Drivers and Utilities CD contains drivers and utilities, the Dell Diagnostics, and user's guides for your computer and optional devices. Dell ships your computer to you with required drivers and utilities already installed-no further installation or configuration is needed. - Page 4 Installing Parts For help with adding parts to your computer, see "Adding and Replacing Parts." For detailed information on the computer parts and assemblies and how to remove and replace them, see the computer Service Manual on support.dell.com.
-
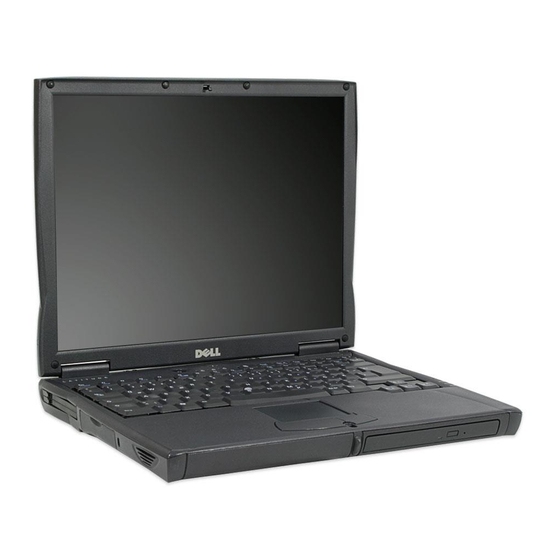
Page 5: About Your Computer
About Your Computer Front View Left Side View Right Side View Back View Bottom View Front View CAUTION: Do not block, push objects into, or allow dust to accumulate in the air vents. Doing so can damage the computer or cause a fire. - Page 6 1 display latch module bay 2 display touch pad 3 keyboard status lights 10 battery bay 4 air vent 11 track stick/touch pad buttons 5 keyboard 12 track stick 6 microphone 13 power button 7 device status lights 14 AccessDirect button Display Latch - Keeps the display closed.
- Page 7 Keyboard Status Lights Turns on when the numeric keypad is enabled. Turns on when the uppercase letter function is enabled. Turns on when he scroll lock function is enabled. Keyboard - The keyboard includes a numeric keypad as well as the Microsoft® Windows® logo key For information on supported keyboard shortcuts, see "Using the Keyboard and Touch Pad."...
- Page 8 Flashing orange: The battery charge is low. Solid orange: The battery charge is critically low. Module Bay - You can install devices such as an optical drive or Dell™ TravelLite™ module in the module bay. For more information, see "Using the Module Bay."...
- Page 9 Left Side View...
-
Page 10: Right Side View
1 security cable slot 2 speaker 3 hard drive 4 PC Card slot Security Cable Slot - Lets you attach a commercially available antitheft device to the computer. Instructions for installing antitheft devices are usually included with the device. NOTICE: Before you buy an antitheft device, ensure that it will work with the security cable slot. - Page 11 1 modem connector 5 audio connectors 2 network connector 6 infrared sensor 3 S-video TV-out connector 7 speaker 4 air vents Modem Connector If you ordered the optional internal modem, connect the telephone line to the modem connector. (If no modem is included, the connector opening is filled by a plug.) For information on using the modem, see the online modem documentation supplied with your computer.
- Page 12 Connects the computer to a network. The light on the right flashes yellow to indicate network activity. The light on the left turns reddish-orange when the computer is connected to a 100-Mbps network; the light turns green for a 10-Mbps network or a wireless card.
-
Page 13: Back View
Attach headphones or speakers to the connector. Attach a microphone to the connector. Infrared Sensor - The infrared sensor lets you transfer files from your computer to another infrared- compatible device without using cable connections. When you receive your computer, the infrared sensor is disabled. You can use the system setup program enable the infrared sensor. - Page 14 NOTICE: To avoid damaging the computer, wait 5 seconds after turning off the computer before you disconnect an external device. CAUTION: Do not block, push objects into, or allow dust to accumulate in the air vents. Doing so can damage the computer or cause a fire. 1 serial connector 6 video connector 2 parallel connector 7 AC adapter connector...
- Page 15 Docking Connector NOTE: Docking devices may not be available in all countries. Connects the optional docking device. A docking device allows you to easily use external devices with your computer, such as an external keyboard, mouse, and monitor. See the documentation that came with your docking device for additional information. PS/2 Connector NOTE: You can use the integrated keyboard and an external keyboard at the same time.
- Page 16 Video Connector Connects an external monitor. See "Using the Display." AC Adapter Connector - Attach an AC adapter to the computer. The AC adapter converts AC power to the DC power required by the computer. You can connect the AC adapter with your computer either turned on or off.
-
Page 17: Bottom View
Bottom View 1 Mini PCI card, modem, and memory module cover 2 device latch releases 3 docking device latch Mini PCI Card, Modem, and Memory Module Cover - Covers the compartment that contains the memory module(s), optional modem, and optional Mini PCI card. See "Adding and Replacing Parts."... -
Page 18: Help And Support Center
About Microsoft® Windows® XP Help and Support Center Switching to Classic View Desktop Cleanup Wizard Files and Settings Transfer Wizard Program Compatibility Wizard User Accounts and Fast User Switching Home and Small Office Networking Internet Connection Firewall Help and Support Center To access help with the Windows XP operating system and other support and educational tools, click the Start button and click Help and Support. -
Page 19: Desktop Cleanup Wizard
Window and Button Appearance Right-click anywhere on the main desktop screen and click Properties. Click the Appearance tab. From the Windows and buttons drop-down menu, select Windows Classic style. To customize color, font, and other classic desktop options, click Advanced. When you have completed your appearance selections, click OK. - Page 20 NOTE: The time required to collect and transfer data depends on the amount of data collected. Times can vary from a few minutes to several hours. The Files and Settings Transfer Wizard allows you to transfer files and settings from one computer to another (for instance, when upgrading to a new computer), even if the old computer is running an earlier operating system.
-
Page 21: Internet Connection Firewall
The Network Setup Wizard includes a checklist and steps to guide you through the process of sharing resources, such as files, printers, or an Internet connection, between computers in a home or small office. For more information, see Windows Help and Support Center. Internet Connection Firewall NOTE: Enabling the Internet Connection Firewall does not reduce the need for virus-checking... -
Page 22: Using The Keyboard And Touch Pad
Using the Keyboard and Touch Pad Dell™ AccessDirect™ Button Numeric Keypad Keyboard Shortcuts Touch Pad Track Stick Customizing the Touch Pad and Track Stick Dell™ AccessDirect™ Button Press this button to launch a frequently used program, such as your default Internet browser. -
Page 23: Numeric Keypad
In Windows 2000 Open the Control Panel, and then double-click the Keyboard icon. Click the AccessDirect tab in the Keyboard Properties window. Click Help, and follow the instructions. Numeric Keypad NOTE: When you connect an external keyboard or keypad to the computer, the keypad is disabled. The keypad numbers and symbols are marked in blue on the right of the keypad keys. -
Page 24: System Functions
System Functions Opens the Windows Security window Enables and disables the numeric keypad Enables and disables scroll lock Display Functions Switches the video image to the next display in the following sequence: the integrated display, an external monitor, and both displays simultaneously Increases brightness on the integrated display only (not on an external monitor) Decreases brightness on the integrated display only (not on an external monitor) Power Management... -
Page 25: Touch Pad
Increases the volume of the integrated speakers and external speakers, if attached Decreases the volume of the integrated speakers and external speakers, if attached Enables and disables the integrated speakers and external speakers, if attached Windows® Logo Key Functions Minimizes all open windows Maximizes all windows Runs Microsoft®... - Page 26 To move the cursor, lightly slide your finger over the smooth sensor area. To select an object, lightly tap once on the surface of the touch pad or use your thumb to press the left touch pad button. To select and move (or drag) an object, position the cursor on the object and tap down-up-down on the touch pad.
-
Page 27: Customizing The Touch Pad And Track Stick
To move the cursor, press the track stick. Press up or down to move the cursor to the top or bottom of the display screen. Press left or right to move the cursor to the left or right of the display screen. To select an object, tap once on the track stick or use your thumb to press the left track stick button. -
Page 28: Changing The Track Stick Cap
Your computer came with an additional track stick cap. You can purchase additional caps by visiting the Dell website at www.dell.com. You may need to change the track stick cap if it wears down from prolonged use. Pull the cap off the track stick. -
Page 29: About The Module Bay
Using the Module Bay About the Module Bay Swapping Devices While the Computer Is Turned Off Swapping Devices While the Computer Is Running Using the CD or DVD Tray Adjusting the Volume Adjusting the Picture About the Module Bay You can install devices such as a floppy drive, CD drive, CD-RW drive, DVD drive, DVD/CD-RW drive, Zip drive, second hard drive, or second battery in the module bay. -
Page 30: Swapping Devices While The Computer Is Running
NOTICE: Insert devices before you dock and turn on the computer. Insert the new device into the bay, and push it until you hear a click. Turn on the computer. Swapping Devices While the Computer Is Running NOTICE: To prevent damage to the docking connector, do not remove or replace devices while the computer is connected to a docking device. - Page 31 Click OK, and wait until the device you want to eject is cleared from the list of devices in the Unplug or Eject Hardware window. Keep the display open, and tilt the computer back so that you can access the bottom of the computer. Slide and hold the latch release, and pull the device out of the module bay.
-
Page 32: Adjusting The Volume
For more information on playing CDs or watching movies, click Help on the CD player or DVD player (if available). Adjusting the Volume NOTE: Ensure that the speakers are not muted, or you will not hear your CD or DVD playing. Click the Start button, point to All Programs (Programs in Windows 2000)->... - Page 33 Click the Settings tab. Click and drag the bar in Screen area, and change the setting to 1024 by 768 pixels by moving the bar to the left or right. Click the pull-down menu under Colors, and then click High Color (16 bit). Click OK.
-
Page 34: Using A Battery
The computer also supports the 3800- and 3600-mAh batteries you may have received with earlier Dell computers, but battery life is significantly decreased with these older batteries. Any battery rated lower than 3600 mAh is not supported and will cause the light to flash orange, indicating insufficient charge capacity. -
Page 35: Checking The Battery Charge
4460-mAh lithium-ion battery is designed to work with your Dell™ computer. Replace it only with a compatible battery purchased from Dell. A 3800- or 3600-mAh battery from any Latitude™ C-Family computer will also work in this computer, although with significantly decreased battery life. -
Page 36: Health Gauge
Health Gauge The battery life span is largely determined by the number of times it is charged. After hundreds of charge and discharge cycles, batteries lose some charge capacity, or battery health. To check the battery health, press and hold the status button on the battery charge gauge for at least 3 seconds. If no lights appear, the battery is in good condition, and more than 80 percent of its original charge capacity remains. -
Page 37: Removing A Battery
charge when you connect the computer to an electrical outlet; instead, the light flashes alternately green and orange. Ensure that the computer is disconnected from an electrical outlet, and allow the computer and the battery to cool to room temperature. Then reconnect the computer to its electrical outlet and continue charging the battery. -
Page 38: Storing A Battery
Storing a Battery Remove the battery when you store your computer for an extended period of time. A battery discharges during prolonged storage. After a long storage period, recharge the battery fully before you use it. -
Page 39: Power Management Modes
Power Management Management Tips Power Management Modes Power Options Properties Management Tips NOTE: "Using a Battery" for more information on conserving battery power. Connect the computer to an electrical outlet when possible because the battery life expectancy is largely determined by the number of times it is charged. Place the computer in standby mode or... -
Page 40: Hibernate Mode
Press the power button. Close the display. Press To exit standby mode, press the power button or open the display depending on how you set the options on Advanced tab. You cannot make the computer exit standby mode by pressing a key or touching the touch pad. -
Page 41: Power Schemes Tab
The Low battery alarm and Critical battery alarm settings alert you with a message when the battery charge falls below a certain percentage. When you receive your computer, the Low battery alarm and Critical battery alarm check boxes are selected. Dell recommends that you continue to use these settings. "Using a... -
Page 42: Power Meter Tab
Power Meter Tab The Power Meter tab displays the current power source and amount of battery charge remaining. Advanced Tab The Advanced tab allows you to: Set power icon and standby mode password options. Depending on your operating system, program the following functions: Prompt user for an action (Ask me what to do). - Page 43 computer is connected to an electrical outlet. To change additional Intel SpeedStep options: Click the Advanced button and then click one of the following options: Disable Intel SpeedStep technology control Remove flag icon (from the notification area) Disable audio notification when performance changes Click OK to accept any changes, and then click OK to close the Intel SpeedStep window.
-
Page 44: Using Pc Cards
Using PC Cards PC Card Types PC Card Blanks Extended PC Cards Installing a PC Card Removing a PC Card or Blank PC Card Types See "Specifications" for information on supported PC Cards. NOTE: A PC Card is not a bootable device. The PC Card slot has two connectors that support four combinations of cards: A single Type I or Type II card (using either the upper or lower PC Card connector) One Type I card and one Type II card (using either connector) -
Page 45: Installing A Pc Card
these precautions when using extended PC Cards: Protect the exposed end of an installed card. Striking the end of the card can damage the system board. Always remove an extended PC Card before you pack the computer in its carrying case. Install an extended card in the upper PC Card connector to allow room for a second PC Card. -
Page 46: Removing A Pc Card Or Blank
The computer recognizes most PC Cards and automatically loads the appropriate device driver. If the configuration program tells you to load the manufacturer's drivers, use the floppy disk or CD that came with the PC Card. Removing a PC Card or Blank NOTICE: Use the PC Card configuration utility on the taskbar to select a card and stop it from functioning before you remove it from the computer. -
Page 47: Traveling With Your Computer
Remove any extraneous items, such as paper clips, pens, and paper, from the keyboard and palm rest and then close the display. Use the optional Dell carrying case to pack the computer and its accessories together safely. Avoid packing the computer with items such as shaving cream, colognes, perfumes, or food. -
Page 48: Travel Tips
NOTICE: If the computer has been exposed to extreme temperatures, allow it to acclimate to room temperature for 1 hour before powering on. Pack the computer so that it does not slide around in the trunk of your car or in an overhead storage compartment. - Page 49 The technician will attempt to get the phone number and address of the caller. Dell will then contact the law enforcement agency to which you made the report of the missing or stolen computer.
-
Page 50: About Passwords
PC Cards with encryption features. If you forget any of your passwords, contact your system administrator or call Dell. For your protection, Dell technical support staff will ask you for proof of your identity to ensure that only an authorized person can use the computer. -
Page 51: Using An Administrator Password
If you forget the primary password and do not have an administrator password assigned, or if you have both a primary and an administrator password assigned but forget them both, contact your system administrator or contact Dell. NOTICE: If you disable the administrator password, the primary password is also disabled. - Page 52 The Drivers and Utilities CD for your computer is a bootable CD. Viewing Existing Asset Tag and Service Numbers Boot the computer using a bootable floppy disk or CD. Type cd c:\Dell\Util and press Type asset and press Assigning an Asset Tag Number...
- Page 53 Boot the computer using a bootable floppy disk or CD. Type cd c:\Dell\Util and press Type asset and a space followed by the new number, and press For example, type the following command line and press asset 1234$ABCD& When the computer prompts you to verify the asset tag number, type y and press The computer displays the new or modified asset tag number and the service tag sequence.
- Page 54 For security, you cannot set, change, or delete the owner tag if the primary or administrator passwords are set. Boot the computer using a bootable floppy disk or CD. Type cd c:\Dell\Util and press Type asset /o /d and press Asset Tag Options To use one of the asset tag options (see the following table): Boot the computer using a bootable floppy disk or CD.
-
Page 55: Solving Problems
If the battery status light rapidly flashes orange, the battery may be defective. Contact Dell. Test the electrical outlet - Ensure that the electrical outlet is working by testing it with another device, such as a lamp. -
Page 56: Ensuring Sufficient Power For Your Computer
Docking Power Considerations To achieve maximum performance when using the Dell C/Dock Expansion Station, you must use a 90-W AC adapter with the expansion station. Using a 70-W AC adapter with the expansion station causes the computer to run in reduced-performance mode and may result in an AC adapter warning message. -
Page 57: Error Messages
AC Adapter Computer Using Dell C/Port Using Dell C/Dock Expansion Rating Undocked Station 90 W maximum maximum performance maximum performance performance 70 W maximum maximum performance battery optimized (reduced performance performance) 50 W Error Messages If the message is not listed, see the documentation for the operating system or the program that was running at the time the message appeared. - Page 58 Diskette subsystem reset failed - The floppy drive controller may be faulty. Run the Diskette tests as described in "Using the Dell Diagnostics." Diskette write-protected - Because the floppy disk is write-protected, the operation cannot be completed. Slide the write-protect notch.
- Page 59 Program." Keyboard clock line failure - For external keyboards, check the cable connection. Run the Keyboard Controller test as described in "Using the Dell Diagnostics." Keyboard controller failure - For external keyboards, check the cable connection. Restart the computer, and avoid touching the keyboard or the mouse during the boot routine.
- Page 60 No timer tick interrupt - A chip on the system board may be malfunctioning. Run the System Set tests as described in "Using the Dell Diagnostics." Non-system disk or disk error - A floppy disk is in the floppy drive. Remove the floppy disk and restart the computer.
-
Page 61: Video And Display Problems
Fill out the Diagnostics Checklist as you complete these checks. If the display is blank NOTE: If you are using a program that requires a higher resolution than your computer supports, Dell recommends that you attach an external monitor to your computer. -
Page 62: If The Display Is Difficult To Read
Check the light - When the light is blinking, the computer has power. If the light is blinking, the computer is in standby mode-press the power button to exit standby mode. If the light is off, press the power button. If the light is on, your power management settings may have caused the display to turn off. -
Page 63: If Only Part Of The Display Is Readable
Try different settings for Colors, Screen area, and Advanced Settings. Run the Video diagnostics tests - If no error message appears and you still have a display problem, but the display is not completely blank, run the Video device group in the Dell Diagnostics. Then contact Dell. -
Page 64: If You Have A Problem With Integrated Speakers
Fill out the Diagnostics Checklist as you complete these checks. If you have a problem with integrated speakers Adjust the Windows volume control - Double-click the speaker icon in the lower-right corner of your screen. Ensure that the volume is turned up and that the sound is not muted. Adjust the volume, bass, or treble controls to eliminate distortion. -
Page 65: Printer Problems
Run the Misc. PCI Devices diagnostic test - "Using the Dell Diagnostics." If the tests complete successfully, the controller is functioning properly. If the problem persists, or if the tests do not complete successfully, contact Dell. Printer Problems Fill out the Diagnostics Checklist as you perform the various checks. -
Page 66: Modem And Internet Connection Problems
Check the printer - Run the printer self-test. If the test does not complete successfully, the printer is probably defective. Contact the printer manufacturer. Modem and Internet Connection Problems NOTICE: Connect the modem to an analog telephone wall jack only. Connecting the modem to a digital telephone network damages the modem. -
Page 67: Touch Pad Or Mouse Problems
then select the proper code as listed in your telephone directory. Click Apply and click OK. Close the Phone and Modems Options window. Close the Control Panel window. Windows 2000 Click the Start button, point to Settings, and then click Control Panel. Click Phone and Modem Options. -
Page 68: External Keyboard Problems
To test the mouse controller (which affects pointer movement) and the operation of the touch pad or mouse buttons, run the Mouse test in the Pointing Devices device group in the Dell Diagnostics. Reinstall the touch pad driver - "Reinstalling Software."... -
Page 69: Unexpected Characters
If the characters appear now but did not with the external keyboard, you may have a defective external keyboard. Run the keyboard diagnostics tests - See the PC-AT Compatible Keyboards tests in the Dell Diagnostics. If the tests indicate a defective external keyboard, contact Dell. -
Page 70: If You Cannot Save A File To A Floppy Disk Drive
If a drive error message appears, see "Error Messages" for an explanation. Run the Diskette tests as described in "Using the Dell Diagnostics." If you cannot play a CD, CD-RW, or DVD NOTE: Because of different worldwide file types, not all DVD titles work in all DVD drives. -
Page 71: If You Hear An Unfamiliar Scraping Or Grinding Sound
If a drive error message appears, see "Error Messages" for an explanation. Run the IDE Drives tests as described in "Using the Dell Diagnostics." If you cannot eject the CD, CD-RW, or DVD drive tray Ensure that the computer is turned off. -
Page 72: If You Have Problems With A Hard Drive
If you have problems with a Dell-provided PC Card - Contact Dell. If you have problems with a PC Card not provided by Dell - Contact the PC Card manufacturer. -
Page 73: Network Problems
Network Problems Fill out the Diagnostics Checklist as you complete these checks. Check the network cable connector - Ensure that the network cable connector is firmly connected to the connector on the computer and the network wall jack. Check the network lights on the network connector - Green indicates that the network connection is active. -
Page 74: A Solid Blue Screen Appears
Perform this procedure only after you are certain that it is safe to do so. If the computer is connected to an electrical outlet, Dell recommends that you turn off AC power at the circuit breaker before attempting to remove the power cables from the electrical outlet. -
Page 75: If You Drop Or Damage Your Computer
See your System Information Guide for information on your warranty coverage. If the computer does not start, or if you cannot identify the damaged components, contact Dell. If You Drop or Damage Your Computer Save and close any open files, exit any open programs, and shut down the computer. - Page 76 Dell. E-mail Dell - Go to support.dell.com and then click E-Mail Dell in the Communicate list. Send an e-mail message to Dell about your problem; you can expect to receive an e-mail message from Dell within hours. See "Getting Help"...
-
Page 77: Using The Display
Before you change any of the original display settings, make a note of the original settings for future reference. NOTE: Dell recommends that you use only the Dell-installed video drivers, which are designed to offer the best performance with your Dell-installed operating system. In Microsoft® Windows® XP Click the Start button and click Control Panel. -
Page 78: Dual Independent Display Mode
Under Pick a task..., click the area you want to change, or under or pick a Control Panel icon, click Display. Try different settings for Color quality and Screen resolution. If you choose a resolution or color palette that is higher than the display supports, the settings adjust automatically to the closest possible setting. -
Page 79: Swapping Primary And Secondary Displays
In Windows 2000 The Windows 2000 operating system does not natively support dual independent display (extended desktop) mode on this computer. However, Dell has designed software that lets this computer use two displays together to simulate dual independent display behavior. - Page 80 Click the buttons under the appropriate pictures (monitor, display panel, or TV) to select your primary and secondary displays, and then click Apply. The primary and secondary buttons may look different depending on your configuration. They may consist of boxes numbered 1 and 2, or they may appear as bulls-eye (primary) and dual-screen (secondary) icons.
-
Page 81: Using The Dell Diagnostics
And if you find a problem you cannot solve by yourself, the diagnostic tests can provide you with important information you will need when talking to Dell's service and support personnel. If you are experiencing a problem with your computer, Dell recommends that you perform the checks in "Solving... -
Page 82: Starting The Dell Diagnostics
When the boot device list appears, highlight Diagnostics and press NOTE: An alternative way of starting the Dell Diagnostics is to perform steps 1–3 and then press and hold down the Dell AccessDirect™ button while you turn on the computer. -
Page 83: Diagnostics Menu
Quick Tests runs only the subtests that do not require user interaction and that do not take a long time to run. Dell recommends that you choose Quick Tests first to increase the odds of tracing the source of the problem quickly. - Page 84 When you select Advanced Testing from the Diagnostics Menu, the following screen appears, listing the diagnostic test device groups and devices of the selected device group, and the screen allows you to select categories from a menu. Press the arrow keys or to navigate the screen.
-
Page 85: Confirming The System Configuration Information
Provides descriptions of the main menu screen area, the Device Groups, and the different diagnostic menus and commands and instructions on how to use them. Keys Explains the functions of the all of the keystrokes that can be used in Dell Diagnostics. Device... - Page 86 Identification tests of the microprocessor, the video controller, the keyboard controller, and other key components BIOS configuration information temporarily saved in RAM Do not be concerned if the Device Groups area does not list the names of all the components or devices you know are part of your computer.
-
Page 87: Cleaning Your Computer
Cleaning Your Computer Computer and Keyboard Display Touch Pad Floppy Drive CD, CD-RW, and DVD Drives Computer and Keyboard Shut down and turn off your computer, disconnect any attached devices, and disconnect them from their electrical outlets. Remove any installed batteries. Gently use a vacuum cleaner with a brush attachment to remove dust from the slots and holes on your computer and between the keys on the keyboard. -
Page 88: Floppy Drive
Floppy Drive Use only a commercially available cleaning kit to clean your floppy drive. Such kits contain pretreated floppy disks to remove contaminants that accumulate during normal operation. CD, CD-RW, and DVD Drives NOTICE: Always use compressed air to clean the lens in the drive. Never touch the lens. If you notice problems, such as skipping, with the playback quality of your CDs or DVDs, clean the discs. -
Page 89: Reinstalling Software
Resolving Software and Hardware Incompatibilities Using Microsoft® Windows® System Restore Reinstalling Drivers and Utilities Dell ships your computer to you with required drivers and utilities already installed-no further installation or configuration is needed. NOTICE: The Drivers and Utilities CD may contain drivers for operating systems that are not on your computer. -
Page 90: Manually Reinstalling Drivers For Windows Xp
Click the link of a specific driver or utility to display information about the driver or utility that you want to install. Click the Install button (if present) to begin installing the driver or utility. At the welcome screen, follow the screen prompts to complete the installation. If no Install button is present, automatic installation is not an option. -
Page 91: Using The Windows Xp Device Driver Rollback
After extracting the driver files to your hard drive as described previously, click the Start button and right-click My Computer. Click Properties. Click the Hardware tab and click Device Manager. Double-click the type of device for which you are installing the driver (for example, Modems or Infrared devices). -
Page 92: Windows 2000
Click the Start button and click Control Panel. Click Performance and Maintenance and click System. Click the Hardware tab and click Device Manager. In the Device Manager list, check for conflicts with the other devices. Conflicts are indicated by a yellow exclamation point (!) beside the conflicting device or a red X if the device has been disabled. - Page 93 checking specific devices. Double-click the malfunctioning device type in the Device Manager list. Double-click the icon for the specific device in the expanded list. The Properties window appears. If an IRQ conflict exists, the Device status area in the Properties window reports what other devices are sharing the device's IRQ.
-
Page 94: Creating A Restore Point
Click the Start button and click Control Panel. Click the Performance and Maintenance. Click System. Click the System Restore tab. Ensure that Turn off System Restore is not checked. Creating a Restore Point Using the System Restore Wizard In Windows XP, you can either use the System Restore Wizard or manually create a restore point. To use the System Restore Wizard, click the Start button, click Help and Support, click System Restore, and then follow the instructions in the System Restore Wizard window. -
Page 95: Undoing The Last System Restore
Ensure that Restore my computer to an earlier time is selected and click Next. Click a calendar date to which you want to restore your computer. The Select a Restore Point screen provides a calendar that allows you to see and select restore points. -
Page 96: Adding And Replacing Parts
"Specifications" for information on the memory supported by your computer. Be sure to add only memory modules that are intended for your computer. NOTE: Memory modules purchased from Dell are covered under your computer warranty. CAUTION: Before working inside your computer, read the safety instructions in your System Information Guide. - Page 97 NOTICE: To prevent damage to the memory module connector, do not use tools to spread the inner metal tabs that secure the memory module. If you are replacing a memory module, remove the existing module. NOTICE: Handle memory modules by their edges, and do not touch the components on a module. Use your fingertips to carefully spread apart the securing clips on each end of the memory module connector.
-
Page 98: Adding A Mini Pci Card
NOTICE: If you need to install memory modules in two connectors, install a memory module in the connector labeled "JDIM (DIMMA)" before you install a module in the connector labeled "JDIM2 (DIMMB)." Ground yourself and install the new memory module: Align the notch in the module with the slot in the center of the connector. - Page 99 If you ordered a Mini PCI card at the same time that you ordered your computer, Dell has already installed the card for you. NOTE: Handle components and cards by their edges, and avoid touching pins and contacts. CAUTION: Before working inside your computer, read the safety instructions in your System Information Guide.
-
Page 100: Replacing The Hard Drive
Lift the Mini PCI card out of its connector. Align the new Mini PCI card with the connector at a 45-degree angle, and press the Mini PCI card into the connector. Connect the antenna cable(s) from the Mini PCI card to the antenna connector(s) on the computer. NOTICE: The connectors are keyed for correct insertion;... - Page 101 Before working inside your computer, read the safety instructions in your System Information Guide. NOTE: Dell does not guarantee compatibility or provide support for hard drives from sources other than Dell. To replace the hard drive in the hard drive bay: Ensure that the work surface is flat and clean to prevent scratching the computer cover.
-
Page 102: Adding A Modem
Use the Drivers and Utilities CD to install the drivers and utilities for your computer. Adding a Modem If you ordered the optional modem at the same time that you ordered your computer, Dell installed the modem for you. CAUTION: Before working inside your computer, read the safety instructions in your System Information Guide. - Page 103 If a modem is not already installed, go to step 11. If you are replacing a modem, remove the existing modem: Remove the screw(s) securing the modem to the system board, and set them aside. Pull straight up on the attached pull tab to lift the modem out of its connector on the system board, and disconnect the modem cable.
-
Page 104: Connecting A Television To The Computer
S-video (for a television with S-video input) Composite video (for a television with only a composite video input; also uses the Dell-supplied composite TV-out adapter cable) The audio connector on the side of the computer enables you to connect the computer to your television or audio device, using a commercially available audio cable. - Page 105 Before you begin, ensure that you have the following cables: 1 S-video cable 2 audio cable Turn off the computer and the television and/or audio device you want to connect. Plug one end of the S-video cable into the S-video connector on the computer.
-
Page 106: Composite Video Connection
Plug the other end of the S-video cable into your television. Plug the single-connector end of the audio cable into the headphone connector on your computer. Plug the two RCA connectors on the other end of the audio cable into the audio input connectors on your television or other audio device. - Page 107 To connect the computer to a television that has a composite video input only, Dell provides a composite TV- out adapter cable. Before you begin, ensure that you have the following cables: 1 composite TV-out adapter cable 2 composite video cable 3 audio cable Turn off the computer and the television and/or audio device you want to connect.
- Page 108 1 S-video TV-out connector 2 S-video connector 3 composite TV-out adapter cable 4 composite video connector Plug one end of the composite video cable into the composite video connector on the composite TV-out adapter cable. Plug the other end of the composite video cable into the composite video connector on the television. Plug the single-connector end of the audio cable into the headphone connector on the computer.
-
Page 109: Enabling The Display Settings For A Television
Plug the two RCA connectors on the other end of the audio cable into the audio input connectors on your television or other audio device. Enabling the Display Settings for a Television ATI Video Controller NOTE: Ensure that you properly connect the television before you enable the display settings. Open the Control Panel window. - Page 110 Click the Displays tab. Click the upper-left corner of the TV button to enable the television. To play a DVD on the television, click the small "primary" button (resembles a bulls-eye) at bottom left under the TV picture. NOTE: Various programs access the hardware in different ways. You may or may not need to click the primary button for operations other than playing DVDs.
-
Page 111: Setting Up The Dolby Headphone
Setting Up the Dolby Headphone NOTE: The Dolby headphone feature is available only if your computer has a DVD drive. Double-click the Intervideo Win DVD icon on the Windows desktop. Click the Properties icon. Click the Dolby Headphone tab. Click Enable Dolby Headphone. NOTE: Icon labels may be visible only when you place the pointer over the icon. -
Page 112: Using The System Setup Program
Dell recommends that you write down the information for future reference. NOTICE: Unless you are an expert computer user or are directed to do so by Dell technical support, do not change the settings for this program. Certain changes might make your computer work incorrectly. -
Page 113: System Setup Screens
System Setup Screens The system setup screens display the current setup information and settings for your computer. Each screen is laid out with the system setup options listed at the left. To the right of each option is a field that displays the setting or value for that option. - Page 114 Performing a One-Time Boot You can set a one-time-only boot sequence without going into the system setup program. (You can also use this procedure to boot to the Dell Diagnostics on the Diagnostics Utility partition on your hard drive.) Turn off the computer.
-
Page 115: Changing Printer Modes
Fast IR or Slow IR. Dell recommends that you use Fast IR. If the infrared device cannot communicate with your computer, turn off the computer and repeat steps 1 through 5 to change the setting to Slow IR. - Page 116 At the end of the installation process, click Yes to restart the computer. After you enable the infrared sensor, you can use it to establish a link to an infrared device. To set up and use an infrared device, see the infrared device documentation and Windows Help. NOTE: If the infrared device cannot communicate with your computer after you repeat steps 1 through 5 to change the system setup program setting to Slow IR, contact the infrared device...
-
Page 117: Specifications
Specifications Microprocessor Display System Information Keyboard PC Card Touch Pad Memory Track Stick Ports and Connectors Battery Communications AC Adapter Video Physical Audio Environmental Microprocessor Microprocessor types Intel® Mobile Pentium® 4M or Intel Celeron® processor L1 cache 8 KB (internal) L2 cache 512 KB (on die) External bus frequency... - Page 118 4-pin USB 1.1-compliant connector Infrared sensor compatible with IrDA Standard 1.1 (Fast IR) and IrDA Standard 1.0 (Slow IR) Docking 200-pin connector for a Dell™ docking device S-video TV-out 7-pin mini-DIN connector (optional S-video to composite video adapter cable) Mini PCI Type IIIA Mini PCI card slot with Wi- Fi (802.11b) wireless support...
- Page 119 Video Video type 64-bit hardware accelerated Data bus 4X AGP Video controller ATI Mobility RADEON 7500C Video memory 32 MB LCD interface LVDS TV support NTSC or PAL in S-video and composite modes Audio Audio type AC97 (Soft Audio) Audio controller Cirrus Logic CS4205 Stereo conversion 18-bit (analog-to-digital and digital-...
- Page 120 Operating angle 0° (closed) to 180° Viewing angles: Horizontal ±40° Vertical +10°/–30° Pixel pitch 0.28 x 0.28 mm (XGA) 0.20 x 0.20 mm (SXGA+) Power Consumption: Panel with backlight (typical) 6.5 W (XGA) 7.0 W (SXGA+) Controls brightness can be controlled through keyboard shortcuts Keyboard Number of keys...
- Page 121 Battery Type 8-cell "smart" lithium ion (4460 mAh) Dimensions: Depth 88.5 mm (3.48 inches) Height 21.5 mm (0.83 inch) Width 139.0 mm (5.47 inches) Weight 0.43 kg (0.95 lb) Voltage 14.8 VDC Charge time (approximate): Computer on 2.5 hours Computer off 1 hour Operating life 3 to 4 hours with average usage;...
- Page 122 Physical Height 36.8 mm (1.4 inches) Width 319.5 mm (12.5 inches) Depth 253.6 mm (9.9 inches) Weight (with 8-cell battery): With travel module 2.4 kg (5.3 lb) With floppy drive 2.6 kg (5.7 lb) With CD drive 2.6 kg (5.8 lb) Environmental Temperature range: Operating...
-
Page 123: Getting Help
Make a copy of the Diagnostics Checklist and fill it out. Use Dell's extensive suite of online services available at Dell Support (support.dell.com) for help with installation and troubleshooting procedures. If the preceding steps have not resolved the problem, contact Dell. -
Page 124: Autotech Service
AutoTech Service Dell's automated technical support service-AutoTech-provides recorded answers to the questions most frequently asked by Dell customers about their portable and desktop computers. When you call AutoTech, use your touch-tone telephone to select the subjects that correspond to your... -
Page 125: Technical Support Service
Automated Order-Status Service To check on the status of any Dell™ products that you have ordered, you can go to support.dell.com, or you can call the automated order-status service. A recording prompts you for the information needed to locate and report on your order. -
Page 126: Before You Call
Pack the equipment to be returned in the original (or equivalent) packing materials. You are responsible for paying shipping expenses. You are also responsible for insuring any product returned, and you assume the risk of loss during shipment to Dell. Collect On Delivery (C.O.D.) packages are not accepted. -
Page 127: City Code
Toll-free numbers are for use within the country for which they are listed. When you need to contact Dell, use the electronic addresses, telephone numbers, and codes provided in the following table. If you need assistance in determining which codes to use, contact a local or an international operator. -
Page 128: Table Of Contents
Customer Care Fax 11 4515 7138 City Code: 11 Aruba General Support toll-free: 800-1578 Australia (Sydney) E-mail (Australia): au_tech_support@dell.com E-mail (New Zealand): nz_tech_support@dell.com International Access Code: 0011 Home and Small Business 1-300-65-55-33 Country Code: 61 Government and Business toll-free: 1-800-633-559... -
Page 129: Country Code: 55
604 633 4966 Customer Service (Penang, Malaysia) 604 633 4949 Country Code: 673 Transaction Sales (Penang, Malaysia) 604 633 4955 Canada (North York, Online Order Status: www.dell.ca/ostatus Ontario) AutoTech (automated technical support) toll-free: 1-800-247-9362 International Access TechFax toll-free: 1-800-950-1329 Code: 011... -
Page 130: Switchboard
Large Corporate Accounts Spare Parts toll-free: 800 858 2621 Colombia General Support 980-9-15-3978 Costa Rica General Support 0800-012-0435 Czech Republic Website: support.euro.dell.com (Prague) E-mail: czech_dell@dell.com International Access Technical Support 02 2186 27 27 Code: 00 Customer Care 02 2186 27 11... - Page 131 E-mail: fin_support@dell.com International Access Code: 990 E-mail Support (servers): Nordic_support@dell.com Country Code: 358 Technical Support 09 253 313 60 Technical Support Fax 09 253 313 81 City Code: 9 Relational Customer Care 09 253 313 38 Home/Small Business Customer Care...
- Page 132 Website: support.ap.dell.com E-mail: ap_support@dell.com International Access Code: 001 Technical Support (Dimension™ and Inspiron™) 296 93188 Country Code: 852 Technical Support (OptiPlex™, Latitude™, and Dell 296 93191 Precision™) Customer Service (non-technical, post-sales issues) 800 93 8291 Transaction Sales toll-free: 800 96 4109...
- Page 133 Technical Support outside of Japan (Dimension and 81-44-520-1435 City Code: 44 Inspiron) Technical Support (Dell Precision™, OptiPlex™, and toll-free:0120-198-433 Latitude™) Technical Support outside of Japan (Dell Precision, 81-44-556-3894 OptiPlex, and Latitude) Faxbox Service 044-556-3490 24-Hour Automated Order Service 044-556-3801 Customer Care...
- Page 134 (Austin, Texas, U.S.A.) Sales (Austin, Texas, U.S.A.) 512 728-4397 SalesFax (Austin, Texas, U.S.A.) 512 728-4600 or 512 728-3772 Luxembourg Website: support.euro.dell.com E-mail: tech_be@dell.com International Access Code: 00 Technical Support (Brussels, Belgium) 3420808075 Country Code: 352 Home/Small Business Sales (Brussels, Belgium)
- Page 135 Relational Sales Fax 020 674 47 50 Switchboard 020 674 50 00 Switchboard Fax 020 674 47 50 New Zealand E-mail (New Zealand): nz_tech_support@dell.com E-mail (Australia): au_tech_support@dell.com International Access Code: 00 Home and Small Business 0800 446 255 Country Code: 64...
- Page 136 671 16800 Fax Switchboard 671 16865 Panama General Support 001-800-507-0962 Peru General Support 0800-50-669 Poland (Warsaw) Website: support.euro.dell.com E-mail: pl_support@dell.com International Access Code: 011 Customer Service Phone 57 95 700 Country Code: 48 Customer Care 57 95 999 Sales 57 95 999...
- Page 137 Vasby) E-mail: swe_support@dell.com International Access E-mail Support for Latitude and Inspiron: Code: 00 Swe-nbk_kats@dell.com Country Code: 46 E-mail Support for OptiPlex: Swe_kats@dell.com E-mail Support for Servers: City Code: 8 Nordic_server_support@dell.com Technical Support 08 590 05 199 Relational Customer Care 08 590 05 642...
- Page 138 Fax Technical Support 08 590 05 594 Sales 08 590 05 185 Switzerland Website: support.euro.dell.com (Geneva) E-mail: swisstech@dell.com International Access E-mail for French-speaking HSB and Corporate Code: 00 Customers: support.euro.dell.com/ch/fr/emaildell/ Country Code: 41 Technical Support (Home and Small Business) 0844 811 411...
- Page 139 (1-877-335-5638) Employee Purchase Program (EPP) Customers toll-free: 1-800-695-8133 Financial Services website: www.dellfinancialservices.com Financial Services (lease/loans) toll-free: 1-877-577-3355 Financial Services (Dell Preferred Accounts [DPA]) toll-free: 1-800-283-2210 Business Customer Service and Technical Support toll-free: 1-800-822-8965 Employee Purchase Program (EPP) Customers toll-free: 1-800-695-8133...
- Page 140 Toll-free numbers are for use within the country for which they are listed. When you need to contact Dell, use the electronic addresses, telephone numbers, and codes provided in the following table. If you need assistance in determining which codes to use, contact a local or an international...
-
Page 141: Regulatory Notices
Plug the computer into a different outlet so that the computer and the receiver are on different branch circuits. If necessary, consult a Dell Technical Support representative or an experienced radio/television technician for additional suggestions. Dell™ computers are designed, tested, and classified for their intended electromagnetic environment. These electromagnetic environment classifications generally refer to the following harmonized definitions: Class A is typically for business or industrial environments. - Page 142 EMC classification for the intended environment. For parallel printers, a cable is available from Dell. If you prefer, you can order a cable from Dell on the World Wide Web at accessories.us.dell.com/sna/category.asp? category_id=4117.
-
Page 143: Fcc Identification Information
FCC Identification Information The following information is provided on the device or devices covered in this document in compliance with FCC regulations: Model number: PP01L Company name: Dell Computer Corporation One Dell Way Round Rock, Texas 78682 USA 512-338-4400 Modem Regulatory Information This equipment complies with Part 68 of the FCC rules. -
Page 144: Fax Branding
Interference-Causing Equipment Standard #3 (ICES-003) as Class B digital devices. To determine which classification (Class A or B) applies to your computer (or other Dell digital apparatus), examine all registration labels located on the bottom, side, or the back panel of your computer (or other digital apparatus). - Page 145 Marking by the symbol indicates compliance of this Dell computer to the EMC Directive and the Low Voltage Directive of the European Union. Such marking is indicative that this Dell system meets the following technical standards: EN 55022 - "Information Technology Equipment - Radio Disturbance Characteristics - Limits and Methods of Measurement."...
-
Page 146: Ce Mark Notice
(RF) interference, in which case the user may be required to take adequate measures. This Dell device is classified for use in a typical Class B domestic environment. A "Declaration of Conformity" in accordance with the preceding directives and standards has been made and is on file at Dell Computer Corporation Products Europe BV, Limerick, Ireland. -
Page 147: New Zealand Telecom Warnings
New Zealand Telecom Warnings General "The grant of a Telepermit for any item of terminal equipment indicates only that Telecom has accepted that the item complies with minimum conditions for connection to its network. It indicates no endorsement of the product by Telecom, nor does it provide any sort of warranty. - Page 148 Any Dell computer bearing the ENERGY STAR® Emblem is certified to comply with EPA ENERGY STAR® requirements as configured when shipped by Dell. Any changes you make to this configuration (such as installing additional expansion cards or drives) may increase the computer's power consumption beyond the limits set by the EPA's ENERGY STAR®...
- Page 149 EN 55022 Compliance (Czech Republic Only) VCCI Notice (Japan Only) Most Dell computers are classified by the Voluntary Control Council for Interference (VCCI) as Class B information technology equipment (ITE). However, the inclusion of certain options can change the rating of some configurations to Class A.
- Page 150 back panel of your computer. Once you have determined your computer's VCCI classification, read the appropriate VCCI notice. Class A ITE This is a Class A product based on the standard of the Voluntary Control Council for Interference (VCCI) for information technology equipment.
-
Page 151: Class A Device
Republic of Korean Ministry of Information and Communications (MIC) registration labels located on your computer (or other Dell digital device). The MIC label may be located separately from the other regulatory marking applied to your product. Line two of the label identifies the emissions class for the product-"(A)"... -
Page 152: Class B Device
Class B Device Please note that this device has been approved for nonbusiness purposes and may be used in any environment, including residential areas. MIC Class B Regulatory Label If the regulatory label includes the following marking, your computer is a Class B product. Polish Center for Testing and Certification Notice The equipment should draw power from a socket with an attached protection circuit (a 3-prong socket). - Page 153 A protection mark "B" confirms that the equipment is in compliance with the protection usage requirements of standards PN-93/T-42107 and PN-EN 55022.
- Page 154 BSMI Notice (Taiwan Only) If you find a mark on the regulatory label on the bottom, side, or back panel of your computer, the following section is applicable:...
- Page 155 NOM Information (Mexico Only)
-
Page 156: Macrovision Product Notice
Warranty and Return Policy Dell Computer Corporation ("Dell") manufactures its hardware products from parts and components that are new or equivalent to new in accordance with industry-standard practices. For information about the Dell warranty for your computer, see the System Information Guide. - Page 157 Glossary A B C E F G H I K L M N O P R U V W X Z AC - alternating current The form of electricity that powers your computer when you plug the AC adapter power cable into an electrical outlet.
- Page 158 bit - The smallest unit of data interpreted by your computer. bootable CD - A CD that you can use to start your computer. In case your hard drive is damaged or your computer has a virus, ensure that you always have a bootable CD or bootable disk available. bootable disk - A disk that you can use to start your computer.
- Page 159 A metric unit of measure equal to 0.39 inch. cm/sec - centimeters per second Control Panel - A utility that allows you to modify operating system and hardware settings, such as display settings. controller - Chips that control the transfer of data between the microprocessor and memory or between the microprocessor and devices.
- Page 160 most CD media as well. DVD drive - A drive that uses optical technology to read data from DVDs and CDs. DVD player - The software used to watch DVD movies. The DVD player displays a window with buttons you use to watch a movie. DVD-RW drive - A drive that can read DVDs and most CD media and write to DVD-RW (rewritable DVDs) discs.
- Page 161 NOTE: If an extended PC Card is installed, you may have trouble inserting a second PC Card. Always install extended cards in the top PC Card connector. NOTICE: Always remove an extended PC Card before packing the computer or traveling. If something strikes the exposed end of the PC Card, the system board may be damaged.
- Page 162 hard drive - A drive that reads and writes data on a hard disk. The terms hard drive and hard disk are often used interchangeably. heat sink - A metal plate on some microprocessors that helps dissipate heat. help file - A file that contains descriptive or instructional information about a product.
- Page 163 a software package, user name, and access phone numbers for a monthly fee. If your computer has a modem, you can connect to the Internet, access websites, and send and receive e-mail. KB - kilobyte A unit of data that equals 1,024 bytes but is often referred to as 1,000 bytes. keyboard shortcut - A command requiring you to press multiple keys at the same time.
- Page 164 A temporary data storage area inside your computer. Because the data in memory is not permanent, Dell recommends that you frequently save your files while you are working on them, and always save your files before you shut down the computer. Your computer can contain several different forms of memory, such as RAM, ROM, and video memory.
- Page 165 A unit of length that equals one thousandth of a meter or 1/25 inch. modem - A device that allows your computer to communicate with other computers over analog telephone lines. There are three types of modems: external, PC Card, and internal. You typically use your modem to connect to the Internet and exchange e-mail.
- Page 166 parallel connector - An I/O port often used to connect a parallel printer to your computer. partition - A physical storage area on a hard drive that is assigned to one or more logical storage areas known as logical drives. Each partition can contain multiple logical drives. PC Card - A removable I/O card, slightly larger than a credit card, adhering to the PCMCIA standard.
- Page 167 An I/O port often used to connect devices such as a handheld digital device or digital camera to your computer. service tag - A bar code label on your computer that identifies your computer when you access Dell | Support at support.dell.com or when you call Dell for customer or technical support.
- Page 168 setup program - A program that is used to install and configure hardware and software. The setup.exe or install.exe program comes with most Windows software packages. Setup program differs from system setup program. shortcut - An icon that provides quick access to frequently used programs, files, folders, and drives. When you place a shortcut on your Windows desktop and double-click the icon, you can open its corresponding folder or file without having to find it first.
- Page 169 SXGA - super extended graphics array A video standard for video cards and controllers that supports resolutions up to 1280 x 1024. SXGA+ - super extended graphics array plus A video standard for video cards and controllers that supports resolutions up to 1400 x 1050. system board - The main circuit board in your computer.
- Page 170 port hub that plugs into your computer. USB devices can be connected and disconnected while the computer is turned on and they can also be daisy-chained together. UXGA - ultra extended graphics array A video standard for video cards and controllers that supports resolutions up to 1600 x 1200. voltage video controller - The circuitry on a video card or on the system board (in computers with an integrated...
- Page 171 watt The measurement of electrical power. One W is 1 ampere of current flowing at 1 volt. WHr - watt-hour A unit of measure commonly used to indicate the approximate capacity of a battery. For example, a 66 WHr battery can supply 66 W of power for 1 hour or 33 W for 2 hours. wallpaper - The background pattern or picture on the Windows desktop.
Need help?
Do you have a question about the Latitude C640 and is the answer not in the manual?
Questions and answers