Table of Contents
Advertisement
Quick Links
Advertisement
Table of Contents

Related Manuals for Hisense LCD3201EU


Summary of Contents for Hisense LCD3201EU
- Page 1 LCD COLOUR TV USER'S MANUAL LCD3201EU Part No: IES040723...
-
Page 2: Table Of Contents
WELCOME TO THE PERFECT VIEW Dear customer, Thank you for choosing this LCD Colour TV. We expect our product and service will comfort you for long. This manual is to guide you to set up and operate your TV as quickly as possible. Please read all the safety and operation instructions carefully before you begin and then follow what the handbook tells. -
Page 3: Important Safeguard
IMPORTANT SAFEGUARD WARNING: TO PREVENT FIRE OR SHOCK HAZARD, DO NOT EXPOSE THIS APPLIANCE TO RAIN OR MOISTURE. FIRE AND SHOCK PRECAUTIONS Adequate ventilation must be provided to prevent heat build up inside unit. Keep the inside of unit free from foreign objects, such as hairpins, nails, paper, etc. -
Page 4: Product Overview And Parts
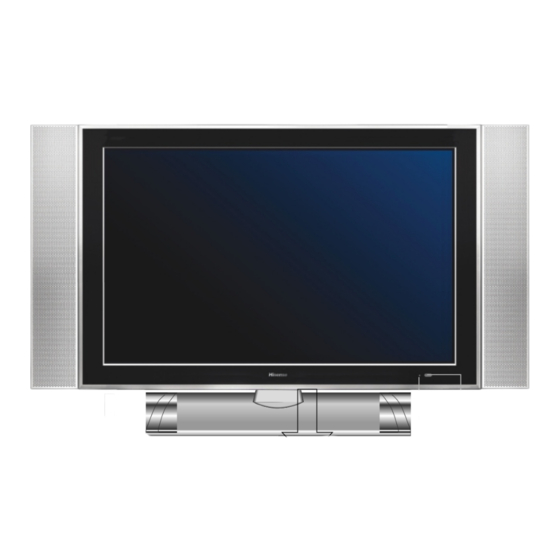
Preparation for Using your new TV Selecting a location for the TV 1)Place the TV on the floor or on a sturdy platform in a location where light does not directly hit the screen. 2)Place the TV far enough from the walls to allow proper ventilation. Inadequate ventilation may cause overheating, which may damage the TV. -
Page 5: Connecting Your Tv
Preparation for Using your new TV Power Switch (ON/OFF) Channel down / cursor down Channel up / cursor up Volume down / cursor left Volume up / cursor right Menu button Source select Power button (standby) Headphone output Connecting your TV Caution: Do not plug the TV in until you have finished connecting all of your equipment. -
Page 6: Connecting To A Computer
Preparation for Using your new TV Connecting to A Computer You can use your TV as a monitor/speakers for interface and PC audio interface. PC/NB To speaker NOTE: modes that PC mode can display are:VGA SVGA XGA SXGA Connecting to an antenna To enjoy the terrestrial signal transmitted by your local TV station, you need an indoor or outdoor antenna (not supplied). -
Page 7: Using The Remote Control
Using the remote control Preparing the remote control for use Installing the remote control batteries 1. Open the battery cover on the back of the remote control. 2. Install two AAA size(1.5V) batteries. Match the + and - signs on the batteries to the signs on the battery compartment. -
Page 8: Learning About The Remote Control
Using the remote control Learning about the remote control Channel Number : Direct channel selection Recall : Return to previous channel P.Mode : Select picture mode CH+ : Channel up VOL- : Volume down CH- : Channel down S.Mode : Select sound mode Zoom : Adjust zoom ratio Still : Snapshooting Video : Switch to SCART1 or... -
Page 9: Using The Tv Features
Using the TV features Understanding the TV features Multimedia - TV receiver, Video monitor and PC display, all in one. Wider viewing angle, 16:9 display - 170 viewing angle at typical value Digital display device - truthfully reproducing the images, without distortion or blurring, irrespective of magnetic or geomagnetic effect. - Page 10 Using the TV features Select channels by numbers To select a channel : Press the channel numbers in series to select channel directly. For example, to seclect channel 120, then press the button 2, 12_ will display, press the button zero, you can enjoy the program of channel 120. NOTE: When you changing the channel, the sound state graphics can be displayed below the channel number.
-
Page 11: Using The Channel Menu
Using the TV features Using the CHANNEL menu PROGRAM 1) Press the [MENU] button to enter the main menu. 2) Press the [VOL+ or VOL-] button to select the item CHANNEL. 3) Press the [CH+ or CH-] button to select PROGRAM. 4) Press the [VOL+ or VOL-] button to select the present channel. -
Page 12: Using The Picture Menu
Using the TV features Using the PICTURE menu PROGRAM Adjust picture settings 1) Press the [MENU] button to enter the main menu. 2) Press the [VOL+ or VOL-] button to select the item PICTURE PARAMETERS. 3) Press the [CH+ or CH-] button to select the item you want to adjust. -
Page 13: Using The Menu Lock Setting Menu
Using the TV features Using the MENU LOCK SETTINGS menu LOCK MENU 1) Press the [MENU] button to enter the main menu. 2) Press the [VOL+ or VOL-] button to select the item MENU LOCK SETTINGS. 3) Press the [CH+ or CH-] button to select the LOCK MENU. -
Page 14: Using The General Setting Menu
Using the TV features Using the GENERAL SETTINGS menu OSD POSITION 1) Press the [MENU] button to enter the main menu. 2) Press the [VOL+ or VOL-] button to select the item GENERAL SETTINGS 3) Press the [CH+ or CH-] button to select OSD POSITION 4) Press the [VOL+ or VOL- or CH+ or CH-]... -
Page 15: Teletext Operations
Using the TV features Using the GENERAL SETTINGS menu DEINTERLACER 1) Press the MENU button to enter the main menu. 2) Press the [VOL+ or VOL-] button to select the item GENERAL SETTINGS 3) Press the [CH+ or CH-] button to select DEINTERLACER 4) Press the [ VOL+ ] button to enter the DEINTERLACER 5) Press the [ CH+ or CH-] button to select the feature Using the PC menu... - Page 16 Using the TV features Teletext Operations REVEAL Some Teletext pages contain quiz or questions with hidden answers. Press the [ ] button to see the answers. Press the [ ] button again to hide the answers. CANCEL When a page is selected in Teletext mode it may take some time before it becomes available. Press the [ YPbPr ] button to switch to the TV mode.
-
Page 17: Scart Connector Pinout Details
Appendix The SCART interface Scart Connector Pinout Details Pin Signal Audio output B (right) Audio input B (right) Audio output A (left) Ground (audio) Ground (blue) Audio input A (left) Blue input Function select (AV control) Ground (green) 10 Comms data 2 11 Green input 12 Comms data 1 13 Ground (red) -
Page 18: Cleaning And Care
Appendix Pin Signal Audio output B (right) Audio input B (right) Audio output A (left) Ground (audio) Ground Audio input A (left) Function select (AV control) Ground 11 - 13 Ground 14 Ground (blanking) 16 - 17 Ground (video input & output) - 18 - 19 Video output (composite) Video input (composite) -
Page 19: Troubleshooting
Appendix Troubleshooting Before calling a service technician, please check the following table for a possible cause of the problem and some solutions. Symptoms TV will not turn on No picture, no sound No sound, picture OK Poor sound, picture OK Poor picture, sound OK Unable to select a certain channel Poor colour or no colour... -
Page 20: Specifications
OTHER: Dimensions 39inchesX23inchesX8.7inches 24Kg Weight Supplied accessories Remote control, AC Power cord, Batteries Design and specifications are subject to change without notice. LCD3201EU S38-E69 Cable/ antenna S-VIDEO YPBPR Digital RGB(DVI-D) X1 SCART 1 audio and SCART2 audio Mini-jack for stereo...
Need help?
Do you have a question about the LCD3201EU and is the answer not in the manual?
Questions and answers