
Subscribe to Our Youtube Channel
Related Manuals for Roberts robi


Summary of Contents for Roberts robi
- Page 1 DAB / FM RDS Digital Radio and Remote Control from ROBERTS Please read this manual before use...
-
Page 2: Table Of Contents
Contents Please read this first ..................2 Controls ......................4 Display ......................7 Operating your radio - DAB ................9 Secondary DAB services ................12 Finding new DAB stations ................13 Operating your radio - FM ................15 Manual tuning - FM ..................19 Favourite stations - DAB and FM .............. -
Page 3: Please Read This First
Please read this first Thank you for purchasing , a DAB and FM radio accessory for iPod and iPod nano. Please take a little time to read these instructions in order to get the best from your radio. is designed to operate with your iPod to provide DAB and FM radio listening on the move. - Page 4 Please read this first (contd.) and your iPod should only be connected and disconnected when your iPod is switched off. You can then use the Play / Pause button on to switch your iPod on and off in addition to the iPod controls. uses the supplied headphones as the aerial for the radio.
-
Page 5: Controls
Controls Favourite (7) Headphone Socket (10) Display (11) iPod connection (1) Volume Up (8) Hold switch (2) Mode (4) Next / Forward / Previous / Rewind / Scan (clear) (6) Scan (add) (5) Play-Pause / Mute / Power On-Off (3) Volume Down (9) The numbers against each function refer to paragraphs on the following pages. - Page 6 Controls (contd.) iPod cable and connector - This must be connected to the docking connector on your iPod in order to use the radio. Hold switch - Slide this switch up to prevent accidental operation of all buttons . The display will show ‘Locked’ if a button is pressed while Hold is applied.
- Page 7 Controls (contd.) Previous / Rewind / Scan button - In DAB mode press to select previous radio station, press and hold to clear radio station list and re-scan. In FM mode press to step frequency down, press and hold to scan. In Remote mode press to select the previous track or press and hold to rewind the current track.
-
Page 8: Display
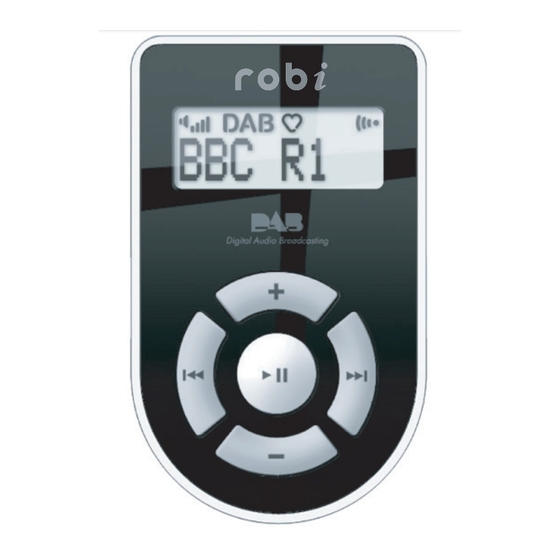
Display Text area - this is used to display radio station names or frequencies and user messages. Volume - Five segments indicate the approximate volume setting. More segments are visible at higher volume levels. The loudspeaker symbol will flash if is set to mute the audio output. - Page 9 Display (contd.) Signal strength - Five segments indicate the approximate strength of the radio signal received via the headphone lead aerial. Good quality reception is generally achieved when at least three segments are visible. Display backlight - The display backlight is normally switched off to conserve power, but it is switched on for five seconds after pressing any button.
-
Page 10: Operating Your Radio - Dab
Operating your radio - DAB Carefully plug into your iPod docking connector checking that the connector is correctly aligned (see Connecting to your iPod, page 25). Plug the headphones into . The headphone and iPod leads act as the radio aerial and so the cables should be unravelled for good radio reception. - Page 11 Welcome Scan 5A Found 23 BBC R2...
- Page 12 Operating your radio - DAB (contd.) When the scanning is completed the last radio station found will be selected. The display then shows the name of the station currently selected. If the station list is still empty after the scan will display ‘No DAB’.
-
Page 13: Secondary Dab Services
Note: If no DAB radio stations are found it may be necessary to relocate the headphone lead to a position giving better reception. It will then be necessary to repeat the scan - see 'Finding new DAB stations', page 13. Secondary DAB services Some DAB radio stations have one or more secondary services associated with them which may not broadcast continually. -
Page 14: Finding New Dab Stations
Finding new DAB stations As time passes new DAB radio stations may become available, or if you move to a different location there may be alternative DAB stations which receive. To find new stations proceed as follows:- With connected to your iPod, select the DAB radio mode as previously described. - Page 15 Finding new DAB stations (contd.) If you wish to clear the list of previously stored DAB stations, then follow steps 1 - 3 above, but press and hold the Previous button for 5 seconds instead of the Next button. This will cause the stored list of radio stations and your favourites to be erased before the scan takes place.
-
Page 16: Operating Your Radio - Fm
Operating your radio - FM Carefully plug into your iPod docking connector checking that the connector is correctly aligned (see Connecting to your iPod, page 25). Plug the headphones into . The headphones and the iPod lead act as the radio aerial and so the cables should be unravelled for good radio reception. - Page 17 Welcome 87.5MHz 89.1MHz...
- Page 18 Operating your radio - FM (contd.) The display will show the frequency of the signal which has been found. If RDS information is available, the display will then show the radio station name. To find more FM radio stations, repeat this procedure from step 4. Alternatively, press and hold the Previous button to scan the FM band in a downwards direction (high frequency to low frequency).
- Page 19 BBC R2 C l a s s i c...
-
Page 20: Manual Tuning - Fm
Manual tuning - FM Ensure that is switched on and in FM mode (see Operating your radio - FM). will display the currently tuned FM frequency or station name - for example 89.9MHz in the example shown. To tune to a higher frequency press the Next button. The frequency will increase by 100kHz with each press of the button. - Page 21 89.9MHz 90.0MHz 90.1MHz BBC R2...
-
Page 22: Favourite Stations - Dab And Fm
Favourite stations - DAB and FM To make it easier for you to listen to the radio stations that you prefer, allows you to create a lists of favourite stations. holds two separate lists of favourite stations, one for DAB and one for FM radio modes. With in DAB or FM mode, press and release the Favourite button until the heart symbol is not visible. - Page 23 Favourite stations - DAB and FM (contd.) Note: If no radio stations have been marked as favourites, then it will not be possible to put into the favourites display mode. Classic Classic Classic...
-
Page 24: Remote Control Operation
iPod Remote Control operation Carefully plug into your iPod docking connector checking that the connector is correctly aligned (see Connecting to your iPod, page 25). Plug the headphones into Your iPod may power up when is connected. If not, press and hold the Play / Pause button on to switch on your iPod. - Page 25 iPod Remote Control operation (contd.) Use the Previous or Next buttons on if you wish to change tracks. Press and hold either to rewind or fast-forward playback as needed. After listening to your iPod, press and hold the Play / Pause button to switch off.
-
Page 26: Connecting To Your Ipod
Connecting to your iPod With your iPod switched off, carefully plug into the docking connector at the base of your iPod. Note that the connector marker on the cable connector should be facing upwards as shown below. Do not force the connector into the socket. -
Page 27: Troubleshooting
Troubleshooting Some possible problems and their solutions to help you will not turn on - Is your iPod battery well charged? Is securely plugged into the docking connector on your iPod? Is there at least one audio file stored on your iPod which has been transferred using Apple's iTunes software? If your iPod has been off for some time, may not be able to switch it on. -
Page 28: Battery Life
Troubleshooting (contd.) In the event of a malfunction, you may need to reset the product to resume normal operation (see page 28). In some cases it may be necessary to disconnect from your iPod, and then to reset your iPod before reconnection. For additional help, please refer to the FAQ page for on our web site at http://www.robertsradio.co.uk/pages/robi_faq.html... -
Page 29: Factory Reset
Factory reset If you wish to restore to its original factory settings (no radio stations stored, no favourites), then you should follow this procedure. With connected to your iPod press and hold down the Play / Pause button to switch on the radio. Press and release the Mode button as needed to enter Remote mode, then simultaneously press and hold Volume Up, Volume Down, Previous and Next buttons until the display shows ‘Reset’. -
Page 30: Caution
Caution IMPORTANT: Excessive sound pressure from earphones and headphones can cause hearing loss. Please be aware that some alternative headphones may play at a higher sound level than those supplied with the unit. Specifications Power Requirements Uses power from the battery of the host iPod Battery Life with iPod... -
Page 31: Guarantee
Company’s service department for attention. In the event that it is not possible to return the instrument to the Roberts' dealer from whom it was purchased, please contact Roberts Radio Technical Services at the address shown at the back of this manual. - Page 32 97-99 Worton Road Isleworth Middlesex TW7 6EG Technical Help-line :- 020 8758 0338 (Mon-Fri during office hours) Website: http://www.robertsradio.co.uk iPod and iTunes are trademarks of Apple Computer, Inc., registered in the U.S. and other countries. © 2007 Roberts Radio Limited Issue 1...
Need help?
Do you have a question about the robi and is the answer not in the manual?
Questions and answers