Table of Contents
Advertisement
Available languages
Available languages
D
B
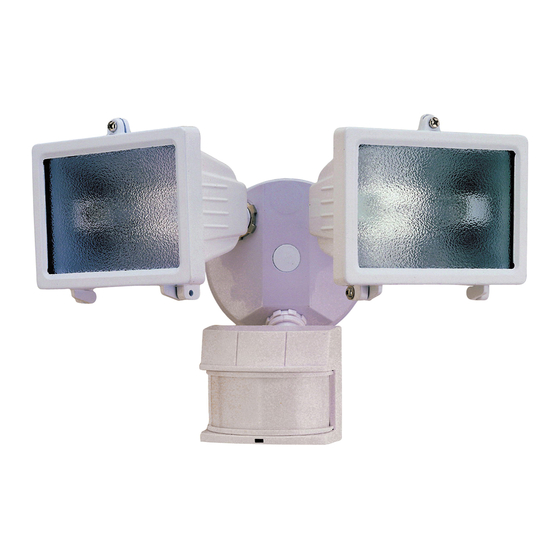
Twin Halogen
®
ual
rite
Motion Sensing Light
Model SL-5512
Features
• Turns on lighting when motion is detected.
• Automatically turns lighting off.
• D
B
Timer.
®
ual
rite
• Photocell keeps the lighting off during daylight
hours.
• LED indicates motion was sensed (day or night).
This package includes:
Plastic Hanger
Rubber Plug
Cover
Plate
Light Control
Mounting Bolt
Mounting Strap
2 Halogen Bulbs
© 2008 HeathCo LLC
6 Mounting
Screws (3 sizes)
3 Wire
Connectors
Sensor
Gasket
Light Shield
Requirements
• The light control requires 120-volts AC.
• If you want to use Manual Mode, the control must be
wired through a switch.
• Some codes require installation by a
qualified electrician.
• This product is intended for use with the enclosed
gasket and with a junction box marked for use in wet
locations.
OPERATION
Mode:
On-Time
Test
5 Seconds
Auto
1, 5, or 20 Min
Manual
To Dawn*
Accent
3, 6 Hr, to Dawn
* resets to Auto Mode at dawn.
Note: When first turned on wait about 1
the circuitry to calibrate.
Put ON-TIME switch
on the sensor bottom
to TEST and the D
-
ual
B
switch OFF.
®
rite
Put the ON-TIME switch in the 1, 5,
or 20 minute position.
MANUAL MODE
Manual mode only works at night
because daylight returns the sensor
to AUTO.
Flip the light switch off for one second
then back on to toggle between AUTO
and MANUAL MODE.
Manual mode works only with the
ON-TIME switch in the 1, 5, or 20
position.
Works: Day Night
x
1
/
minutes for
2
TEST
ON-TIME
D
B
ual
rite
TEST 1 5 20
Off 3 6 Dusk to
Dawn
AUTO
ON-TIME
TEST 1 5 20
1 Second OFF
then...
... back on.
595-5575-09
x
x
x
x
®
Advertisement
Table of Contents

Related Manuals for Heath Zenith SL-5512


Summary of Contents for Heath Zenith SL-5512
- Page 1 Twin Halogen ® rite Motion Sensing Light Model SL-5512 Features • Turns on lighting when motion is detected. • Automatically turns lighting off. • D Timer. ® rite • Photocell keeps the lighting off during daylight hours. • LED indicates motion was sensed (day or night).
-
Page 2: Mode Switching Summary
Mode Switching Summary TEST Move ON-TIME Switch to 1, 5, or 20 minutes AUTO Flip light switch off for one second then MANUAL MODE * If you get confused while switching modes, turn the power off for one minute, then back on. After the cali- bration time the control will be in the AUTO mode. - Page 3 Bulb Installation NOTE: Lamps are included, but you will need to install them NOTE: When re-lamping, turn power off and let the fixture cool. ❒ Open glass covers. To remove the old bulb push the bulb towards the right until the left side of the bulb is clear of the left socket.
-
Page 4: Test And Adjustment
TEST AND ADJUSTMENT ❒ Turn on the circuit breaker and light switch. NOTE: Sensor has a 1 minute warm up period before it will detect motion. When first turned on, wait 1 minutes. ❒ Turn the RANGE control to the medium position (halfway between MIN and MAX), D and the ON-TIME control to the TEST position. -
Page 5: Specifications
SPECIFICATIONS Range ... . Up to 70 ft. (21 m); 100 ft. (30.5 m) with Range Boost. [var ies with surrounding temperature] Sensing Angle ..Up to 240° Electrical Load . - Page 6 Please call 1-800-858-8501 (English speaking only) for assistance before returning If you experience a problem, follow this guide. You may also want to visit our Web site at: www.hzsupport.com. If the problem persists, call* for assistance at 1-800-858-8501 (English speaking only), 7:30 AM to 4:30 PM CST (M-F).
- Page 7 Luz halógena gemela con detector de movimiento y D Modelo SL-5512 Características • Prende la luz cuando detecta movimiento. • Apaga la luz automáticamente. • Temporizador luz de dos niveles, D • La fotocélula mantiene la luz apagada durante el día.
- Page 8 Resumen de las modalidades del interruptor PRUEBA Mueva el interruptor de tiempo (ON-TIME) a 1, 5 AUTOM. Apague el interruptor por un segundo y préndalo de nuevo* MODO MANUAL * Si se confunde mientras cambia de fases, apague la electricidad por un minuto y préndala de nuevo. Después del tiempo de calibración el control estará...
- Page 9 Instalación de Bombilla NOTA: Incluye lámparas pero, usted deberá instalar- las. NOTA: Cuando cambie la bombilla, apague la energía y deje que el aparato se enfríe. ❒ Abra la cubierta de vidrio y quite la bombilla vieja em- pujándola hacia la derecha hasta que el lado izquierdo de la bombilla se salga del enchufe izquierdo.
-
Page 10: Prueba Y Ajuste
PRUEBA Y AJUSTE ❒ Prenda el cortacircuitos y el interruptor de luz. NOTA: El detector tiene un período de cerca de 1 minutos de calentamiento antes de detectar movimiento. Cuando lo prenda por primera vez, espere 1 minutos. ❒ Gire el control de ALCANCE (RANGE) a la posición media (entre MIN y MAX), DualBrite control de DURACIÓN (ON-TIME) a la posición de PRUEBA (TEST). -
Page 11: Guia De Investigacion De Averias
ESPECIFICACIONES Alcance ... Hasta 21 m, Aumento de Dis- tancia prendido. Hasta 30.5 m, Aumento de Distancia apagado. (varía con la temperatura del medio ambiente). Angulo de detección . Hasta 240° Carga Eléctrica . - Page 12 Favor de llamar al 1-800-858-8501 (sólo para hablar en inglés) para pedir ayuda antes de devolver el producto a la tienda. Si tiene algún problema, siga esta guía. Usted puede también visitar nuestro sitio Web: www.hzsupport.com. Si el problema continúa, llame al 1-800-858-8501 (sólo para hablar en inglés), de 7:30 AM a 4:30 PM CST (L- V).
- Page 13 Luminaire halogène double à détecteur de mouvement rite Modèle SL-5512 Caractéristiques • Allume l’éclairage lorsqu’un mouvement est détecté. • Éteint automatiquement l’éclairage. • Minuterie de D rite • Photocellule qui maintient l’éclairage éteint pendant la période de lumière du jour.
- Page 14 Résumé du mode de commutation TEST Placer l’interrupteur ON- TIME à 1, 5 ou 20 minutes AUTO Mettre l’interrupteur hors circuit pendant une seconde, puis le PRIORITÉ MANUELLE remettre en circuit* * Si vous ne savez plus dans quel mode se trouve l’ap- pareil, couper l’alimentation pendant une minute puis la rétablir.
- Page 15 Installation De L’ampoule NOTE: Les lampes ont été incluses, mais il vous faudra les installer. NOTE: Avant de remplacer une ampoule, couper l'ali- mentation et attendre que l'appareil refroidisse. ❒ Ouvrir le couvercle de verre. Pour enlever l'ampoule, pousser en tournant vers la droite jusqu'à ce que le côté...
- Page 16 ESSAIS ET RÉGLAGES ❒ Mettre en circuit le disjoncteur et l’interrupteur d’éclairage. NOTE: Le capteur doit se réchauffer 1 de pouvoir détecter le mouvement. Lorsque l’appareil est mis en circuit, attendre 1 minute. ❒ Placez le bouton RANGE en position médiane (à mi-chemin entre MIN et MAX), le bouton D à...
- Page 17 FICHE TECHNIQUE Portée ... . 21 m avec amplification de portée hors circuit et de 30,5 m losqu’en circuit (varie selon la température environnante). Angle de détection . . . Jusqu’à 240˚ Charge électrique .
- Page 18 veuillez faire le 1 800 858-8501 (service en anglais seulement) pour obtenir de l’aide avant de retourner l’article au magasin. En cas de problème, suivez ce guide. Vous pouvez aussi visiter notre site Web à www.hzsupport.com. Si le problème persiste, composez* le 1 800 858-8501 (service en anglais seulement), entre 7 h 30 et 16 h 30, HNC, du lundi au vendredi.
- Page 19 NOTE / NOTA _________________ _____________________________ _____________________________ _____________________________ _____________________________ _____________________________ _____________________________ _____________________________ _____________________________ _____________________________ _____________________________ _____________________________ _____________________________ _____________________________ _____________________________ _____________________________ _____________________________ _____________________________ _____________________________ 595-5575-09...
- Page 20 Información de la compra Renseignements d’achat Model #: _________________ Nº de modelo / N° de modèle Staple Purchase Receipt Here Engrape aquí el recibo de compra Agrafez le reçu d’achat ici PLEASE KEEP YOUR DATED SALES RECEIPT, IT IS REQUIRED FOR ALL WARRANTY REQUESTS. POR FAvOR GUARDE SU RECIBO DE vENTA FECHADO;...
Need help?
Do you have a question about the SL-5512 and is the answer not in the manual?
Questions and answers