Holux GPSport 260 User Manual
Gps data logger with internal memory
Hide thumbs
Also See for GPSport 260:
- User manual (93 pages) ,
- Quick manual (4 pages) ,
- User manual (43 pages)
Table of Contents
Advertisement
Quick Links
Advertisement
Table of Contents

Related Manuals for Holux GPSport 260


Summary of Contents for Holux GPSport 260
- Page 1 GPSport 260 User’s Guide...
-
Page 2: Safety Precautions
Warranty Information The GPSport 260 is warranted to be free from defects in material and functions for a period of one year from the date of purchase. If there is a product failure of within this period (under normal conditions), a replacement will be provided at... -
Page 3: Copyright Information
No part of this manual, including the products and software described in it, may be reproduced, transmitted, transcribed, stored in a retrieval system, or translated into any language in any form or by any mean, without the express written permission of Holux Technology, Inc. Copyright, All Rights Reserved. Federal Communications Commission (FCC) -
Page 4: Rf Exposure Warning
CAUTION Any changes or modifications not expressly approved by the grantee of this device could void the user's authority to operate this equipment. This device complies with Part 15 of the FCC Rules. Operation is subject to the following two conditions: (1) This device may not cause harmful interference, and (2) this device must accept any interference received, including interference that may cause undesired operation. -
Page 5: Table Of Contents
Table of Contents Introduction..................1 ...................2 EATURES ................3 ARTS AND UNCTIONS ..............6 TANDARD CCESSORIES ..............7 HARGING THE ATTERY Using the AC Charger ..............7 ..............8 NSTALLING OUNT ..............10 OWNLOADING RACK Installing ezTour Plus ..............10 Starting ezTour Plus ..............13 Starting ezTour Planner..............14 Installing Driver ................15 Connecting to a PC...............17 Introduction of 8 Function Modes ...........18 ..................18... - Page 6 ................49 ASIC PERATION Basic Operation without Setting ............49 Speed Meter .................49 Quick Menu...................51 ...................52 TATUS CONS Setting Up GPSport 260 ..............54 ..................54 UICK ETUP ....................56 LERT To Set Alerts..................56 To Set Time Alert................57 To Set Speed Alert ................57 To Set Distance Alert..............58 To Set Altitude Alert...............58...
- Page 7 Set Backlight.................69 Auto Flip Page ................69 Memory Mode ................70 Auto Power Off................71 ................72 YSTEM ETTING Delete all log .................72 Time Format..................72 Time Zone..................73 Unit ....................73 Language..................74 LCD Contrast ................74 Odometer..................75 GPS ....................76 Reset Device ................77 Initial Setup ...................77 About ezTour Plus and ezTour Planner...........78 .............78 UNCTIONS OF EZ ............78...
-
Page 8: Introduction
Introduction Thank you for purchasing the GPSport 260. The GPSport 260 comes with a sturdy feel and shape and is packed with great features. The GPSport 260 works as a GPS data logger with internal memory, plus, it also serves the purpose of a speed meter that shows immediate sport information including speed, distance, time, and pace while users are exercising. -
Page 9: Features
Features ● GPS positioning ● Follow course: Allow users to plan routes at home and download routes to the device! ● BMI calculation ● Automatic page flipping ● Auto power off after a specified interval with no signal ● Multi Finder can record up to 20 locations and supports return-to -starting-point ●... -
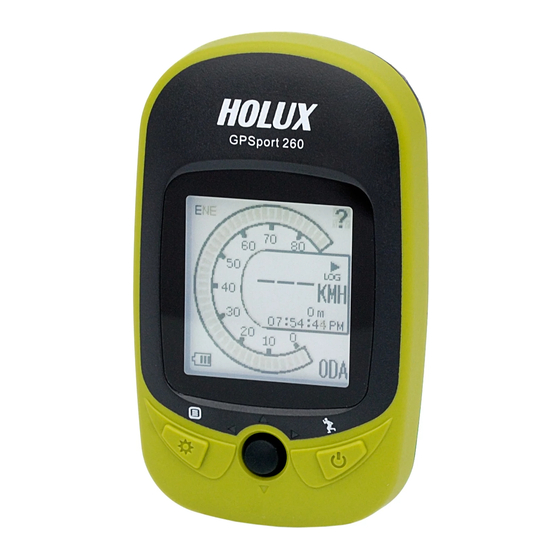
Page 10: Parts And Functions
Parts and Functions Front View 1.5’’ LCD screen Backlight Power/ Exit Start/Pause OK/Up/ Down/ Right/ Left button... - Page 11 Rear View Mini USB Port Button Name Icon Function Power button Press to pause/resume log when the device is turned on. Press for 3 seconds to power on/off the unit. Exit Exit to previous level of menu Backlight Press for 3 seconds to turn on/off the backlight.
- Page 12 5-Direction Use Left, Up, Right, and Down to select an option. Press the OK button in the middle to confirm selection. Reset device Cannot turn off the system with the power button, please reset system.
-
Page 13: Standard Accessories
Standard Accessories Please make sure the following accessories are included in the box. Please contact your supplier immediately if there are any missing items. GPSport 260 USB cable Quick Guide AC Adapter Warranty Card CD-ROM (including ezTour Plus, ezTour Planner*, and documents for user manuals.) -
Page 14: Charging The Battery
Charging the Battery Using the AC Charger Plug the mini USB plug of the AC charger into the mini USB port at the back of the GPSport 260. Plug the AC charger into a wall outlet. When charging, the Power indicator shows . -
Page 15: Installing Bike Mount
Installing Bike Mount You can install the bike mount and the GPS on the left or right side of the handlebar or on the stem. 1. Attach the bracket to the bracket holder. 2. Thread the two cable ties through the slots of the bracket holder. - Page 16 3. Place the rubber pad under the bike mount and attach the bike mount securely to the bike stem using the two cable ties. 4. Slide in the GPS on top of the bike mount until it snaps into place. Press here to release the device Note: Cable ties are reusable...
-
Page 17: Downloading Track Logs
Downloading Track Logs To download the recorded track log and view it on your computer, firstly you will need to install the bundled ezTour Plus. Installing ezTour Plus 1. Insert the provided installation CD into the computer’s CD drive. The introductory screen appears automatically. If the screen does not appear, open the Autorun.exe file on the CD. - Page 19 Click Finish to exit the wizard.
-
Page 20: Starting Eztour Plus
Starting ezTour Plus Once the ezTour Plus is well installed in your computer, the ezTour Plus icon will appear on your desktop as a shortcut. Double-click the icon to start ezTour Plus. The following opening screen appears and you are ready to use the software. For details, please refer to the included ezTour Plus user manual. -
Page 21: Starting Eztour Planner
Starting ezTour Planner The ezTour Planner will be automatically installed when the ezTour Plus is installed and the program icon will appear on the tool bar. Double-click the icon and the software to start planning your courses. -
Page 22: Installing Driver
1. After the ezTour is installed, you can open the ”Holux_Driver” folder and install driver. The path is “ “ C:\Program Files\HOLUX ezTour\DL\Holux_Driver 2. Select “PL2303” folder, and click the driver program of the latest date to install. 3. Follow the on-screen instruction to proceed. The installation... - Page 23 Click Finish to exit the wizard.
-
Page 24: Connecting To A Pc
After the ezTour Plus is installed, you can now connect your GPSport 260 to your computer to download the recorded track log. Use the included mini USB cable to connect the GPSport 260 with your computer as described below. Connect the mini USB plug (smaller) of the USB cable to the mini USB port at the back of the device. -
Page 25: Introduction Of 8 Function Modes
Introduction of 8 Function Modes Main Menu The main menu appears when the device is turned on by pressing the power button. 8 operation modes are displayed in the main menu including Sport, Plot, Follow Course, Multiple Finder, Pedometer, Compass, History and Setting modes. Use the up/down button to scroll up/down and select the mode by pressing the OK button . -
Page 26: Sport Mode
Sport Mode In Sport mode, user can turn on/off the log recording. This mode displays sport information including analog speed meter, speed, time and distance, barometer altitude, calories consumed, and CO2 reduced. Press the 5-way button left right to switch among different sub pages for different sport information. - Page 27 Dashboard/ Analog speed meter Displays the speedometer in analog fashion. Information displayed in this page includes Compass, GPS Signal, Battery Status, Log (status), Grade, Odometer, Current Speed, Trip Distance, and Clock. Speed & Distance: Displays current speed and distance. Altitude and Trip Time: Displays barometer altitude and the variation since the log started.
- Page 28 Time and Grade: Displays current Time and Grade. Calories: Displays calories consumed since the log started and total calories consumed today. This 5 way button icon shown on this page means the information shown on this page can be determined by users. Move the Up/ Down button to select the information to be displayed on Top or Bottom.
- Page 29 Carbon Saving: Displays amount of carbon dioxide emissions avoided or number of trees planted by not driving in one journey. This 5 way button icon shown on this page means the information shown on this page can be determined by users. Move the Up/ Down button to select the information to be displayed on Top or Bottom.
- Page 30 The above selection, for example, will result in the display on Sub Page 4 as shown.
- Page 31 User Defined Screen Listed below are user defined screens of all combination.
-
Page 33: Plot Mode
Plot Mode Plot mode shows track log in graph and in real time display without interruption. The real time transectional plot shows four units of sport information including: Altitude + Time Altitude + Distance Speed + Time Speed + Distance Plot Displays the graph for altitude and time. - Page 34 View Mode Real-time track drawing Push the OK button to enter Pan/Zoom mode Compass Real time track drawing; push to enter Pan/Zoom mode Back to Menu Show POI. Press again to disable the function. POI name will be displayed in the language edited in ezTour Planner.
- Page 35 Zoom Mode Zoom out /Zoom in Back to View Mode Show POI. Press again to disable the function. POI name will be displayed in the language edited in ezTour Planner. Plot Mode Display Altitude/Speed plot The following x- and y-axis combinations are available: Altitude + Time Altitude + Distance...
- Page 36 Orientation direction can be based on 1. GPS 2. Always north 3. According to Compass The orientation direction appears on Track View (in Plot Mode) to help users with more track information besides Altitude, Time, Speed, and Distance. Select to toggle between Hide Track and Show Track.
-
Page 37: Follow Course Mode
To follow course, tracks can be acquired from one of the following methods: 1. Plan your routes with ezTour Planner and then send it from the PC to GPSport 260. Please refer to the ezTour Planner user manual for details. - Page 38 Follow course from listed tracks List Displays the tracks currently stored on the GPSport 260. The listed tracks were pre-planned and exported from ezTour Planner Track details includes: Distance, time, maximum speed, average speed, calories, carbon reduction, trees planted, and the number of check points in the track.
- Page 39 Follow course from history logs History List Displays the tracks logs currently stored on the GPSport 260. Track details: All history logs are listed in time order followed by track distance. Move the up and down cursor to select the log.
- Page 40 Check Points Preview all checkpoints and the details of check points in one track. When a check point is selected, you will be prompted to confirm if the selected check point the starting point to follow. Press the OK button to confirm.
- Page 41 View Track Course in Speed Meter Mode View Track Course Loaded track can be displayed in four modes, i.e. Speed Meter, Plot Mode, Track View and Orientation. User left right button to switch between pages. Shows distance & ascend to next check point and distance to the destination.
- Page 42 View Track Course in Plot Mode Show track on Plot Mode. View Track Course in Track View Shows Check Points on track; Zoom in / out for the loaded track. Press the button to enter/toggle between the Zoom & Pan mode...
-
Page 43: Multi Finder Mode
Multi Finder Mode The Multiple Finder Mode shows the direction to the start of the track and leads you back to the starting point; alternatively, enter the coordinates for the destination to be guided by direction and distance. TripStart auto memorized your first GPS fixing location. - Page 44 List Points Users may store up to 20 records. Select Reset List to clear all recorded Finder. Set Points Save current coordinates to a Finder point on the List. Show Displays the coordinates of current location and the destination.
-
Page 45: Pedometer Mode
Pedometer Mode Pedometer mode enables users to count and record the number of steps taken, and the calories burned. Press the Power button to Start/Pause Pedometer. Press the OK button to enter the Option Menu. The icon appears to indicate the pedometer is starting. - Page 46 2. Log recording continues when Pedometer is working. Enter this mode, input your stride length and press OK. While working as a pedometer, the GPSport 260 needs no GPS signal to calculate distance. Distance is calculated on the basis of steps timing stride length.
-
Page 47: Compass Mode
Compass Mode Works as a regular magnetic compass Shows direction mark with degree Shows current coordinates Push CAL to calibrate compass... -
Page 48: History Mode
History Mode History shows track details including speed, time, distance, altitude, check points, calories consumed, and CO2 reduced. Displays total number of tracks. Tracks can also be set as Favorite. Track List displays all history track logs with track time and distance listed by order of time. Push the OK button to save the track to your favorite list. - Page 49 Statistics: shows activity statistic for all tracks or favorites. Track statistics. Use the left and right buttons to switch between different intervals (1, 2, 3, 4, 5, 6, 7, 10, 12 days, 2 weeks, 1 month, and all.)
-
Page 50: Setting Mode
Setting Mode Setting Menu Quick Setup Quick setup allows you to select sport type, set user weight and select Odometer. Alert The Alert function can be set for time, speed, distance and altitude. - Page 51 Calibration Calibration is needed at the start of each activity’s log. The GPSport 260 is set to automatically start logging user’s track once it is turned on. Users can also set the log interval by pre-determined time or distance. General...
- Page 52 System System includes Delete All Log, Set Time Format, Time Zone, Unit, Language, LCD contrast, Odometer, GPS, and Reset Device (Factory Reset).
-
Page 53: Getting Started
Press the OK button again. Initial Setup Please perform the initial setup for the very first time use of GPSport 260. If the GPSport 260 is reset, the Initial Setup will automatically start when users turn on the device. -
Page 54: Turning On/Off Backlight
Turning On/Off Backlight Press the button for 3 seconds to turn on/off backlight. Backlight can be set to Always on, or you can set it to be automatically turned off after 10, 30, 60, or 120 seconds as displayed below. Go to Main Menu Setting General... -
Page 55: Starting/Stopping Logging
Starting/Stopping Logging Auto-Start Logging The GPSport 260 is set to automatically log your track once it is turned To pause logging during activity, just press the Power button and the icon “ ” will be replaced by pause icon “ ” as shown below. -
Page 56: Basic Operation
Basic Operation Basic Operation without Setting The GPSport 260 is designed to automatically log once it is on and GPS signal is received. Select Sport Mode from the main menu and the default first page Speed Meter appears. You are ready to use the basic function of this device. -
Page 58: Quick Menu
Quick Menu Press concurrently, the quick menu appears for fast setup including: enter Main Menu, Save POI, Pause Log, Save & Clear (log), and QR Code and Lock Keys. Save POI Save coordinates as POI (waypoint) Pause Log Pause track logging. Save &... -
Page 59: Status Icons
Status Icons The status icons indicates Sport mode, Compass icon, POI, Backlight, Satellite Status, Memory Mode and Battery. Sport mode icons: Bicycle mode Running mode Walking mode Vehicle mode Track Log icons: Track currently being logged Track currently not being logged Compass icons: The black arrow always points north The compass needs calibrating... - Page 60 Satellite mode icons: Satellite fix acquired Device currently attempted to acquire satellite fix Memory mode icons: Overwrite: Memory now in Overwrite mode Full Stop: Show % of remaining memory Battery status icons: Battery is being charged Battery is fully charged Low battery warning Note: When battery is extremely low, the device will be turned off automatically.
-
Page 61: Setting Up Gpsport 260
Setting Up GPSport 260 Quick Setup User-friendly Quick setup function allows you to quickly setup most common settings. Press the Menu button to enter Main Menu and choose Quick Setup to begin. Q1. Sport Mode appears. Use the Up/Down button to move to the desired sport mode. - Page 62 The Odometer page appears. Odometer A/B appears for users to choose between different trips. This is useful especially when users want to calculate mileages for different trips in different sport modes. Press the Up/Down button to select odometer. Press the OK button when finish.
-
Page 63: Alert
Alert The Alert function can be set for time, speed, distance and altitude. Time Alert - appears only when the pre-determined time is reached. Speed Alert - appears only when the pre-determined speed is reached. Distance Alert - appears only when the pre-determined distance is reached. Altitude Alert - appears only when the pre-determined altitude is reached. -
Page 64: To Set Time Alert
To Set Time Alert Press the Left/Right button to move to left/right. Press the Up/Down button to adjust the value. Press the OK button to confirm. iii. Press the Up/Down (Y) / (N) button to check Enable or leave it blank. iv. -
Page 65: To Set Distance Alert
Note: Speed must be set within the range of 1 to 500 (km/h). To Set Distance Alert Press the Left/Right button to move to left/right. Press the Up/Down button to adjust the value. Press the OK button to confirm. iii. Press the Up/Down (Y) / (N) button to check... -
Page 66: Reset Alert
iii. Press the Up/Down (Y) / (N) button to check Enable or leave it blank. Press the OK button to confirm and return to the Alert Menu. Note: Altitude must be set within the range of 1 to 9999 (m). Reset Alert You may also reset alert by selecting Reset Alert from the Alert submenu:... -
Page 67: Calibration
Altimeter Calibration A barometer is an instrument for determining the pressure generated by the weight of the atmosphere. Users can use GPSport 260 to determine their immediate altitude and altitude gained/lost. Barometer calibration is set to be automatically performed by default. - Page 68 2. the highest and lowest ones of the 5 log points are left out. There are 3 values remained. 3. Average the 3 values. The auto calibration is performed every time when the device is turned Auto Calibration: Main Menu Setting Calibration Altimeter...
- Page 69 Manual Calibration: Main Menu Setting Calibration Altimeter Manual Enter the current height by pressing the Up/Down button to adjust the value. Press the OK button to confirm and exit. Note: Altitude must be set within the range of -999 to +30,000 (m).
-
Page 70: Compass Calibration
Compass Calibration Main Menu Setting Calibration Compass Press the OK button to calibrate the compass. Step 1. Hold the compass level with the horizon. Make sure that you are not near any metallic or magnetic objects. Press the OK button. Step 2. - Page 71 Note: Users should always calibrate the compass at the start of their outdoor activities for more accurate log information.
-
Page 72: Log
Inteval The GPSport 260 is set to automatically log your track once it is turned on. The factory setting of automatic logging is set to log at interval of time/distance 10 m/5 sec. The GPSport 260 checks the distance every 5 seconds. - Page 73 The log Interval Auto is useful especially for users who do not want to repeatedly record one waypoint during a trip. Most cases, recording waypoints at the same place only because users were staying for a period of time is not necessary. Note: Time interval must be set within the range of 1 to 120 seconds;...
- Page 74 Auto-Start (Logging) Auto-Start means the GPSport 260 will automatically starts to log once the satellite signal is well received. User can enable/disable the auto logging by entering Setting Auto Start Yes/No Pause (Logging) Users can set the log to stop/pause recording when the speed is below a determined number from 1km to 5 km.
-
Page 75: General (Setting)
General (Setting) User Profile Users profile includes User’s age (Birth year), Weight and Height. Once the above information is entered, user’s BMI (Body Mass Index) value is determined. Refer to the following table for BMI categories. Body mass index by category Category Underweight Below 18.5... -
Page 76: Set Backlight
Set Backlight Backlight can be set to Always on if needed. To save power, backlight can be set to automatically off after it has been activated for 10, 30, 60 or 120 seconds. Auto Flip Page Users can enable the Auto Flip Page to rotate all sport information pages regularly by 5, 10, 30 or 60 seconds. -
Page 77: Memory Mode
Memory Mode As a data logger, the GPSport 260 is designed to automatically collect information upon activation, and can be left unattended for the duration of the monitoring period, the internal memory will be used up by recorded information. Overwrite Users can then determine if new data logs received should overwrite old data logs data logger by selecting Overwrite. -
Page 78: Auto Power Off
Auto Power Off The GPSport 260 can be set to be automatically powered off when there’s no GPS signal being detected for 15 minutes, 30 minutes, 1 hour, or 2 hours. Users can ignore the function and set to No which will keep the GPSport powered on even when there’s no GPS signal detected. -
Page 79: System Setting
System Setting Delete all log Select “Delete all log” will empty the internal memory and all recorded log data will be removed. Time Format System Time Format Select format “24 hours” and “12 hours”. -
Page 80: Time Zone
Time Zone System Time Zone Press the up and down button to select. Unit Unit Conversion converts units of Speed/Distance, Weight and Temperature. Speed/ Distance System Unit Speed/Distance Select “Distance/Speed” to choose metric as “km/m/kmh”, imperial as “mi/ft/mph” or nautical as “kt/nm”. -
Page 81: Language
Weight System Unit Weight Select “weight” to choose metric as “Kilogram/kg”, or imperial as “Pound/lb”. Language LCD Contrast LCD contrast can be adjusted in the LCD Contrast. Press the Up/Down button to select. -
Page 82: Odometer
Odometer You can save trip information in Odometer A or Odometer B. The default is Odometer A. The value of both odometers can be reset or modified. Press the left and right button to move among the number. Press up and down button to increase/decrease the value. When finished, press OK button to continue. -
Page 83: Gps
Enter GPS to view the signal strength or you can activate to Cold Start. Signal Setting Signal Cold Start Setting Cold Start Users are recommended to perform Cold Start when they travel for a long distance within a short period of time, say flying from Asia to Europe, for the GPS receiver may have problem to receive information about the current time, the orbits of the satellites or its own current position with previous GPS acquired. -
Page 84: Reset Device
Reset Device Press Reset Device to restore all settings to factory setting. Please note that all existing values and settings will be cleared except for Track logs in history, history name, finder point & name, odometer data, & POI data. Once the device is reset to factory setting, users will be prompted with the initial setup screen when the device is turned on. -
Page 85: About Eztour Plus And Eztour Planner
User define Placemark to plan the rest point at home Automatically show earth elevation as soon as the route is completed! Able to synchronize the route to GPSport 260 Import/Export .gpx .kml files for other usages Access multiple projects in the same project window. - Page 86 Allow users keep notes of every activity. Replay the activity on map and detailed information of every point. Analyze detailed information for user defined segment of activity. (marker1 marker2 support.) Export statistic data to Excel report. Plan routes before trip or activity. Automatically find route by start and end points setting.
-
Page 87: Normal Care And Maintenance
Normal Care and Maintenance To ensure the unit’s normal operation and extended life span, please note the following while using and storing: Do not drop the unit If violently impacted or shocked, serious damage may be caused. Avoid sudden temperature changes Condensation may occur when entering a warm room on a cold day. - Page 88 Please do not disassemble the product, this may void the warranty and damage the unit. Storage When the product is not being used for a long period, store the device in a cool and dry place. For long-term storage, keeping the unit in a dry box is recommended.
-
Page 89: Specifications
Specifications GPS Chip Chipset: MTK 3329 Dimensions 81.7x 54x 22 mm Weight Battery Rechargeable 1050 mAh lithium battery Power DC5V/1A Button 2 buttons : Menu / Power + 5 Direction keys Antenna Built-in patch antenna IO Interface Mini USB Display High-contrast electro-luminescent backlit display, 4-level grayscale LCD.
Need help?
Do you have a question about the GPSport 260 and is the answer not in the manual?
Questions and answers