Table of Contents
Advertisement
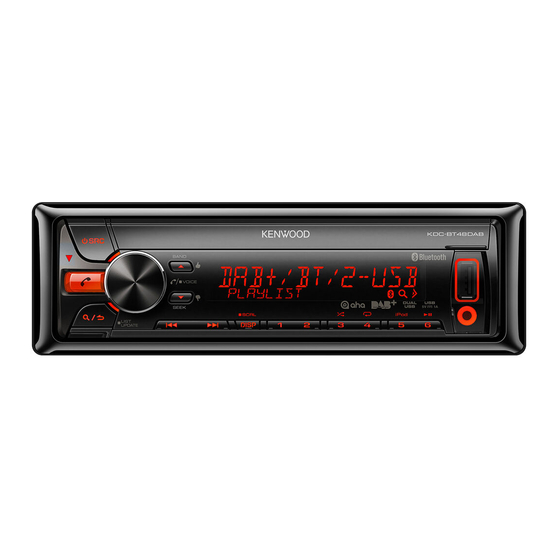
KDC-BT48DAB
CD-RECEIVER
INSTRUCTION MANUAL
AMPLI-TUNER LECTEUR DE CD
MODE D'EMPLOI
CD-RECEIVER
BEDIENUNGSANLEITUNG
CD RECEIVER
GEBRUIKSAANWIJZING
SINTOLETTORE STEREO COMPACT DISC
ISTRUZIONI PER L'USO
REPRODUCTOR DE DISCOS COMPACTOS RECEPTOR DE FM/AM
MANUAL DE INSTRUCCIONES
© 2013 JVC KENWOOD Corporation
GET0975-001A (EW/E0)
Advertisement
Table of Contents

Related Manuals for Kenwood KDC-BT48DAB


Summary of Contents for Kenwood KDC-BT48DAB
-
Page 1: Instruction Manual
KDC-BT48DAB CD-RECEIVER INSTRUCTION MANUAL AMPLI-TUNER LECTEUR DE CD MODE D’EMPLOI CD-RECEIVER BEDIENUNGSANLEITUNG CD RECEIVER GEBRUIKSAANWIJZING SINTOLETTORE STEREO COMPACT DISC ISTRUZIONI PER L’USO REPRODUCTOR DE DISCOS COMPACTOS RECEPTOR DE FM/AM MANUAL DE INSTRUCCIONES © 2013 JVC KENWOOD Corporation GET0975-001A (EW/E0) - Page 2 Entsorgung von gebrauchten elektrischen und elektronischen Geräten und Batterien (anzuwenden in den Ländern der Europäischen Union und anderen europäischen Ländern mit einem separaten Sammelsystem für solche Geräte) Das Symbol (durchgestrichene Mülltonne) auf dem Produkt oder seiner Verpackung weist darauf hin, dass dieses Produkt nicht als normaler Haushaltsabfall behandelt werden darf, sondern an einer Annahmestelle für das Recycling von elektrischen und elektronischen Geräten und batterien abgegeben werden muss.
- Page 3 Informazioni sullo smaltimento delle vecchie apparecchiature elettriche ed For Israel elettroniche e delle batterie (valide per i Paesi Europei che hanno adottato sistemi di raccolta differenziata) I prodotti e le batterie recanti il simbolo di un cassonetto della spazzatura su ruote barrato non possono essere smaltiti insieme ai normali rifiuti di casa.
- Page 4 Esto significa que el aparato utiliza rayos láser EU-Vertreter: Representante en la UE: considerados como de clase débil. No existe el peligro de que este aparato Kenwood Electronics Europe BV JVCKENWOOD NEDERLAND B.V. emita al exterior una radiación peligrosa. Amsterdamseweg 37, 1422 AC UITHOORN, Niederlande...
- Page 5 Šiuo, JVC KENWOOD, pareiškia, kad šis ce KDC-BT48DAB est conforme aux exigences JVC KENWOOD declara que este KDC-BT48DAB está S tem JVC KENWOOD izjavlja, da je ta KDC-BT48DAB KDC-BT48DAB atitinka pagrindinius Direktyvos essentielles et aux autres dispositions de la directive...
-
Page 6: Table Of Contents
CONTENTS BEFORE USE Warning BEFORE USE Do not operate any function that takes your attention away from safe driving. BASICS Caution Volume setting: GETTING STARTED • Adjust the volume so that you can hear sounds outside the car to prevent accidents. •... -
Page 7: Basics
BASICS Faceplate Remote control (RC-406) (not supplied) (However, this unit can be remotely controlled with an optionally purchased remote control.) Volume knob (turn/press) Display window Remote sensor (Do not expose to bright sunlight.) Pull out the insulation sheet when using for the first time. -
Page 8: Getting Started
GETTING STARTED Set the initial settings Press B SRC to enter STANDBY. Press the volume knob to enter [FUNCTION]. Turn the volume knob to make a selection (see the following table), then press the knob. Press and hold to exit. To return to the previous setting item or hierarchy, press Cancel the demonstration Default: XX... -
Page 9: Digital Radio (Dab)
For details on how to update the Press S / T: Search for a preset service. AUTO2: firmware, see: MANUAL: Press S / T: Select an ensemble, service or component. www.kenwood.com/cs/ce/ Press and hold S / T: Manually search for an ensemble. ENGLISH |... - Page 10 DIGITAL RADIO (DAB) • To store a service: Press and hold one of the number buttons Replay (1 to 6). Press and hold K SEEK (or press K on RC-406). • To select a stored service: Press one of the number buttons “REPLAY MODE”...
-
Page 11: Analog Radio
ANALOG RADIO DIGITAL RADIO (DAB) ASW SELECT TRAVEL, WARNINGS, NEWS, WEATHER, EVENT, SPECIAL, RAD INFO, SPORTS, FINANCE: Turn the volume knob to make a selection, then press the knob. “ ” appears in front of the activated announcement type. Automatically switch from any source to Digital radio ensembles broadcasting an activated announcement type. - Page 12 ANALOG RADIO • [LOCAL SEEK]/ [MONO SET]/ [NEWS SET]/ [REGIONAL]/ [AF SET]/ [PTY SEARCH] is Other settings selectable only when the band is FM1/ FM2/ FM3. Press the volume knob to enter [FUNCTION]. • Available Program Type: Turn the volume knob to make a selection (see the following table), SPEECH: NEWS, AFFAIRS, INFO (information), SPORT, EDUCATE, DRAMA, CULTURE, then press the knob.
-
Page 13: Cd / Usb / Ipod
• MP3/WMA/AAC/WAV file or iPod: FILE REPEAT, FOLDER REPEAT, REPEAT OFF USB cable from the rear of the unit • KENWOOD Music Editor Light (KME Light)/ KENWOOD Music Control iPod/iPhone (KMC) file ( 18): FILE REPEAT, REPEAT OFF USB input terminal Random play * Press 3 ... - Page 14 CD / USB / iPod Select a track/file from a list Direct Music Search (using RC-406) Set the skip search ratio For iPod: Applicable only when [MODE OFF] is Press DIRECT. While listening to iPod or KME Light/ KMC file... selected.
-
Page 15: Aux
RADIO Preparation: Preparation: Do this Select [ON] for [BUILT-IN AUX]. ( 5) Install the latest version of Aha Press 6 IW (or press Pause or resume application onto your device (iPhone/ Start listening ENT IW on RC-406). playback iPod touch), then create an account and log in to Aha Press S / T (or press Select a content... -
Page 16: Bluetooth
BLUETOOTH® You can operate Bluetooth devices using this unit. • Pairing request (via Bluetooth) is Pair a Bluetooth device automatically activated if an iPhone/iPod When connecting a Bluetooth device to touch is connected through the USB input Connect the microphone the unit for the first time, perform pairing terminal. - Page 17 BLUETOOTH® Bluetooth mobile phone Improve the sound quality during a call While talking on the phone... Do this Press the volume knob to enter [FUNCTION]. Receive a call Press or the volume knob or one of Turn the volume knob to make a selection (see the following table), then the number buttons (1 to 6) (or press press the knob.
- Page 18 BLUETOOTH® Bluetooth mode operations VOICE Speak the name of the contact you want to call or use the voice command to control the phone functions. ( 13, Use Voice Recognition) Press to enter Bluetooth mode. Turn the volume knob to make a selection (see the following table), BATT* LOW/ MID/ FULL: Shows the strength of the battery.
- Page 19 BLUETOOTH® Turn the volume knob quickly to enter alphabet search mode. Delete a contact The first menu (ABCDEFGHIJK) appears. To go to the other menu Not applicable for mobile phone that supports PBAP. (LMNOPQRSTUV or WXYZ1 ), press J / K. Turn the volume knob or press S / T to select the desired first Press to enter Bluetooth mode.
- Page 20 BLUETOOTH® Internet radio via Bluetooth Bluetooth audio player “DL PB ” appears and transfer the TRANSFER PB Operations and display indications may differ phonebook of the connected phone to Listen to Aha Radio according to their availability on the connected this unit manually.
-
Page 21: Audio Settings
AUDIO SETTINGS While listening to any source... LOUDNESS LEVEL1/ LEVEL2: Selects your preferred low and high frequencies boost Press the volume knob to enter [FUNCTION]. to produce a well-balanced sound at a low volume level. ; OFF: Cancels. Turn the volume knob to select [AUDIO CONTROL], then press the SUBWOOFER SET ON: Turns on the subwoofer output. ;... -
Page 22: Display Settings
• This unit supports the PC application KENWOOD Music Editor Light and Android™ application KENWOOD Music Control. • When you play audio files with song data added using the KENWOOD Music Editor Light or KENWOOD Music Control, you can search for audio files by Genres, Artists, Albums, Playlists, and Songs. -
Page 23: Troubleshooting
• Sound cannot be heard. Clean the connectors. ( 2) • You cannot operate iPod if “KENWOOD” or “ ” is displayed • The unit does not turn on. on iPod. • Information shown on the display is... - Page 24 Make sure you have installed the latest version of the Aha is not successful. • Reduce the distance from the microphone when you speak REQUIRED” application for KENWOOD application on your device. • “N/A VOICE TAG” the name. appears. • Make sure the same voice as the registered voice tag is “AHA UNAVAILABLE”...
-
Page 25: Specifications
SPECIFICATIONS TROUBLESHOOTING Symptom Remedy DAB Frequency Range L Band 1 452.960 MHz — 1 490.624 MHz Band III 174.928 MHz — 239.200 MHz Sound is being • Reduce the distance between the unit and the Bluetooth interrupted or skipped audio player. Sensitivity –100 dBm during playback of a •... - Page 26 SPECIFICATIONS Laser Diode GaAIAs Profile HFP (Hands-Free Profile) SPP (Serial Port Profile) Digital Filter (D/A) 8 times over sampling PBAP (Phonebook Access Profile) Spindle Speed 500 rpm — 200 rpm (CLV) OPP (Object Push Profile) A2DP (Advanced Audio Distribution Profile) Wow & Flutter Below measurable limit AVRCP (Audio/Video Remote Control Profile) Frequency Response (±1 dB)
-
Page 27: Installation / Connection
INSTALLATION / CONNECTION Warning Installing the unit (in-dash mounting) • The unit can only be used with a 12 V DC power supply, negative ground. • Disconnect the battery’s negative terminal before wiring and mounting. • Do not connect Battery wire (yellow) and Ignition wire (red) to the car chassis or Ground wire (black) to prevent a short circuit. - Page 28 Color and function Yellow : Battery (D) Wiring harness A5 Blue/White : Power control A7 Red : Ignition (ACC) To connect the Kenwood Brown A8 Black : Earth (ground) connection navigation system, consult your (Mute control wire) MUTE B1 Purple ] navigation manual.
- Page 29 Installing the DAB antenna Determine the antenna installation position • The direction of the film antenna (F) changes depending on whether the film antenna (F) is installed on the Caution right side or left side. • The film antenna (F) is exclusively for use inside the vehicle. •...
- Page 30 Installation overview – Wait until the glass surface is completely Caution dry before proceeding. The antenna should be installed on the passenger side for When installing the antenna cable inside – Warm the surface of the windscreen with safety. the front pillar with the air bag installed defroster if it is cold (during winter).
- Page 31 Remove the application film (tag III). Remove the film covering the earth sheet and paste the earth sheet on the metal part of the vehicle. Provide sufficient leeway for the earth sheet so that it does not interfere with the interior parts (front pillar cover). Also take care that the interior parts do not interfere with the amplifier unit (G).
Need help?
Do you have a question about the KDC-BT48DAB and is the answer not in the manual?
Questions and answers