
Subscribe to Our Youtube Channel
Related Manuals for ResMed VPAP III


Summary of Contents for ResMed VPAP III
-
Page 1: User Manual
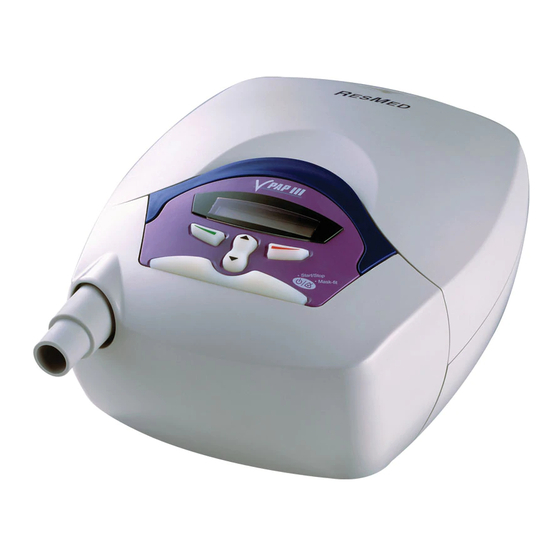
VPAP III & III ST ™ User Manual English 248127/1 VPAP III & III ST User Manual 248127/1 05 07 Global leaders in sleep and respiratory medicine www.resmed.com... - Page 2 HumidAire 2iC ™ station Handle Water LCD screen chamber Control panel Removable Air outlet front cover HUMIDAIRE 2iC AND VPAP ResMed Passover HumidAire ™ Air filter cover Power switch Serial communications Power socket port (9-pin) Auxiliary port (15-pin) OTHER ACCESSORIES Docking...
- Page 3 ATTACHING A HUMIDAIRE HUMIDIFIER ATTACHING A PASSOVER HUMIDIFIER REPLACING THE AIR FILTER (52 cm) (52 cm) (2 m/3 m) (2 m/3 m)
- Page 4 VPAP III & III ST ™ User Manual English...
- Page 5 Manufactured by: ResMed Ltd 1 Elizabeth MacArthur Drive Bella Vista NSW 2153 Australia Tel: +61 (2) 8884 1000 or 1 800 658 189 (toll free) Fax: +61 (2) 8883 3114 Email: reception@resmed.com.au Distributed by: ResMed Corp 14040 Danielson Street Poway CA 92064-6857 USA Tel: +1 (858) 746-2400 or 1-800-424-0737 (toll free) Fax: +1 (858) 746-2900 Email: reception@resmed.com...
-
Page 6: Table Of Contents
........1 What the VPAP III and VPAP III ST are Intended for... - Page 7 Limited Warranty ........43 Index .
-
Page 8: Introduction
Medical Information What the VPAP III and VPAP III ST are Intended for The VPAP III and VPAP III ST systems are intended to provide non-invasive ventilation for patients with respiratory insufficiency or obstructive sleep apnoea (OSA), in the hospital or home. -
Page 9: Warnings
The VPAP should be used with masks and accessories recommended by • ResMed or the prescribing physician. Use of incorrect masks and accessories may adversely affect the function of the VPAP . The VPAP is designed for use with masks that allow exhaled gases to be •... -
Page 10: Adverse Effects
Note: The above are general warnings and cautions. Further specific warnings, cautions and notes appear next to the relevant instructions in the manual. Adverse Effects You should report unusual chest pain, severe headache or increased breathlessness to your physician. An acute upper respiratory tract infection may require temporary discontinuation of treatment. -
Page 12: The Vpap System
1.5 m away from, or at least 2.5 m above the patient. It must also comply with IEC 60950 or equivalent. Masks You will also need a ResMed mask system (supplied separately). The following ResMed mask systems are recommended for use with the VPAP: Nasal Masks Ultra Mirage™ Nasal Mask •... -
Page 13: Humidifiers
To select an appropriate setting for another mask system, find the closest match to a ResMed mask in Table 3 on page 23. Not all masks are available in all regions. -
Page 14: Setting Up The Vpap System
Connect one end of the air tubing firmly onto the air outlet of the unit (D-2). WARNING Only ResMed air tubing should be used with your flow generator. A different type of air tubing may alter the pressure you actually receive and reduce the effectiveness of your treatment. - Page 15 Attaching a HumidAire 2i Humidifier Please refer to the illustrations in section E of the illustration sheet. attaches to the front of the VPAP to provide heated HumidAire 2i humidification. No other accessories are required for its use. The VPAP automatically detects the presence of the .
- Page 16 7 . Navigate to the humidifier setting (if available) in the VPAP menu and select "PASSOVER". See “How to Use the Detailed Menu (if enabled by your clinician)” on page 20. The VPAP is now ready for use with the ResMed . To start Passover treatment, see “Starting Treatment”...
-
Page 17: Using The Lcd Screen And Keypad
Using the LCD Screen and Keypad The control panel of the VPAP includes an LCD screen and keypad. LCD screen Left key Right key Up/down key Front key LCD Screen The LCD screen displays the menus and treatment screens. To assist you in adjusting the VPAP, the keypad and LCD are equipped with a backlight. - Page 18 Function Left (green) • Performs the function indicated by the guiding text displayed above it on the LCD screen. Guiding text includes menu, enter, change and apply. Right (red) • Performs the function indicated by the guiding text displayed above it on the LCD screen. Guiding text includes exit and cancel The keypad backlight is on at all times when the VPAP is powered.
-
Page 20: Starting Treatment
Starting Treatment The VPAP unit should be assembled beside your bed with the air tubing and mask system connected. See “Setting Up The VPAP” on page 7. Turn the main power switch at the back of the unit to on (I). Main power switch... -
Page 21: Stopping Treatment
Stopping Treatment To stop treatment at any time, remove your mask and press the Front key if your clinician has enabled the SmartStart function, simply remove your mask and treatment will end (SmartStop is not applicable with the "Mir Full" mask setting). - Page 22 Once you have a secure and comfortable fit, check your Mask-Fit star rating on the LCD screen. Definitions of the Mask-Fit star ratings are presented in Table 1. Note: If there is another person nearby to check your Mask-Fit star rating, you can adjust your mask, mask cushion and headgear while lying down.
-
Page 24: Cleaning And Maintenance
Cleaning and Maintenance You should regularly carry out the cleaning and maintenance described in this section. Daily Cleaning Mask Clean the mask according to the instructions supplied with the mask. Air tubing Disconnect the air tubing from the VPAP unit (and humidifier, if used) and hang the tubing and mask in a clean, dry place until next use. -
Page 25: Replacing The Air Filter
Note: The air filter should be inspected once a month. Servicing This product (VPAP III/VPAP III ST) should be inspected by an authorised ResMed service centre 5 years from the date of manufacture. Prior to this, the device is intended to provide safe and reliable operation provided that it is operated and maintained in accordance with the instructions provided by ResMed. -
Page 26: How To Use The Vpap Menus
How to Use the VPAP Menus The VPAP unit provides a set of functions arranged in menus and submenus. Via the LCD screen, the menus and submenus allow you to view and change the settings for a particular function. You can access the menus regardless of whether the VPAP is in standby mode or delivering therapy. -
Page 27: How To Use The Detailed Menu (If Enabled By Your Clinician)
VPAP screen Ramp screen Options: RESMED VPAP III RAMP: 20min OFF, 5, 10, 15, 20, 25, menu menu 30, 35, 40, 45 min USED: 00000hrs View only 00000/00000days SW: SX3650201 View only exit Figure 1: VPAP Standard Menu Series To access the VPAP menus: •... - Page 28 VPAP screen Ramp screen OFF, 5, 10, 15, 20, 25, RESMED VPAP III RAMP: 20min 30, 35, 40, 45 min menu menu SETTINGS enter exit MIRAGE, MIR FULL, MASK: ULTRA change exit STANDARD, ULTRA TUBE LENGTH: 2M TUBE LENGTH: 2m...
-
Page 29: Menu Functions (Detailed Menu Only)
To access the VPAP menus: • Press the Left key (menu) while the (or Ramp) screen is displayed. VPAP To scroll through items within a menu or submenu: • Press the Up/Down key To enter a submenu: • Press the Left key (enter). To change a setting option for a function: •... - Page 30 See “SmartStart™” on page 23. Mask Alarm Turns the Mask Alarm signal on ON/OFF (VPAP III ST); or off. If enabled, the Mask Alarm (VPAP III) feature will alert you when a high mask leak is detected. An...
-
Page 31: Results Menu
Ultra Mirage Full Face Mask Results Menu Note: This menu appears only if at least one Smart Data™ option has been enabled by the clinician. See the VPAP III Smart Data Diary for further details. Table 4: Results Menu Function... -
Page 32: Options Menu
Options Menu Table 5: Options Menu Function Default Function Description Setting Options Smart Data The Smart Data menu is ON/OFF –Auto displayed only if one or more Appear of the options have been set to ON by the clinician. If Auto Appear is set to ON, the Smart Data screens are displayed upon powering up of the device. -
Page 33: Treatment Screens
The treatment screens contain the following information: Treatment mode: Mode of treatment set by your clinician. Options include: CPAP, Spontaneous, Spontaneous/Timed (VPAP III ST) and Timed (VPAP III ST). Ramping indicator: Appears if the VPAP is in ramp mode. This disappears once the ramp time has elapsed. - Page 34 Minute ventilation: Volume of air inhaled per minute (units: litres per minute). It is the product of respiratory rate and tidal volume. Tidal volume: Volume of air inhaled per breath (units: millilitres per breath). Cycle indicator: How the VPAP changes the pressure when you are exhaling.
-
Page 36: Helpful Hints
Helpful Hints Starting out Mouth Leaks If using a nasal mask, try to keep your mouth closed during treatment. Air leaks from your mouth can decrease the effectiveness of your treatment. If mouth leaks are a problem, a full face mask or chin strap may help. Contact your clinician or equipment supplier for further details. - Page 37 Note: When using the VPAP with a HumidAire 2i, use a pure sine wave inverter not a modified sine wave inverter. Please refer to the VPAP III battery power guide for battery capacities and further details.
-
Page 38: Troubleshooting
Troubleshooting If there is a problem, try the following suggestions. If the problem cannot be solved, contact your equipment supplier or ResMed. Do not attempt to open the unit. Problem Possible Cause Solution No display. Power not connected or Ensure the power cable is switch at back is not on. - Page 39 Incompatible humidifier or Use only equipment as but the flow mask system being used. recommended and generator does not supplied by ResMed. stop automatically when you remove your mask. Display error The air tubing is loose. Check that the air tubing...
- Page 40 Problem Possible Cause Solution Excessive motor Component failure. Return your unit for noise. servicing. Display error You have experienced Check that your air tubing message: excessively high leak is connected properly and High leak levels during the night. that your mask does not in last session leak excessively.
-
Page 42: System Specifications
System Specifications Dynamic pressure characteristics IPAP: 2 cm H O to 25 cm H O (measured at the end of standard 2 m air tubing) EPAP: 2 cm H O to 25 cm H O (measured at the end of standard 2 m air tubing) CPAP: 4 to 20 cm H O (measured at the end of standard 2 m air tubing) - Page 43 Air Tubing: Flexible plastic, 2 m or 3 m length IEC 60601-1 Classifications Class II (double insulation) Type CF Table 7: Displayed values Display Value Range Accuracy Resolution Pressure sensor at air outlet Pressure -5 to 30 cm H ±0.5 cm H 0.1 cm H Flow sensor in flow generator* Leak...
- Page 44 Pressure Variation 25.00 Max Pressure 20.00 15.00 2/3 Max Pressure 10.00 1/3 Max Pressure 5.00 10 BPM 15 BPM 20 BPM 0.00 Breaths Pressure Volume curve 1/3 Max Pressure 2/3 Max Pressure 13.1 13.2 13.3 13.4 13.5 13.6 Pressure (cm H Pressure (cm H Max Pressure 10 BPM...
- Page 45 If you need information on these disposal systems, please contact your local waste administration. The crossed-bin symbol invites you to use these disposal systems. If you require information on collection and disposal of your ResMed device please contact your ResMed office, local distributor or go to www.resmed.com/environment.
- Page 46 Guidance and Manufacturer’s Declaration - Electromagnetic Emissions and Immunity Guidance and manufacturer’s declaration – electromagnetic emissions The VPAP is intended for use in the electromagnetic environment specified below. The customer or the user of the VPAP should assure that it is used in such an environment. Electromagnetic environment - Emissions test Compliance...
- Page 47 Guidance and manufacturer’s declaration – electromagnetic immunity The VPAP is intended for use in the electromagnetic environment specified below. The customer or the user of the VPAP should assure that it is used in such an environment. Electromagnetic IEC60601-1-2 Compliance Immunity test environment –...
- Page 48 Guidance and manufacturer’s declaration – electromagnetic immunity (Continued) The VPAP is intended for use in the electromagnetic environment specified below. The customer or the user of the VPAP should assure that it is used in such an environment. Immunity IEC60601-1-2 Compliance Electromagnetic environment –...
- Page 49 Recommended separation distances between portable and mobile RF communications equipment and the VPAP The VPAP is intended for use in an environment in which radiated RF disturbances are controlled. The customer or the user of the VPAP can help prevent electromagnetic interference by maintaining a minimum distance between portable and mobile RF communications equipment (transmitters) and the VPAP as recommended below, according to the maximum output power of the communications equipment.
-
Page 50: Limited Warranty
Note: Some models are not available in all regions. If the product fails under conditions of normal use, ResMed will repair or replace, at its option, the defective product or any of its components. This Limited Warranty does not cover: a) any damage caused as a result of improper use, abuse, modification or alteration of the product;... - Page 52 Index Accessories 6 IEC 60601-1 Classifications 36 Air filter 18 International Use 29 air tubing 36 cleaning 17 keypad 10 Keys, functions 10 Back-light, LCD and Keypad 10 LCD screen 10 Cautions 2 Left Key 11 cleaning periodic 17 weekly 17 Mask Alarm 23 Cleaning and Maintenance 17 Mask Fitting 29...
- Page 53 Servicing 18 Servicing Menu 25 setting up 7 Settings Menu 22 SmartStart 23 Standard Menu 20 Starting Treatment 13 Stopping Treatment 14 System Specifications 35 Travelling 29 treatment screen 26 Troubleshooting 31 Up/Down Key 10 Used (time) screen 19 User/Owner Responsibility 1 Using the Mask-Fitting feature 14 Using the Menus 19 Weekly Cleaning 17...
Need help?
Do you have a question about the VPAP III and is the answer not in the manual?
Questions and answers