Axis 243SA User Manual
Hide thumbs
Also See for 243SA:
- Specifications (6 pages) ,
- Installation manual (55 pages) ,
- User manual (84 pages)
Table of Contents
Advertisement
Quick Links
Download this manual
See also:
Installation Manual
Advertisement
Table of Contents

Related Manuals for Axis 243SA


Summary of Contents for Axis 243SA
- Page 1 AXIS 243SA Video Server User’s Manual...
- Page 2 Search by product, category, or phrases more of the following measures: Re-orient or relocate the • report problems to Axis support staff by logging in to your receiving antenna. Increase the separation between the private support area equipment and receiver.
- Page 3 • Dispose of used batteries according to the manufacturer's instructions. AXIS 243SA Video Servers User’s Manual Revision 1.0 Dated: October 2007 Part No:30267 Copyright© Axis Communications AB, 2007...
-
Page 4: Table Of Contents
AXIS Media Control (AMC) ........ - Page 5 AXIS 243SA Pan Tilt Zoom ..............38 Installing PTZ devices .
- Page 6 AXIS 243SA Glossary ............... 75...
-
Page 7: Product Description
As the AXIS 243SA is designed for use in security systems, it is equipped with several security features, such as IP address filtering, several user levels with passwords and HTTPS. -
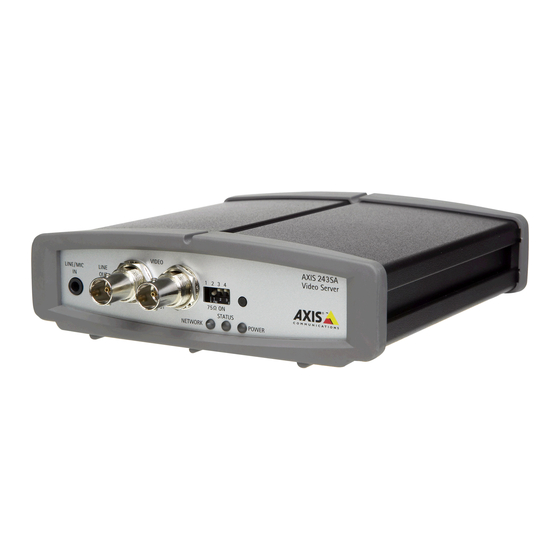
Page 8: Led Indicators
Flashes green/amber during firmware upgrade. Switches & connectors DIP switch - The AXIS 243SA provides a single DIP switch for line termination of the video input. Upon delivery the DIP (dual in-line package) switch on the AXIS 243SA is configured for composite video input, as follows:... -
Page 9: Rear Panel
• The AXIS 243SA supports conversion between composite video and Y/C (S-Video) using a Y/C to BNC cable (not supplied). Control Button - Press this button to restore the factory default settings, as described in Resetting to the factory default settings, on page 59, or to install the video server using AXIS Internet Dynamic DNS Service (See the Axis Video Server Installation Guide). - Page 10 AXIS 243SA - Product description Network connector - The AXIS 243SA connects to the network via a standard network cable, and automatically detects the speed of the local network segment (10BaseT/100BaseTX Ethernet). RS-232 connector - A 9-pin D-SUB connector providing an RS-232 serial connection.
-
Page 11: Using Axis 243Sa
To view streaming video in Microsoft Internet Explorer, set your web browser to allow the installation of AXIS Media Control (AMC) on your computer. AMC is required to enable audio in the AXIS 243SA. AMC also provides an MPEG-4 decoder for viewing MPEG-4 video streams. This decoder is installed the first time an MPEG-4 video stream is accessed. -
Page 12: The Live View Page
Using AXIS 243SA The Live View page If your AXIS 243SA has been customized to meet specific requirements, the buttons and other items described below may or may not be displayed on the Live View page. The following provides an overview of each available button: The Video Format drop-down list allows you to temporarily change the video format on the Live View page. - Page 13 Using AXIS 243SA Click the Record button to start a recording. The button must be configured to appear on the Live View Settings page. AMC Audio controls There are audio controls for controlling the client computer’s speaker output and microphone/line input.
-
Page 14: Video And Audio Streams
Video and audio streams Video and audio streams The AXIS 243SA provides several video and audio stream formats. The type you want to use depends on your requirements and the properties of your network. The Live View page in AXIS 243SA provides access to Motion JPEG and MPEG-4 video and audio streams, and to single JPEG images. -
Page 15: Mpeg-4 Protocols And Communication Methods
The recommended method of accessing live video (MPEG-4 and/or Motion JPEG) and audio from the Axis video server is to use the AXIS Media Control (AMC) in Microsoft Internet Explorer in Windows. This ActiveX component is automatically installed on first use, after which it can be configured by opening the AMC Control Panel applet from the Windows Control Panel. -
Page 16: Other Methods Of Accessing The Video Stream
Video/images from the Axis video server can also be accessed in the following ways: • If supported by the client, the Axis video server can use Motion JPEG server push to display video. This option maintains an open HTTP connection to the web browser and sends data as and when required, for as long as required. - Page 17 To access the video stream, for example, from QuickTime™ the following path can be used: rtsp://<ip>/mpeg4/#/media.amp This path is for all supported methods, and the client will negotiate with the Axis video server to determine which transport protocol to use.
-
Page 18: Configuring The Video Server
Accessing the Setup tools Follow the instructions below to access the Setup Tools from a web browser. 1. Start the browser and enter the IP address or host name of the Axis video server in the location/address field. 2. The Live View page is now displayed. Click Setup to display the Setup tools. -
Page 19: Video & Image Settings
AXIS 243SA - Video & image settings Video & image settings The following descriptions show examples of the available features in the AXIS 243SA. For details of each setting, please refer to the online help available from each page. Click access the online help. -
Page 20: Video Source Settings
AXIS 243SA - Video & image settings Video Stream The Maximum video stream time can be set as Unlimited, or set a maximum stream time per session in seconds, minutes or hours. When the set time has expired, a new stream on the Live View page can be started by refreshing the page in the web browser. -
Page 21: Advanced - Mjpeg Settings
AXIS 243SA - Video & image settings Advanced - MJPEG settings Sometimes the image size is large due to low light or complex scenery. Adjusting the maximum frame size helps to control the bandwidth and storage used by the MJPEG video stream in these situations. - Page 22 Windows 4-bit BMP (16 colors) Overlay image limitations: • The maximum overlay image size supported by AXIS 243SA is the same as the maximum image resolution. See Technical Specifications, on page 69. • When a text overlay is also used, this reduces the amount of space available to the overlay image.
- Page 23 AXIS 243SA - Video & image settings 4. Click in the box beside Enable to enable one or more of the masks you have defined and click on Save.
-
Page 24: Audio
AXIS 243SA - Audio Audio The AXIS 243SA can transmit audio to other clients using an external microphone and can play audio received from other clients by attaching a speaker. The Setup page has an additional menu item called Audio, which allows different audio configurations, such as, full duplex, half duplex and simplex. - Page 25 Audio from an external microphone or a line source can be connected to the Line/Mic In jack of the AXIS 243SA. The audio source can be set to Microphone or Line. If you are using a microphone, the input sensitivity can be set to High or Low. See Technical specifications, on page 69 for the exact maximum levels.
- Page 26 If the sound from the speaker is too low or high it is possible to adjust the output gain for the active speaker attached to the Axis video server. When satisfied with the settings, click Save, or click Reset to revert to the previously saved settings.
- Page 27 AXIS 243SA - Audio The noise canceller threshold value can be set to High, Medium High, Medium low and Low. A lower threshold allows most of the audio to pass. Only the weakest background noise is reduced. A higher threshold makes the noise canceller act on even stronger background noise.
-
Page 28: Live View Config
AXIS 243SA - Live View Config Live View Config Layout These are the tools for deciding the layout of the Live View page. The layout can be set in three ways: • Use Axis look - the lay- out is unchanged. - Page 29 AXIS 243SA - Live View Config Upload Own Web Files Your own web files, or background pictures must first be uploaded to the Axis video server in order that it appears for selection in the Custom Settings setup dialog. Once uploaded, the files are shown in the drop-down list.
-
Page 30: Html Examples
AXIS 243SA - Live View Config For more information on the VAPIX API, see the Developer pages at the Axis web site www.axis.com/developer. See also the section on PTZ, on page 38. Action Buttons The manual trigger buttons can be used to manually start and stop an event from the Live View page. -
Page 31: External Video
External Video You can add links to other Axis network devices available over the network. These sources can be displayed on the Live View page, just as if they were video sources connected directly to the Axis video server. -
Page 32: Event Configuration
Event Servers are used for receiving uploaded image files and/or notification messages. To set up an Event server for your AXIS 243SA, go to Setup > Event Configuration > Event Servers and enter the required information according to the selected server type. -
Page 33: Event Types
• camera tampering • PTZ presets How to set up a triggered event The following is an example for setting the Axis video server to upload images when a door is opened: 1. Click Add triggered in the Event types page. - Page 34 Configure as for pre-trigger. Note: If the pre- or post-buffer is too large for the AXIS 243SA's internal memory, the frame rate is reduced and individual images may be missing. If this occurs, an entry will be created in the unit's log file.
-
Page 35: Camera Tampering
In the Motion Detection menu, you can configure the video source(s) for motion detection. The motion detection feature is used to generate an alarm whenever movement occurs (or stops) in the image. AXIS 243SA can use up to 10 motion detection windows. • Include windows target specific areas within the image •... - Page 36 AXIS 243SA - Event configuration Note: Using the motion detection feature may decrease overall performance in the video server. How to configure Motion Detection This example describes how to configure motion detection: 1. Click Motion Detection in the Event Configuration menu.
-
Page 37: Port Status
Under Event Configuration > Port Status, there is a list that shows the status for the connected inputs and outputs of the Axis video server. This is for the benefit of an operator, who cannot access the System Options section. -
Page 38: Pan Tilt Zoom
AXIS 243SA - Pan Tilt Zoom Pan Tilt Zoom Installing PTZ devices AXIS 243SA supports several PTZ devices. Please see www.axis.com for a complete list of supported devices, and to obtain the correct driver. Follow the instructions below to install a PTZ device: 1. -
Page 39: Ptz Configuration
HTTP specification for generic control of PTZ devices using CGI commands or a TCP/IP client. Please refer to the Axis website at www.axis.com for further information. PTZ configuration Once PTZ has been installed for the AXIS 243SA, PTZ Configuration now appears in the menu to the left along with the following sub menus. Preset positions A preset position is a pre-defined camera view than can be used to quickly move the camera to a specific location. - Page 40 PTZ driver and are displayed in the PTZ Panel. Limits - Define the pan, tilt, zoom and focus limits for the Axis video server. Movements to the left and right, up and down can be restricted to narrow the area under surveillance.
- Page 41 Use the PTZ control queue window to enable and disable PTZ queueing. This window allows you to set up a queue for viewers wanting to access the Axis video server, and limits the number of viewers and the length of time each viewer can access and control the PTZ unit.
- Page 42 The administrator will be removed from the queue 60 seconds after their last PTZ control command. 2. Event - The AXIS 243SA can be set up to take control of the queue and move to a specific position for 20 seconds when triggered by an alarm. The event will immediately be placed first in the queue, except when an administrator is in control.
-
Page 43: Ptz Controls
AXIS 243SA - Pan Tilt Zoom PTZ controls If the Axis video server has been appropriately configured, the Live View page displays the controls available for the installed Pan Tilt Zoom (PTZ) device. The administrator can enable/disable the controls for specified users. - Page 44 The camera stops moving when the button is released. Note: There is also joystick support in AXIS Media Control (AMC). Control panel The focus and iris (image brightness) can be adjusted manually by using the control bars, or they can be set for automatic adjustment, by clicking the Auto iris and Auto focus buttons.
- Page 45 There are also driver specific shortcuts that can appear in the Control Panel. In the screen to the right, a driver has been installed that brings up the Wiper shortcut button, which allows the user to configure and use a windshield wiping action with the Axis video server.
-
Page 46: System Options
Referrals - to prevent unauthorized sources from including the video stream from the AXIS 243SA into external Web pages, check the Referrals box and enter the IP address or host name of the computer that hosts the Web pages with the included video stream. -
Page 47: 802.1X - Network Admission Control
Protocol over SSL (Secure Socket Layer)). That is, all communication that would otherwise go via HTTP will instead go via an encrypted HTTPS connection. Certificate - to use HTTPS for communication with the AXIS 243SA, a Certificate must be created using one of these methods: •... - Page 48 The one used in the Axis implementation is EAP-TLS (EAP-Transport Layer Security). The AXIS network video device presents its certificate to the network switch, which in turn forwards this to the RADIUS server. The RADIUS server validates or rejects the certificate and responds to the switch, and sends its own certificate to the client for validation.
- Page 49 Protected network 1. A CA server provides the required signed certificates. 2. The Axis video device requests access to the protected network at the network switch. The switch forwards the video device’s CA certificate to the RADIUS server, which then replies to the switch.
-
Page 50: Date & Time
Network - Basic TCP/IP settings IP Address Configuration Your Axis network camera supports both IP version 4 and IP version 6. Both versions may be enabled simultaneously, and at least one version must always be enabled. When using IPv4, the IP address can be set automatically via DHCP, or a static IP address can be set manually. - Page 51 IP address change (under Services) to receive notification from the camera when the IP address changes. • Alternatively, if your DHCP server can update a DNS server, you can access the AXIS 243SA by host name which is always the same, regardless of the IP address.
-
Page 52: Network - Advanced Tcp/Ip Settings
Host name configuration The AXIS 243SA can be accessed using a host name, instead of an IP address. The host name is usually the same as the assigned DNS Name. For more information, please see the online help... -
Page 53: Socks
Use NAT traversal when your video server is located on an intranet and you want to make it available from the other side of a NAT router. The FTP server running in the Axis video server enables the upload of new firmware, and user applications. Check the box to enable the service. -
Page 54: Qos (Quality Of Service)
The QoS in Axis network video products marks the data packets for various types of network traffic originating from the product. This makes it possible for network routers and switches to reserve a fixed amount of bandwidth for these types of traffic. -
Page 55: Snmp
Unit connectors, on page 60. RS232 - The COM port RS-232 on the AXIS 243SA supports several operational modes listed on this page. For more information, please see COM ports RS-232 and RS-485, on... -
Page 56: Maintenance
AXIS 243SA - System options RS485 - The COM ports on the AXIS 243SA supports several operational modes listed on this page. For more information, please see COM ports RS-232 and RS-485, on page 62. Maintenance • Restart - The unit is restarted without changing any of the settings. Use this method if the unit is not behaving as expected. - Page 57 The System Overview provides a summary of the status of the video server. Logs & Reports When contacting Axis support, please be sure to provide a valid Server Report with your query. The Access Log is automatically included in the server report.
-
Page 58: Advanced
For more information, please visit the Developer pages at www.axis.com/developer Plain Config - this function is for the advanced user with experience of Axis video server configuration. All parameters can be set and modified from this page,... -
Page 59: Resetting To The Factory Default Settings
AXIS 243SA - System options Resetting to the factory default settings To reset the AXIS 243SA to the original default settings, go to the System Options > Maintenance web page (described in Maintenance, on page 56) or use the control button... -
Page 60: Unit Connectors
• Y/C to BNC cable, on page 63 The D-Sub connector The Axis video server provides one 9-pin D-Sub connector, providing the physical interface for an RS-232 port, used for connecting accessory equipment; such as standalone PTZ devices for the remote control of connected video cameras. -
Page 61: The I/O Terminal Connector
PTZ devices, for example. RS-485 - B (inverting) The Axis video server includes one (green) 12-pin connector block. Connect input/output devices to this block: 1. Loosen the corresponding screw on top of the pin on the connector block (see the table above to determine which pin to use). -
Page 62: Schematic Diagram - I/O Terminal Connector
HTTP • Pan Tilt Zoom (PTZ) - for controlling a PTZ device. A PTZ device requires a driver for its function. Drivers can be obtained from www.axis.com. Please see page 38 for information on how to connect PTZ devices. -
Page 63: Y/C To Bnc Cable
4. Set the DIP switches on the front panel of the unit to 1=ON, 2=OFF, 3=ON, 4=OFF. 5. Go to AXIS 243SA web pages under Setup > Video & Image > Video Source and select Y/C (S-video) from the Physical connector drop-down list. -
Page 64: Troubleshooting
Note: Pre-configured and customized settings will be retained for use when the new firmware is running (pro- vided the features are available in the new firmware) although this is not guaranteed by Axis Communica- tions. 1. Save the firmware file to your computer. The latest version of the Axis video server firmware is available free of charge from the Axis Web site at www.axis.com/techsup or from your local distributor. -
Page 65: Support
2. If the unit does not reply within a few seconds, restart it and wait for a reply. Press CTRL+C to stop Ping. 3. Open a web browser and type in the Axis video server’s IP address. In the page that appears, use the Browse button to select the file (for example, axis243sa.bin). Then click the Load button to restart the upgrade process. -
Page 66: Symptoms, Possible Causes And Remedial Actions
The IP address must be set within two minutes after power has been applied to the video server. Restart the server and try again. Ensure also the ping length is set to 408. (See the Axis video server Installation Guide) - Page 67 Using only 16 or 256 colors on your display will produce dithering artifacts in the image. Incorrect exposure in images Incorrect line termination If the Axis video server is to be connected in loop through with other equipment, disable the input termination by turning the corresponding DIP switch to OFF. Problems with the MPEG-4 format Lower frame rate than expected.
- Page 68 Audio volume too low/high Volume settings incorrect. The volume of the microphone or speaker connected to the AXIS 243SA is either too high or too low. Change the volume for the speaker or microphone in the Live View page. Input and output gain set incor- Change the input gain for the microphone and the output gain for the speaker to adjust the rectly.
-
Page 69: Technical Specifications
Technical specifications Item Specification Models • AXIS 243SA: One video channel, two-way audio * Also available as Blade versions for Axis Video Rack Solution Video compression • Motion JPEG • MPEG-4 Part 2 (ISO/IEC 14496-2) • Profiles: ASP and SP Resolutions •... - Page 70 • Camera live view for up to 20 clients, browser • Video recording to file (ASF), • Sequence tour for up to 20 PTZ presets or external Axis video sources • Customizable HTML pages Minimum Web browsing • Pentium III CPU 500 MHz or higher, or equivalent AMD,128 MB RAM, DirectX 9...
- Page 71 • licenses for 1 encoder and 1 decoder, • decoder software for Windows Video management • AXIS Camera Station - Video management software for viewing, recording and software (not included) archiving up to 25 cameras See www.axis.com/partner/adp_partners.htm for further software applications via partners Accessories (not included) •...
-
Page 72: General Performance Considerations
To see the bandwidth and frame rate currently required by the video stream, the AXIS 243SA provides a tool that can be used to display these values directly in the video image. To do this, special format strings are added as part of a text overlay. -
Page 73: Frame Rates - Motion Jpeg
Frame rates - MPEG-4 The following test results show the frame rates in frames/second (fps) for MPEG-4 streams from the AXIS 243SA. Note that these values are guidelines only - actual values may vary. The MPEG-4 test conditions: • Compression level = 50% •... - Page 74 AXIS 243SA - Technical specifications There are also factors in the monitored scene that will affect the bandwidth. These are: • the amount of motion • the image’s complexity • the lighting conditions For MPEG-4, if there is only limited bandwidth available, and if this is more important than the image quality, using a constant bit rate (CBR) is recommended.
- Page 75 IP address to access the product from a web browser. AXIS IP Utility - A tool for discovering and setting IP Active Speaker - a speaker with a built-in power addresses for Axis network devices. AXIS IP Utility is amplifier.
- Page 76 There are three basic ETRAX (Ethernet Token Ring AXIS) - The ETRAX chip is types of Video Control Unit: Multiplexer, Switch and the cornerstone of Axis technology and the 'brain' in Quad.
- Page 77 AXIS 243SA - Glossary integrated Ethernet networking and extremely flexible I/O at the gateway, and a switch, which furnishes the actual options. path in and out of the gateway for a given packet. Factory default settings - These are the settings that...
- Page 78 AXIS 243SA - Glossary 1 frame. Interlacing was developed many years ago for commonly used on the web. A JPEG image is a bitmap, the analog TV world and is still used widely today. It and usually has the file suffix '.jpg' or ".jpeg." When...
- Page 79 AXIS 243SA - Glossary the coding format used by standard commercial DVD networked PC, or a dedicated video recording hard disk movies. server with its own software application. MPEG-4 - MPEG-4 is a group of audio and video coding PAL (Phase Alternating Line) - PAL is an analog color standards and related technology.
- Page 80 A router is sometimes along its vertical axis, and zooming is the adjustment of included as part of a network switch. See also Switch. the zoom lens to magnify the view.
- Page 81 AXIS 243SA - Glossary monitoring of network-attached devices for any been granted for specific applications and data residing conditions that warrant administrative attention. on that computer. Sockets - Sockets are a method for communication Time-lapse recorder - This type of video recorder is...
- Page 82 AXIS 243SA - Glossary This detection can, for example, be used to trigger an alarm event in a network camera and start the upload of images from the camera. Video switcher - An analog video switcher sequentially displays full screen images, from one camera after another, typically at 3-5 seconds intervals.
- Page 83 ../../../../shared_images/various_cmyk/axis_logo_color.eps 1 Images/243sa_front.eps 8 ../../Images/Photos/VS241Q_bak.tif @ 300 dpi 9 Images/enter_ip.tif @ 72 dpi 11 Images/243SA_UserDefinedLink.eps 11 ../../Images/Screenshots/format.tif 12 ../../Images/Screenshots/output.tif @ 300 dpi 12 ../../Images/Screenshots/output2.tif @ 300 dpi 12 ../../Images/Screenshots/seq_onoff.tif @ 100 dpi 12 ../../Images/Screenshots/trigger_onoff.tif @ 300 dpi 12 ../../Images/Screenshots/snapshot.tif @ 300 dpi 12 ../../Images/Screenshots/gp.tif @ 300 dpi 12 ../../Images/Screenshots/stop_but.tif @ 300 dpi 12 ../../Images/Screenshots/snpsht2.tif @ 300 dpi 12...
- Page 84 Images/243SA_PTZ_Configuration.eps 39 Images/243SA_GuardTour.tif @ 72 dpi 40 Images/243SA_OSDmenu.tif @ 72 dpi 41 Images/243SA_PTZ_controlQ.tif @ 72 dpi 41 ../../Images/Screenshots/help.tif 41 Images/243SA_PTZcontrols.eps 43 ../../Images/Screenshots/absolute_bar.tif 44 ../../Images/Screenshots/ptz_ctrl_panel.tiff 45 ../../Images/Screenshots/help.tif @ 300 dpi 47 ../../Images/Screenshots/help.tif @ 300 dpi 50 ../../Images/Screenshots/help.tif @ 300 dpi 51 ../../Images/Screenshots/help.tif @ 300 dpi 52 ../../Images/Screenshots/help.tif @ 300 dpi 53 ../../Images/Screenshots/help.tif @ 300 dpi 55...
- Page 85 Audio mode 24 Audio output 26 Generic HTTP 62 Audio settings 24 Generic TCP/IP 62 Audio transmission 17 AXIS Internet Dynamic DNS Service 51 AXIS Media Control (AMC) 15 Half duplex 24, 25 Host name 52 HTML examples 30 Backup 56...
- Page 86 AXIS 243SA - Index Restore 56 Maximum bandwidth 53 RS-232 connector 10 Motion detection 35 RS-485 61 Motion JPEG 14, 17 RTP 15, 55 MPEG-4 14, 17 RTSP 15, 53 MPEG-4 clients 17 MPEG-4 protocols 15 MPEG-4 settings 55 Scheduled event 32...
- Page 87 AXIS 243SA - Index Viewer settings 30 Y/C to BNC cable 63...
Need help?
Do you have a question about the 243SA and is the answer not in the manual?
Questions and answers