Advertisement
Table of Contents
Advertisement
Table of Contents

Related Manuals for KRK V8


Summary of Contents for KRK V8
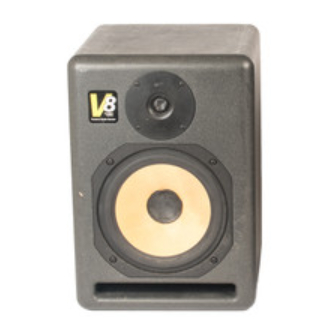
- Page 1 V I D E O S H I E L D E D B I - A M P L I F I E D S T U D I O M O N I T O R KRK SYSTEMS, LLC. 5452 BUSINESS DRIVE HUNTINGTON BEACH, CA. 92649...
- Page 2 Contents Page Introduction/ Features Overview • • • • • • • • • • • • • • • • • • • • System Controls • • • • • • • • • • • • • • • • • • • • • • • • • • • • • • • Connecting Your System •...
- Page 3 High Frequency Adjustment is through a rear panel mounted 3-position toggle switch. Range of control is +1dB, Flat, or -1dB shelving above 1 kHz. Factory setting for your V8 is flat (toggle switch is in middle position). Room acoustics may dictate which type of adjustment you need to make to retain a flat frequency response from the monitor.
-
Page 4: Connecting Your System
All connections should be made, all faders and controls should be set at their minimum levels, and all other equipment should be powered on prior to powering on your V8 monitors. The power On/Off switch is located on the rear panel and is internationally marked to indicate the operational status. -
Page 5: Positioning Your Monitors
(excluding any interaction with the mixing console). But when ideal positioning isn't practical, low frequency control is the solution. Lets say you have two different studios in your facility; in one room the V8’s are close to the wall, in the other they're further away from the wall. Simply adjust the low frequency on each monitor and you'll have the same sound in each room. - Page 6 Mid-Field Configuration – This configuration is basically the same as the Close-Field set-up. (see Figure 2) It is normally used with larger monitors or when the monitors are too large or heavy for the meter bridge. This set- up has the potential for a larger sweet spot and better spatial imaging. Make sure that the height of the woofer is above height of the console.
- Page 7 The most significant thing to remember is that each room presents it’s own set of acoustic variables. You'll want to experiment a bit to arrive at the best possible sound for your room. IMPORTANT NOTE: Your V8 was originally packaged in a specially designed carton and included special packing materials. Please save these items.
-
Page 8: System Highlights
Design Goals KRK’s design goal for your V8 was to create a monitor capable of accurately reproducing sound with clarity and accuracy. Other monitors in the marketplace tend to modify, extend, or “tilt” their response above 1 kHz to sound more “spatial, exciting and impressive”. What is not mentioned is this practice tends to make you incorrectly balance your mixes to compensate for this effect, leading to poor “translation”. -
Page 9: Troubleshooting
System section on page 3). • The power light is illuminated on the front panel of the V8. If not, turn the power switch OFF and check the A/C mains fuse(s). NEVER USE A LARGER AMPERAGE FUSE THAN IS SPECIFIED! Turn the power switch back on. - Page 10 Please read the warranty card that was included in the shipping carton of your monitor prior to shipping it back to KRK Systems, Inc. All products in need of repair can be returned to the dealer where it was purchased or to KRK Systems, Inc. at the following address: KRK SYSTEMS, INC.
-
Page 11: Specifications
System Gain Control 3-Stage Selectable HF Gain Trim +1.0dB, Flat, -1.0dB 3-Stage Selectable LF Turnover Frequency -3dB @ 45Hz, 50Hz or 65Hz. LED Power Indicator Power On/Off Muting and Delay KRK and V8 are registered trademarks of KRK Systems, Inc. - Page 12 Safety Instructions: English This symbol is intended to alert the user of important operating and maintenance (servicing) instructions in the literature provided with the equipment. This symbol is intended to alert the user of the presence of un-insulated “dangerous voltage” within the products enclosure that may present a risk of electric shock.
- Page 13 Explanation of graphical symbols The lightning flash with arrowhead symbol, within an equilateral triangle, is intended to alert the user to the presence of uninsulated “dangerous voltage” within the product’s enclosure that may be of sufficient magnitude to constitute a risk of electric shock to humans. The exclamation point within an equilateral triangle is intended to alert the user to the presence of important operating and maintenance (servicing) instructions in the literature accompanying the product.
- Page 14 Consignes de Securite: Francais Ce symbole sert à avertir l’utilisateur que la documentation fournie avec le matérial contient des instructions importantes concernant l’exploitation et la maintenance (rèparation) Ce symbole sert à avertir l’utilisateur de la présence dans le boìtier de l’appareil de “tensions dangereuses”...
- Page 15 Explication des symboles graphiques Le symbole “éclair” avec fléche à l’intérieur d’un triangle équilatéral est utilisé pour alerter l’utilisateur de la presence à l’intérieur du coffret de “voltage dangereux” non isolé d’ampleur suffisante pour constituer un risque d’elétrocution. Le symbole d’exclamation à l’intérieur d’un triangle équilatéral est employé pour alerter les utilisateurs de la présence d’instuctions importantes pour le fonctionnement et l’entretien (service) dans le livret d’instructions accompagnant l’appareil.
Need help?
Do you have a question about the V8 and is the answer not in the manual?
Questions and answers