Table of Contents
Advertisement
Thank you very much for purchasing the ZOOM
Please read this manual carefully to learn about all the functions of
the
so that you will be able to use it fully for a long
time.
Keep this manual in a convenient place for reference when necessary.
* A printed list of effect parameters is not included with the
Please download a copy from the ZOOM website. → http://www.zoom.co.jp/downloads/
Copying or reproduction of this document in whole or in part without permission is prohibited.
OPERATION MANUAL
.
© 2013 ZOOM CORPORATION
.
If the
hours, it will turn off automatically
by default.
If you want the power to stay ON all the time,
please see "4 To set the Power Management
function" on page 19 and set the value to OFF.
is not used for 10
Advertisement
Table of Contents

Subscribe to Our Youtube Channel
Related Manuals for Zoom Multistomp MS-70CDR


Summary of Contents for Zoom Multistomp MS-70CDR
- Page 1 * A printed list of effect parameters is not included with the function" on page 19 and set the value to OFF. Please download a copy from the ZOOM website. → http://www.zoom.co.jp/downloads/ © 2013 ZOOM CORPORATION Copying or reproduction of this document in whole or in part without permission is prohibited.
-
Page 2: Table Of Contents
Contents Usage and Safety Precautions …………………… 3 Tapping the Tempo ……………………………… 16 Part Names ………………………………………… 4 Changing Various Settings ……………………… 18 Turning the Power ON ……………………………… 6 Updating the Firmware …………………………… 23 Adjusting Effects …………………………………… 8 Effect Types ……………………………………… 24 Selecting and Saving Patch Memories …………... -
Page 3: Usage And Safety Precautions
OFF and disconnect other cables. Contact the store where you bought the unit Do not drop, bump or apply excessive force to the unit. or ZOOM service with the following information: product model, serial number and specific Be careful not to allow foreign objects or liquids to enter the unit. -
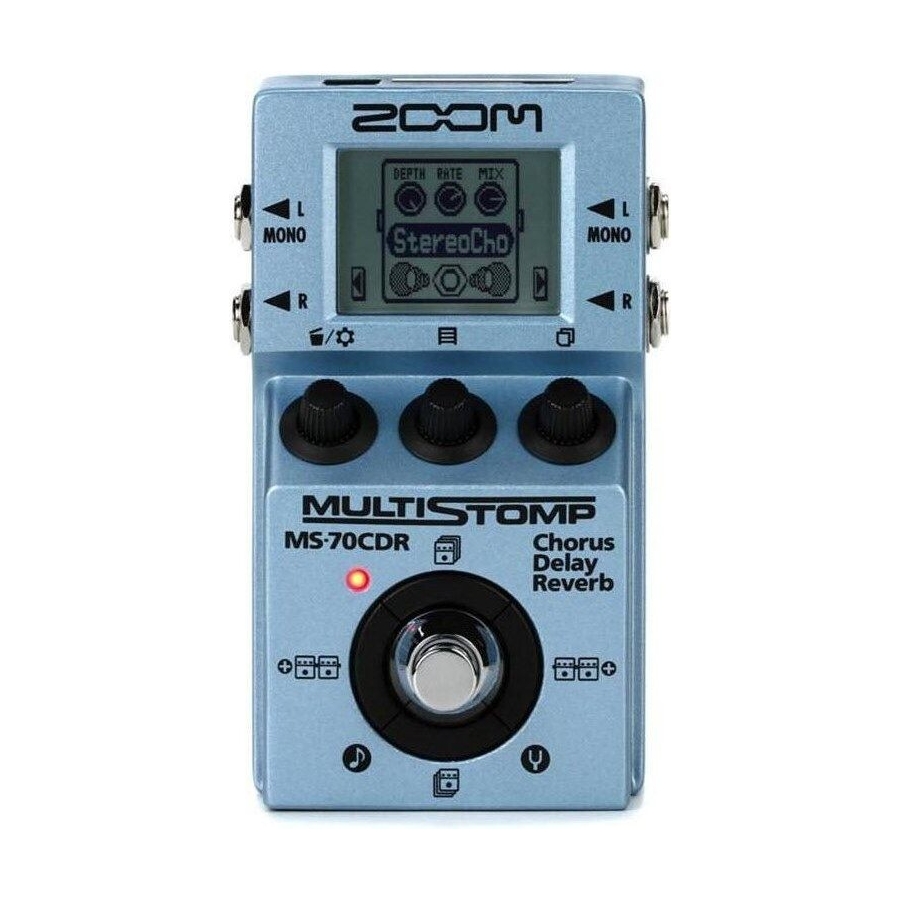
Page 4: Part Names
DC9V AC adapter jack USB connector To power the unit from an outlet, Use to connect to a computer and connect an AD-16 adapter here update firmware (→P23). (→P6). INPUT jack OUTPUT jacks Connect the output of a guitar, Connect to an amp or another bass, other electronic instrument or effector. - Page 5 Parameter knobs Cursor keys From the left Parameter knob 1 [ Turn left and right to adjust the parameter. Press to open the MENU where you can remove and rearrange effects and make various settings (→P12, 18). You can also check the firmware version (→P22). Up and down cursor keys [ Parameter knob 2 [ Press to change the effect type.
-
Page 6: Turning The Power On
Plug a guitar cable into the INPUT jack. To turn the power ON Lower the amplifier’s volume all the way. Power the unit with batteries or an adapter. <When using batteries> Open the cover on the bottom of the unit and insert batteries in the compartment. - Page 7 Edit Screen shows parameter being edited Display information The Home Screen shows the current effect Effect type Page tabs Parameter names Virtual knob Parameter values HINT Graphic for selected effect Shows other effects are in this direction. adjusted, multiple page tabs will be shown. HINT parameter values.
-
Page 8: Adjusting Effects
Confirm that the Home Screen is shown. To select an effect type To turn an effect ON and OFF Press either Press HINT See step 2 of ”To add an effect” . (See page 12.) To adjust parameters NOTE Turn Adjusting Effects... - Page 9 To change the page Effect processing limit allows you to combine 6 effects as you like. Press However, if you combine effect types that require great amounts of processing power (HD Reverb, for example), the available processing The next page opens. capacity might not be enough.
-
Page 10: Selecting And Saving Patch Memories
Confirm that the Home Screen is shown. Select the patch memory to be saved with a new name. To select a patch memory Turn When shipped from the factory, the automatic patch Press memory saving function is active. As soon as a parameter is adjusted this change is automatically saved. -
Page 11: Changing Patch Memories With The Footswitch
Confirm that the Home Screen is shown. To cycle through patch memories in the list in order using the footswitch To add or remove patch memories to a list that the footswitch cycles through Open the MEMORY list. Open the MEMORY list. Press Press Change the patch memory. -
Page 12: Using 2 Or More Effects
Confirm that the Home Screen is shown. To remove an effect To add an effect Open the MENU. Open the ADD EFFECT UNIT screen. Press Press and hold either for 1 second Select DELETE EFFECT UNIT. Select the effect category. Turn Press Press any... - Page 13 Select the effect to move and ”lift” it. To scroll through the effects shown Turn When multiple effects are in use, scroll to change the (Select) visible one. Press either Press (Lift) HINT Shows the effect number counting from the right. Shows how many effects are in this direction.
-
Page 14: Using The Tuner
To activate the Tuner To change the tuner’s standard pitch Confirm that the Tuner Screen is open. Press Press hold for 1 second Turn NOTE A setting must be changed to make pressing and holding the footswitch activate Tap Tempo. (See page 18.) To select the tuner type Confirm that the Tuner Screen is open. - Page 15 CHROMATIC To tune an instrument The chromatic tuner shows the nearest pitch name (semitone) and how far the input sound is from that pitch. Play the open string that you want to tune and tune it. Other tuner types Depending on the selected type, the nearest string Chromatic tuner name and how far the sound input is from that pitch The name of the nearest note and the pitch accuracy...
-
Page 16: Tapping The Tempo
Delay effects and some modulation effects can be Tap the footswitch 2 or more times at the synchronized to the tempo. Select an effect that can be desired tempo. synchronized, and set its Time, Rate or other parameter that can be synchronized to a or note value. The tempo can be set by tapping the footswitch or a knob. - Page 17 To tap tempo by hand Open an effect that can be synchronized to the tempo on the Home Screen. (See page 8, 24.) Open the parameter editing screen. Press Tap the knob 2 or more times at the desired tempo. Press The ON/OFF indicator flashes in time with the tempo.
-
Page 18: Changing Various Settings
To change various settings To set the function activated by pressing and holding the footswitch Open the MENU. Set the function activated by pressing the footswitch Press continuously for 1 second to TUNER or TAP TEMPO. Select HOLD FOR TUNER/TAP from the SETTINGS menu. - Page 19 To set the tuner mode To set the Power Management function Select BYPASS/MUTE TUNER from the SETTINGS menu. Select POWER MANAGEMENT from the SETTINGS menu. Turn Turn Press Press Set the tuner mode Set the Power Management function. Turn Turn Press Press HINT...
- Page 20 To set the Auto Save function To select the battery type Select AUTO SAVE from the SETTINGS menu. Select BATTERY TYPE from the SETTINGS menu. Turn Turn Press Press Set the Auto Save function. Set the type of batteries used. Turn Turn Press...
- Page 21 To adjust the display contrast To set the amount of time until the backlight dims Select LCD CONTRAST from the SETTINGS menu. Select LCD BACKLIGHT from the SETTINGS menu. Turn Turn Press Press Adjust the display contrast. Set the amount of time until the backlight dims. Turn Turn Press...
- Page 22 To view the firmware versions Open the MENU. Press Select VERSION. Turn Press The firmware version is shown. HINT for the latest firmware versions. Changing Various Settings...
-
Page 23: Updating The Firmware
Launch the firmware update application on To update the firmware your computer, and execute the update. While pressing both the up and down cursor NOTE keys, use a USB cable to connect the USB connector to the computer. is being updated. While pressing HINT both... -
Page 24: Effect Types
Tempo Tempo Category Effect type Effect explanation Category Effect type Effect explanation sync. sync. This is a model of tc electronic's This is a stereo chorus with a clear CoronaCho StereoCho CORONA CHORUS. tone. This effect mixes a shifted pitch This is a model of tc electronic's CoronaTri Chorus... - Page 25 Tempo Tempo Category Effect type Effect explanation Category Effect type Effect explanation sync. sync. By mixing a small amount of the This vibe sound features unique TheVibe pitch-shifted effect sound with undulations. Ba Detune the original sound, a natural bass This effect shifts the pitch up or chorus effect is achieved.
- Page 26 Tempo Tempo Category Effect type Effect explanation Category Effect type Effect explanation sync. sync. This effect combines 2 delays This tape echo effect models the TapeEcho3 DualDigiD and is based on the Eventide TimeFactor DigitalDelay. This echo effect that can be This long delay has a maximum DriveEcho driven is modeled on the LINE6...
- Page 27 Tempo Tempo Category Effect type Effect explanation Category Effect type Effect explanation sync. sync. This delay, which is based on Based on the Eventide TimeFactor the LO-FI mode of the strymon FilterPong, this effect combines FLTR PPD LO-FI Dly TIMELINE, allows you to degrade filter and delay effects.
- Page 28 Tempo Tempo Category Effect type Effect explanation Category Effect type Effect explanation sync. sync. This reverb effect simulates the HD Reverb This is a high-definition reverb. Hall acoustics of a concert hall. This reverb effect simulates a Spring HD Hall This is a dense hall reverb.
- Page 29 Tempo Tempo Category Effect type Effect explanation Category Effect type Effect explanation sync. sync. This effect reproduces only the This effect adds tremolo to reverb EarlyRef early reflections of reverb. and is based on the TREMOLO TremoloRv VERB setting of an Eventide This gate reverb, which is suited SPACE.
- Page 30 Category Effect type Effect explanation Category Effect type Effect explanation sync. sync. ZOOM's unique noise reduction This effect, which is based on cuts noise during pauses in the Eventide SPACE BlackHole SpaceHole playing without affecting the algorithm, combines delay and tone.
-
Page 31: Restoring The To Its Factory Default Settings
Press the footswitch to execute it. To execute the All Initialize function The All Initialize function restores all the factory Press default settings. NOTE Executing the All Initialize function will restore all the settings of the , including its patch memories, to factory defaults. -
Page 32: Troubleshooting
The unit will not turn ON An effect is not working to the INPUT jack to start the unit. ”DSP Full!” appears on the effect graphic. In this case, the effect is bypassed (→P9). No sound or very low volume Batteries lose their charge quickly →P6). -
Page 33: Specifications
Maximum output level: Line +5dBm (with output load impedance of 10 k or more) Power AC adapter DC9V (center minus plug), 500 mA (ZOOM AD-16) Batteries Continuous operation using 2 AA alkaline batteries for about 7 hours with mono input or about 5 hours with stereo input 130.3mm(D) x 77 .5mm(W) x 58.5mm(H) -
Page 34: Tuner Types
Tuner Types String number / Note name Display Meaning GUITAR Standard tuning for guitars, including 7-string guitars OPEN A In open A tuning, the open strings make an A chord OPEN D In open D tuning, the open strings make a D chord OPEN E In open E tuning, the open strings make an E chord OPEN G... - Page 36 For more detailed information about recycling of this product, which the receiver is connected. please contact your local city office, your household waste disposal service or the shop where you purchased the product. ZOOM CORPORATION 4-4-3 Surugadai, Kanda, Chiyoda-ku, Tokyo 101-0062 Japan http://www.zoom.co.jp Z2I-1626-01...
Need help?
Do you have a question about the Multistomp MS-70CDR and is the answer not in the manual?
Questions and answers