Powermatic 54A Operating Instructions And Parts Manual
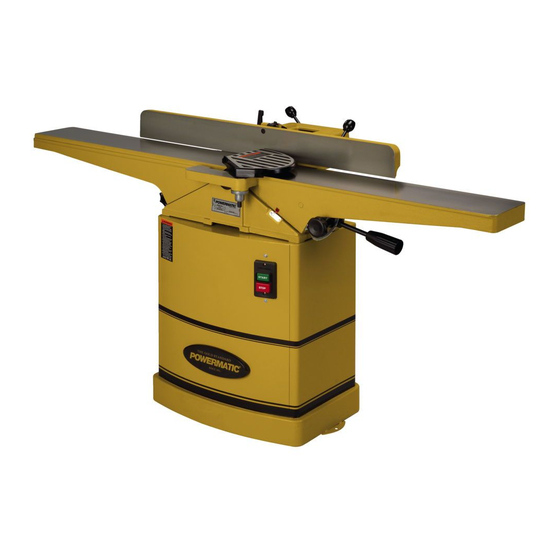
6-inch woodworking jointer
Hide thumbs
Also See for 54A:
- Brochure (3 pages) ,
- Instruction manual & parts list (32 pages) ,
- Operating instructions and parts manual (70 pages)
Table of Contents
Advertisement
This Manual is Bookmarked
Operating Instructions and Parts Manual
6-inch Woodworking Jointer
Models 54A and 54HH
54A (1791279DXK) serial # 8040543557 and up
54HH (1791317K) serial # 8010540313 and up
WMH TOOL GROUP, Inc.
2420 Vantage Drive
Elgin, Illinois 60123
Part No. M-1791279DX
Ph.: 800-274-6848
Revision C 06/08
www.powermatic.com
Copyright © 2008 WMH Tool Group, Inc.
Advertisement
Table of Contents

Related Manuals for Powermatic 54A


Summary of Contents for Powermatic 54A
- Page 1 This Manual is Bookmarked Operating Instructions and Parts Manual 6-inch Woodworking Jointer Models 54A and 54HH 54A (1791279DXK) serial # 8040543557 and up 54HH (1791317K) serial # 8010540313 and up WMH TOOL GROUP, Inc. 2420 Vantage Drive Elgin, Illinois 60123 Part No.
-
Page 2: Warranty And Service
This warranty covers only the initial purchaser of the product. WHAT IS THE PERIOD OF COVERAGE? The general POWERMATIC warranty lasts for the time period specified in the product literature of each product. WHAT IS NOT COVERED? The Five Year Warranty does not cover products used for commercial, industrial or educational purposes. Products with a Five Year Warranty that are used for commercial, industrial or education purposes revert to a One Year Warranty. -
Page 3: Table Of Contents
Setting Cutterhead Knives (Model 54A only) ..................17 Replacing Knives (Model 54A only) ....................19 Setting Knives for Rabbeting and Nicks (Model 54A only)..............20 Replacing or Rotating Knife Inserts (Model 54HH only) ..............20 Determining Correct Table Height ...................... 21 Hand Placement .......................... -
Page 4: Warnings
Warnings 1. Read and understand the entire owner's manual before attempting assembly or operation. 2. Read and understand the warnings posted on the machine and in this manual. Failure to comply with all of these warnings may cause serious injury. 3. - Page 5 20. Keep visitors a safe distance from the work area. Keep children away. 21. Make your workshop child proof with padlocks, master switches or by removing starter keys. 22. Give your work undivided attention. Looking around, carrying on a conversation and “horse-play” are careless acts that can result in serious injury.
- Page 6 Familiarize yourself with the following safety notices used in this manual: This means that if precautions are not heeded, it may result in minor injury and/or possible machine damage. This means that if precautions are not heeded, it may result in serious injury or possibly even death.
-
Page 7: Specifications
Introduction This manual is provided by WMH Tool Group, Inc., covering the safe operation and maintenance procedures for the Powermatic Model 54A and 54HH Jointers. This manual contains instructions on installation, safety precautions, general operating procedures, maintenance instructions and parts breakdown. -
Page 8: Unpacking
(Shown full scale in Figure 1) 1/4-20 x 1/2” Pan Head Screws (A) 3/8” x 5/8” Spring Washers (B) 1/4-20 x 1/2” Flat Washers (C) Lock Bolts (D) Tools Included (Model 54A) 8/10mm Open End Wrench 12/14mm Open End Wrench Figure 2 3mm Hex Wrench... -
Page 9: Assembly
Assembly Unpacking and Cleanup Locate the jointer in an area that is level and provides a solid foundation. Make sure that any potential kickback is not in line with aisles, doorways, wash stations or other work areas. 1. Carefully finish removing all contents from both shipping cartons. -
Page 10: Installing Fence To Bed
Installing Fence to Bed Referring to Figure 5: 1. Before moving the fence assembly, secure the tilt lock handle (K). Secure the tilt lock handle to avoid personal injury from moving parts. 2. Place the key (F) into the machined slot of the fence support (G) as shown. -
Page 11: Installing The Pulley Cover
4. Pull down on the motor to achieve the desired belt tension. The V-belt is properly tensioned when finger pressure on the belt half way between the two pulleys causes 1/2" deflection (Figure 7). 5. Tighten the mounting bolts. After two hours of operation, check belt tension again. -
Page 12: Electrical
If repair or replacement of operation (D). Contact your local Authorized the electric cord or plug is necessary, do not Powermatic Service Center or qualified connect the equipment-grounding conductor to a electrician for proper procedures to install live terminal. -
Page 13: Adjustments
Extension Cords Recommended Extension Cord Gauges Make sure your extension cord is in good Extension Cord Length in Feet * condition. When using an extension cord, be sure Amps to use one heavy enough to carry the current your machine will draw. An undersized cord will cause <... -
Page 14: Fence Stop Adjustments
Fence Stop Adjustments Periodically check the 90° and 45° backward (135°) tilt accuracy of the fence with an angle measuring device, such as an adjustable square or machinist’s protractor. 90º Stop Adjustment Referring to Figure 14: The 90º stop is controlled by the stop bolt (F) and the stop block (C). -
Page 15: Infeed Table Height Adjustment
Infeed Table Height Adjustment Refer to Figures 16 – 18. Initial (Coarse) Adjustment: 1. Loosen the rear thumb screw (D) and the lock knob (B). 2. Raise or lower the height adjustment handle (C) until the scale (A, Fig. 16 and Figure 17) reads approximately the desired depth of cut. -
Page 16: Table Gib Adjustment
Adjust the height of the outfeed table as follows: 1. Disconnect jointer from power source. 2. Carefully number each blade (model 54A only) Figure 21 with a marker to make them easier to differentiate. -
Page 17: Setting Cutterhead Knives (Model 54A Only)
After this adjustment is completed on the model 54A, it is necessary to proceed to the Setting Cutterhead Knives section to verify that all three Figure 23 knives are at the correct height and parallel to the outfeed table. - Page 18 2. Carefully number each blade with a marker to make them easier to differentiate. 3. Place a straightedge across the outfeed table extending it over the cutterhead towards one end of the knife. Cutterhead knives dangerously sharp. Do not grab the cutterhead itself to rotate it! Failure to comply may cause serious injury.
-
Page 19: Replacing Knives (Model 54A Only)
4 and 5). 15. Tighten the gib lock screws. 16. Repeat this entire procedure for the remaining two knives Replacing Knives (Model 54A only) Planer knives are dangerously sharp. Use extreme caution when inspecting, removing, sharpening, or replacing knives. Failure to comply may cause serious injury. -
Page 20: Setting Knives For Rabbeting And Nicks (Model 54A Only)
Setting Knives for Rabbeting and Nicks (Model 54A only) NOTE: Rabbeting is not applicable on helical cutterhead models. To position the knives for rabbet cuts, take a shop scale with 1/32” graduations and place it against the end of the cutterhead. Slide the knife out until it is at the 1/32”... -
Page 21: Determining Correct Table Height
The outfeed table and cutterhead knives (Model 54A only) are correctly adjusted when all three blades are parallel to the outfeed table and all three blades are set at the same height in the cutterhead. -
Page 22: Operating Controls
Operating Controls Outfeed Table Height Adjust Hand Wheel Outfeed Table Cutter Guard Fence Adjustment Handle Fence Infeed Table Infeed Table Lock Knob Infeed Table Height Fine/Coarse Adjustment On/Off Switch 10. Infeed Table Lock 11. Fence Travel Lock Handle Controls - Front View 12. -
Page 23: Hand Placement
Basic Operations Before making any cuts on the stock, make a few practice cuts by raising the infeed table to "0" and with the power disconnected. In this manner you will acquaint yourself with the feel of jointer operations. Hand Placement Never pass hands directly over the cutterhead. -
Page 24: Surfacing
Surfacing The purpose of planing on a jointer is to produce one flat surface. The other side can then be milled to precise, final dimensions on a thickness planer resulting in a board that is smooth and flat on both sides and each side parallel to the other. -
Page 25: Beveling
Beveling Beveling an edge is the same operation as edge jointing, except that the fence is tilted to a specified angle. Make certain that the material being beveled is over 12 inches long, more than 1/4 inch thick and 1 inch wide. Although the fence may be tilted in or out, it is recommended that the fence be tilted in toward the operator (as shown in Figure 39) -
Page 26: Rabbet Cuts (Straight Knife Only)
Illustrated in Figure 44 are three types of push blocks commonly used in jointing. Push blocks may be obtained commercially or easily constructed. Note: The 54A Jointer is supplied with two push blocks for feeding stock. Figure 42 Rabbet Cuts (Straight Knife only) IMPORTANT: Rabbeting can be done with the straight knife cutterhead only;... -
Page 27: Cutterhead Removal
Cutterhead Removal The entire cutterhead assembly may be removed for cleaning or for bearing and blade replacement. Some woodworkers keep a spare cutterhead with replacement blades should the original cutterhead have to be repaired. Blades in the cutterhead are sharp! Use extreme caution when handling the removal of the cutterhead. -
Page 28: Troubleshooting Operating Problems
11. Carefully remove the cutterhead (A, Fig. 48). 12. Before placing the new cutterhead back into the casting, thoroughly clean the "saddle" and the bearing housings of saw dust and grease so that they seat properly. 13. To re-install the cutterhead, reverse the above steps. -
Page 29: Optional Accessories
708801DX ..Knives (set of 3) (see website business hours; 1791212 ...Knife Inserts (set of 10) www.powermatic.com). Having Model 6285917 ...Push Block Number and Serial Number of your machine 6285991 ...Tool Kit available when you call will allow us to serve you 2230035 ...Knife Setting Gauge... -
Page 30: Stand - Parts List (All Models)
34..... 6296140....Flat Washer............5/32 x 3/8 x 1/32..2 35..... 6296141....Star Washer ............BW-4 (5/32 x 3/8) ..2 36..... 6296142....Nut ..............#8-32......1 37..... 3520B-140 ....Powermatic Nameplate................1 38..... 6296150....Warning Label ..................1 39..... PM2700-440 ....Wide Stripe (not shown) ..............per ft. -
Page 31: Stand -Assembly (All Models)
Stand –Assembly (All Models) -
Page 32: Bed - Parts List (All Models)
Bed – Parts List (All Models) Index No. Part No. Description Size Qty. 1....6296086....Base Slide..................... 1 2....6296087....Washer...............3/8 x 1 x 5/32....4 3....6296088....Spring Pin............4mm dia. x 14mm Lg .. 1 4....6296089....Key..............9.5mm x 273 mm..1 5....6285931....Cap Screw............3/8-16 x 1-1/2 .... 2 6.... - Page 33 Bed – Parts List (All Models) Index No. Part No. Description Size Qty. 58..... 6285893....Washer....................1 59..... 6285894....Spring....................1 60..... 6285895....Knob ..................... 1 61..... 6285896....Retainer ....................1 62..... 6285897....Screw..............5/32-32 x 5/8 ....3 63..... 6296147....Depth Scale................... 1 64..... 6296148....Rivet...................... 2 65.....
-
Page 34: Fence - Parts List And Assembly (All Models)
Fence – Parts List and Assembly (All Models) Index No. Part No. Description Size Qty....6296130....Fence Assembly..................1 1....6296143....Locking Bolt................... 1 2....6296066....Flat Washer..........13mm x 28mm x 3mm ..2 3....6296067....Stop Block..................... 1 4....6296068....Fence Bracket ..................1 5.... -
Page 35: Cutterhead - Parts And Assembly (Model 54A Only)
Cutterhead – Parts and Assembly (model 54A only) Index No. Part No. Description Size Qty....JJ6CSDX-CA ...Cutterhead Assembly (Index #s 1-15) ............ 1 1....JJ6CSDX-101 ..Special Button Head Socket Screw............12 2....TS-0720091 .....Lock Washer ............3/8”......2 3....JEA-B01 ....Bolt......................2 4.... -
Page 36: Cutterhead - Parts And Assembly (Model 54Hh Only)
Cutterhead – Parts and Assembly (model 54HH only) Index No. Part No. Description Size Qty....PM54HH-CA ....Cutterhead Assembly (Index # 1-12)............1 1....TS-0267041 .....Socket Set Screw ..........1/4”-20 x 3/8 ....2 2....JH-C07 ....Cutterhead Pulley.................. 1 3....JH-C04 ....Bearing Housing..................1 4.... -
Page 37: Wiring Diagrams
Wiring Diagrams Wiring Diagram – Serial # 05060540312 and lower ELECTRICAL SCHEMATIC - 115V 300MFD 125 VAC START BLACK BLACK WHITE WHITE STOP GREEN GREEN GROUND ELECTRICAL SCHEMATIC - 230V 300MFD 125 VAC START BLACK BLACK WHITE WHITE STOP GREEN GREEN GROUND Serial # 05060540312 and lower... -
Page 38: Wiring Diagram - Serial # 05060540313 And Higher
Wiring Diagram – Serial # 05060540313 and higher... - Page 40 WMH Tool Group, Inc. 2420 Vantage Drive Elgin, Illinois 60124 Phone: 800-274-6848 www.powermatic.com www.wmhtoolgroup.com...
Need help?
Do you have a question about the 54A and is the answer not in the manual?
Questions and answers