Table of Contents
Advertisement
Quick Links
electrolux 43
Thank you for selecting our appliance
We wish you lots of enjoyment with your new appliance and we hope that you will consider our brand
again when purchasing household appliances.
Please read this user manual carefully and keep it throughout the product life cycle as a reference
document. The user manual should be passed on to any future owner of the appliance.
43
Advertisement
Table of Contents

Subscribe to Our Youtube Channel
Related Manuals for Zanussi ZYB 591


Summary of Contents for Zanussi ZYB 591
- Page 1 electrolux 43 Thank you for selecting our appliance We wish you lots of enjoyment with your new appliance and we hope that you will consider our brand again when purchasing household appliances. Please read this user manual carefully and keep it throughout the product life cycle as a reference document.
-
Page 2: Table Of Contents
44 electrolux Contents Warnings and Important Safety Information .................. 45 Description of the appliance ......................47 Control panel..........................48 When the oven is first installed ..................... 49 Function Symbols ........................52 Using the Oven .......................... 53 Programming the Oven....................... 59 Safety and Energy Saving Functions .................. -
Page 3: Warnings And Important Safety Information
electrolux 45 English Warnings and Important Safety Information Always keep these user instructions with the appliance. Should the appliance be passed on to third persons or sold, or if you leave this appliance behind when you move house, it is very important that the new user has access to these user instructions and the accompanying information. -
Page 4: Child Safety
46 electrolux Child Safety This appliance is intended for use by adults. It • is dangerous to allow children to use it or play with it. Children should be kept away while the oven • is working. Also, after you have switched the oven off, it remains hot for a long time. -
Page 5: Description Of The Appliance
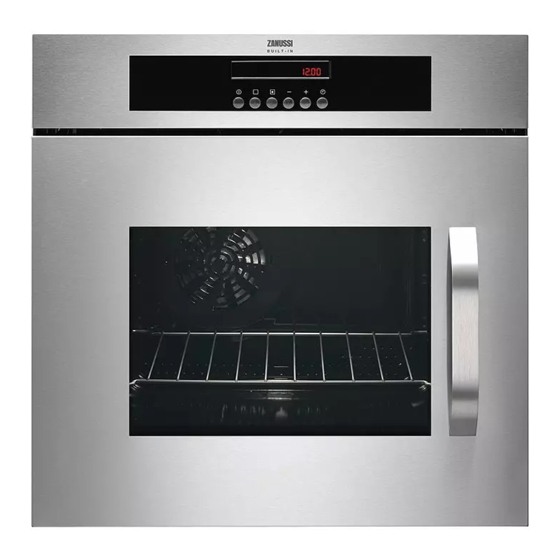
electrolux 47 Description of the appliance 1. Control Panel 5. Oven light 2. Electronic programmer 6. Oven Fan 3. Air Vents for Cooling Fan 7. Rating plate 4. Grill Oven accessories Cake tray Dripping pan 2 x Anti-tip shelf... -
Page 6: Control Panel
48 electrolux Control panel Cooking Temperature display Time display function Push buttons 1. ON / OFF 2. Oven Function Control 3. Fast Heat Up Function 4. Pyrolytic Function 5. Decreasing Control “ “ (Time or Temperature) 6. Increasing Control “ “ (Time or Temperature) 7. -
Page 7: When The Oven Is First Installed
electrolux 49 When the oven is first installed Remove all packaging, both inside and outside the oven, before using the oven. When the oven is first connected to the electrical supply, the display will automatically show 12:00 and the symbol will flash. - Page 8 50 electrolux During this time, an unpleasant odour may be emitted. This is absolutely normal, and is caused by residues of manufacturing. Once this operation is carried out, let the oven cool down, then clean the oven cavity with a soft cloth soaked in warm water to which a little mild washing- up liquid has been added.
-
Page 9: The Cooling Fan
electrolux 51 When the required temperature is reached, an acoustic alarm will sound for a short time and the thermometer symbol will illuminate permanently. How to set the temperature and cooking time Press button “ “ and “ “ to increase or decrease the pre-set temperature while the “°”... -
Page 10: Function Symbols
52 electrolux Function Symbols Fan cooking - This setting allows you Defrosting – The oven fan operates to roast or roast and bake without heat and circulates the air, at simultaneously using any shelf, without room temperature, inside the oven. flavour transference. -
Page 11: Using The Oven
electrolux 53 Using the oven The oven is supplied with an exclusive system which produces a natural circulation of air and the constant recycling of steam. This system makes it possible to cook in a steamy environment and keep the dishes soft inside and crusty outside. - Page 12 54 electrolux Oven Shelves and Shelf Supports Oven Shelves and Shelf Supports To clean the oven shelves, soak in warm soapy water and remove stubborn marks with a well wetted soap impregnated pad. Rinse well and dry with a soft cloth. The shelf supports can be removed for easy cleaning.
-
Page 13: Conventional Cooking
electrolux 55 The oven has four shelf levels, and is How to use the fan oven supplied with two shelves. The shelf 1. Switch the oven on. positions are counted from the bottom of 2. Press the Oven Function Control button and the oven as shown in the diagram. - Page 14 56 electrolux During cooking, the cooling fan and the thermostat Top oven element only control light will operate in the same way as described This function is suitable for finishing cooked dishes, for the fan oven function. e.g. lasagne, shepherds pie, cauliflower cheese How to use the Inner Grill Element etc.
-
Page 15: Pizza Oven
electrolux 57 4. Adjust the grid and grill pan runner position to Hints and Tips allow for different thicknesses of food and follow the instructions for grilling. On baking: Cakes and pastries usually require a medium Pizza Oven temperature (150°C-200°C) and therefore it is The bottom element provides direct heat to the necessary to preheat the oven for about 10 base of pizzas, quiches or pies, while the fan... -
Page 16: Cooking Times
58 electrolux the roasting pan in the shelf level below to catch the juices. Leave the joint to stand for at least 15 minutes, so that the meat juices do not run out. To reduce the build up of smoke in the oven, it is recommended to pour a little water in the roasting pan. -
Page 17: Programming The Oven
electrolux 59 Programming the Oven How to set the minute minder 1) Press button to select the Minute Minder function. The relevant symbol will flash and the control panel will display "0.00". (Fig. 7) 2) Press button “ “ to select the required time. Maximum time is 23 hours 59 minutes. - Page 18 60 electrolux 3) While the symbol is flashing, press button “ “ to select the required time. Maximum time is 23 hours 59 minutes. The programmer will wait 3 seconds and then start running. 4) When cooking time is over, the oven will be switched off automatically and an acoustic alarm will be heard while the control panel will display "0.00".
-
Page 19: Safety And Energy Saving Functions
electrolux 61 Safety and Energy Saving Functions Safety Cut-Off Function The oven will switch off automatically if any change of setting is made, according to the table below (Fig. 12). If temperature setting is: the oven will switch off: 250°C after 3 hours Fig. - Page 20 62 electrolux To unlock the oven: Press buttons and “ “ at the same time and keep them pressed for about 3 seconds. An acoustic signal will be emitted and the indication ‘SAFE’ will go off. The oven can now be operated. "Fast Heat Up"...
-
Page 21: Demo Mode
electrolux 63 Demo mode This mode is intended to be used in shops to demonstrate the oven functionality without any power consumption except the interior light, the display and the fan. This function can only be switched on when the appliance is first connected. If there is a power failure, when the power supply is restored again, the Demo function can only be switched on if in the display 12:00 and the symbol... -
Page 22: Baking And Roasting Tables
64 electrolux Baking and Roasting Table Conventional Cooking and Fan Cooking Timings do not include pre-heating. The empty oven should always be pre-heated for 10 minutes. Cooking times in Conventional Cooking Fan Cooking TYPE OF DISH minutes NOTES temp temp °C °C CAKES Whisked recipies... - Page 23 electrolux 65 Conventional Grilling Timings do not include pre-heating. The empty oven should always be pre-heated for 10 minutes. Cooking time in Quantity Grilling minutes TYPE OF DISH 1st side Pieces temp.°C 2nd side Fillet steaks 12~15 12~14 Beef-steaks 10~12 Sausages 12~15 10~12...
-
Page 24: Cleaning And Maintenance
66 electrolux Cleaning and Maintenance External cleaning Regularly wipe over the control panel, oven door Before cleaning switch the oven off and door seal using a soft cloth well wrung out in and let it cool down. warm water to which a little liquid detergent has The appliance must not be cleaned been added. -
Page 25: Pyrolytic Cleaning
electrolux 67 Pyrolytic cleaning The oven cavity is coated with a special enamel resistant to high temperatures. During the pyrolytic cleaning operation, the tempe- rature inside the oven can reach about 500 °C thus burning food residuals. For your security, during the pyrolytic cleaning operation, the oven door automatically locks when the temperature inside the oven approaches about 300 °C. - Page 26 68 electrolux How to use the pyrolytic cleaning function Before activating the pyrolytic cleaning function, remove any excessive spillage and make sure that the oven is empty. Do not leave anything inside it (e.g. pans, grids, baking tray, dripping pan, etc.) as this could heavily damage them.
- Page 27 electrolux 69 2. The Cooking Duration symbol will flash for 5 seconds; during this time push ' ' or ' ' buttons to select the pyrolytic 1 (P I) or pyrolytic 2 (P 2) function (Fig. 19). 3. Once you have chosen the desired pyrolytic function, the “Pyro”...
- Page 28 70 electrolux To programme the pyrolytic cleaning At the end of the pyrolytic cleaning process, the display shows the time of day. The oven door is cycle (delayed start, automatic stop) locked. If you desire, you can programme the starting and Once the oven has cooled down, an acoustic signal ending time of the pyrolytic cleaning cycle.
- Page 29 electrolux 71 Cleaning The Oven Door The oven door is made up of four glasses. It is possible to remove them for easier cleaning. Warning - The oven door may bang shut if you try to extract the inner glasses when the oven door is still fitted to the oven.
- Page 30 72 electrolux Clean the oven door glass with warm water and a soft cloth only. Never use harsh abrasives as they could damage the special heat-resistant surface of the inner glasses. Once the cleaning is carried out, refit the oven door, following the procedure in reverse.
- Page 31 electrolux 73 Fig. 32 Fig. 29 Fig. 33 Fig. 30 Fig. 34 Fig. 31...
-
Page 32: Replacing The Oven Light
74 electrolux Replacing The Oven Light Disconnect the appliance If the oven bulb needs replacing, it must comply with the following specifications: Electric power: 15 W/25 W, Electric rate: 230 V (50 Hz), Resistant to temperatures of 300°C, Connection type: E14. These bulbs are available from your local Service Force Centre. -
Page 33: If Something Is Wrong
electrolux 75 If something is wrong If the appliance is not working correctly, please check the following before contacting the Electrolux Service Centre: SOLUTION PROBLEM The oven is not switching on. Touch the control, then select a cooking function. Has the fuse in the domestic electrical installation been tripped? Is the child safety device or the automatic On/Off cut- off function switched on? -
Page 34: Technical Data
76 electrolux Technical Data Heating element ratings Bottom oven element 1000 W Top heating element 800 W Full oven (Top+Bottom) 1800 W Grill 1650 W Full grill 2450 W Fan Cooking heating 2000 W Pizza function 3000 W Oven light 25 W Hot air fan motor 25 W... -
Page 35: Instructions For The Installer
electrolux 77 Instructions for the Installer The connection cable must in any case be laid out Installation and connection must be so that at no point does it reach 50°C (over room done in compliance with the temperature). regulations force. After the connection has been carried out, the interventions must be carried out heating elements must be tested by being operated... -
Page 36: Instructions Fo Building In
78 electrolux Instructions for Building In For problem-free functioning of the built-in appliance, the kitchen unit or the recess into which the appliance is built must have suitable dimensions. In accordance with the regulations in force, all parts which ensure the shock protection of live and insulated parts must be fastened in such a way that Fig. -
Page 37: Service And Spare Parts
electrolux 79 Service and spare parts If after the checks listed in the chapter "If something is wrong", the appliance still does not work correctly, contact your local Service Centre, specifying the type of malfunctioning, the appliance model (Mod.), the product number (Prod. No.) and the serial number (Ser. -
Page 38: European Warranty
80 electrolux European Guarantee This appliance is guaranteed by Electrolux in each of the countries listed at the back of this user manual, for the period specified in the appliance guarantee or otherwise by law. If you move from one of these countries to another of the countries listed below the appliance guarantee will move with you subject to the following qualifications:- The appliance guarantee starts from the date you first purchased the appliance which will be •... - Page 39 81 ZYB 591 0.79 kWh 0.78 kWh 43 min. 41 min. 1130 cm²...
- Page 40 82 electrolux...
- Page 41 electrolux 83...
- Page 42 84 electrolux www.zanussi.com.es 35696-2101 05/07...
Need help?
Do you have a question about the ZYB 591 and is the answer not in the manual?
Questions and answers