Table of Contents
Advertisement
Quick Links
Download this manual
See also:
User Manual
Advertisement
Table of Contents

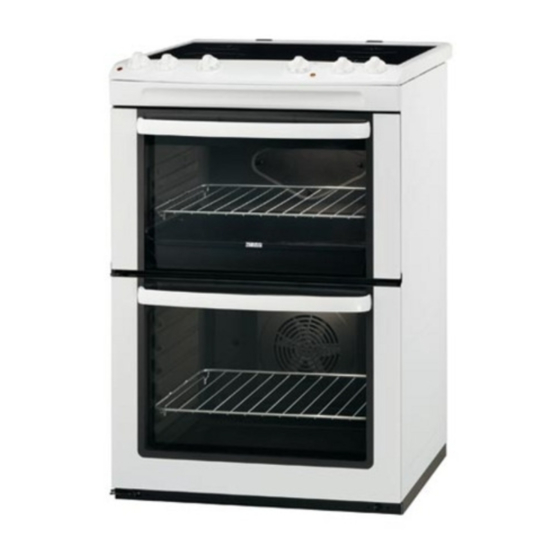
Summary of Contents for Zanussi ZCV661
- Page 1 User manual Cooker ZCV661...
-
Page 2: Table Of Contents
• If the appliance has a child safety device, we recommend that you activate it. • Cleaning and user maintenance shall not be made by children without supervision. General Safety • The appliance and its accessible parts become hot during use. Do not touch the heating elements. www.zanussi.com... -
Page 3: Safety Instructions
Always wear safe- door or under a window. This prevents hot ty gloves. cookware to fall from the appliance when the door or the window is opened. • Do not pull the appliance by the handle. www.zanussi.com... - Page 4 The with them. isolation device must have a contact open- • The vapours that very hot oil releases can ing width of minimum 3 mm. cause spontaneous combustion. www.zanussi.com...
- Page 5 • Do not activate the cooking zones with Service empty cookware or without cookware. • Contact the Service to repair the appliance. • Do not put aluminium foil on the appliance. We recommend only the use of original spare parts. www.zanussi.com...
-
Page 6: Product Description
Oven lamp Fan and heating element Shelf positions of the main oven Shelf positions of the top oven Cooking surface layout Cooking zone 1200 W Cooking zone 1700 W Cooking zone 1200 W Residual heat indicator Cooking zone 1700 W www.zanussi.com... -
Page 7: Before First Use
Warning! Refer to the Safety chapters. • Cookware made of enamelled steel and with aluminium or copper bottoms Cookware can cause discoloration on glass ce- ramic surface. • The bottom of the cookware must be as thick and flat as possible. www.zanussi.com... -
Page 8: Hob - Care And Cleaning
If you switch off the ap- pliance, the cooling fan continues to operate until the appliance cools down. Activating and deactivating the ovens 1. Turn the knob for the top oven or the knob for the main oven to the necessary set- tings. www.zanussi.com... -
Page 9: Oven - Using The Accessories
Warning! Refer to the Safety chapters. Grilling set The grilling set includes the roasting pan grid and the deep roasting pan. You can use the roasting pan grid on the two sides. Warning! Risk of burns when removing the accessories from a hot oven. www.zanussi.com... -
Page 10: Oven - Helpful Hints And Tips
If this oc- General instructions curs, do not change the temperature set- ting. The differences equalize during the • Your new oven may bake or roast differently to the appliance you had before. Adapt your baking procedure. www.zanussi.com... -
Page 11: Tips On Baking
Cakes: Madeira 140 - 150 75 - 90 Cakes: Rich Fruit 140 - 150 120 - 150 Cakes: Gingerbread 140 - 150 80 - 90 Cakes: Meringues 90 - 100 150 - 180 Cakes: Flapjack 160 - 170 25 -30 www.zanussi.com... - Page 12 (e.g. shelf posi- tions 1 and 3) Shelf Positions are not critical but ensure that oven shelves are evenly spaced Baking Temperature Approx Cook Time Food Shelf Position [°C] (mins) Biscuits 180 - 190 10 - 20 1 / 3 www.zanussi.com...
- Page 13 20-35 minutes per 0.5 kb (1 lb) and 170 - 190 20-30 minutes over Mutton/Lamb 20-35 minutes per 0.5 kb (1 lb) and 170 - 190 25-35 minutes over Pork/Veal/Ham 30-40 minutes per 0.5 kb (1 lb) and 170 - 190 30-40 minutes over www.zanussi.com...
- Page 14 Defrosting extend the time to defrost very much. • Put the food out of the packaging and set it • Put the oven shelf in the first shelf level from on a plate on the oven shelf. the bottom. www.zanussi.com...
-
Page 15: Oven - Care And Cleaning
3. Pull it forwards against the spring pres- the clips. Refer to the picture. sure and out along the support on both 3. Remove the glass panels. sides. 4. The heating element folds down. The oven ceiling is ready to clean. www.zanussi.com... - Page 16 Removing the glass: Important! Use the same oven lamp type. 1. Push the door trim at one side to remove it. 4. Install the glass cover. Refer to the picture. 2. Pull up the trim. 3. Remove the glass panels. www.zanussi.com...
-
Page 17: What To Do If
You can install your freestanding appliance Technical data with cabinets on one or two sides and in the corner. Dimensions Height 893 - 912 mm Width 600 mm Depth 600 mm Top oven capacity 37 l Main oven capacity 74 l www.zanussi.com... - Page 18 (See fig. 1). You must install the anti-tilt pro- tection (A) on the wall. The distance of the www.zanussi.com...
-
Page 19: Environment Concerns
Do not dispose pose at your local waste management facility. appliances marked with the symbol with the household waste. Return the product to your local recycling facility or contact your municipal office. www.zanussi.com... - Page 20 www.zanussi.com/shop...


Need help?
Do you have a question about the ZCV661 and is the answer not in the manual?
Questions and answers