
Related Manuals for Zibro TOSCA


Summary of Contents for Zibro TOSCA
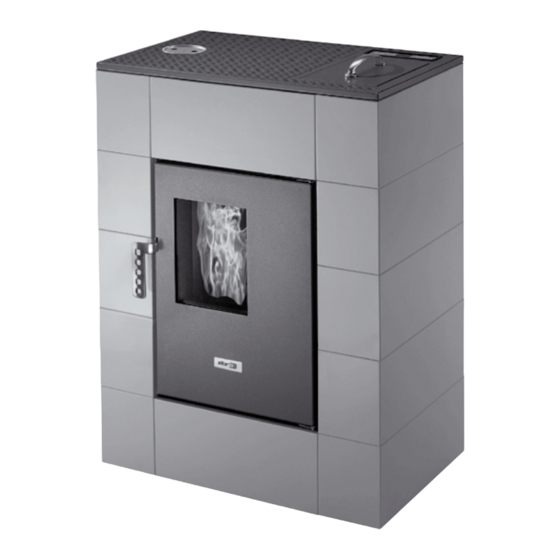
- Page 1 Tosca gebRaUchsanWeisUng bRUgsanVisning ManUeL D’UTiLisaTiOn OPeRaTing ManUaL isTRUziOni D’UsO > gebRUiKsaanWiJzing bRUKsanVisning...
- Page 2 iMPORTanT cOMPOnenTs Fire box burning pot room ash draw room inside fire baffle Window pane glass stopper Fire-door silicone strip Fire-door Pot/burning pot + grid ash draw Left side panel cover Fuel hopper cover control panel board auger Right side panel Lower dashboard smoke thermocouple Pressure switch pipe...
- Page 3 Dear sir, Madam, Congratulations on the purchase of your Zibro stove. You have acquired a high quality product that, if used responsibly and correctly, will give you many years of comfort and pleasure. In order to ensure the maximum life span and safe use of your Zibro heating pro- duct. Please carefully read this manual first and store it for future reference. On behalf of the manufacturer, we provide you a 24-month guarantee on all ma- terial and production defects. Enjoy your Zibro! Yours sincerely, PVG International b.v. Customer service department.
-
Page 4: Safety Instructions
This product is intended to be used for room heating in residential houses and is only suitable for use in dry locations in normal household situations, indoors in liv- ing room, kitchen and garage. Do not install the stove in bedrooms or bathrooms. Correct installation of this stove is extremely important for product performance and your personal safety. Therefore: • T his heater must be installed by a by Zibro authorized heating and installation engineer. The warranty can only be effective when it is installed by a by Zibro agreed professional. The instructions for use given in this manual may vary from local and/or regional legislation. When this is the case the most stringent condition is applicable. Any responsibility in cases of installation not comply- ing to local legislation and regulation and/or in case of incorrect air ventila- tion and/or inappropriate use is explicitly declined by the manufacturer and distributor. - Page 5 at highest stoking rate the wall temperature can never exceed 80°C. In case of doubt a fire proof protective plate must be placed. • T he surface of the stove can become very hot when in use. NEVER leave chil- dren unattended with the stove. Children should be supervised to ensure they do not play with the stove. • T his stove is not intended for use by person (including children) with reduced physical, sensory or mental capabilities, or lack of experience and knowledge, unless they have been given supervision or instruction concerning use of the appliance by a person responsible for their safety. • T he surface of the stove can become very hot when in use. Use appropriate –heat proof- personal protection such as heat protective gloves when operat- ing the stove.
- Page 6 Before connecting the device, check that: • The connection voltage corresponds to that on the type plate. • The socket and power supply are suitable for the device. • The plug on the cable fits the socket. • H ave the electrical installation checked by a recognised expert if you are not sure that everything is in order. • Never cover the air inlets and outlets. • Do not insert objects into the openings of the device. • N ever allow the device to come into contact with water. Do not spray the de- vice with water or submerge it as this may cause a short circuit. • A lways take the plug out of the socket before cleaning or replacing the device or a part of the device. • N EVER connect the device with the aid of an extension cable. If a suitable, earthed socket is not available, have one fitted by a recognised electrician.
-
Page 7: First Start-Up
cal legislation and/or insurance company instructions: make sure that at least once per year at the beginning of the heating season your entire stove system -including chimney- is checked and maintained by an authorized specialist. When intensively using the stove the chimney must be cleaned more frequently. The draught of the flue gasses is inside the stove forced by a fan. Installing auxil- iary fans inside the flue/chimney system could comprise the proper working of the smoke extraction fan and must therefore be avoided. c. FiRsT sTaRT UP Before starting the stove remove all items such as manual, paperwork, gloves (if applicable), stove tool etc. from the fire hearth / fire bed. When starting the stove for the first time the auger needs extra time to be filled with wood pellets, as a result at least three starting attempts will be needed as also the burning pot is empty. -
Page 8: Controlling The Stove
D. nORMaL OPeRaTiOn OF The sTOVe KEY P1 LED 1 DISPLAY A LED 2 LED 3 KEY P6 KEY P2 KEY P3 DISPLAY B LED 4 LED 5 KEY P4 KEY P5 Picture 2 • K ey P1: increase the by the user required room temperature. P1 can also be used to show indication of the flue gas temperature and to show burning level. • Key P2: decrease the by the user required room temperature. - Page 9 8. T he room air recirculation fan will now start. Air from the room is sucked into the stove from the back and is heated up inside the stove after which the air is blown into the room. 9. D uring normal operation display A will show the heating power output level of the heater. The display will show for example “on 4”. Display B will show the actual room temperature, for example “20°C”. See picture 3. Picture 3 10. K eys P5 and P6 can be used to increase or decrease the heating power level. Changing the heating power to a lower value will mean that it will take longer before the heater reaches the required room temperature.
- Page 10 Light the fire starter using a match and wait for 1 minute before starting the stove using the “normal starting up procedure” as described in §D.1.1.1 When this is not leading to a good burning fire it is required that the installation parameters of the stove will be changed by a professional. Contact a Zibro agreed installer. Do not use other fuel than the mentioned wood pellets. Other fuels such...
-
Page 11: Flame Adjustment
In the starting up phase, when the fire is not (yet) burning, the power output (burning level) can be changed as follows: press P1 and at the same time press P5 or P6 to respectively decrease or increase the power level. When the room temperature has reached the required temperature the heater will automatically switch to the lowest heating power level. Display A will show “on 1”. Display B will now show “r IS”, which means that the room temperature is at the required level and the stove has switched to the lowest possible heating power... - Page 12 The stove is provided with a clock and a weektimer. The stove can be programmed via 2 individual programs. The parameters are: • UT01 to set the day • UT02 to set the hour • UT03 to set the minute • U T04 to set technical parameters (reserved for Zibro authorized technicians only) • UT05 to set starting time for Program 1 • UT06 to set switching off time for Program 1 • UT07 to choose the week days using Program 1 • UT08 to set starting time for Program 2 • UT09 to set switching off time for Program 2...
- Page 13 Monday Tuesday Wednesday Thursday Friday saturday sunday no day (*) Display B Day 1 Day 2 Day 3 Day 4 Day 5 Day 6 Day 7 (*) No day means: no day is specified in the stove programme. When “No day” is chosen the programmes 1 and 2 are switched off. When display B shows “off” it means that no day is defined by the end user To set the clock: 1. press P3 3 times, display B will show “UT 02” change the hours to the current actual time buttons P1 and P2. 3. press P3 again, display B will show “UT 03” change the minutes to the current, actual minutes using P1 and P2 5. confirm time by pressing P4 D.11.2 setting the week timer When using the week timer programmes: make sure the actual day of the week is...
- Page 14 When day of the week in UT 01 is programmed as “Off” programme 1 is switched off. setting the week timer for programme 2. 1. Press P3 as many times until display A shows “UT08” 2. S et the starting time for programme 2 using P1 and P2. The starting time is shown in display B. 3. P ress P3 again, display A will now show “UT 09” and the off time can now be programmed 4. Set the off time using P1 and P2. The off time is shown in display B 5. P ress P3 again, display A will now show “UT 10”. Per day of the week can now be defined whether the stove must turn on/off at the moments defined at “UT 08” and “UT 09”.
-
Page 15: Safety Devices
• Higher maintenance cost The use of low quality pellets can damage your stove. Damages caused by low quality pellets are not covered by the warranty. Contact the Zibro dealer or the authorized Zibro installer for more information on pellets. Even when using good quality standardised pellets it is normal that difference arise in combustion rates, ash production and build up of slack. - Page 16 Actions to be taken: 1. Switch off the stove using P4 (on/off) Call in a Zibro authorized engineer. e.3 nOn sTaRTing / nO FiRe aLaRM In case: A. the fire is not starting, or B. the fire went out or C. the temperature is too low, the display will show “AlAr no FirE” the stove will automatically stop the...
-
Page 17: Maintenance
2. V erify the possible cause for the “AlAr no rEtE” in chapter H “troubleshoot- ing”. 3. R ectify the cause of the error, if possible following the advices in chapter H “troubleshooting”, or alternatively call in a Zibro authorized engineer. Clean the burning pot Press P4 for longer than 1 second to delete the alarm message from the dis- play. - Page 18 Before starting executing maintenance or cleaning make sure the fire has extinguished completely and that any hot surfaces are cooled down sufficiently. • F ailing to observe the maintenance procedures can result in personal injuries, operating malfunctions and irreparable damage to the stove and building. • T he flue/chimney must be kept clean at all times as soot deposits or not burnt residues may reduce its opening. Culmination of soot deposits or residues might even catch fire leading to dangerous situations. • H ave the chimney cleaned and swept by an authorized specialist following the local legislation and/or your insurance company prescription. In absence of such local legislation and/or insurance prescription: make sure that at least twice per year (first time at the...
- Page 19 F.3.1 cleaning the outer- and inner surface of the stove Clean the surface of the stove with (hot) water and soap. Do not use abrasive or solvent based cleaning products as this might result in damage to the surface fin- ish.
- Page 20 Make sure the ash does not get into contact with combustible materials (such as for example a wooden floor) Only clean the ash draw when the stove has cooled down completely! Picture F8 F.3.6 checking the fire door seal At least twice per year, first time before the heating season starts, check the charg- ing door seal on leakage and outlook. See pict. F10. Have it replaced by a by Zibro authorized technician if needed. Only use original Zibro spare parts. Only check the fire door seal when the stove has cooled down completely! F.3.7 cleaning pellet hopper and auger Check the pellet hopper and auger once per month on saw dust or other debris. Make sure the pellet hopper is empty. See pict. F11. Clean the pellet hopper and visible part of the auger with a vacuum cleaner.
- Page 21 TechnicaL seRVice, ORiginaL sPaRe PaRTs Before leaving the factory, each stove has been carefully tested and commissioned. Any repairs or commissioning that may become necessary during or after installa- tion must be carried out by heating engineers authorized by Zibro. Original factory spare parts can be obtained only and exclusively from our Technical Servicing Cent- Picture F10: checking the ers and authorized points of sale. fire door seal When contacting your dealer, the Technical Service Centre or the authorized heat- ing engineer, first make sure to be able to specify the model and serial number at their first request. Only use by Zibro agreed spare parts. Using non Zibro spare parts will lead to nul- lification of the warranty. Picture F11: cleaning pellet hopper and auger...
-
Page 22: Troubleshooting
Start no FirE” the minimum tempe- the stove with some “fire starter” rature threshold to or “fire lighters” in the fire bed. See start chapter D.1.1.2. Call authorized Zibro technician if the problem still conti- nuous. Ignitor is broken Replace the ignitor, code COM0234. By authorized Zibro technician only Outside temperature is Empty the burning pot and start too low. - Page 23 Auger is blocked Unplug the stove from electricity, move the inside hand protection of the tank away, empty the tank, carefully clean the visible parts of the auger. Replace the hand protection and start again. Call authorized Zibro technician if the problem still continu Wood pellets are not Try better quality wood pellets. good quality. The phase 1 parameter The wood pellets supply must to the set in the circuit board burning pot might need adjustment.
- Page 24 The fire has a weak The stove has obstruc- Stove needs maintenance. By authori- and orange flame, tions internally zed Zibro technician only pellet do not burn Fumes extractor is Wood pellets can burn thanks to the correctly and/or the damaged chimney flue having natural draught. glass turns black (too) Have fan replaced immediately (cod. quickly Com0259) as it can be bad for your health. By authorized Zibro technician only Room air recirculation Flue gas temperature...
- Page 25 COM0233. By authorized Zibro techni- cian only Electronic circuit board Replace the electric circuit board code is broken COM0231. By authorized Zibro techni- cian only Excessive chimney Call an chimney expert to verify if the length chimney is according to the law. Call authorized Zibro technician to verify whether chimney is suitable for the stove. Unfavourable weather When there is a very strong wind a conditions negative depression to the chimney can occur. Verify and start the stove again. Stove switches off. Stove is overheated Too high room temperature. Open...
- Page 26 Possible “AlAr Sec” cause: too high room temperature. Open doors to other rooms. If the problem continues call authorized Zibro technician Stove switches off, Fumes outlet tempera- Replace the sensor, Code COM0239. Alarm displayed is ture sensor is broken By authorized Zibro technician only “AlAr HottEmp”...
-
Page 27: Warranty Provisions
7. Transportation costs and the risks involved during the transportation of the heater or heater components shall always be at the expense of the purchaser. 8. The warranty shall only apply when the stove is installed by a by Zibro agreed installer and the signed commissioning protocol can be presented. In order to avoid unnecessary costs, we recommend that you always carefully read this manual first. In case they offer no solution, please consult your dealer or installer. -
Page 28: Technical Data
J. TechnicaL DaTa Model Tosca Type of stove Wood pellets Capacity (*) 3700-6100 Electrical power consumption (ignition / 350 / 120 normal operation) Electrical power supply V/Hz 230/~50 Recirculation airflow (min – max) 120 – 160 Thermal efficiency at nominal capacity / 82.1 / 77.9 reduced capacity (*) CO level at 13% O nominal / reduced ca- 0.026 / 0.05... -
Page 29: Declaration Of Conformity
EC Directives based on its design and type: Product Description: Residential space heating appliances fired by wood pellets Brand of Product: Zibro Reference of Product: Tosca Applicable EC Directives: EC Low Voltage Directive: 2006/95/EEC EC EMC Directive: 2004/108/EC EC RoHS Directive... - Page 30 +32 3 326 39 39 tel: +39 571 628 500 fax: +32 3 326 26 39 fax: +39 571 628 504 email: pvgbelgium@zibro.com email: pvgitaly@zibro.it q SCHWEIZ u NORGE PVG Schweiz AG Appliance A/S Salinenstrasse 63 Gefionsvej 7 4133 PRATTELN DK-3400 HILLERØD...
Need help?
Do you have a question about the TOSCA and is the answer not in the manual?
Questions and answers