Table of Contents
Advertisement
Expand Your Factory Radio
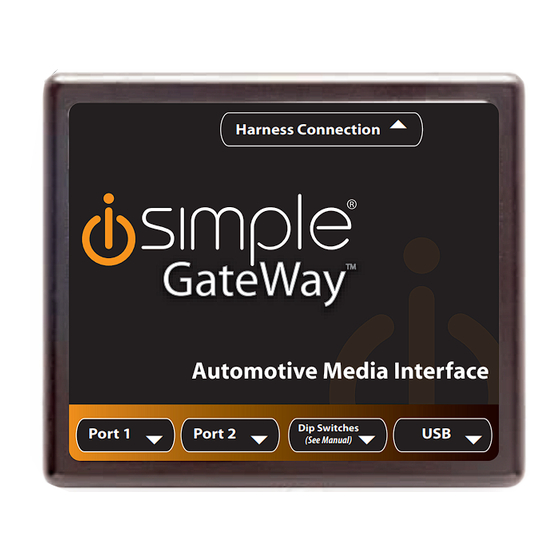
Harness Connection
Port 1
Port 2
NISSAN/INFINITI
370z • Cube
Pathfinder • Armada
Sentra • Maxima
Altima • Rouge
Versa • G35
M35/45 • QX56
Murano
Owner's Manual
Media Gateway
PXAMG
PGHNI2
iSimple®
A Division of AAMP of America™
13190 56th Court Clearwater, FL 33760
Ph. 866-788-4237
support@isimplesolutions.com
©2009 AAMP of Florida, Inc.
www.isimplesolutions.com
Dip Switches
USB
(See Manual)
add
iPod
®
Rev. 01-28-11
Inst019
Advertisement
Table of Contents

Subscribe to Our Youtube Channel
Related Manuals for iSimple Media Gateway PXAMG PGHNI2


Summary of Contents for iSimple Media Gateway PXAMG PGHNI2
- Page 1 Altima • Rouge Versa • G35 M35/45 • QX56 Murano Owner’s Manual Media Gateway PXAMG PGHNI2 iSimple® A Division of AAMP of America™ 13190 56th Court Clearwater, FL 33760 Ph. 866-788-4237 support@isimplesolutions.com ©2009 AAMP of Florida, Inc. www.isimplesolutions.com Rev. 01-28-11...
-
Page 2: Table Of Contents
Table of Contents Pages 1. Introduction 2. Precautions 3. Compatibility Notes 4. Dipswitch Settings 5. Installation Nissan Vehicles 6. 370z/Cube/Juke Operation 7. Pathfinder/Armada Operation 8-11 8. Sentra/Maxima Operation 11-15 9. 2009-2010 Maxima Operation 15-18 10. Murano Operation 18-21 11. Altima/Rouge Operation 21-25 12. - Page 3 Media Gateway & Optional Add-ons *The Media Gateway Factory Radio will only support 2 Not Included inputs. Media Gateway Harness iPod Part #: PGHNI2 Not Included Media Gateway Part #: PXAMG Harness Connection Harness Connection Dip Switches Port 1 Port 2 (See Manual) ...
-
Page 4: Introduction
1. Introduction ® Thank you for purchasing the iSimple Media Gateway. The Media Gateway is designed to provide endless hours of listening pleasure from your factory radio. To ensure that your iPod performs correctly with your radio, we recommend that you read this entire manual before attempting installation of the Media Gateway. -
Page 5: Dipswitch Settings
4. Dipswitch Settings 2007-2011 Armada 2007-2008 G35/G37 Fig. A 2007-2011 Maxima Non-Navigation 2009-2011 Murano 2007-2011 Pathfinder 2007-2011 Sentra 2007 QX56 2009-2011 370z Fig. B 2011 Juke 2007-2011 Altima 2009-2010 Cube 2007-2011 Rouge 2007-2011 Versa 2007-2008 M35/45 Fig. B Dipswitch Overview This is a quick description of the dipswitch functions for the PXAMG in Nissan applications. -
Page 6: Installation
5. Installation 1. When making electrical connections it is always recommended that the vehicle’s battery be disconnected from the electrical system before performing the installation. 2. Carefully remove the trim panels covering the bolts that secure the radio into the dash cavity. Remove these bolts, and carefully pull the radio from the dash of the vehicle. -
Page 7: Ipod Operation
10. Note: The first time you access the Media Gateway, your radio may display “DEV INIT” while the device is initializing. If this is displayed, please wait one minute then cycle the ignition off and on. Then access SAT mode again to begin normal gateway operation. -
Page 8: Hd Radio Operation
Browse by Artist Press the “TUNE ▼” button to enter the Browse menu. ”PL:LIST” will appear on your display. Press the “SEEK ▲” button until “AR:ARTIST” is displayed. Press the “TUNE ▼” button to select Browse by Artist. The list of Artists on your iPod will be displayed one at a time in alphabetical order. “AR” will be displayed in front of the artist’s name to indicate that you are searching for an artist. -
Page 9: Sirius Satellite Radio Operation
Store Presets Tune to a station you want to store. Press the “SCAN” button. Press “SEEK ▲” to select the preset location (1-18) where you wish to store the preset. When the preset location is displayed (for example PRE1) press the “TUNE▲” button to store it. The screen will display “PR SAVED”... -
Page 10: Pathfinder/Armada Operation
Selecting AUX Input Entering Mode Select Menu Press the “AM/FM” button and then the “AUX” button. Immediately press the “SEEK ▲” button to scroll through the available sources. Once “AUX” is displayed, press the “TUNE ▼” button to select it. Selecting Factory Installed Satellite Radio (If equipped) Entering Mode Select Menu... - Page 11 Exit Browse menu Press the “SCAN” button or wait 10 seconds and the Browse menu will automatically exit. Browse by Artist Press the “<<SEEK” button to enter the Browse menu. ”PL:LIST” will appear on your display. Turn the rotary TUNE KNOB until “AR:ARTIST” is displayed. Press the “<<SEEK”...
- Page 12 Changing Bands Press the “AM/FM/SAT” button a few times until “SAT” is displayed on the screen. Immediately turn the rotary TUNE KNOB to scroll through the available sources. Once the band you would like to select is displayed (“HD-AM” or “HD-FM”), press the “<<SEEK”...
-
Page 13: Sentra/Maxima Operation
Recall Presets Press the preset button that corresponds with the channel you want to recall. Changing Display Press the “DISP” button to display artist and track information. Selecting AUX Input Entering Mode Select Menu Press the “AM/FM/SAT” button a few times until “SAT” is displayed on the screen. Immediately turn the rotary TUNE KNOB to scroll through the available sources. - Page 14 Previous Track Press the “<<SEEK” button to return to the previous track. Random Mode Press the “SCAN” button while listening to the iPod to toggle through the random modes. Entering Browse Menu / Select Press the “TUNE>>” button TWICE to enter the Browse menu or to make a selection while in the Browse menu Menu Navigation Press “SEEK>>”...
- Page 15 HD Radio Operation Important Configuration Process To ensure proper functionality of your HD tuner, you must first set the “TUNE” and “SEEK” buttons to the proper configuration. (Note: You do not have to repeat this process if you have already done so for iPod control!) To do this you must first enter the Mode Select Menu.
- Page 16 Exit menus Press the “SCAN” button to exit the Preset Menu and continue playing the current station. “EXIT” will be displayed when the button is pressed. You can also wait the allotted 10 seconds and the menu will exit automatically. Changing Display: Press the “DISP”...
-
Page 17: 09-2010 Maxima Operation
Selecting AUX Input Entering Mode Select Menu Press the “RADIO” button a few times until “SAT” is displayed on the screen. Immediately press the “SEEK>>” button to scroll through the available sources. Once “AUX” is displayed, press the “<<TUNE” button to select it. Selecting Factory Installed Satellite Radio (If equipped) Entering Mode Select Menu... - Page 18 Browse by Artist Press the “<<SEEK” button to enter the Browse menu. ”PL:LIST” will appear on your display. Turn the rotary TUNE KNOB until “AR:ARTIST” is displayed. Press the “<<SEEK” button to select Browse by Artist. The list of Artists on your iPod will be displayed one at a time in alphabetical order. “AR” will be displayed in front of the artist’s name to indicate that you are searching for an artist.
- Page 19 Store Presets Tune to a station you want to store. Press the “SCAN” button. Turn the rotary TUNE KNOB to select the preset location (1-18) where you wish to store the preset. When the preset position is displayed (for example PRE1) press “SEEK>>” to store it. The screen will display “PR SAVED”...
-
Page 20: Murano Operation
Selecting AUX Input Entering Mode Select Menu Press the “AM/FM” button and then the “AUX” button. Immediately turn the rotary TUNE KNOB to scroll through the available sources. Once “AUX” is displayed, press the “<<SEEK” button to select the displayed mode. Selecting Factory Installed Satellite Radio (If equipped) Entering Mode Select Menu... - Page 21 Browse by Artist Press the “<<SEEK” button to enter the Browse menu. ”PL:LIST” will appear on your display. Turn the rotary TUNE KNOB until “AR:ARTIST” is displayed. Press the “<<SEEK” button to select Browse by Artist. The list of Artists on your iPod will be displayed one at a time in alphabetical order. “AR” will be displayed in front of the artist’s name to indicate that you are searching for an artist.
- Page 22 Store Presets Tune to a station you want to store. Press the “SCAN” button. Turn the rotary TUNE KNOB to select the preset location (1-18) where you wish to store the preset. When the preset position is displayed (for example PRE1) press “SEEK>>” to store it. The screen will display “PR SAVED”...
- Page 23 Selecting AUX Input Entering Mode Select Menu Press the “AM/FM” button and then the “AUX” button. Immediately turn the rotary TUNE KNOB to scroll through the available sources. Once “AUX” is displayed, press the “<<SEEK” button to select the displayed mode. Selecting Factory Installed Satellite Radio (If equipped) Entering Mode Select Menu...
- Page 24 Changing Display Press the “DISP” button to toggle through the display modes (Track, Artist, etc). Browse by Artist Press the “TUNE ▼” button to enter the Browse menu. ”PL:LIST” will appear on your display. Press the “SEEK ▲” button until “AR:ARTIST” is displayed. Press the “TUNE ▼”...
- Page 25 Changing Bands Press the “AM/FM/SAT” button a few times until “SAT” is displayed on the screen. Immediately press the “SEEK ▲” button scroll through the available sources. Once the band you would like to select is displayed (“HD-AM” or “HD-FM”), press the “SEEK ▼” button to select it.
- Page 26 Store Presets Tune to the station you wish to store as a preset. Press and hold the preset button on which you want to store the channel. Please Note: If you are using the Media Gateway to add Sirius but still have factory XM installed, it is important to keep the presets in seperate banks.
- Page 27 iPod Operation Entering Mode Select Menu Press the “RADIO” button a few times until “SAT” is displayed on the screen. Immediately press the “SEEK ▲” button to scroll through the available sources. Once “IPOD” is displayed, press the “TUNE ▼” button to select it. Next Track Press the “SEEK ▲”...
- Page 28 Browse by Artist Press the “TUNE ▼” button to enter the Browse menu. ”PL:LIST” will appear on your display. Press the “SEEK ▲” button until “AR:ARTIST” is displayed. Press the “TUNE ▼” button to select Browse by Artist. The list of Artists on your iPod will be displayed one at a time in alphabetical order. “AR” will be displayed in front of the artist’s name to indicate that you are searching for an artist.
- Page 29 Seek Down Press the “SEEK ▼” button TWICE to seek down to next available station. Changing Bands Press the “AM/FM/SAT” button a few times until “SAT” is displayed on the screen. Immediately press the “SEEK ▲” button to scroll through the available sources. Once the band you would like to select is displayed (“HD-AM”...
-
Page 30: Important Note
Store Presets Tune to the station you wish to store as a preset. Press and hold the preset button on which you want to store the channel. Please Note: If you are using the Media Gateway to add Sirius but still have factory XM installed, it is important to keep the presets in seperate banks. - Page 31 Random Mode Press the “SCAN” button while listening to the iPod to toggle through the random modes. Entering Browse Menu / Select Press the “▼ TRACK” button to enter the Browse menu or to make a selection while in the Browse menu. Menu Navigation Turn the TUNE KNOB Clockwise to scroll through the options in the Browse menu.
- Page 32 Tune Up Press the “SEEK/CAT ▲” button to manually tune up. Seek Up Turn the TUNE KNOB Clockwise to seek up to next available station. Tune Down Press the “▼ TRACK” button to manually tune down. Seek Down Turn the TUNE KNOB Counter-Clockwise to seek down to next available station. Changing Bands Press the “RADIO”...
-
Page 33: M35/45 Operation
Category Down Press the “<<SEEK” button to move down through the categories Store Presets Tune to the station you wish to store as a preset. Press and hold the preset button on which you want to store the channel. Please Note: If you are using the Media Gateway to add Sirius but still have factory XM installed, it is important to keep the presets in seperate banks. - Page 34 Random Mode Press and hold the “TRACK >>” button while listening to the iPod to toggle through the random modes. Entering Browse Menu / Select Press the “<< SEEK” button to enter the Browse menu or to make a selection while in the Browse menu.
- Page 35 Seek Up Turn the Tuning Knob Clockwise to seek up to next available station. Tune Down Press the “<< SEEK” button to manually tune down. Seek Down Turn the TUNE KNOB Counter-Clockwise to seek down to next available station. Changing Bands Press the “RADIO”...
-
Page 36: Qx56 Operation
Category Down Press the “<<SEEK” button to move down through the categories Store Presets Tune to the station you wish to store as a preset. Press and hold the preset button on which you want to store the channel. Please Note: If you are using the Media Gateway to add Sirius but still have factory XM installed, it is important to keep the presets in seperate banks. - Page 37 Random Mode Press the “SCAN” button while listening to the iPod to toggle through the random modes. Entering Browse Menu / Select Press the “<<SEEK” button to enter the Browse menu or to make a selection while in the Browse menu. Menu Navigation Turn the TUNE KNOB clockwise to scroll through the options in the Browse menu.
- Page 38 HD Radio Operation Entering Mode Select Menu Press the “AM/FM/SAT” button a few times until “SAT” is displayed on the screen. Immediately turn the TUNE KNOB to scroll through the available sources. Once “HD-FM” is displayed, press the “<<SEEK” button to select it. Tune Up Press the “SEEK >>”...
- Page 39 Channel Up Turn the TUNE KNOB clockwise to move up through the channels. Channel Down Turn the TUNE KNOB counter-clockwise to move down through the channels. Category Up Press the “SEEK>>” button to move up through the categories. Category Down Press the “<<SEEK”...
-
Page 40: Troubleshooting
16. Troubleshooting Symptom Cause Remedy This only occurs the first time the Radio shows “DEV Media Gateway INIT” device is initializing. Media Gateway is powered on. Wait a few minutes, cycle ignition off and on then enter SAT mode. The track forward The seek and tune Please see the Important Configuration Process in the iPod... - Page 41 Troubleshooting (cont) Symptom Cause Remedy When I listen to Factory antenna Use Media Gateway to access the factory AM or cable is connected HD radio source. This will provide FM radio there to the HD radio all AM and FM reception for your is only static, no tuner.
-
Page 42: Warranty Info
www.isimplesolutions.com For Best Performance Have It Professionally Installed.
Need help?
Do you have a question about the Media Gateway PXAMG PGHNI2 and is the answer not in the manual?
Questions and answers