Milwaukee 6310-20 Operator's Manual
18 volt circular saw
Hide thumbs
Also See for 6310-20:
- Operator's manual (33 pages) ,
- Operator's manual (24 pages) ,
- Operator's manual (20 pages)
Table of Contents
Advertisement
Available languages
Available languages
Quick Links
Catalog No.
No de Cat.
Catálogo No.
6310-20
18 VOLT CIRCULAR SAW
SCIE CIRCULAIRE 18V
SIERRA CIRCULAR DE 18V
TO REDUCE THE RISK OF INJURY, USER MUST READ AND UNDERSTAND OPERATOR'S MANUAL.
AFIN DE RÉDUIRE LE RISQUE DE BLESSURES, L'UTILISATEUR DOIT LIRE ET BIEN COMPRENDRE LE
MANUEL DE L'UTILISATEUR.
PARA REDUCIR EL RIESGO DE LESIONES, EL USUARIO DEBE LEER Y ENTENDER EL MANUAL DEL
OPERADOR.
OPERATOR'S MANUAL
MANUEL de L'UTILISATEUR
MANUAL del OPERADOR
SPECIAL NOTE: New battery packs are not fully charged.
Charge your battery pack before using it for the first time and
follow the charging instructions in your charger manual.
NOTE SPÉCIALE : Les batteries neuves ne sont pas
entièrement chargées. Chargez la batterie avant de vous en
servir la première fois en suivant les instructions de recharge
dans le manuel qui accompagne cet outil.
NOTA ESPECIAL: Las batterias, cuando son nuevas, no
están totalmente cargadas. Cargue su bateria antes de
usarla por primera vez siga las instrucciones de carga que
vienen en el manuel de la herramienta.
Advertisement
Table of Contents

Subscribe to Our Youtube Channel
Related Manuals for Milwaukee 6310-20


Summary of Contents for Milwaukee 6310-20
- Page 1 MANUAL del OPERADOR Catalog No. No de Cat. Catálogo No. 6310-20 SPECIAL NOTE: New battery packs are not fully charged. Charge your battery pack before using it for the first time and follow the charging instructions in your charger manual.
- Page 2 page 2...
- Page 3 GENERAL SAFETY RULES — FOR ALL BATTERY OPERATED TOOLS WARNING! READ AND UNDERSTAND ALL INSTRUCTIONS. Failure to follow all instructions listed below, may result in electric shock, fire and/or serious personal injury. SAVE THESE INSTRUCTIONS WORK AREA TOOL USE AND CARE 13.
- Page 4 SPECIFIC SAFETY RULES — CIRCULAR SAWS Maintain labels and nameplates. These carry important information. If unreadable or missing, contact a MILWAUKEE service facility for a free replacement. DANGER! Keep hands away from cutting area and blade. Keep your second hand on auxiliary handle or motor housing. If both hands are holding the saw, they cannot be cut by the blade.
-
Page 5: Specifications
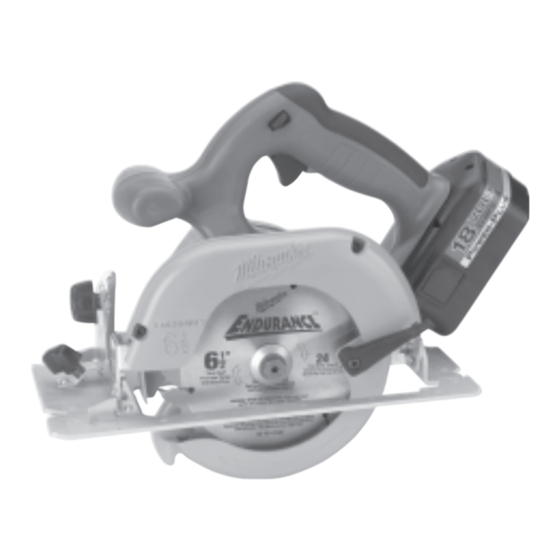
Depth of Cut Properly Recycle Nickel Cadmium Size At 90° at 45° Batteries 3200 6-1/2" 0 to 2-1/8" 0 to 1-9/16" 6310-20 5/8" Volts Direct Current No Load Revolutions per Minute Underwriters Laboratories, Inc. FUNCTIONAL DESCRIPTION Lock-off button Trigger Handle Battery... -
Page 6: Tool Assembly
CHARGING AND USING BATTERY PACK Charge your battery pack before using your tool for the first time and Removing Battery Pack from Tool (Fig. 1) when your tool no longer performs with the power and torque needed Push in the release buttons and slide the battery pack away from for the job. - Page 7 Raise or lower the shoe to the desired position. Markings in 1/4" Adjusting the Blade to Shoe (Fig. 8 & 9) increments are located on the inner side of the upper guard for The shoe has been adjusted at the factory to a 90 degree setting. depth setting.
-
Page 8: Operation
MILWAUKEE service facility. The brake is not a substitute for the guard, and you must always wait for the blade to stop completely before re- moving the saw from the workpiece. - Page 9 Troubleshooting If the blade does not follow a straight line: If the blade binds, smokes or turns blue from friction: • Teeth are dull. This is caused by hitting a hard object such as a nail • Blade is dull or stone, dulling teeth on one side.
-
Page 10: Maintenance
Use a MILWAUKEE Battery Pack only until it no longer performs with the power and torque needed for your applica- tion. - Page 11 Others hazardous. For a complete listing of accessories refer to your MILWAUKEE Electric Tool catalog. To obtain a catalog, contact your local distributor or a service center listed on the back cover of this operator’s manual. Thin Kerf Blades Special thin kerf blade designed for cordless circular saws.
- Page 12 RÈGLES DE SÉCURITÉ GÉNÉRALES POUR TOUS LES OUTILS À BATTERIE AVERTISSEMENT! VOUS DEVEZ LIRE ET COMPRENDRE TOUTES LES INSTRUCTIONS. Le non-respect, même partiel, des instructions ci-après entraîne un risque de choc électrique, d'incendie et/ou de blessures graves. CONSERVEZ CES INSTRUCTIONS UTILISATION ET ENTRETIEN DES OUTILS AIRE DE TRAVAIL 13.
- Page 13 Entretenez les étiquettes et marqies di fabricant. Les indications qu'elles contiennent sont précieuses. Si elles deviennent illisibles ou se détachent, faites-les remplacer gratuitement à un centre de service MILWAUKEE accrédité. DANGER! N’approchez pas les mains de la zone de coupe ou de la lame. Gardez l’autre main sur la poignée auxiliaire ou sur le carter du moteur.
-
Page 14: Spécifications
Profondeur Profondeur Arbre Disposez correctement des Cat. à vide de lame de coupe à 90° de coupe à 45° batteries au nickel-cadmium 6310-20 3200 165mm 16mm 0 to 54mm 0 to 40mm 0 to 2-1/8" 0 to 1-9/16" 6-1/2" 5/8"... -
Page 15: Montage De L'outil
RECHARGE ET USAGE DE LA BATTERIE Rechargez la batterie avant de vous servir de l’outil la première fois, ou Retrait de la batterie de l’outil (Fig. 1) lorsque l’outil n’offre plus la puissance et le couple nécessaire au travail Enfoncez les boutons de dégagement et retirez la batterie. à... - Page 16 Faites monter ou descendre la semelle jusqu’à ce qu’elle se trouve à Rélage de l’angle de la lame par rapport à la semelle la position désirée. Des graduations inscrites aux 6,4mm (1/4po.) (Fig. 8 et 9) sur la partie intérieure du garde-lame supérieur vous permettent de L’angle de la semelle a été...
- Page 17 MANIEMENT AVERTISSEMENT! 11. Soyez vigilant. La moindre distraction peut occasionner le gauchissement ou le coincement. Méfiez-vous des coupes à répétition qui peuvent engendrer des mouvements nonchalants. Pour minimiser les risques de blessures, utilisez uniquement des accessoires spécifiquement recomrnandés pour outil. ’emploi AVERTISSEMENT! d’accessoires...
- Page 18 • La semelle est hors ligne ou inclinée manque fréquemment, faites vérifier la scie à un centre-service MILWAUKEE accrédité. Le frein n'est pas un substitut du garde-lame. Vous • La lame est gauchie devez donc attendre que la lame soit complètement arrête avant de retirer la •...
-
Page 19: Garantie
à la dernière page pas correctement, renvoyez l’outil, le chargeur et la batterie à un centre de ce manuel. de service MILWAUKEE accrédité, afin qu’on en effectue la réparation. Garantie des batteries Entretien de la batterie Les batteries pour outils sans cordon sont garanties pour un an à... - Page 20 Pour une liste complète des accessoires, prière de se reporter au catalogue MILWAUKEE Electric Tool. Pour obtenir un catalogue, il suffit de contacter votre distributeur local ou l'un des centres-service énumérés sur la page de couverture de ce manuel.
- Page 21 INSTRUCCIONES GENERALES DE SEGURIDAD - PARA LAS HERRAMIENTAS A BATERIAS ¡ADVERTENCIA! LEA Y ENTIENDA TODAS LAS INSTRUCCIONES. Se debe seguir todas las instrucciones a continuación para evitar una descarga eléctrica, incendio y/o lesiones graves. GUARDE ESTAS INSTRUCCIONES AREA DE TRABAJO EL USO Y MANTENIMIENTO DE LA HERRAMIENTA Mantenga el área de trabajo limpia e iluminada.
- Page 22 Guarde las etiquetas y placas de especificaciones. Estas tienen información importante. Si son ilegibles o si no se pueden encontrar, póngase en contacto con un centro de servicio de MILWAUKEE para una refacción gratis. ¡PELIGRO! Mantenga las manos lejos de la cuchilla y del área de corte. Mantenga una de sus manos sobre la empuñadura auxiliar o el cárter del motor.
-
Page 23: Descripcion Funcional
Baterías de níquel cadmio Corriente r p m de Corte de Corte Disco correctamente recicladas continua Disco a 90° a 45° 6310-20 3200 165mm 0 to 54mm 0 to 40mm 16mm Voltaje de corriente continua 6-1/2" 5/8" 0 to 2-1/8" 0 to 1-9/16"... - Page 24 USO Y CARGA DE LA BATERIA Cargue su batería antes de usar su herramienta po primera vez o cuando Como se quita la batería de la herramienta (Fig. 1) la misma no opera ya con el poder y torque necesario para la aplicación. Presione el botón de liberación y saque el juego de batería.
- Page 25 Suba o baje la zapata a la posición deseada. Las graduaciones en Cómo ajustar la cuchilla con respecto a la zapata (Fig. 8 y 9) incrementos de 6,4mm (1/4") marcadas en el lado interior de la La zapata viene ajustada de la fábrica a 90 grados. Inspeccione la sierra guarda superior son para fijar la profundidad.
- Page 26 OPERACION ¡ADVERTENCIA! 10. Use una guía de corte o filo cuando corte a lo largo. Este tipo de guías mejoran el control sobre la sierra y reducen el riesgo de que el disco se doble o atasque. Para reducir riesgo lesion, use solamente acessorios especificamente 11.
- Page 27 • El disco no tiene filo autorizada de MILWAUKEE . El freno no sustituye la guarda, por lo que • El disco está colocado al revés siempre deberá esperar a que el disco de corte se detenga por completo antes de retirar la sierra del área de trabajo.
-
Page 28: Mantenimiento
Use una bateria MILWAUKEE hasta que ya no trabaje con la potencia y el torque necesario para la aplicación requerida. - Page 29 Para una lista completa de accessorios, refiérase a su catálogo MILWAUKEE Electric Tool. Para obtener un catálogo, contacte su distribuidor local o uno de los centros de servicio listos en la página de cubierta de este manual.
- Page 30 NOTES NOTES NOTAS page 30...
- Page 31 NOTES NOTES NOTAS page 31...
- Page 32 UNITED STATES CANADA MILWAUKEE Service Service MILWAUKEE To locate the factory S Milwaukee Electric Tool (Canada) Ltd ERVICE ENTER or authorized service station nearest you, call 755 Progress Avenue Scarborough, Ontario M1H 2W7 1-800-414-6527 Tel. (416) 439-4181 TOLL FREE • NATIONWIDE Fax: (416) 439-6210 Monday-Friday •...
Need help?
Do you have a question about the 6310-20 and is the answer not in the manual?
Questions and answers