Table of Contents
Advertisement
Quick Links
Advertisement
Table of Contents

Subscribe to Our Youtube Channel
Related Manuals for dixell iPro SERIES


Summary of Contents for dixell iPro SERIES
- Page 1 SERIES (V.3.2)
-
Page 3: Table Of Contents
Analogue outputs ................................ 37 4.5.3.4 Digital outputs ................................37 4.5.3.5 Wiring diagrams ................................38 4.5.3.6 Mechanical specifications ............................38 4.5.3.7 Electrical specifications ............................... 38 iPro Series 1592025700 IPROFAMILY stp GB 2012.08.08.doc 3/72... - Page 4 7.5.5 Analogue output for relays (coil power supply 12Vdc) ......................65 CONNECTION OF THE DIGITAL OUTPUTS CANBUS CONNECTION RS485 SLAVE CONNECTIONS RS485 MASTER CONNECTION iPro Series 1592025700 IPROFAMILY stp GB 2012.08.08.doc 4/72...
-
Page 5: Important Recommendations
The device must not be installed in particularly hot environments as high temperatures can damage it (electronic circuits and/or plastic components forming part of the casing). Comply with the temperature and humidity limits specified in the manual in order to store the product correctly. iPro Series 1592025700 IPROFAMILY stp GB 2012.08.08.doc 5/72... -
Page 6: Product Disposal (Weee)
13 August 2005 and must be disposed of as separated waste. Should the product be disposed of incorrectly, sanctions may be applied as stipulated in applicable local regulations regarding waste disposal. iPro Series 1592025700 IPROFAMILY stp GB 2012.08.08.doc 6/72... -
Page 7: Introduction
As the system is one of the most technologically advanced, it is flexible and can be customised for it to be adapted to the user’s particular requirements. iPro Series 1592025700 IPROFAMILY stp GB 2012.08.08.doc 7/72... -
Page 8: General Specifications
Internal web server with the Dixell website as default with the option of downloading a customised website for reading and writing variables with synoptic creation (via HTML). • Ethernet port. • USB port. • Connection to the dedicated remote LCD display. • CANBus. iPro Series 1592025700 IPROFAMILY stp GB 2012.08.08.doc 8/72... - Page 9 • 8 fully programmable keys. • Panel or wall mounted. The LED display (only for the IPS versions) has the following features: • Configurable digits and icons • 6 fully programmable keys iPro Series 1592025700 IPROFAMILY stp GB 2012.08.08.doc 9/72...
-
Page 10: Versions Of The Programmable Controllers
EXPANSION IPX106D (6 relay, disconnectable connectors) IPX206D (6 relay, spring+screw connectors) IPX306D (6 relay, disconnectable+screw connectors) • ELECTRONIC VALVE DRIVER XEV20D (driver for electronic valve – up to 2 valves per driver) iPro Series 1592025700 IPROFAMILY stp GB 2012.08.08.doc 10/72... -
Page 11: Ipro.genius And Ipro.chill (Ipg100D – Ipc100D Ranges)
IPRO.GENIUS AND IPRO.CHILL (IPG100D – IPC100D RANGES) iPro Series 1592025700 IPROFAMILY stp GB 2012.08.08.doc 11/72... -
Page 12: Description Of The Connections
Yellow status LEDs (LED1) and red LED (ALARM) See relative paragraph Connector for NC contact to reset an external modem RS232 connector for an external GSM modem connection (SIEMENS TC35) Connector for an internal analogue modem iPro Series 1592025700 IPROFAMILY stp GB 2012.08.08.doc 12/72... -
Page 13: Description Of The Inputs And Outputs
DI14 Opto-insulated digital input 14 (potential free contact) DI15 Opto-insulated digital input 15 (potential free contact) DI16 Opto-insulated digital input 16 (potential free contact) DI17 Opto-insulated digital input 17 (potential free contact) iPro Series 1592025700 IPROFAMILY stp GB 2012.08.08.doc 13/72... - Page 14 NC relay output to reset an external modem (24Vac/dc) Version with SSR relay RL11 Relay 11 normally open contact RL11 Common relays 11 RL12 Relay 12 normally open contact RL12 Common relays 12 RL13 Common relays 13 iPro Series 1592025700 IPROFAMILY stp GB 2012.08.08.doc 14/72...
- Page 15 RL14 Relay 14 normally open contact RL14 Common relays 14 RL15 Relay 15 normally open contact RL15 Common relays 15 RL13 Relay 13 normally open contact iPro Series 1592025700 IPROFAMILY stp GB 2012.08.08.doc 15/72...
-
Page 16: Technical Specifications
The electrical devices controlled by these analogue outputs must be Notes: powered separately with another transformer (do not use the same secondary of the controller's power) in order to prevent the outputs from malfunctioning or being damaged. iPro Series 1592025700 IPROFAMILY stp GB 2012.08.08.doc 16/72... -
Page 17: Standard Digital Outputs
Verify the capacity of the output used. There is double insulation between Notes: the digital outputs and the low voltage of the rest of the circuit. Do not use different voltages for the various groups of relays nor within each group. iPro Series 1592025700 IPROFAMILY stp GB 2012.08.08.doc 17/72... -
Page 18: Wiring Diagrams
4.1.3.6 Wiring diagrams iPro Series 1592025700 IPROFAMILY stp GB 2012.08.08.doc 18/72... -
Page 19: Mechanical Specifications
Control to classify with the definitions 2.5.1 e 2.5.2 mentioned in the section 2.5 of the general requirements EN60730-1 (2.5.1 = integrated control, 2.5.2 = incorporated control). Electrical safety: • EN60730-1 Electromagnetic compatibility: • EN61000-4-2, EN61000-4-3, EN61000-4-4, EN61000-4-5, EN61000-4-6, EN61000-4-8, EN61000-4-11 iPro Series 1592025700 IPROFAMILY stp GB 2012.08.08.doc 19/72... -
Page 20: Ipro.genius (Ipg200D Range)
IPRO.GENIUS (IPG200D RANGE) iPro Series 1592025700 IPROFAMILY stp GB 2012.08.08.doc 20/72... -
Page 21: Description Of The Connections
Yellow status LEDs (LED1) and red LED (ALARM) See relative paragraph Connector for NC contact to reset an external modem RS232 connector for an external GSM modem connection (SIEMENS TC35) Connector for an internal analogue modem iPro Series 1592025700 IPROFAMILY stp GB 2012.08.08.doc 21/72... -
Page 22: Description Of The Inputs And Outputs
Opto-insulated digital input 12 DI13 Opto-insulated digital input 13 DI14 Opto-insulated digital input 14 DI15 Opto-insulated digital input 15 DI16 Opto-insulated digital input 16 DI17 Opto-insulated digital input 17 DI18 Opto-insulated digital input 18 iPro Series 1592025700 IPROFAMILY stp GB 2012.08.08.doc 22/72... - Page 23 Connection for VISOGRAPH remote terminal (+) Remote Display Connection for VISOGRAPH remote terminal (-) Modem Reset NC relay input to reset an external modem (24Vac/dc) Modem Reset NC relay output to reset an external modem (24Vac/dc) iPro Series 1592025700 IPROFAMILY stp GB 2012.08.08.doc 23/72...
-
Page 24: Analogue Inputs
Verify the capacity of the output used. There is double insulation between Notes: the digital outputs and the low voltage of the rest of the circuit. Do not use different voltages for the various groups of relays nor within each group. iPro Series 1592025700 IPROFAMILY stp GB 2012.08.08.doc 24/72... -
Page 25: Electrical Specifications
Phoenix quick coupling connectors for low voltage Connectors: STELVIO 90° screw connectors for digital outputs (250Vac, 6A max) AT91RM9200 32-bit 200Mhz Microprocessor: 128MB, in 8-bit Permanent FLASH memory: 32MB o 64MB, in 16-bit RAM: standard Internal clock: iPro Series 1592025700 IPROFAMILY stp GB 2012.08.08.doc 25/72... -
Page 26: Plastic Container
Control to classify with the definitions 2.5.1 e 2.5.2 mentioned in the section 2.5 of the general requirements EN60730-1 (2.5.1 = integrated control, 2.5.2 = incorporated control). Electrical safety: • EN60730-1 Electromagnetic compatibility: • EN61000-4-2, EN61000-4-3, EN61000-4-4, EN61000-4-5, EN61000-4-6, EN61000-4-8, EN61000-4-11 iPro Series 1592025700 IPROFAMILY stp GB 2012.08.08.doc 26/72... -
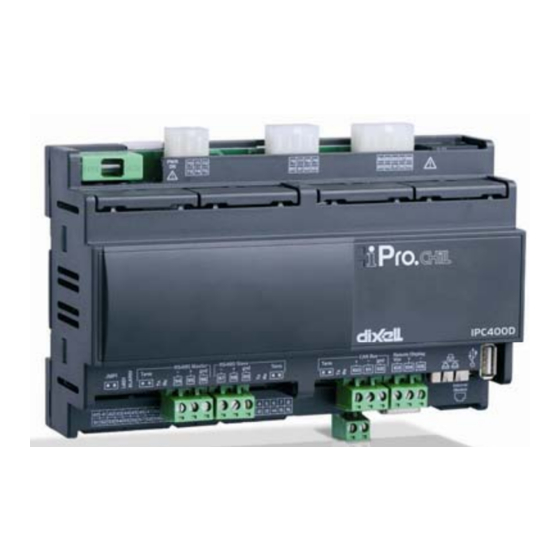
Page 27: Ipro 4 Din (Ipg100D – Ipg200D – Ipc100E Ranges)
IPRO 4 DIN (IPG100D – IPG200D – IPC100E RANGES) 4.3.1 Description of the connections Connector Description Connector for 24Vac/dc power supply Analogue inputs (Pb1 - Pb6, PbC) Additional power (+5Vdc, +12Vdc, GND) Analogue outputs (Out1 - Out4, GND) iPro Series 1592025700 IPROFAMILY stp GB 2012.08.08.doc 27/72... -
Page 28: Description Of The Inputs And Outputs
Common relays 1, 2, 3 and 4 (MAX 10A) Common relays 1, 2, 3 and 4 (MAX 10A) Relay 1 normally open contact Relay 2 normally open contact iPro Series 1592025700 IPROFAMILY stp GB 2012.08.08.doc 28/72... -
Page 29: Digital Inputs
Use another transformer (do not use the same secondary of the Notes: controller's power) in order to prevent the inputs from malfunctioning or being damaged. Note: the digital inputs as dry contacts are available on request. iPro Series 1592025700 IPROFAMILY stp GB 2012.08.08.doc 29/72... -
Page 30: Analogue Outputs
Notes: the digital outputs and the low voltage of the rest of the circuit. Do not use different voltages for the various groups of relays nor within each group. 4.3.3.5 Wiring diagrams iPro Series 1592025700 IPROFAMILY stp GB 2012.08.08.doc 30/72... -
Page 31: Usb-Ethernet Adapter
This adapter is not set up for fixed or continuous connection. If the adapter should be kept connected continuously, the room temperature must not exceed 50°C. iPro Series 1592025700 IPROFAMILY stp GB 2012.08.08.doc 31/72... -
Page 32: Ipro.link (Ipl500D)
USB port for downloads (BIOS, ISaGRAF® application, maps of parameters, remote display applications, network configuration, website) and uploads (log files) Ethernet port for TCP/IP connections SIM CARD slot (only for version with GPRS modem) Connection for GPRS modem antenna iPro Series 1592025700 IPROFAMILY stp GB 2012.08.08.doc 32/72... -
Page 33: Description Of The Inputs And Outputs
LAN or RS485 MASTER Connection (-) – depend on the model Serial Port LAN or RS485 MASTER Connection (+) – depend on the model CANBUS connection (-) CANBUS connection (+) 4.4.3 Technical specifications 4.4.3.1 Wiring diagrams iPro Series 1592025700 IPROFAMILY stp GB 2012.08.08.doc 33/72... -
Page 34: Mechanical Specifications
On a DIN rail (EN 50022, DIN 43880) Mount: Fastened with screws via the removable plastic flaps. PC-ABS Thermoplastic Material: V0 (UL94) Self-extinguishing: 300V Comparative Tracking Index (CTI): Black or White, depending on the model Colour: iPro Series 1592025700 IPROFAMILY stp GB 2012.08.08.doc 34/72... -
Page 35: Ipx106D
Rx and Tx LED to indicate that communication is active Closed circuit terminal (Term) LAN serial port connector Dip-switch to set the address of the device. Green LED to indicate the presence of power Red status LED (ALARM) See relative paragraph iPro Series 1592025700 IPROFAMILY stp GB 2012.08.08.doc 35/72... -
Page 36: Description Of The Inputs And Outputs
Relay 6 normally open contact Common relays 5, 6 and 3 (MAX 6A) Common relays 1, 2 and 4 (MAX 6A) Relay 1 normally open contact Relay 2 normally closed contact Relay 3 normally closed contact iPro Series 1592025700 IPROFAMILY stp GB 2012.08.08.doc 36/72... -
Page 37: Digital Outputs
The common relays of the outputs are separate and split into groups. Different voltages can be used for different groups of relays but the same voltage must be used within each group. iPro Series 1592025700 IPROFAMILY stp GB 2012.08.08.doc 37/72... -
Page 38: Wiring Diagrams
Connectors: SELECOM/CIVILUX connectors for digital outputs (250Vac, 6A max) or with a different order code: Phoenix quick coupling connectors for low voltage STELVIO 90° screw connectors for digital outputs (250Vac, 6A max) iPro Series 1592025700 IPROFAMILY stp GB 2012.08.08.doc 38/72... -
Page 39: Setting The Address Of The Device
The address of the device is set via a dip-switch and numbering is binary as shown in the table below: Not used If the address is changed while the device is switched on, to confirm the new address remember to switch off and switch on again the device. iPro Series 1592025700 IPROFAMILY stp GB 2012.08.08.doc 39/72... -
Page 40: Ipx125D – Ipx115D
Digital relay outputs 3 NO relays + 1 changeover relay, 1 common Digital relay outputs 6 NO relays, 2 common Digital relay outputs 3 NO relays + 2 changeover relays, 3 common iPro Series 1592025700 IPROFAMILY stp GB 2012.08.08.doc 40/72... -
Page 41: Description Of The Inputs And Outputs
Opto-insulated digital input 1 Opto-insulated digital input 2 Opto-insulated digital input 3 Opto-insulated digital input 4 Opto-insulated digital input 5 Opto-insulated digital input 6 Opto-insulated digital input 7 Opto-insulated digital input 8 iPro Series 1592025700 IPROFAMILY stp GB 2012.08.08.doc 41/72... - Page 42 SSR relay 18 normally open contact RL17 SSR relay 17 normally open contact Common relays 16, 17, 18 and 19 RL19 SSR relay 19 normally open contact RL20 Relay 20 normally open contact iPro Series 1592025700 IPROFAMILY stp GB 2012.08.08.doc 42/72...
-
Page 43: Technical Specifications
The electrical devices controlled by these analogue outputs must be Notes: powered separately with another transformer (do not use the same secondary of the controller's power) in order to prevent the outputs from malfunctioning or being damaged. iPro Series 1592025700 IPROFAMILY stp GB 2012.08.08.doc 43/72... -
Page 44: Digital Outputs
Notes: the digital outputs and the low voltage of the rest of the circuit. Do not use different voltages for the various groups of relays nor within each group. 4.6.3.5 Wiring diagrams iPro Series 1592025700 IPROFAMILY stp GB 2012.08.08.doc 44/72... -
Page 45: Mechanical Specifications
The address of the device is set via a dip-switch and numbering is binary as shown in the table below: Not used If the address is changed while the device is switched on, to confirm the new address remember to switch off and switch on again the device. iPro Series 1592025700 IPROFAMILY stp GB 2012.08.08.doc 45/72... -
Page 46: Ipx225D – Ipx215D
5 NO relays, 1 common and 1 potential free (Neutral) The position 93 is not connected Digital outputs with SSR relays 4 NO relays, 1 common The position 109 is not connected iPro Series 1592025700 IPROFAMILY stp GB 2012.08.08.doc 46/72... -
Page 47: Description Of The Inputs And Outputs
Opto-insulated digital input 1 Opto-insulated digital input 2 Opto-insulated digital input 3 Opto-insulated digital input 4 Opto-insulated digital input 5 Opto-insulated digital input 6 Opto-insulated digital input 7 Opto-insulated digital input 8 iPro Series 1592025700 IPROFAMILY stp GB 2012.08.08.doc 47/72... - Page 48 Common relays 20, 21, 22 and 23 (MAX 6A) RL20 Relay 20 normally open contact RL21 Relay 21 normally open contact RL22 Relay 22 normally open contact RL23 Relay 23 normally open contact RL16 SSR relay 16 normally open contact iPro Series 1592025700 IPROFAMILY stp GB 2012.08.08.doc 48/72...
-
Page 49: Technical Specifications
The electrical devices controlled by these analogue outputs must be Notes: powered separately with another transformer (do not use the same secondary of the controller's power) in order to prevent the outputs from malfunctioning or being damaged. iPro Series 1592025700 IPROFAMILY stp GB 2012.08.08.doc 49/72... -
Page 50: Digital Outputs
Notes: the digital outputs and the low voltage of the rest of the circuit. Do not use different voltages for the various groups of relays nor within each group. 4.7.3.5 Wiring diagrams iPro Series 1592025700 IPROFAMILY stp GB 2012.08.08.doc 50/72... -
Page 51: Mechanical Specifications
The address of the device is set via a dip-switch and numbering is binary as shown in the table below: Not used If the address is changed while the device is switched on, to confirm the new address remember to switch off and switch on again the device. iPro Series 1592025700 IPROFAMILY stp GB 2012.08.08.doc 51/72... -
Page 52: Interface
Application resident in the microprocessor of the keyboard Up to 5 different languages for each application Panel or wall mounted (depending on the model) Dedicated power supply and communication via a 3-way cable from the programmable controller iPro Series 1592025700 IPROFAMILY stp GB 2012.08.08.doc 52/72... -
Page 53: Connections
• Now download the application from Visoprog Note: This procedure it is possible only if the version of the BIOS of the Visograph is the version 1.6 (23/02/2011), 8.1 (04/03/2011) or superior. iPro Series 1592025700 IPROFAMILY stp GB 2012.08.08.doc 53/72... -
Page 54: Dimensions
5.1.4 Dimensions iPro Series 1592025700 IPROFAMILY stp GB 2012.08.08.doc 54/72... -
Page 55: Meaning Of The Leds And Jumpers In The Various Devices
- if on, the system is malfunctioning. Therefore, verify the CANBus or LAN connection or the configuration/connection of the analogue inputs. - if it flashes, the device is transferring data. - if it flashes, the device is receiving data. iPro Series 1592025700 IPROFAMILY stp GB 2012.08.08.doc 55/72... -
Page 56: Installation
Always separate the power of the controller from that of all the other electrical devices present in the system. The secondary of the supply transformer of the devices must never be connected to the earth. iPro Series 1592025700 IPROFAMILY stp GB 2012.08.08.doc 56/72... -
Page 57: Connection Of The Analogue Inputs
Each sensor must be connected through one of the inputs (from Pb1 to Pb10) and the power supply (+12V) as shown in the diagram below. IPG-IPC IPG-IPC 4 DIN Recommendations: - follow the diagram of the device used, for the numbering. - the configuration is determined by the application. iPro Series 1592025700 IPROFAMILY stp GB 2012.08.08.doc 57/72... -
Page 58: Pressure Transducers And Ratiometric Pressure Transducers (0 - 5V)
Each sensor must be connected through one of the inputs (from Pb1 to Pb10) and the power supply (+12V/GND) as shown in the diagram below. IPG-IPC IPG-IPC 4 DIN Recommendations: - follow the diagram of the device used, for the numbering. - the configuration is determined by the application. iPro Series 1592025700 IPROFAMILY stp GB 2012.08.08.doc 58/72... -
Page 59: Probes And Transducers With 24Vac/Dc Power Supply
- the power supply of the sensor must be separate from that of the programmable controller - follow the diagram of the device used, for the numbering. - the configuration is determined by the application. iPro Series 1592025700 IPROFAMILY stp GB 2012.08.08.doc 59/72... -
Page 60: Connection Of The Digital Inputs
IPG200, IPX125D, IPX115D, IPX215D, IPX215D VERSIONS IPG108D, IPG208D VERSION (special version not standard version) Recommendations: - follow the diagram of the device used, for the numbering. - the configuration is determined by the application. iPro Series 1592025700 IPROFAMILY stp GB 2012.08.08.doc 60/72... -
Page 61: Live Digital Inputs (24Vac/Dc)
20mA or PWM (the PWM configuration requires the Dixell XVxx module to be used for the fan speed to be controlled). NOTE: the analogue outputs in certain models are not opto-insulated. In this case, any devices that require 24Vac/dc power supply must be powered separately with another transformer. iPro Series 1592025700 IPROFAMILY stp GB 2012.08.08.doc 61/72... -
Page 62: V, 4 - 20Ma Analogue Output For Condensation Control
0 - 10V, 4 - 20mA Analogue output for condensation control IPG-IPC VERSION IPG108, IPG208 VERSION Recommendations: - follow the diagram of the device used, for the numbering. - the configuration is determined by the application. iPro Series 1592025700 IPROFAMILY stp GB 2012.08.08.doc 62/72... -
Page 63: Pwm Analogue Output For Condensation Control
0 - 10V, 4 - 20mA Proportional analogue output for servomotors/actuators IPG-IPC IPG 4 DIN Recommendations: - follow the diagram of the device used, for the numbering. - the configuration is determined by the application. iPro Series 1592025700 IPROFAMILY stp GB 2012.08.08.doc 63/72... -
Page 64: Devices With 24Vac/Dc Power Supply
- the power supply of the device must be separate from that of the programmable controller - follow the diagram of the device used, for the numbering. - the configuration is determined by the application. iPro Series 1592025700 IPROFAMILY stp GB 2012.08.08.doc 64/72... -
Page 65: Analogue Output For Relays (Coil Power Supply 12Vdc)
Certain models have SSR relays (solid state relay), which are suitable to control devices where numerous commutations are required, which would not be supported by an electromechanical relay. For the electrical specifications, refer to the specifications of the model using such relays. iPro Series 1592025700 IPROFAMILY stp GB 2012.08.08.doc 65/72... -
Page 66: Canbus Connection
CANBUS CONNECTION Recommendations: - follow the diagram of the device used, for the numbering. iPro Series 1592025700 IPROFAMILY stp GB 2012.08.08.doc 66/72... -
Page 67: Rs485 Slave Connections
RS485 SLAVE CONNECTIONS Recommendations: - follow the diagram of the device used, for the numbering. iPro Series 1592025700 IPROFAMILY stp GB 2012.08.08.doc 67/72... -
Page 68: Rs485 Master Connection
RS485 MASTER CONNECTION Recommendations: - follow the diagram of the device used, for the numbering. iPro Series 1592025700 IPROFAMILY stp GB 2012.08.08.doc 68/72... - Page 69 NOTE: ____________________________________________________________________________________ ____________________________________________________________________________________ ____________________________________________________________________________________ ____________________________________________________________________________________ ____________________________________________________________________________________ ____________________________________________________________________________________ ____________________________________________________________________________________ ____________________________________________________________________________________ ____________________________________________________________________________________ ____________________________________________________________________________________ ____________________________________________________________________________________ ____________________________________________________________________________________ ____________________________________________________________________________________ ____________________________________________________________________________________ ____________________________________________________________________________________ ____________________________________________________________________________________ ____________________________________________________________________________________ ____________________________________________________________________________________ ____________________________________________________________________________________ ____________________________________________________________________________________ ____________________________________________________________________________________ ____________________________________________________________________________________ ____________________________________________________________________________________ ____________________________________________________________________________________ ____________________________________________________________________________________ ____________________________________________________________________________________ ____________________________________________________________________________________ ____________________________________________________________________________________ iPro Series 1592025700 IPROFAMILY stp GB 2012.08.08.doc 69/72...
- Page 70 NOTE: ____________________________________________________________________________________ ____________________________________________________________________________________ ____________________________________________________________________________________ ____________________________________________________________________________________ ____________________________________________________________________________________ ____________________________________________________________________________________ ____________________________________________________________________________________ ____________________________________________________________________________________ ____________________________________________________________________________________ ____________________________________________________________________________________ ____________________________________________________________________________________ ____________________________________________________________________________________ ____________________________________________________________________________________ ____________________________________________________________________________________ ____________________________________________________________________________________ ____________________________________________________________________________________ ____________________________________________________________________________________ ____________________________________________________________________________________ ____________________________________________________________________________________ ____________________________________________________________________________________ ____________________________________________________________________________________ ____________________________________________________________________________________ ____________________________________________________________________________________ ____________________________________________________________________________________ ____________________________________________________________________________________ ____________________________________________________________________________________ ____________________________________________________________________________________ ____________________________________________________________________________________ iPro Series 1592025700 IPROFAMILY stp GB 2012.08.08.doc 70/72...
- Page 71 NOTE: ____________________________________________________________________________________ ____________________________________________________________________________________ ____________________________________________________________________________________ ____________________________________________________________________________________ ____________________________________________________________________________________ ____________________________________________________________________________________ ____________________________________________________________________________________ ____________________________________________________________________________________ ____________________________________________________________________________________ ____________________________________________________________________________________ ____________________________________________________________________________________ ____________________________________________________________________________________ ____________________________________________________________________________________ ____________________________________________________________________________________ ____________________________________________________________________________________ ____________________________________________________________________________________ ____________________________________________________________________________________ ____________________________________________________________________________________ ____________________________________________________________________________________ ____________________________________________________________________________________ ____________________________________________________________________________________ ____________________________________________________________________________________ ____________________________________________________________________________________ ____________________________________________________________________________________ ____________________________________________________________________________________ ____________________________________________________________________________________ ____________________________________________________________________________________ ___________________________________________________________________________________ iPro Series 1592025700 IPROFAMILY stp GB 2012.08.08.doc 71/72...
- Page 72 Series 1592025700 IPROFAMILY stp GB 2012.08.08.doc 72/72...
Need help?
Do you have a question about the iPro SERIES and is the answer not in the manual?
Questions and answers
استطيع ربط اجهزه الكنترول انها تعمل كسر موستات تفصل وتشغيل الوحده والكباسات والمراوح عند درجه حراره معينه كيف يتم برمجه الجهاز المرفق في الصوره وكيف يتم عمليه البرمجه خطوه خطوه وهل يعمل بالفعل وفصل الوحده مع تحديد نقط الفصل والتشغيل بجهاز
To program the Dixell iPro SERIES control devices to operate as a thermostat for turning on and off units, compressors, and fans at specific temperatures, follow these general steps:
1. Connect Temperature Probes: Use NTC or PTC temperature probes connected to the analogue input terminals as described in section 7.3.1.
2. Configure Inputs: Set the input type and parameters in the controller's configuration to match the connected temperature probes.
3. Set Control Logic: Use the programming interface (e.g., ISaGRAF® application) via the USB port to define the temperature thresholds for activating and deactivating the outputs.
4. Assign Outputs: Allocate digital or analogue outputs (sections 7.5 and 7.6) to control compressors, fans, and units. Configure them to switch on/off based on the temperature readings.
5. Download Application: Use the USB-ETHERNET adapter to download the application to the controller, ensuring the adapter is used only temporarily or the room temperature remains below 50°C if kept connected.
6. Test Operation: Verify the device operates correctly at the set temperatures and switches the outputs as intended.
Make sure to follow safety and wiring guidelines during setup.
This answer is automatically generated