Table of Contents
Advertisement
Quick Links
Advertisement
Table of Contents

Subscribe to Our Youtube Channel
Related Manuals for Princeton LCD15


Summary of Contents for Princeton LCD15
- Page 1 15" Flat Panel Display REFERENCE GUIDE...
- Page 2 Precautions Read all of these instructions and save them for later use. Follow all warnings and instructions on the product. Product Do not cover or block the vent holes in the case. Do not insert sharp objects or spill liquid into the LCD monitor through cabinet slots.
- Page 3 covered by the operating instructions. Improper adjustment of other controls may result in damage and will often require extensive work by a qualified technician to restore the product to normal operation. If the product has been dropped or the cabinet has been damaged.
- Page 4 Federal Communication Commission Radio Frequency International Statement This equipment has been tested and found to comply with the limits for a Class B digital device, pursuant to Part 15 of the FCC Rules. These limits are designed to provide reasonable protection against harmful interference in a residential installation.
- Page 5 helpful. This booklet is available from the U.S. Government Printing Office Washington DC, 20402, Stock No. 004-000-00345-4. The manufacture is not responsible for any radio or TV interference caused by unauthorized modification of this equipment. It is the responsibility of the user to correct such interference. Caution: To meet FCC limits for a Class B computing device, a shielded signal cable should be used.
-
Page 6: Product Description
Product Description Congratulations on your purchasing this flat panel monitor of new generation. Your LCD monitor incorporates high quality display into a small light weighted module. It has power-saving capabilities and emits no X-ray radiation. You will certainly benefit from this monitor in lots of ways;... -
Page 7: Product Features
Product Features High contrast color TFT LCD display support resolution up to XGA 1024x768. Compatible with IBM VGA, VESA , and Macintosh standards. Imbedded audio system provides sound performance. Power management system conforms to VESA DPMS standard. Embedded universal power system. Support DDC1/2B for Plug &... -
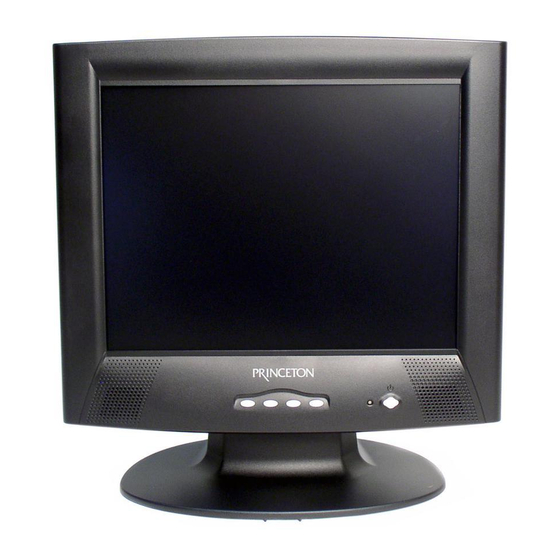
Page 8: Taking A Look
Taking a Look Front View 1. Power Switch Pressing this button turns the display system power on or off. 2. Power LED This LED indicates different status when this unit operates in different modes. 3. Menu/Select Pressing this button pops up the OSD menus on the screen, and used to select (“Up”... - Page 9 Rear View 1. Power Connector This is for connecting the power cable. 2. Signal Connector This can be connected with the D-sub 15 pin signal connector. 3. Audio In This can be connected to the audio-out connector of the computer.
- Page 10 When you disconnect the cord/cables, WARNING be sure to hold the connector instead of the wire part. 1. Connect one end of the power cord to the monitor and the other end to the AC outlet. (Œ) 2. Connect one end of the signal cable to the rear side of computer and the other to the LCD monitor.
-
Page 11: Controls And Adjustment
Display Angle Tilting For viewing clarity, you can tilt the LCD forward (up to 5 degrees) or backward (up to 15 degrees.) CAUTION In order to protect the LCD, be sure to hold the base when you adjust the LCD, and, do not touch the screen. Controls and Adjustment Adjusting with the OSD Control To Display and Select the OSD Functions:... - Page 12 To Adjust the Value of the Control Option: Pressing + / - button changes the value of the selected OSD control option. After adjusting values, the monitor will automatically save the changes. NOTE The OSD screen will disappear if no input activities are detected for 10 seconds.
- Page 13 BRIGHTNESS Adjust the brightness using and buttons. AUDIO Adjust the speakers volume using and buttons. AUTOTUNE Press or buttons to make LCD monitor adjust the related parameters automatically for optimal display status. CONTRAST Selecting the “CONTRAST” function, then pressing + or – buttons. OSD will enter the “Contrast Menu”.
- Page 14 GEOMETRY Selecting the “GEOMETRY” function, then pressing + or – buttons. OSD will enter the “Geometry Menu”. C L O C K 1 3 1 P H A S E H . P O S I T I O N 2 7 4 V .
-
Page 15: Power Led Display & Power Saving
HORIZONTAL POSITION Pressing moves the display image to the right; Pressing moves the display image to the left. VERTICAL POSITION Pressing moves the display image upward; Pressing moves the display image downward. RECALL Press buttons to recall previous preset values. DISPLAY MODE OSD will show the current display mode (resolution, vertical frequency and horizontal frequency) on the menu. -
Page 16: Troubleshooting
Mode Power LED Color Power Consumption H. / V. Sync. Green Orange <8W The LED also indicates the Power Switch control status (see following table). Mode Power LED Color Audio Function Green Action Orange No Action Troubleshooting The monitor does not respond after you turn on the system. Check if the Power Switch of monitor is turned on . -
Page 17: Display Modes
Display Modes Item Resolution Type H. Scan V. Scan Pol. Pixel (kHz) (Hz) (MHz) 640X350 31.469 70.087 + / - 25.175 720X400 31.469 70.087 - / + 28.322 640X480 31.469 59.940 - / - 25.175 640X480 VESA72 37.861 72.809 - / - 31.500 640X480 VESA75... -
Page 18: Specifications
Specifications Model LCD15 Type Configuration LCD15 LCD Display 15.0” TFT Active Matrix Panel Display Size 304(H) x 228(V) mm Pixel Pitch 0.297(H) x 0.297(V) mm Display Mode VGA 640 x 350 (70 Hz) VGA 720 x 400 (70 Hz) VGA 640 x 480 (60/72/75 Hz) - Page 19 Type Configuration LCD15 Power Imbedded AC Input, Universal 100 ~ 240 V Operating Conditions Temperature 5 C ~ 35 C (41 F ~ 95 Humidity 20% ~ 80% (No Condensation) Altitude To 10,000 Feet Storage Conditions Temperature -20 C ~ 60...
- Page 20 ©2000 Princeton Graphic Systems. All rights reserved. This manual may not be copied in whole or part without written consent of Princeton Graphic Systems. Princeton Graphic Systems is not responsible for printing or clerical errors. Windows ® and Windows ®...
- Page 21 Princeton Graphic Systems 2801 South Yale Street Santa Ana, CA 92704 (714) 751-8405 (714) 751-5736 fax www.princetongraphics.com Ref. No. :11/14AP1506A0B Copyright © 2000 Princeton Graphic Systems. All rights reserved. Part No.: 00300000151...
Need help?
Do you have a question about the LCD15 and is the answer not in the manual?
Questions and answers