Table of Contents
Advertisement
Quick Links
Advertisement
Table of Contents

Subscribe to Our Youtube Channel
Related Manuals for Princeton LCD1711


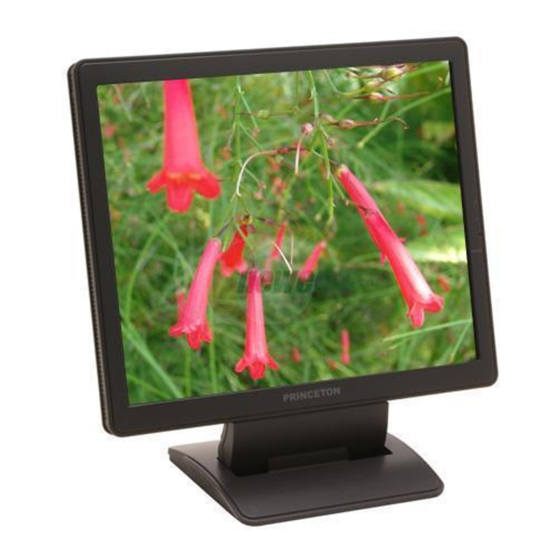
Summary of Contents for Princeton LCD1711
-
Page 3: Table Of Contents
TABLE OF CONTENTS PRECAUTIONS ..................................................... INSTALLATION ..........................POWER CONNECTION ............................. MAINTENANCE ........................ TRANSPORTING THE MONITOR GETTING STARTED ................................................... PACKAGE CONTENTS ........................INSTALLATION OF FIRST USE ......................IDENTIFYING PARTS AND CONTROLS ..................FUNCTIONS OF THE BUTTONS AND INDICATOR: ..............................SETUP ........................ -
Page 4: Precautions
Precautions Installation 1.Do not cover or block the ventilation ports on the rear of the monitor. 2.Do not install the monitor close to heat sources such as radiators or air ducts, or in a location exposed to direct sunlight, excessive dust, mechanical vibration,or shock. Power connection 1.Use the correct power cord for your local voltage. -
Page 5: Getting Started
Getting Started Package contents Before beginning, ensure that the carton contains the following items: 1.LCD Monitor 2.Power cord (The plug may vary according to the electrical standard for your area) 3.Video Signal Cable (Analog, D-SUB Cable) 4.Audio cable (optional) 5.CD-ROM (Contains the driver of the monitor, this user’s manual and other information) 6.Quick Installation Guide... -
Page 6: Installation Of First Use
Installation of First Use 1.The installation of the monitor is very simple. What you need to do is to take the monitor from the packing box and remove all the packing materials. And then put the monitor on the desk carefully; fold the monitor base, so that the monitor can stand on the desk properly. -
Page 7: Setup
Setup 1.Connecting video (Note: Before connecting computer, ensure the resolution and refresh rate of the computer do not exceed the following settings - resolution: 1280*1024, refresh rate: 75Hz.) 1.1 Turn off your computer 1.2 Connect the video signal cable to the VGA port of your PC, tighten the screws on the connector onto the computer 1.3 Connect the other end of video signal cable to the VGA-IN port at the back of the monitor, tighten the screws on the connector onto the monitor 2.Connecting power 2.1 Plug the female end of the power cord in to the AC-IN port at the back of the monitor... -
Page 8: Customizing Your Monitor
Customizing your Monitor The On Screen Display (OSD) system provides a full range of customizable tools to optimize your display. While full customization is available, we strongly recommend using the Auto Adjustment function, which are preset to fully optimize your monitor’s performance. Simply presses the buttons simultaneously to engage the Important: Auto Adjustment. -
Page 9: Osd Icon List
OSD Icon List Icon Functions Detail Optimize the picture performance automatically Auto Adjustment (you may also press _ and _ buttons simultaneously, while the OSD menu is not shown, to activate the function) Adjust the luminance level of the screen Brightness Adjust the contrast level (black to white ratio) of the screen Contrast... - Page 10 Adjust the position of OSD menu on the screen. OSD Menu Position Select between Standard and Advanced power saving modes. Power Saving Mode See addendum for details. Fulfill EPA Energy Star power management requirement Standard Activate monitor Life-Extension function Advanced Reset monitor parameters back to factory preset values.
-
Page 11: Troubleshooting
Troubleshooting Symptom Check Items 1.No picture 1. Check if the monitor is turned on (press the button again). 2.LED indicator (at the right side of the 2. Check if the power cord is properly connected to the monitor and power outlet. monitor) is not lit 3 .Check if there is electricity coming from the power outlet (use another device to check for power). -
Page 12: Technical Features And Specifications
Technical Features and Specifications Item Description LCD Display 17" TFT active matrix panel Display Size 337.92(H) x 270.336(V) mm Pixel Pitch 0.264(H) x 0.264(V) mm Maximum SXGA 1280 x 1024 @75Hz Resolution Recommended SXGA 1280 x 1024 @60Hz Max. Display Color 16.2M colors Brightness 300 cd/m2 (typ.) -
Page 13: Interface Frequency
Interface Frequency 1.The following frequency range is the working period. If the entered mode between below period but not match the frequency of supported timing, display optimization would not be assured. If the entered mode is out of the working period, the display will be blanking (just show “Input Signal Out Of Range”) then go to power saving. 2.Basically, mode judgment is regardless the sync polarity except both or more modes that are all belong to the supported timing list and could be judged by sync polarity only. -
Page 14: Supported Timing List
Supported timing list 1.If the selected timing is NOT included in table below, this LCD monitor will use the most suitable available timing. Pixel Resolution H Frequency H Total Clock Width Size Frequency 640X350@50Hz 25.175M 31.469KHz 4.000 50.030Hz 640X350@60Hz 25.175M 31.469KHz 4.000 59.941Hz... - Page 15 Pixel Resolution H Frequency H Total Clock Width Size Frequency 1152X864@60Hz 80.000M 54.054KHz 1480 4.000 59.270Hz 1152X864@70Hz 94.499M 63.851KHz 1480 4.000 70.012Hz 1152X864@75Hz 108.000M 67.500KHz 1600 4.000 75.000Hz 1152X870@75Hz 100.000M 68.681KHz 1456 4.000 75.061Hz 1152X900@66Hz 92.940M 61.795KHz 1504 4.000 65.950Hz 1152X900@76.2Hz 105.590M 71.732KHz...
-
Page 16: Addendum
Addendum Advanced Power Saving Mode 1.Background The traditional monitors have the function of electricity-saving dormancy. But the interval of dormancy is difficult to decide. If the interval is long, the purpose of saving electricity can not be achieved. While the interval is short, your computer and LCD monitor would be dormant often. - Page 17 5.l How to engage the Monitor Life-Extension function? You may simply use the OSD control to activate the Monitor Life-Extension function. 1. Press the Menu button to activate the OSD menu 2. Press button to select the Power Saving Mode icon. 3.
-
Page 18: Regulations
Regulations FCC compliance 1.This device complies with Part 15 of the FCC Rules. Operation is subject to the following two conditions (1) this device may not cause harmful interference, and (2) this device must accept any interference received, including interference that may cause undesired operation. 2.NOTE: This equipment has been tested and found to comply with the limits for a Class B digital device, pursuant to part 15 of the FCC Rules. -
Page 19: Tco'99
TCO’99 Congratulations! You have just purchased a TCO’99 approved and labeled product! Your choice has provided you with a product developed for professional use. Your purchase has also contributed to reducing the burden on the environment and also to the further development of environmentally adapted electronics products. Why do we have environmentally labeled computers? In many countries, environmental labeling has become an established method for encouraging the adaptation of goods and services to environment. - Page 20 Environmental requirements Flame retardants Flame retardants are present in printed circuit boards, cables, wires, casings and housings. Their purpose is to prevent, or at least to delay the spread of fire. Up to 30% of the plastic in a computer casing can consist of flame retardant substances.
Need help?
Do you have a question about the LCD1711 and is the answer not in the manual?
Questions and answers