Table of Contents
Advertisement
Advertisement
Table of Contents

Related Manuals for Festool PS420EBQ


Summary of Contents for Festool PS420EBQ
- Page 1 Carvex PS420 Series Pendulum Jigsaws PS420EBQ, PSB420EBQ, PSC420EB, PSBC420EB Jigsaw Supplemental User’s Manual WARNING To reduce the risk of serious injury, read and understand all safety precautions and instructions in this manual before using this tool.
-
Page 2: Limited Warranty
Returns 1 The following is an exemplar Festool limited warranty. The actual warranty that comes with your power tool is controlling. If you need to return your Festool tools for any reason, please 2 Tool must be returned in complete and whole condition as supplied to include Systainer, return it to the dealer from which you originally bought the tool. -
Page 3: Table Of Contents
Contents About This Manual ........... 3 Setting the Pendulum Stroke ......10 Tool Symbols ........... 3 Installing/Removing the Battery ....... 11 General Power Tool Safety Warnings ....4 Charging the Battery ........11 Work Area Safety .......... 4 Connecting the Plug-It Power Cord ....12 Electrical Safety .......... -
Page 4: General Power Tool Safety Warnings
General Power Tool Safety Warnings WARNING! Read all safety warnings and Save all warnings and instructions instructions. Failure to follow the warnings and for future reference. instructions may result in electric shock, fire, and/or serious injury. Work Area Safety Keep your work area clean and well lit. Cluttered or dark work tools create sparks which may ignite the dust or fumes. -
Page 5: Service
conditions and the work to be performed. Use of the power To reduce the risk of serious injury, never alter or misuse the ► tool for operations different from those intended could result power tool. in a hazardous situation. Service Have your power tool serviced by a qualified repair person the safety of the power tool is maintained. -
Page 6: Functional Description
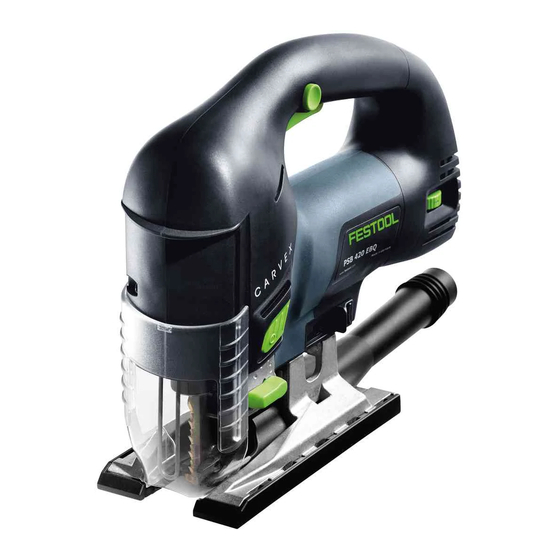
Functional Description Right-Side PSB 420 EBQ PSC 420 EB PSBC 420 EB PS 420 EBQ Item Name or Description Ref. Page(s) Item Name or Description Ref. Page(s) Chip Guard Plug-It Power Cord Port Base Insert Speed Control Pendulum Lever Trigger Release Main Base Variable Speed Trigger Left &... -
Page 7: Intended Use
Festool BPC or BPS class battery pack, from 10.8 volts to 18.0 volts. The TRC 3 battery charger is capable of charging any Festool BPC or BPS class battery pack from 7.2 volts to 18.0 volts. TRC 3 Battery Charger... -
Page 8: Setup
Setup Changing the Sawblade The Carvex jigsaw features tool-free blade changing. Used blades can be ejected from the saw without touching the potentially hot blade. New blades are inserted into the holder with just a simple twist. Choosing the correct sawblade for the task is important Diagonal for optimal results. -
Page 9: Changing Base Inserts
Changing Base Inserts The standard Carvex base can be fitted with one of 5 Phenolic Insert: This insert provides a smooth, hard, ► optional base inserts (shown below). Each base insert is and low-friction base for abrasive environments that could described below. -
Page 10: Changing The Main Base
Changing the Main Base Three bases are available for the Carvex jigsaw. The bases Festool guide rail, or the Festool trammel (for cutting can be installed and removed without tools. circles). The guide rail base can be used with or without dust collection. -
Page 11: Installing/Removing The Battery
Battery equipped Carvex saws include a TRC 3 intelligent battery charger. This charger may be used to charge any Battery Festool BPC (LiIon) or BPS (NiCd, NiMH) series battery. The Slot charger is microprocessor controlled and will detect the type of battery being charged as well as the condition of the battery. -
Page 12: Connecting The Plug-It Power Cord
Connecting the Plug-It Power Cord NOTICE: Make sure to fully tighten the plug-it cord The corded Carvex jigsaws (PS 420 EBQ and PSB 420 EBQ) a full quarter-turn until it clicks. If the plug is not come equipped with a removable Plug-It power cord. The fully locked, the socket and cord can overheat and be cord can be removed for easier storage of the tool. -
Page 13: Setting The Variable Speed
Setting the Variable Speed The speed of the saw can be varied from 1500 to 3800 Material Speed strokes per minute. The two D-handle models have a Soft wood products and veneer plywoods broader speed range of 1000 to 3800 strokes per minute when the variable speed trigger is utilized. -
Page 14: Sawblade Selection
Blade Usage The shank of Festool sawblades are color coded according to their general usage intention. These colors are listed below. Angle Ground The specialty blades are an exception in that each blade will have its own special purpose and material type. -
Page 15: Operation
10) is 5. Place the jigsaw base over the rear T-slot of the guide rail installed on the jigsaw, the saw may be used with a Festool and perform the cut as normal. guide rail for performing straight cuts. In this configura- tion, the distance from the rear edge of the guide rail to the center of the blade is approximately 1⅜"... -
Page 16: Using The Trammel To Cut Circles
Using the Trammel to Cut Circles The optional circle cutter (trammel) permits the jigsaw to 1. Identify the location of the center of the arc or circle you cut circular holes in a workpiece from the minimum and wish to cut. maximum sizes shown in the table below. -
Page 17: Making Bevel Cuts
Making Bevel Cuts Bevel cuts may be made with the optional angle base. The angle base provides bevel angles up to 48° to the left and to the right. It can also function on both inside and outside corners for edge registration. To adjust the bevel angle, rotate the adjustment knob on The best way of setting the bevel angle is to set the angle the rear of the angle base. -
Page 18: Maintenance And Adjustment
Maintenance and Adjustment WARNING! Any maintenance or repair work NOTICE: Do not use compressed air to clean the that requires opening of the motor or gear hous- motor housing of the tool, as you could inject for- ing should be carried out only by an authorized eign objects into the motor through the ventilation Customer Service Center (see your dealer for openings. -
Page 19: Troubleshooting
Make sure the outlet has power. Check the circuit breaker or try another outlet. ► If used with a Festool dust extractor, make sure the selector switch is pointing to “Auto”. ► The auxiliary outlet on the dust extractor has power only when the selector is at Auto. - Page 20 Festool USA 400 N. Enterprise Blvd Lebanon, IN 46052 www.festoolusa.com Service Questions: 800-554-8741 Application Questions: 888-337-8600...
Need help?
Do you have a question about the PS420EBQ and is the answer not in the manual?
Questions and answers